


文章目录
本地安装hexo-cli
安装Node.js、git、hexo-cli
yum -y update
yum install nodejs
yum install git
npm install hexo-cli -g
WARN:Unsupported engine for hexo-util@2.5.0
版本过低,升级nodejs
安装n模块:
npm install -g n
升级node.js到最新稳定版
n stable
升级node.js到最新版
n latest
升级node.js到制定版本
n v12.16.1
升级后的新版和旧版同时存在
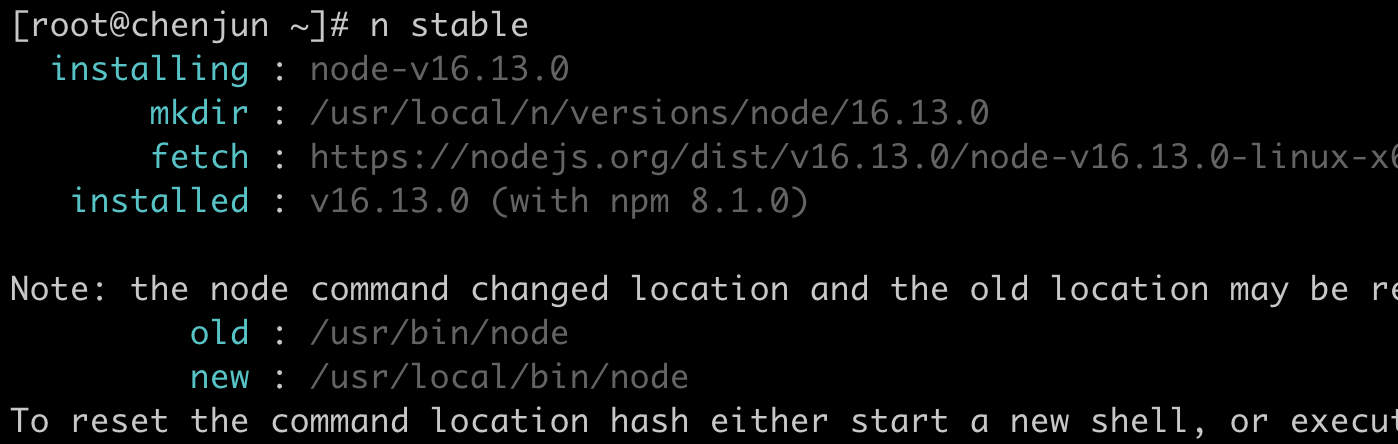
软连接到目录下:
[root@chenjun ~] node -v
v10.24.0
[root@chenjun ~] echo $?
0
[root@chenjun ~] node -v
v10.24.0
[root@chenjun ~] /usr/local/bin/node -v
v12.16.1
[root@chenjun ~] ln -s /usr/local/bin/node /usr/bin/node
ln: 无法创建符号链接'/usr/bin/node': 文件已存在
[root@chenjun ~] rm -fr /usr/bin/node
[root@chenjun ~] ln -s /usr/local/bin/node /usr/bin/node
[root@chenjun ~] node -v
v12.16.1
[root@chenjun ~]
选择博客存放的位置
mkdir myblog
hexo init myblog
cd myblog
npm install
# 本地预览
hexo s
# 更新
hexo g	#生成
hexo d	#部署命令还无法执行,因为还没设置要部署的位置
hexo & aliyun 部署上线
如果没有买服务器,可以部署到gitee或者github上:hexo & gitee 托管本地资源到gitee
有服务器可以直接部署到服务器,相当于把服务器当作git服务器
新建git用户作为git服务器
Hexo可以使用Git来部署,这样每次写完之后就都可以使用git来一键部署了,比较方便。
注意:如果本地没有配置ssh,先配一个ssh
开始前先切到root用户,然后执行:
useradd git # 添加一个新用户
passwd git # 设置git用户密码
su git # 切换用户进行后续操作
cd /home/git/
mkdir -p projects/blog # 把项目目录建立起来
mkdir repos && cd repos
git init --bare blog.git # 创建仓库
cd blog.git/hooks
vim post-receive # 创建一个钩子
post-receive内容
#!/bin/sh
git --work-tree=/home/git/projects/blog --git-dir=/home/git/repos/blog.git checkout -f
给权限
chmod +x post-receive # 添加可执行权限
exit # 返回到root用户
chown -R git:git /home/git/repos/blog.git # 给git用户添加权限
这样Git仓库就配好了。在本地试一下能不能把空仓库拉下来:
git clone git@server_ip:/home/git/repos/blog.git
如果能拉下来,就说明配置成功了。
本机免密码链接git用户
目前每次对git仓库进行操作都需要输入密码,但是我们已经配置了SSH,就可以通过在本地建立SSH信任关系来免去输入密码的步骤
ssh-copy-id -i ~/.ssh/id_rsa.pub git@server_ip # 建立信任关系
ssh git@server_ip # 试一下能不能登录
如果不能登录或者还是要输入密码,就说明前面的操作有误,再检查一下吧。
禁用git用户ssh功能
为了安全起见,这个部署用的git用户最好只能用git clone等操作,所以需要更改它默认的shell:
cat /etc/shells # 查看 git-shell 是否在登录方式里面
which git-shell # 找到git-shell的路径,记下来
vim /etc/shells
然后把刚才记下来的路径添加进去,保存,然后vim /etc/passwd,把git:x:1000:1000::/home/git:/bin/bash
修改为git:x:1000:1000:,,,:/home/git:/usr/bin/git-shell。
这样本地再用ssh就没法登录了,只能进行git操作。
本地部署
vim _config.yml:
deploy:
  type: git
  repo: git@your_ip:/home/git/repos/blog.git
  branch: master
然后在blog目录下执行安装hexo-deployer-git,否则没法使用git部署:
sudo npm install --save hexo-deployer-git
编辑package.json文件,添加部署脚本:
"scripts": {
    "build": "hexo generate",
    "clean": "hexo clean",
    "deploy": "hexo clean && hexo g -d",
    "server": "hexo server"
}
本地命令行输入 hexo d 即可实现部署。如果没有报错,就可以去服务器的 /home/git/projects/blog 目录下看看是不是正常生成了网页。
配置Nginx反向代理
安装nginx
sudo yum -y install nginx
nginx # 启动nginx试一下
配置Nginx反向代理
cd /etc/nginx
cp nginx.conf nginx_backup.conf # 备份配置文件
vim nginx.conf
主要是开头的:user root;、
服务器部分:
  server {
    listen 80;
    server_name 39.103.140.125;

    # Load configuration files for the default server block.
    include /etc/nginx/default.d/*.conf;

    location / {
      root /home/git/projects/blog;
      index index.html index.htm;
    }

    error_page 500 502 503 504 /50x.html;
    location = /50x.html {
      root html;
  }
}
然后重新加载一下配置:
nginx -s reload
浏览器访问ip,就能看到hexo了!
也可以配置域名解析,把自己的域名绑定到现在的ip上,更改nginx配置,访问域名就能访问网站
日常维护hexo
将markdown文件放在_post文件夹
hexo clean
hexo generate		# 生成文件
hexo server			# 本地查看
hexo deploy			# 部署上线
也可以执行npm run deploy部署上线
使用matery主题美化
refer:
http://blinkfox.com/2018/09/28/qian-duan/hexo-bo-ke-zhu-ti-zhi-hexo-theme-matery-de-jie-shao/#toc-heading-10
https://www.jianshu.com/p/cf9730925b5c
Hexo & CSDN 爬虫同步
refer:
Hexo博客同步至CSDN
hexo-插件
hexo-admin
refer
https://developer.aliyun.com/article/775005
https://www.jianshu.com/p/cf9730925b5c
https://www.jianshu.com/p/fb0b0258362f


 2672
2672


 被折叠的 条评论
为什么被折叠?
被折叠的 条评论
为什么被折叠?
 到【灌水乐园】发言


