


一、简介
ansible简介
Ansible是一个非常简单的IT自动化平台,使程序和系统更易于部署。
Ansible本质上是一个进行了封装的Shell,优点在于它是去中心化的工具,可以直接通过ssh管理远程主机,实现无Agent的部署。
AWX简介
AWX提供了一个基于web的用户界面、REST API和构建在Ansible之上的任务引擎。
图形化的AWX 能够更方便的编排和部署 Ansible Playbook,并提供集中的日志记录、审计和系统跟踪。
AWX是商业版Ansible Tower  的开源版本。
awx项目地址:https://github.com/ansible/awx/releases
二、ansible安装
- 1.安装
EPEL源
[root@client ~]# yum -y install epel-release
- 2.安装
ansible
[root@client ~]# yum -y install ansible

- 查看
ansible版本、默认为最新版
[root@client ~]# ansible --version
ansible 2.9.13
  config file = /etc/ansible/ansible.cfg
  configured module search path = ['/root/.ansible/plugins/modules', '/usr/share/ansible/plugins/modules']
  ansible python module location = /usr/lib/python3.6/site-packages/ansible
  executable location = /usr/bin/ansible
  python version = 3.6.8 (default, Nov 21 2019, 19:31:34) [GCC 8.3.1 20190507 (Red Hat 8.3.1-4)]
三、安装docker
1.安装docker
[root@client yum.repos.d]# curl -fsSL https://get.docker.com/ | sh
# Executing docker install script, commit: 26ff363bcf3b3f5a00498ac43694bf1c7d9ce16c
+ sh -c 'yum install -y -q yum-utils'
+ sh -c 'yum-config-manager --add-repo https://download.docker.com/linux/centos/docker-ce.repo'
添加仓库自:https://download.docker.com/linux/centos/docker-ce.repo
+ '[' stable '!=' stable ']'
+ sh -c 'yum makecache'
CentOS-8 - Base - mirrors.aliyun.com                                                                                                                                                                     126 kB/s | 3.9 kB     00:00
CentOS-8 - Extras - mirrors.aliyun.com                                                                                                                                                                    50 kB/s | 1.5 kB     00:00
CentOS-8 - AppStream - mirrors.aliyun.com                                                                                                                                                                134 kB/s | 4.3 kB     00:00
Docker CE Stable - x86_64                                                                                                                                                                                 12 kB/s |  25 kB     00:02
Extra Packages for Enterprise Linux Modular 8 - x86_64                                                                                                                                                   2.8 kB/s | 7.6 kB     00:02
Extra Packages for Enterprise Linux 8 - x86_64                                                                                                                                                           3.7 kB/s | 7.7 kB     00:02
元数据缓存已建立。
+ '[' -n '' ']'
+ sh -c 'yum install -y -q docker-ce'
2.安装docker报错提示containerd.io过低,需要升级containerd.io
错误:
 问题: package docker-ce-3:19.03.13-3.el7.x86_64 requires containerd.io >= 1.2.2-3, but none of the providers can be installed
  - cannot install the best candidate for the job
  - package containerd.io-1.2.10-3.2.el7.x86_64 is filtered out by modular filtering
  - package containerd.io-1.2.13-3.1.el7.x86_64 is filtered out by modular filtering
  - package containerd.io-1.2.13-3.2.el7.x86_64 is filtered out by modular filtering
  - package containerd.io-1.2.2-3.3.el7.x86_64 is filtered out by modular filtering
  - package containerd.io-1.2.2-3.el7.x86_64 is filtered out by modular filtering
  - package containerd.io-1.2.4-3.1.el7.x86_64 is filtered out by modular filtering
  - package containerd.io-1.2.5-3.1.el7.x86_64 is filtered out by modular filtering
  - package containerd.io-1.2.6-3.3.el7.x86_64 is filtered out by modular filtering
  - package containerd.io-1.3.7-3.1.el7.x86_64 is filtered out by modular filtering
3.解决办法
[root@client ~]# wget https://download.docker.com/linux/centos/7/x86_64/edge/Packages/containerd.io-1.2.6-3.3.el7.x86_64.rpm
[root@client ~]# yum install -y containerd.io-1.2.6-3.3.el7.x86_64.rpm
[root@client ~]# curl -fsSL https://get.docker.com/ | sh
4.查看docker版本
[root@client ~]# docker --version
Docker version 19.03.13, build 4484c46d9d
4.1 配置镜像加速器
[root@client ~]# mkdir -p /etc/docker
[root@client ~]# tee /etc/docker/daemon.json <<-'EOF'
{
  "registry-mirrors": ["https://v16stybc.mirror.aliyuncs.com"]
}
EOF
[root@client ~]# systemctl daemon-reload && systemctl restart docker
5.安装 docker-compose 的Python模块
[root@client ~]# pip3 install docker-compose

注:由于网络原因,安装过程中可能会失败,多试两次即可。
6.或者使用下载二进制文件
[root@client ~]# curl -L "https://github.com/docker/compose/releases/download/1.25.5/docker-compose-$(uname -s)-$(uname -m)" -o /usr/local/bin/docker-compose
[root@client ~]# chmod +x /usr/local/bin/docker-compose
7.安装验证
[root@client yum.repos.d]# docker-compose --version
docker-compose version 1.27.3, build unknown
四、安装awx项目
1.下载awx包并解压
[root@client ~]# wget https://github.com/ansible/awx/archive/14.1.0.tar.gz
[root@client ~]# cd awx-14.1.0/installer/
[root@client installer]# ls
build.yml  install.yml  inventory  role
2.查看python3的工作路径并修改inventory文件
[root@client installer]# which python3
/usr/bin/python3
[root@client installer]# sed -i.bak 's/env python/python/g' inventory
[root@client installer]# ll
总用量 24
-rw-rw-r--. 1 root root  166 8月  25 12:12 build.yml
-rw-rw-r--. 1 root root  437 8月  25 12:12 install.yml
-rw-rw-r--. 1 root root 7340 9月  21 02:03 inventory
-rw-rw-r--. 1 root root 7344 8月  25 12:12 inventory.bak
drwxrwxr-x. 7 root root   99 8月  25 12:12 roles
3.下载镜像
[root@client installer]# docker pull redis:latest
[root@client installer]# docker pull postgres:10
[root@client installer]# docker pull ansible/awx:14.1.0
[root@client ~]# docker images
REPOSITORY          TAG                 IMAGE ID            CREATED             SIZE
postgres            10                  7849072676e1        3 days ago          200MB
redis               latest              84c5f6e03bf0        10 days ago         104MB
ansible/awx         14.1.0              8a29b4e35f5f        3 weeks ago         1.3GB
[root@client installer]# ansible-playbook -i inventory install.yml

4.容器查看
[root@client installer]# docker ps
CONTAINER ID        IMAGE                COMMAND                  CREATED             STATUS              PORTS                  NAMES
b3ccad7afb02        ansible/awx:14.1.0   "/usr/bin/tini -- /u…"   52 minutes ago      Up 19 minutes       8052/tcp               awx_task
64989076d24a        ansible/awx:14.1.0   "/usr/bin/tini -- /b…"   52 minutes ago      Up 19 minutes       0.0.0.0:80->8052/tcp   awx_web
c4a3e5c4b507        postgres:10          "docker-entrypoint.s…"   52 minutes ago      Up 19 minutes       5432/tcp               awx_postgres
0dec66f07a43        redis                "docker-entrypoint.s…"   52 minutes ago      Up 19 minutes       6379/tcp               awx_redis
五、登录awx
登陆地址: http://192.168.0.200
账号:admin
密码:password

1.新增清单

2.清单名称为实验区

3.创建主机

4.分别新增被管主机192.168.0.153,指定登录用户和密码

5.主机新增完毕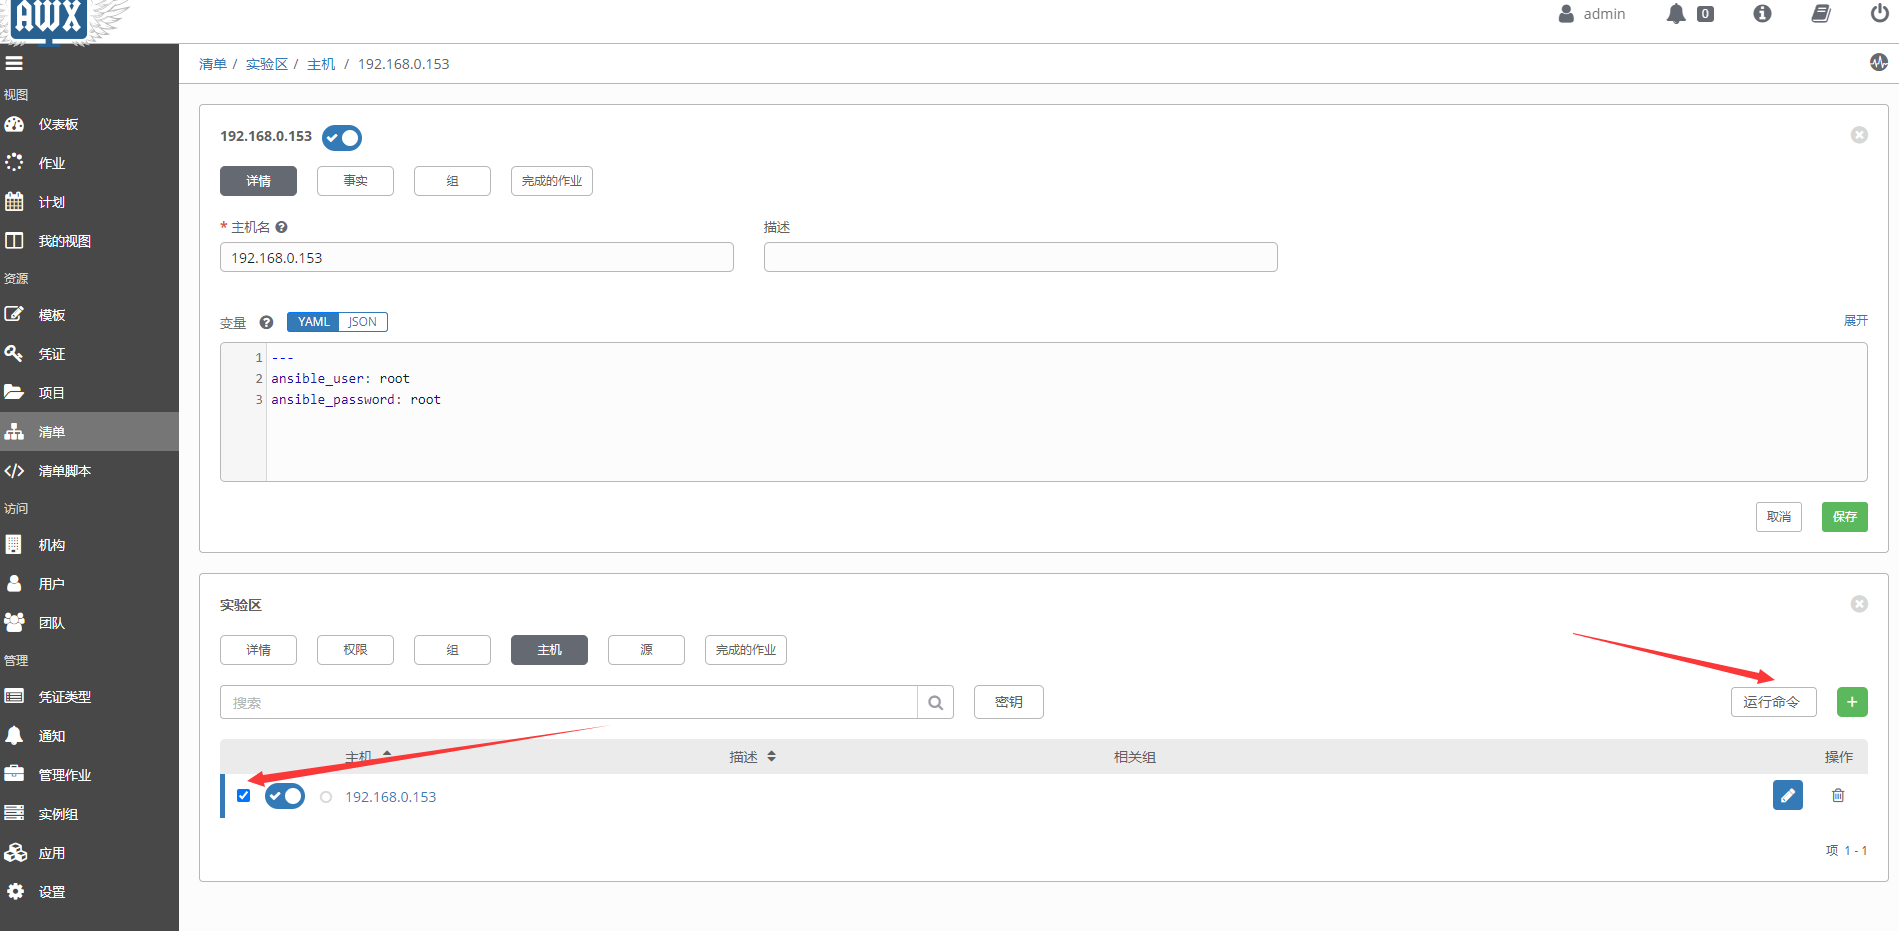
6.执行命令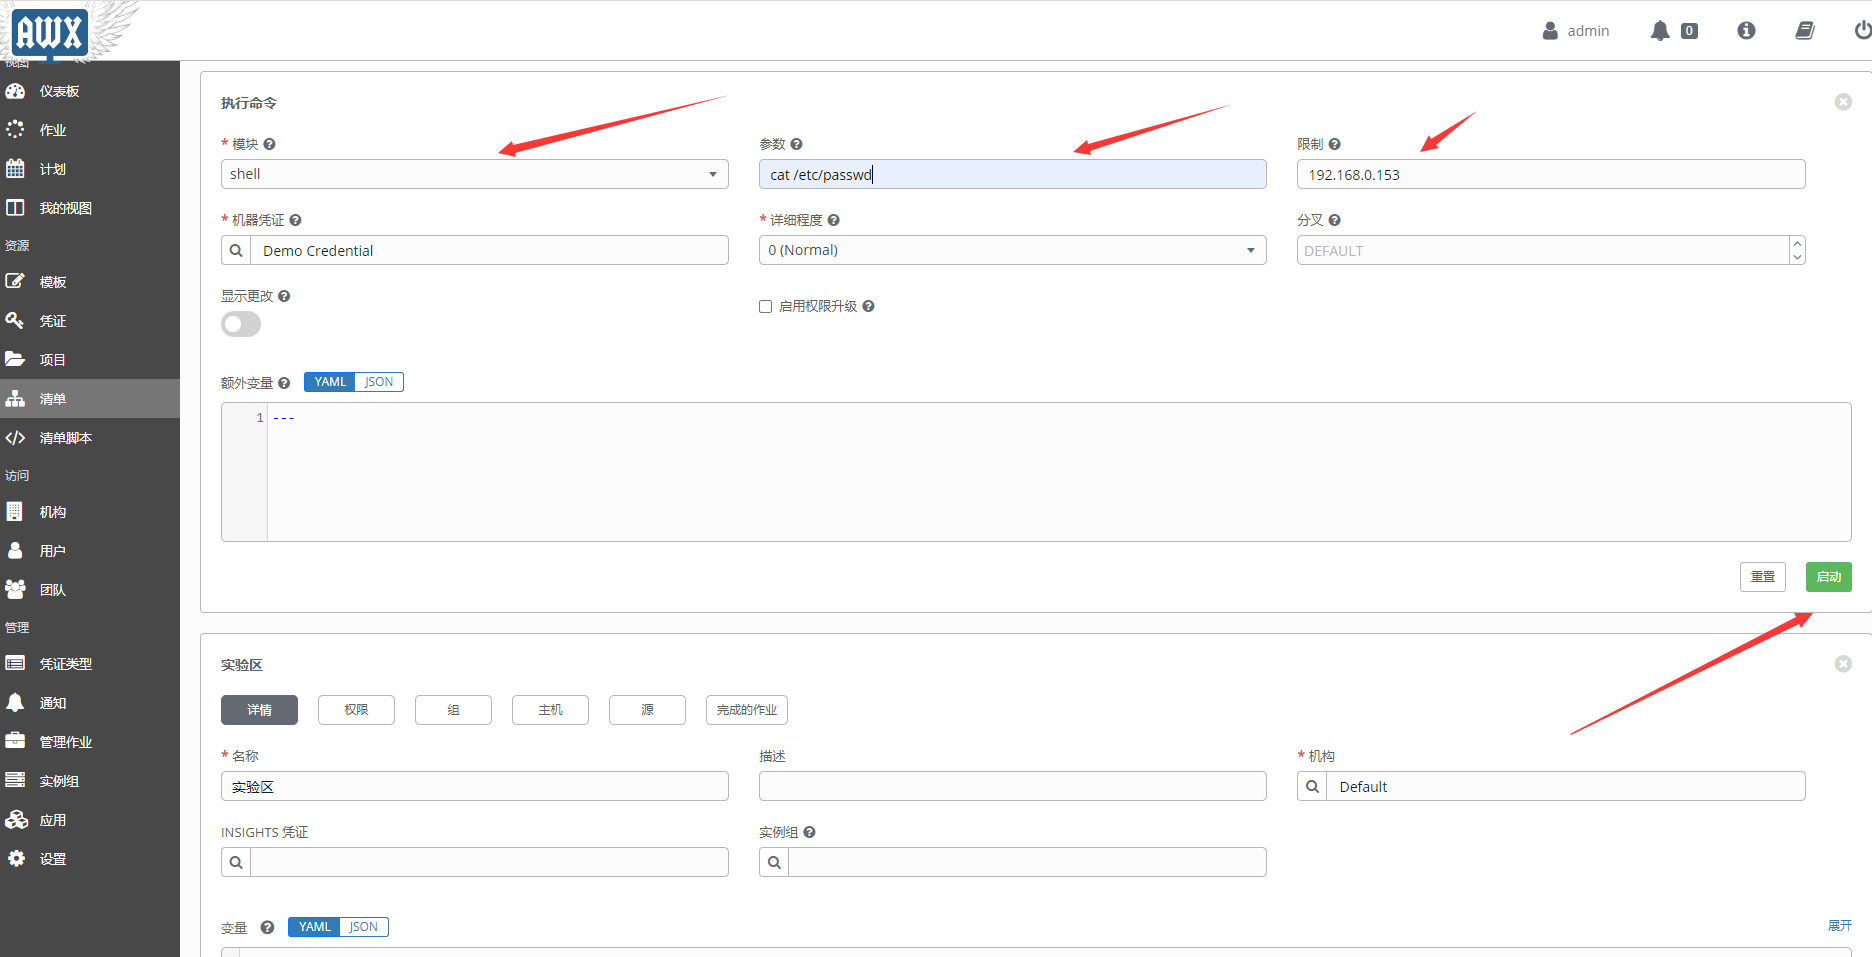
参数为:cat /etc/passwd
注docker相关rpm包下载地址
https://download.docker.com/linux/centos/7/x86_64/edge/Packages/

ansible的rpm下载地址
http://rpmfind.net/linux/RPM/epel/8/x86_64/Packages/a/


 4567
4567


 被折叠的 条评论
为什么被折叠?
被折叠的 条评论
为什么被折叠?
 到【灌水乐园】发言


