


本教程将介绍如何使用 LangGraph 库创建一个状态图,并在执行过程中处理动态中断。
1. 导入必要的库
首先,我们需要导入所需的库:
from typing_extensions import TypedDict
from IPython.display import Image, display

from langgraph.graph import StateGraph, START, END
from langgraph.checkpoint.memory import MemorySaver
from langgraph.errors import NodeInterrupt
2. 定义状态类型
定义一个 State 类型,用于存储状态信息:
class State(TypedDict):
    input: str
3. 定义步骤函数
定义三个步骤函数,每个函数接收一个 State 对象并返回一个新的 State 对象:
def step_1(state: State) -> State:
    print("---Step 1---")
    return state

def step_2(state: State) -> State:
    # 如果输入长度超过 5 个字符,抛出 NodeInterrupt
    if len(state["input"]) > 5:
        raise NodeInterrupt(
            f"Received input that is longer than 5 characters: {state['input']}"
        )
    print("---Step 2---")
    return state

def step_3(state: State) -> State:
    print("---Step 3---")
    return state
4. 构建状态图
使用 StateGraph 构建状态图,并添加节点和边:
builder = StateGraph(State)
builder.add_node("step_1", step_1)
builder.add_node("step_2", step_2)
builder.add_node("step_3", step_3)
builder.add_edge(START, "step_1")
builder.add_edge("step_1", "step_2")
builder.add_edge("step_2", "step_3")
builder.add_edge("step_3", END)
5. 设置内存保存器
设置内存保存器以保存状态:
memory = MemorySaver()
graph = builder.compile(checkpointer=memory)
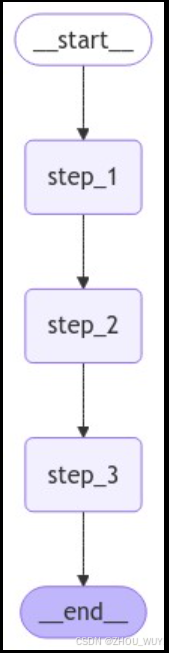
6. 显示状态图
使用 IPython.display 显示状态图:
display(Image(graph.get_graph().draw_mermaid_png()))
7. 运行状态图
定义初始输入和线程配置,并运行状态图:
initial_input = {"input": "hello"}
thread_config = {"configurable": {"thread_id": "1"}}

for event in graph.stream(initial_input, thread_config, stream_mode="values"):
    print(event)
输出:
{'input': 'hello'}
---Step 1---
{'input': 'hello'}
---Step 2---
{'input': 'hello'}
---Step 3---
{'input': 'hello'}
8. 获取状态信息
获取当前状态信息:
state = graph.get_state(thread_config)
print(state.next)
print(state.tasks)
输出:
()
()
9. 处理动态中断
定义一个新的初始输入,并运行状态图直到第一个中断:
initial_input = {"input": "hello world"}
thread_config = {"configurable": {"thread_id": "2"}}

for event in graph.stream(initial_input, thread_config, stream_mode="values"):
    print(event)
输出:
{'input': 'hello world'}
---Step 1---
{'input': 'hello world'}
获取当前状态信息:
state = graph.get_state(thread_config)
print(state.next)
print(state.tasks)
输出:
('step_2',)
(PregelTask(id='a84358c8-7f1d-3676-5b01-75e64543720d', name='step_2', path=('__pregel_pull', 'step_2'), error=None, interrupts=(Interrupt(value='Received input that is longer than 5 characters: hello world', when='during'),), state=None, result=None),)
10. 从中断恢复
使用 None 作为输入继续运行状态图:
for event in graph.stream(None, thread_config, stream_mode="values"):
    print(event)
输出:
{'input': 'hello world'}
获取当前状态信息:
state = graph.get_state(thread_config)
print(state.next)
print(state.tasks)
输出:
('step_2',)
(PregelTask(id='a84358c8-7f1d-3676-5b01-75e64543720d', name='step_2', path=('__pregel_pull', 'step_2'), error=None, interrupts=(Interrupt(value='Received input that is longer than 5 characters: hello world', when='during'),), state=None, result=None),)
11. 更新状态并继续
更新状态并继续运行状态图:
graph.update_state(config=thread_config, values={"input": "foo"})
for event in graph.stream(None, thread_config, stream_mode="values"):
    print(event)

state = graph.get_state(thread_config)
print(state.next)
print(state.values)
输出:
{'input': 'foo'}
---Step 2---
{'input': 'foo'}
---Step 3---
{'input': 'foo'}
()
{'input': 'foo'}
12. 跳过特定节点
定义一个新的初始输入,并运行状态图直到第一个中断:
initial_input = {"input": "hello world"}
thread_config = {"configurable": {"thread_id": "3"}}

for event in graph.stream(initial_input, thread_config, stream_mode="values"):
    print(event)
输出:
{'input': 'hello world'}
---Step 1---
{'input': 'hello world'}
更新状态并跳过 step_2 节点:
graph.update_state(config=thread_config, values=None, as_node="step_2")
for event in graph.stream(None, thread_config, stream_mode="values"):
    print(event)

state = graph.get_state(thread_config)
print(state.next)
print(state.values)
输出:
{'input': 'hello world'}
---Step 3---
{'input': 'hello world'}
()
{'input': 'hello world'}
通过以上步骤,我们成功地创建了一个状态图,并处理了动态中断。希望这个教程对你有所帮助!
参考链接:https://langchain-ai.github.io/langgraph/how-tos/human_in_the_loop/dynamic_breakpoints/#update-the-graph-state


 被折叠的 条评论
为什么被折叠?
被折叠的 条评论
为什么被折叠?
 到【灌水乐园】发言


