


实验环境
这个库在原生python并在windows环境下,官方是不支持的
我是在anconda的环境下使用这个库 下面依次序安装下面三个包
pip install cmake
pip install dlib
pip install face_recognition
api说明
这个库的内容非常简单,但是已经能够覆盖人脸识别的基本功能配合其他库如Pillow和opencv的使用能够让这个库看起来异常强大
下面简单列出几个这个库的功能 更多的请参考库的官方文档
face_recognition.api.load_image_file(file,mode ='RGB' )
功能说明:
将图像文件(.jpg,.png等)加载到numpy数组中
face_recognition.api.batch_face_locations(images,number_of_times_to_upsample = 1,batch_size = 128 )
功能说明:
使用cnn人脸检测器返回图像中人脸边界框的2d数组。如果您使用的是GPU,由于GPU可以一次处理一批图像,因此可以更快地获得结果。如果您不使用GPU,则不需要此功能
face_recognition.api.face_distance(face_encodings,face_to_compare )
功能说明:
给定面部编码列表,将其与已知的面部编码进行比较,并获得每个比较面部的欧式距离。距离告诉您面孔的相似程度
face_recognition.api.face_distance(face_encodings,face_to_compare )
功能说明:
给定面部编码列表,将其与已知的面部编码进行比较,并获得每个比较面部的欧式距离。距离告诉您面孔的相似程度。
face_recognition.api.face_encodings(face_image,known_face_locations = None,num_jitters = 1,model ='small' )
功能说明:
给定图像,返回图像中每个面部的128维面部编码
face_recognition.api.face_landmarks(face_image,face_locations = None,model ='large' )
功能说明:
给定图像,返回图像中每个面部的面部特征位置(眼睛,鼻子等)的字典列表
face_recognition.api.face_locations(img,number_of_times_to_upsample = 1,model ='hog' )
功能说明:
返回图像中人脸边界框的数组
实例
这个qpi还在github上开源了很多例子
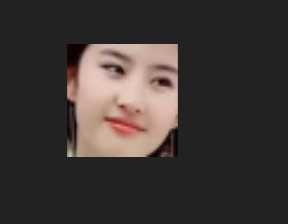
例如下面这个代码就是从一张照片中提取出人脸面部
from PIL import Image, ImageDraw,ImageFont
import face_recognition
image = face_recognition.load_image_file("/9k_.jpg")
face_locations = face_recognition.face_locations(image)
for face_location in face_locations:
    # Print the location of each face in this image
    top, right, bottom, left = face_location
    print("A face is located at pixel location Top: {}, Left: {}, Bottom: {}, Right: {}".format(top, left, bottom, right))

    # You can access the actual face itself like this:
    face_image = image[top:bottom, left:right]
    pil_image = Image.fromarray(face_image)
    pil_image.show()
效果就是这样啦


 4509
4509


 被折叠的 条评论
为什么被折叠?
被折叠的 条评论
为什么被折叠?
 到【灌水乐园】发言


