


学习SpringBoot我们会使用JDBC来加载JDBC配置文件,这是有几种方式来进行文件的加载
Table of Contents
学习SpringBoot我们会使用JDBC来加载JDBC配置文件,这是有几种方式来进行文件的加载
2:@ConfigurationProperties注解的使用:一次加载到处使用。
3:@ConfigurationProperties的使用优化:
4:使用SpringBoot默认方式加载数据源(HikariDataSource)
前提:添加pom依赖
<?xml version="1.0" encoding="UTF-8"?>
<project xmlns="http://maven.apache.org/POM/4.0.0" xmlns:xsi="http://www.w3.org/2001/XMLSchema-instance"
xsi:schemaLocation="http://maven.apache.org/POM/4.0.0 https://maven.apache.org/xsd/maven-4.0.0.xsd">
<modelVersion>4.0.0</modelVersion>
<parent>
<groupId>org.springframework.boot</groupId>
<artifactId>spring-boot-starter-parent</artifactId>
<version>2.2.4.RELEASE</version>
<relativePath/> <!-- lookup parent from repository -->
</parent>
<groupId>com.bjsxt</groupId>
<artifactId>springbootjdbc</artifactId>
<version>0.0.1-SNAPSHOT</version>
<name>springbootjdbc</name>
<description>Demo project for Spring Boot</description>
<properties>
<java.version>1.8</java.version>
</properties>
<dependencies>
<dependency>
<groupId>org.springframework.boot</groupId>
<artifactId>spring-boot-starter-web</artifactId>
</dependency>
<dependency>
<groupId>org.springframework.boot</groupId>
<artifactId>spring-boot-starter-thymeleaf</artifactId>
</dependency>
<!--JDBC坐标-->
<dependency>
<groupId>org.springframework.boot</groupId>
<artifactId>spring-boot-starter-jdbc</artifactId>
</dependency>
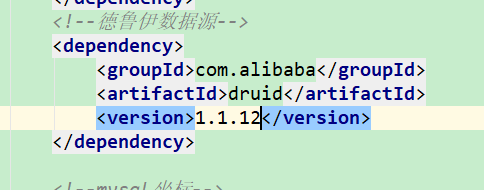
<!--德鲁伊数据源-->
<dependency>
<groupId>com.alibaba</groupId>
<artifactId>druid</artifactId>
<version>1.1.12</version>
</dependency>
<!--mysql坐标-->
<dependency>
<groupId>mysql</groupId>
<artifactId>mysql-connector-java</artifactId>
<version>5.1.38</version>
</dependency>
<dependency>
<groupId>org.springframework.boot</groupId>
<artifactId>spring-boot-starter-test</artifactId>
<scope>test</scope>
<exclusions>
<exclusion>
<groupId>org.junit.vintage</groupId>
<artifactId>junit-vintage-engine</artifactId>
</exclusion>
</exclusions>
</dependency>
</dependencies>
<build>
<plugins>
<plugin>
<groupId>org.springframework.boot</groupId>
<artifactId>spring-boot-maven-plugin</artifactId>
</plugin>
</plugins>
</build>
</project>
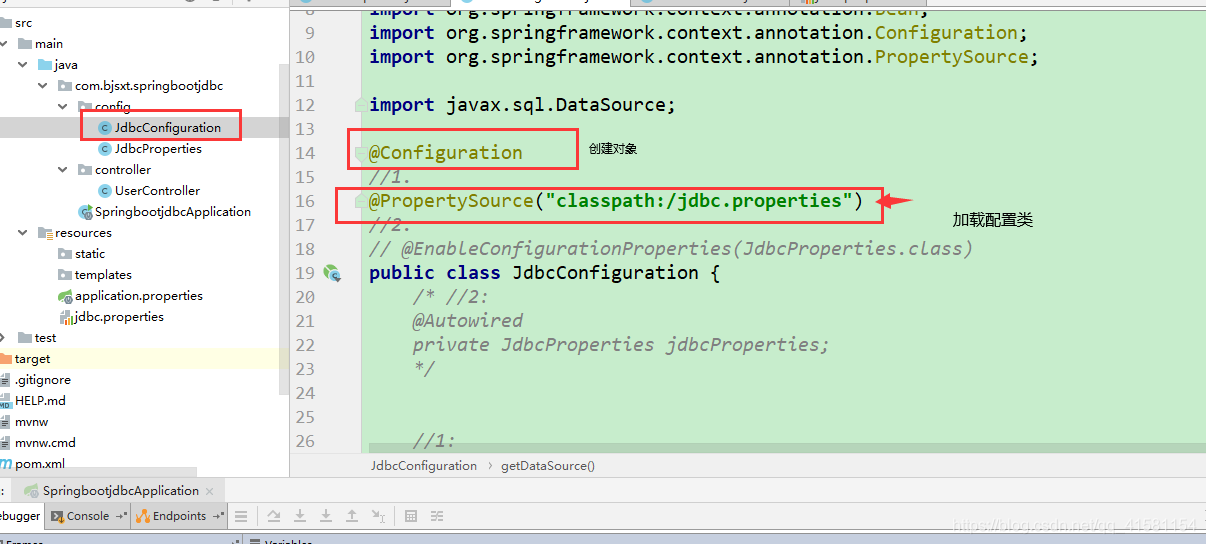
1:使用@PropertySource加载自定义配置文件。
1.1:首先创建配置文件,设置配置文件的内容,我这里写的是连接数据库信息。

1.2:创建加载配置类。


package com.bjsxt.springbootjdbc.config;

import com.alibaba.druid.pool.DruidDataSource;
import org.springframework.beans.factory.annotation.Autowired;
import org.springframework.beans.factory.annotation.Value;
import org.springframework.boot.context.properties.ConfigurationProperties;
import org.springframework.boot.context.properties.EnableConfigurationProperties;
import org.springframework.context.annotation.Bean;
import org.springframework.context.annotation.Configuration;
import org.springframework.context.annotation.PropertySource;

import javax.sql.DataSource;

@Configuration
//1.
@PropertySource("classpath:/jdbc.properties")
//2.
// @EnableConfigurationProperties(JdbcProperties.class)
public class JdbcConfiguration {
    /* //2:
    @Autowired
    private JdbcProperties jdbcProperties;
    */


    //1:
    @Value("${jdbc.driverClassName}")
    private String driverClassName;

    @Value("${jdbc.url}")
    private String url;

    @Value("${jdbc.username}")
    private String username;

    @Value("${jdbc.password}")
    private String password;

    //3
    // @ConfigurationProperties(prefix = "jdbc")
    @Bean
    public DataSource getDataSource(){
        DruidDataSource dataSource=new DruidDataSource();
        dataSource.setDriverClassName(this.driverClassName);
        dataSource.setUrl(this.url);
        dataSource.setUsername(this.username);
        dataSource.setPassword(this.password);
        return dataSource;
    }
}
1.3:创建控制器,打断点查看配置信息。


这样做有一些缺点,如果多次需要使用配置信息,我们都需要这样一步一步的来,代码就会十分的冗余。为此就有了第二种注解使用的方式。
2:@ConfigurationProperties注解的使用:一次加载到处使用。
在使用前我们需要知道,@ConfigurationProperties只能读取SpringBoot的Application的配置文件进行数据的读取加载的。
2.1:将数据配置文件复制到application.properties的文件中去

2.2:创建一个专门用于加载该配置的类。
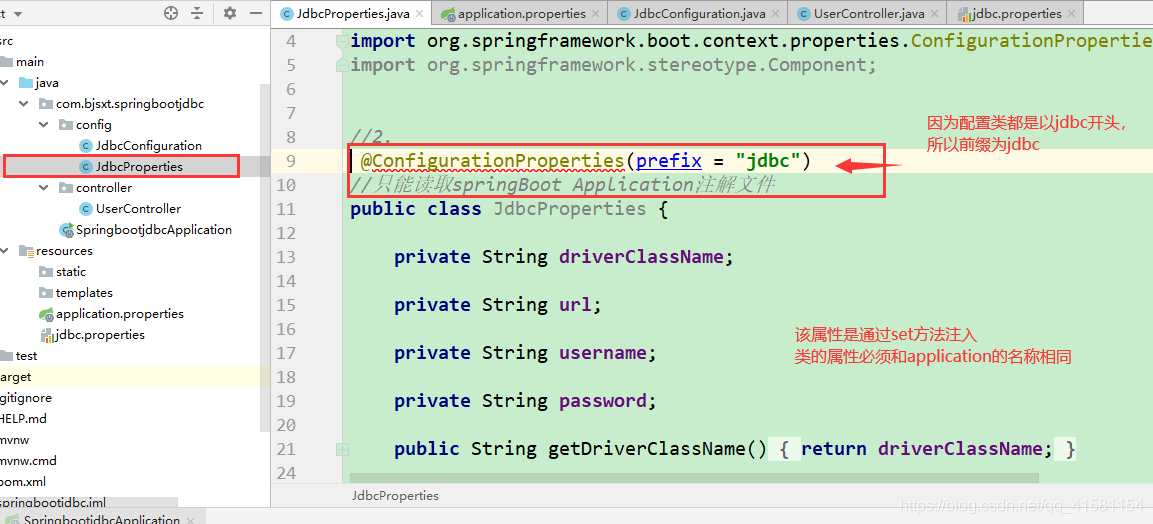
package com.bjsxt.springbootjdbc.config;


import org.springframework.boot.context.properties.ConfigurationProperties;
import org.springframework.stereotype.Component;


//2.
 @ConfigurationProperties(prefix = "jdbc")
//只能读取springBoot Application注解文件
public class JdbcProperties {

    private String driverClassName;

    private String url;

    private String username;

    private String password;

    public String getDriverClassName() {
        return driverClassName;
    }

    public void setDriverClassName(String driverClassName) {
        this.driverClassName = driverClassName;
    }

    public String getUrl() {
        return url;
    }

    public void setUrl(String url) {
        this.url = url;
    }

    public String getUsername() {
        return username;
    }

    public void setUsername(String username) {
        this.username = username;
    }

    public String getPassword() {
        return password;
    }

    public void setPassword(String password) {
        this.password = password;
    }
}
2.3:修改1.2的配置类。通过注入2.2专门加载配置类来通过get方法进行获取
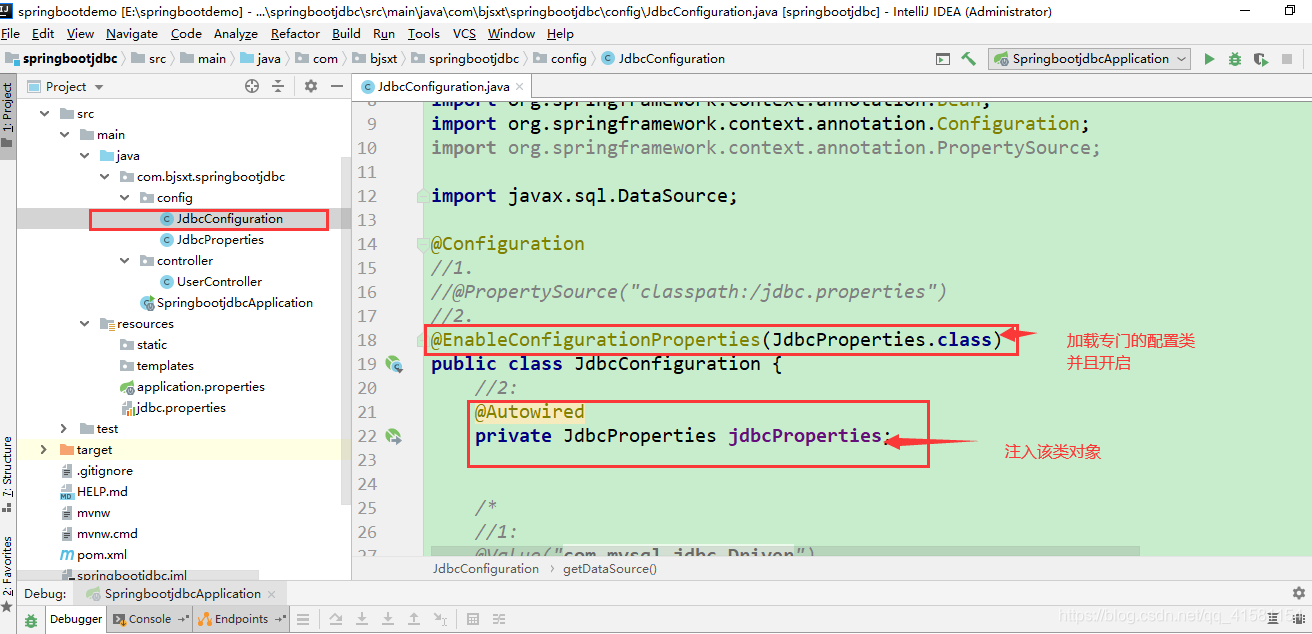

package com.bjsxt.springbootjdbc.config;

import com.alibaba.druid.pool.DruidDataSource;
import org.springframework.beans.factory.annotation.Autowired;
import org.springframework.beans.factory.annotation.Value;
import org.springframework.boot.context.properties.ConfigurationProperties;
import org.springframework.boot.context.properties.EnableConfigurationProperties;
import org.springframework.context.annotation.Bean;
import org.springframework.context.annotation.Configuration;
import org.springframework.context.annotation.PropertySource;

import javax.sql.DataSource;

@Configuration
//1.
//@PropertySource("classpath:/jdbc.properties")
//2.
@EnableConfigurationProperties(JdbcProperties.class)
public class JdbcConfiguration {
    //2:
    @Autowired
    private JdbcProperties jdbcProperties;


    /*
    //1:
    @Value("${jdbc.driverClassName}")
    private String driverClassName;

    @Value("${jdbc.url}")
    private String url;

    @Value("${jdbc.username}")
    private String username;

    @Value("${jdbc.password}")
    private String password;

    */

    //3
    // @ConfigurationProperties(prefix = "jdbc")
    @Bean
    public DataSource getDataSource(){
        DruidDataSource dataSource=new DruidDataSource();
        dataSource.setDriverClassName(this.jdbcProperties.getDriverClassName());
        dataSource.setUrl(this.jdbcProperties.getUrl());
        dataSource.setUsername(this.jdbcProperties.getUsername());
        dataSource.setPassword(this.jdbcProperties.getPassword());
        return dataSource;
    }
}
2.4:测试


3:@ConfigurationProperties的使用优化:
3.1:取消该专门加载配置类注解

package com.bjsxt.springbootjdbc.config;


import org.springframework.boot.context.properties.ConfigurationProperties;
import org.springframework.stereotype.Component;


//2.
// @ConfigurationProperties(prefix = "jdbc")
//只能读取springBoot Application注解文件
public class JdbcProperties {

    private String driverClassName;

    private String url;

    private String username;

    private String password;

    public String getDriverClassName() {
        return driverClassName;
    }

    public void setDriverClassName(String driverClassName) {
        this.driverClassName = driverClassName;
    }

    public String getUrl() {
        return url;
    }

    public void setUrl(String url) {
        this.url = url;
    }

    public String getUsername() {
        return username;
    }

    public void setUsername(String username) {
        this.username = username;
    }

    public String getPassword() {
        return password;
    }

    public void setPassword(String password) {
        this.password = password;
    }
}
3.2:取消加载配置类,在该方法直接开启读取配置文件


package com.bjsxt.springbootjdbc.config;

import com.alibaba.druid.pool.DruidDataSource;
import org.springframework.beans.factory.annotation.Autowired;
import org.springframework.beans.factory.annotation.Value;
import org.springframework.boot.context.properties.ConfigurationProperties;
import org.springframework.boot.context.properties.EnableConfigurationProperties;
import org.springframework.context.annotation.Bean;
import org.springframework.context.annotation.Configuration;
import org.springframework.context.annotation.PropertySource;

import javax.sql.DataSource;

@Configuration
//1.
//@PropertySource("classpath:/jdbc.properties")
//2.
//@EnableConfigurationProperties(JdbcProperties.class)
public class JdbcConfiguration {
    //2:
    /*
    @Autowired
    private JdbcProperties jdbcProperties;
    */


    /*
    //1:
    @Value("${jdbc.driverClassName}")
    private String driverClassName;

    @Value("${jdbc.url}")
    private String url;

    @Value("${jdbc.username}")
    private String username;

    @Value("${jdbc.password}")
    private String password;

    */

    //3
    @ConfigurationProperties(prefix = "jdbc")
    @Bean
    public DataSource getDataSource(){
        DruidDataSource dataSource=new DruidDataSource();
        /*
        dataSource.setDriverClassName(this.jdbcProperties.getDriverClassName());

        dataSource.setUrl(this.jdbcProperties.getUrl());
        dataSource.setUsername(this.jdbcProperties.getUsername());
        dataSource.setPassword(this.jdbcProperties.getPassword());
         */
        return dataSource;
    }
}
3.3:测试:


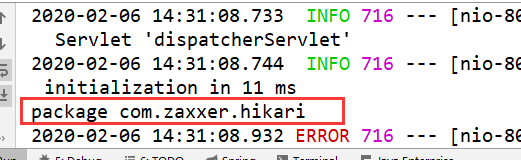
4:使用SpringBoot默认方式加载数据源(HikariDataSource)
4.1:配置application.properties

4.2:是注解配置类无效

package com.bjsxt.springbootjdbc.config;

import com.alibaba.druid.pool.DruidDataSource;
import org.springframework.beans.factory.annotation.Autowired;
import org.springframework.beans.factory.annotation.Value;
import org.springframework.boot.context.properties.ConfigurationProperties;
import org.springframework.boot.context.properties.EnableConfigurationProperties;
import org.springframework.context.annotation.Bean;
import org.springframework.context.annotation.Configuration;
import org.springframework.context.annotation.PropertySource;

import javax.sql.DataSource;

//4.
// @Configuration
//1.
//@PropertySource("classpath:/jdbc.properties")
//2.
//@EnableConfigurationProperties(JdbcProperties.class)
public class JdbcConfiguration {
    //2:
    /*
    @Autowired
    private JdbcProperties jdbcProperties;
    */


    /*
    //1:
    @Value("${jdbc.driverClassName}")
    private String driverClassName;

    @Value("${jdbc.url}")
    private String url;

    @Value("${jdbc.username}")
    private String username;

    @Value("${jdbc.password}")
    private String password;

    */

    //3
    @ConfigurationProperties(prefix = "jdbc")
    @Bean
    public DataSource getDataSource(){
        DruidDataSource dataSource=new DruidDataSource();
        /*
        dataSource.setDriverClassName(this.jdbcProperties.getDriverClassName());

        dataSource.setUrl(this.jdbcProperties.getUrl());
        dataSource.setUsername(this.jdbcProperties.getUsername());
        dataSource.setPassword(this.jdbcProperties.getPassword());
         */
        return dataSource;
    }
}
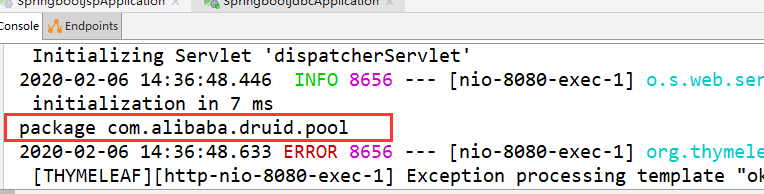
4.3:修改控制器代码,查看该类的位置:

5:SpringBoot中使用自己配置的数据源
5.1:修改pom文件,添加Druid数据源
5.2:修改数据源类型

5.3:重启项目进行测试:


 1614
1614


 被折叠的 条评论
为什么被折叠?
被折叠的 条评论
为什么被折叠?
 到【灌水乐园】发言


