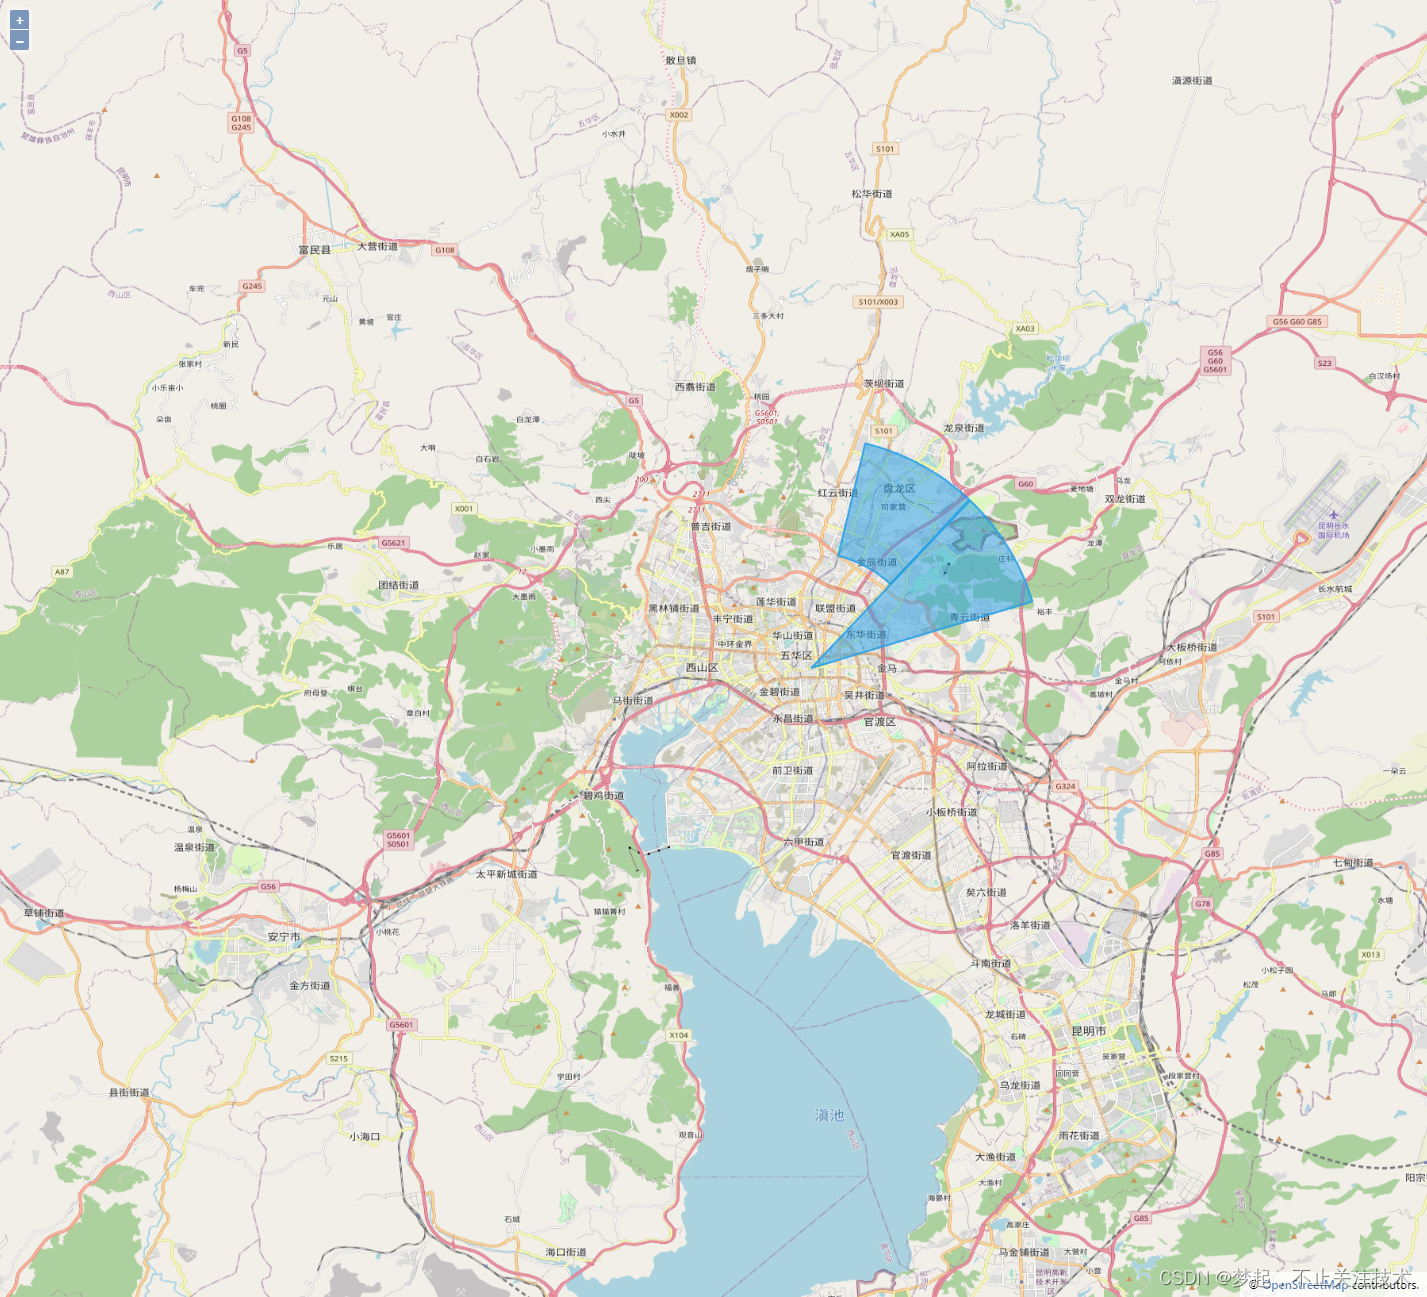
大家好,我是梦起,今天来学习一下openlayers6绘制扇形及环形。
首先 准备一个vue3项目,我是用vite创建的,npm6.x执行上面的语句,npm7+执行下面的语句,因为npm7以上需要使用双破折号。
# npm 6.x
npm create vite@latest webGis --template vue

# npm 7+, extra double-dash is needed:
npm create vite@latest webGis -- --template vue
创建好后进入项目
cd webGis
npm install
安装openlayers,写文章的时候最新版是openlayers6
npm i ol -S运行项目
npm run dev接下来就进入到实际编码阶段
import { ref, onMounted } from 'vue' // vue相关方法
import { Map, View } from 'ol'      // 地图实例方法、视图方法
import { Polygon, LinearRing} from 'ol/geom'; // 地图绘制多边形,线性环方法
import Tile from 'ol/layer/Tile'    // 瓦片渲染方法
import OSM from 'ol/source/OSM'    // OSM瓦片
import 'ol/ol.css'                 // 地图样式
<template>
  <div id="map" class="map__x"></div>
</template>

<script>
    import { ref, onMounted } from 'vue' // vue相关方法
    import { Map, View } from 'ol'      // 地图实例方法、视图方法
    import { Polygon, LinearRing} from 'ol/geom'; // 地图绘制多边形,线性环方法
    import Tile from 'ol/layer/Tile'    // 瓦片渲染方法
    import OSM from 'ol/source/OSM'    // OSM瓦片
    import 'ol/ol.css'                 // 地图样式

    export default {
		setup() {
            let map = ref(null) // 存放地图实例
            function initMap () {
                // 地图实例
                map.value = new Map({
                    target: 'map',                         // 对应页面里 id 为 map 的元素
                    layers: [                              // 图层
                        new Tile({                           // 使用瓦片渲染方法
                            source: new OSM()                  // 图层数据源
                        })
                    ],
                    view: new View({                       // 地图视图
                      projection: "EPSG:4326",             // 坐标系,有EPSG:4326和EPSG:3857
                      center: [102.712251, 25.040609], // 昆明坐标
                      minZoom:10,                          // 地图缩放最小级别
                      zoom: 12                         // 地图缩放级别(打开页面时默认级别)
                    })
                })
            }

        }
    }
</script>

<style scoped>
.map__x {
  width: 100%;
  height: 100%;
  position: fixed;
}
</style>
/**
* APIMethod:OpenLayers绘制扇形的接口扩展
* @param origin 圆心
* @param radius 半径
* @param sides 边数 建议100 少了有棱角,多了增加计算量
* @param r 弧度
* @param angel 旋转角度
* @returns {OpenLayers.Geometry.Polygon}
*/
function createSector(origin, radius, sides, r, angel) {
	let rotation = 360 - r;
	let angle = Math.PI * ((1 / sides) + (1 / 2));
	if (rotation) {
		angle += (rotation / 180) * Math.PI;
	}
	let rotatedAngle, x, y;
	let points = [];
	for (let i = 0; i < sides; ++i) {
		let an = i * ((360 - rotation) / 360);
		rotatedAngle = angle + (an * 2 * Math.PI / sides);
		x = origin[0] + (radius * Math.cos(rotatedAngle));
		y = origin[1] + (radius * Math.sin(rotatedAngle));
		points.push([x, y]);
	}
	if (rotation != 0) {
		points.push(origin);
	}
	var ring = new LinearRing(points);
	ring.rotate((360 - angel) / 57.3, origin);//绘制好后,需要旋转展示,rotate是逆时针旋转,这边需要顺时针,所以用360减去旋转角度得到顺时针旋转角度
	let list = ring.getCoordinates()
	return new Polygon([list]);
}
/**
* APIMethod:OpenLayers绘制环形的接口扩展
* @param origin 圆心
* @param radius 外半径
* @param radius2 内半径
* @param sides 边数
* @param r 弧度
* @param angel 旋转角度(环形右边半径与x正向轴的角度)
* @returns {OpenLayers.Geometry.Polygon}
*/
function createRegularPolygonCurve(origin, radius, sides, r, angel, radius2) {
let rotation = 360 - r;
let angle = Math.PI * ((1 / sides) + (1 / 2));
if (rotation) {
angle += (rotation / 180) * Math.PI;
}
let rotatedAngle, x, y;
let points = [];
let points2 = [];
for (let i = 0; i < sides; ++i) {
let an = i * ((360 - rotation) / 360);
rotatedAngle = angle + (an * 2 * Math.PI / sides);
x = origin[0] + (radius * Math.cos(rotatedAngle));
y = origin[1] + (radius * Math.sin(rotatedAngle));
points.push([x, y]);
}
for (let i = 0; i < sides; ++i) {
let an = i * ((360 - rotation) / 360);
rotatedAngle = angle + (an * 2 * Math.PI / sides);
x = origin[0] + (radius2 * Math.cos(rotatedAngle));
y = origin[1] + (radius2 * Math.sin(rotatedAngle));
if (i == 0) {
points.unshift([x, y]);
}
points2.push([x, y]);
}
points2.reverse();
points = points.concat(points2)
var ring = new LinearRing(points);
ring.rotate((360 - angel + r) / 57.3, origin);
let list = ring.getCoordinates()
safetyArr.value.push([list])
return new Polygon([list]);
}源码放资源里了,有需要的可以下载,源码效果如下图
源码下载地址:vue3+vite+openlayers6实现绘制扇形及环形组件代码-Javascript文档类资源-CSDN下载


 1277
1277


 被折叠的 条评论
为什么被折叠?


