# istio注入并部署测试deployment[root@k8s-master-1 example1]# istioctl kube-inject -f deployment.yaml | kubectl apply -f -
namespace/canary created
deployment.apps/busybox-httpd-v1 created
deployment.apps/busybox-httpd-v2 created
service/busybox-canary created
# istio相关部署[root@k8s-master-1 example1]# kubectl apply -f istio.yaml
gateway.networking.istio.io/canary-gateway created
virtualservice.networking.istio.io/canary created
destinationrule.networking.istio.io/canary created
# 查看gateway访问地址[root@k8s-master-1 example1]# kubectl get svc -n istio-system
NAME TYPE CLUSTER-IP EXTERNAL-IP PORT(S)
istio-egressgateway ClusterIP 10.0.253.161 <none>80/TCP,443/TCP
istio-ingressgateway LoadBalancer 10.0.83.120 192.168.0.15 15021:38405/TCP,80:49967/TCP,443:49290/TCP,31400:38905/TCP,15443:36855/TCP
istiod ClusterIP 10.0.99.239 <none>15010/TCP,15012/TCP,443/TCP,15014/TCP
kiali NodePort 10.0.234.37 <none>20001:40640/TCP,9090:36639/TCP
prometheus NodePort 10.0.132.174 <none>9090:30086/TCP
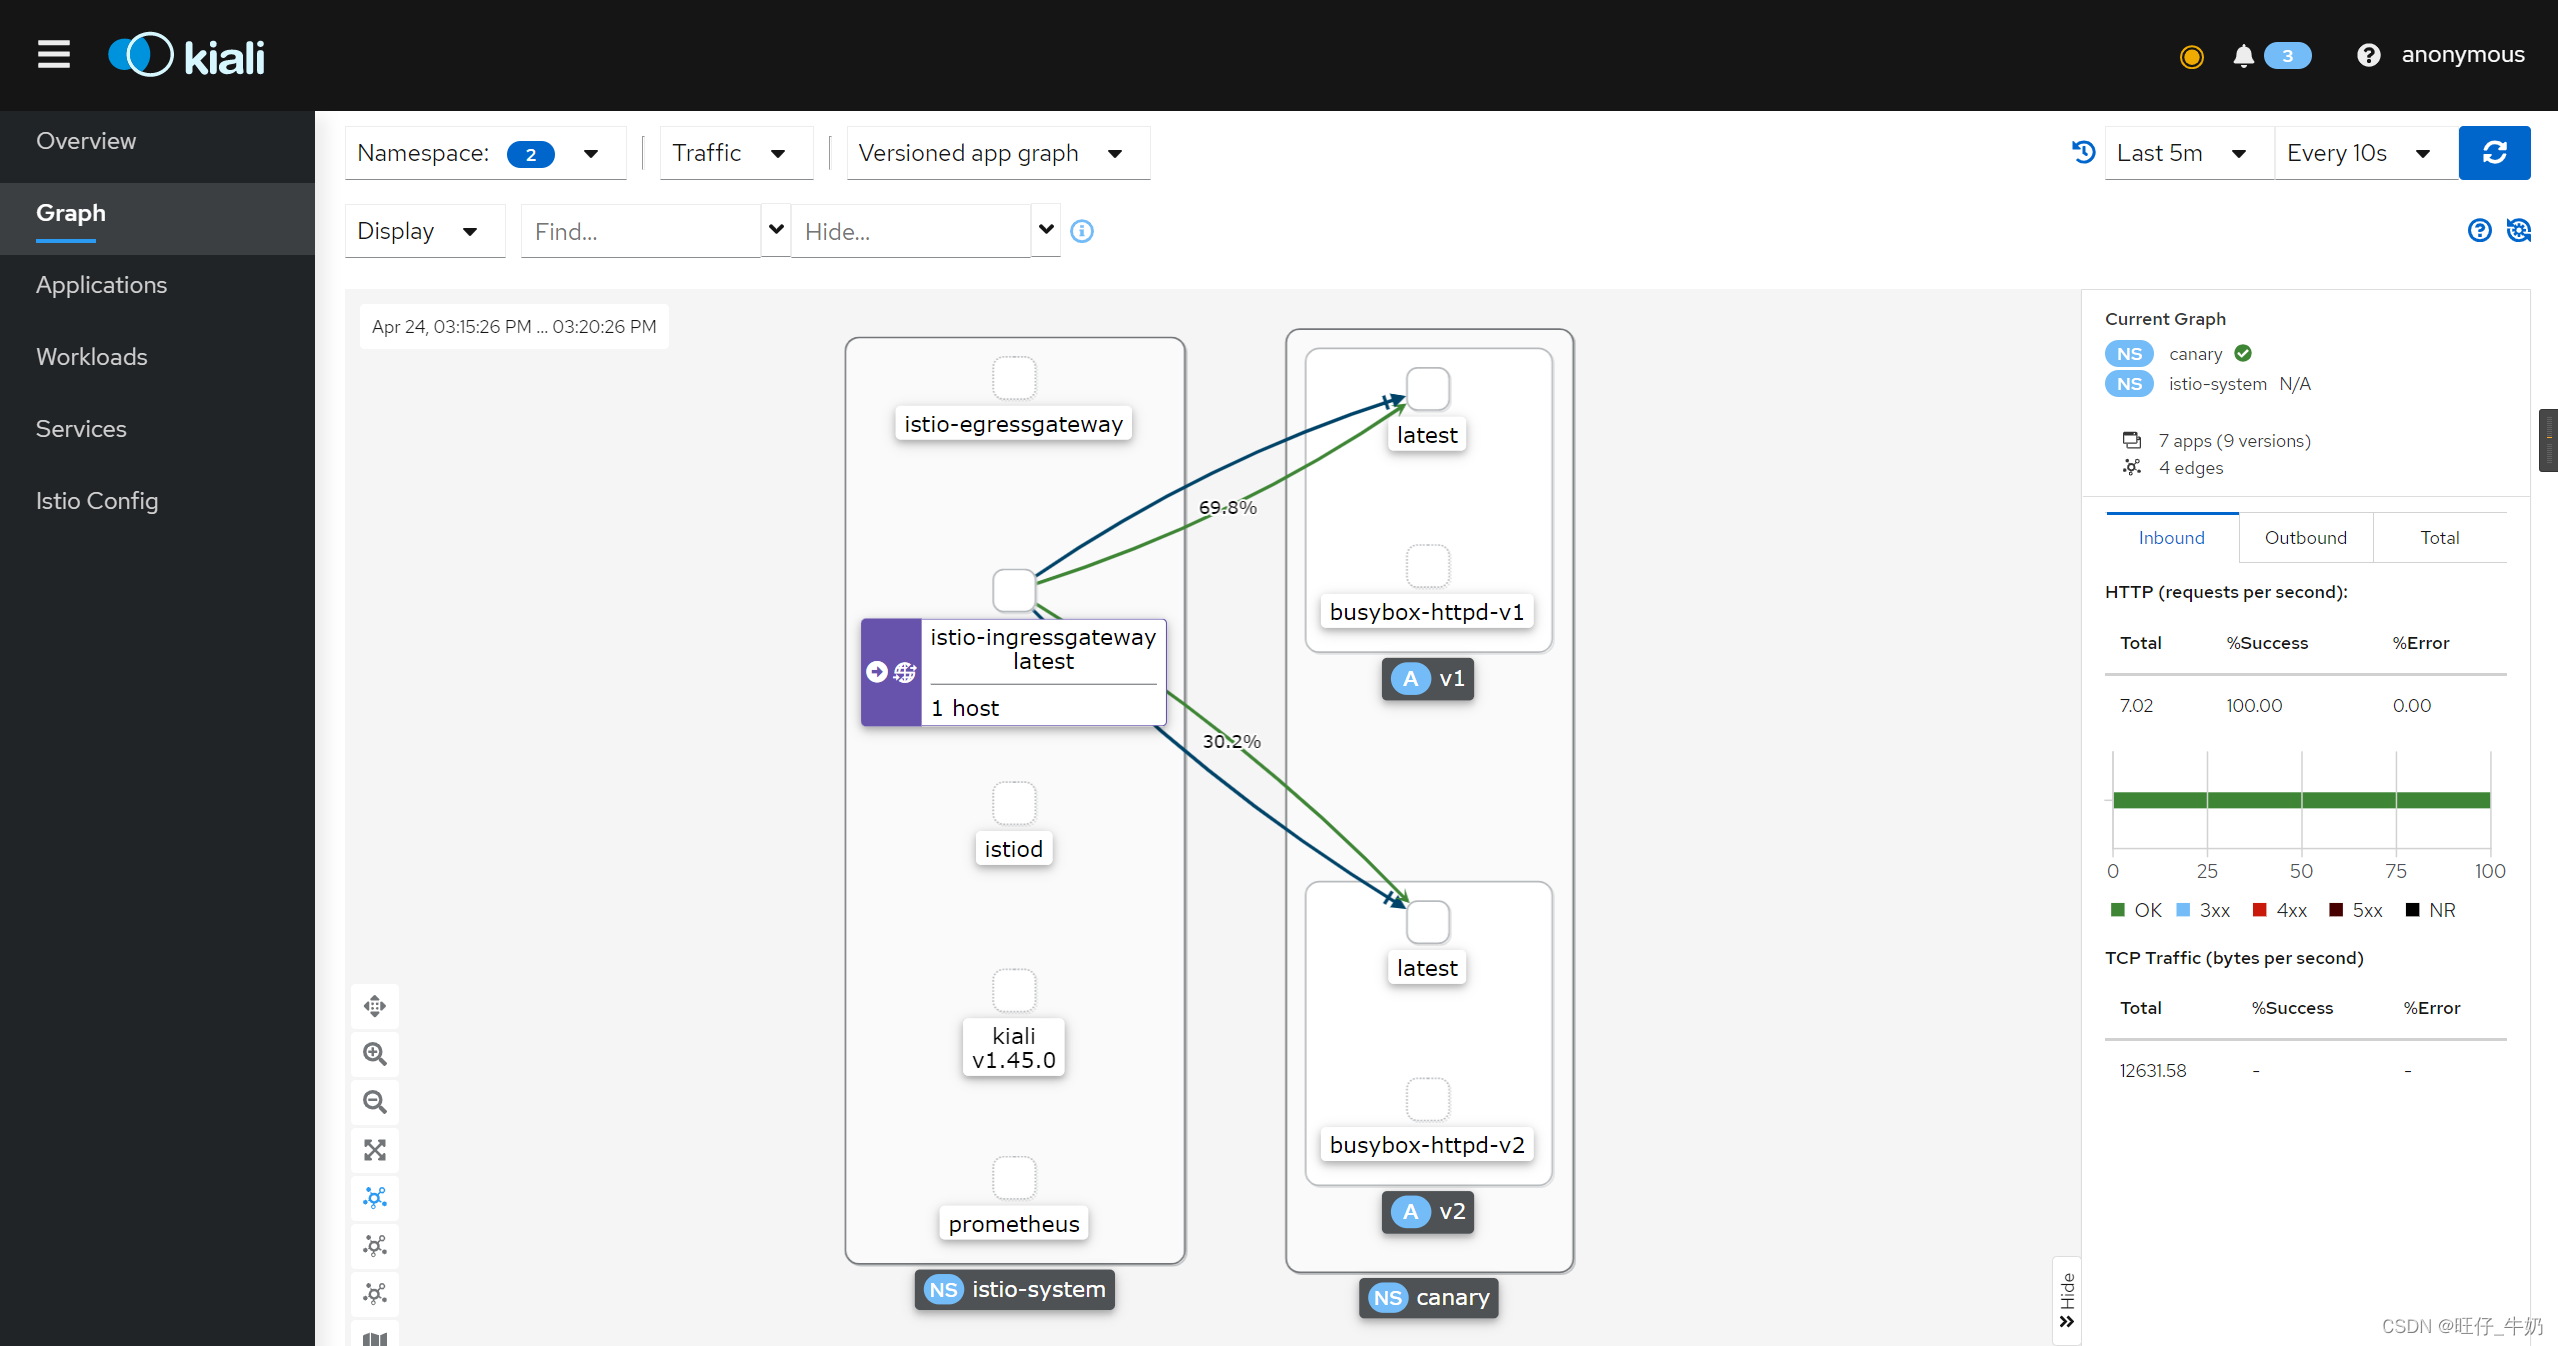
# 访问192.168.0.10:49967即可将流量传递给后端POD,通过下面可见大致实现了流量3-7分布,即金丝雀发布[root@k8s-master-1 example1]# for i in `seq 1 10`; do curl 192.168.0.10:49967 ; done
this is busybox-httpd-v1
this is busybox-httpd-v1
this is busybox-httpd-v2
this is busybox-httpd-v1
this is busybox-httpd-v2
this is busybox-httpd-v1
this is busybox-httpd-v2
this is busybox-httpd-v1
this is busybox-httpd-v1
this is busybox-httpd-v1


 1806
1806


 被折叠的 条评论
为什么被折叠?
被折叠的 条评论
为什么被折叠?
 到【灌水乐园】发言


