


前言-Freemarker简单介绍
- 近期项目工作中需要编写大量格式相同但数据不同的Word文档,需要实现自动生成文档的效果,但是通过网上冲浪和官方文档搜索,相对来说,没有分类整理的文档,因此自己抽空简要分类整理了一下,如果错误,还请各位reader尽情指出。
0 环境准备
- 这里提供一个基础SpringBoot项目,后续的每个环节的代码都将一步步以这个为基础构建,如果你也打算从头开始挨个实操一遍,可以下载并导入之后同步我的后续操作,文末也会提供一份完整的代码
- 链接:https://www.aliyundrive.com/s/iXoQuRZh9pf
- 环境配置说明
- IDEA2019.3
- JDK1.8
- SpringBoot2.3.7.RELEASE
- Freemarker 2.3.28
- 目录结构介绍
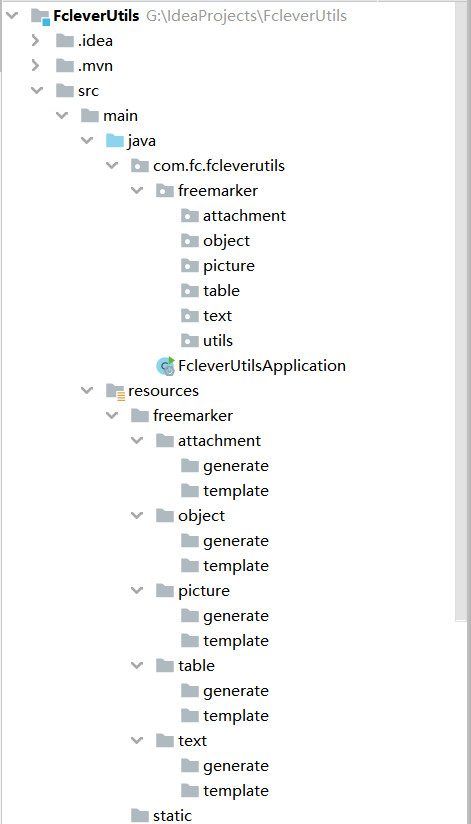
- src下存储主要的代码,这里划分了六个包,分别是text(普通文本)、object(对象)、picture(图片)、table(表格)、attachment(附件)、utils(工具类),之所以将每个不同类型的操作分开,是因为考虑到看到此篇文章的reader都有各自不同的需求,这样就可以直接定位到自己需要的模块,如果需要不同类型的组合,只需要弄清楚每一块的数据存储和映射就可以做到自己按需拼凑了。建议看一下处理普通文本模块,里面一些内容在后续其他模块不会重复赘述
- resource下面也针对五大类型设置了五个文件夹,其中每个文件的名字和src下的包名是对应的,其中template文件夹存储模板文件(doc、xml、ftl文件),generate保存根据对应模板生成的最终文件
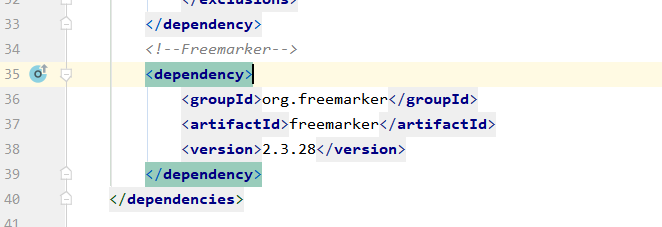
- pom.xml中没有比较特别的,引入了Freemarker的依赖
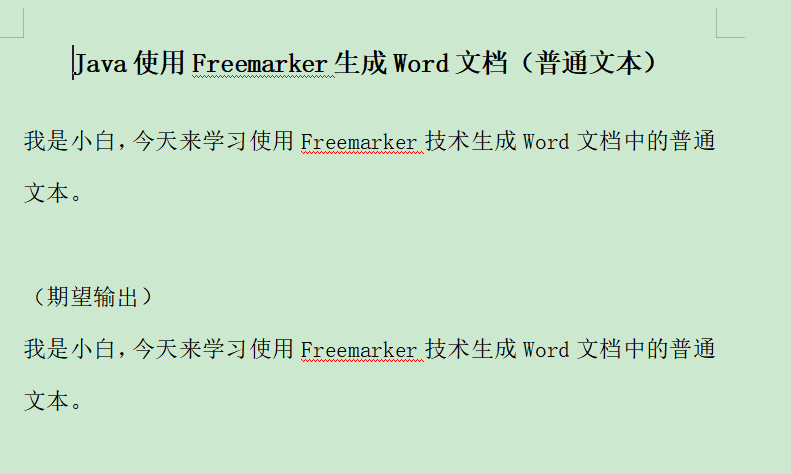
1 处理普通文本
-
准备Word文档
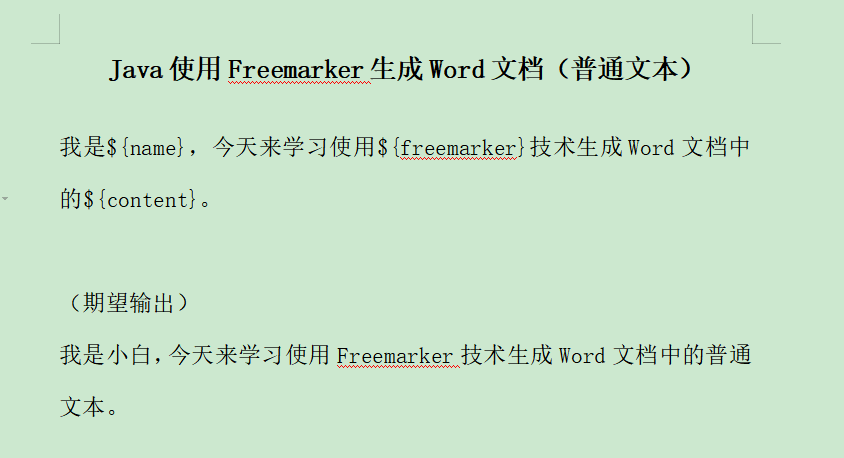
- 在resources/freemarker/text/template文件夹下,创建一个text.doc文件,文件内容如下
-
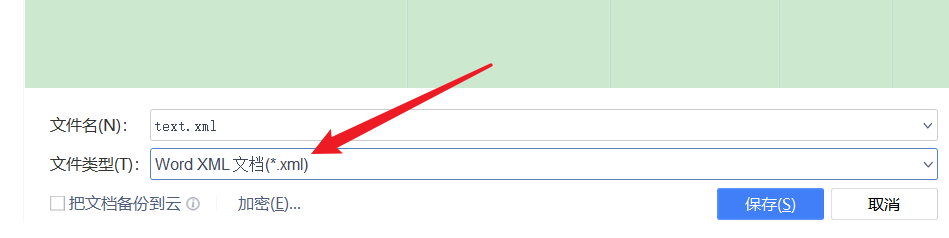
保存为xml格式
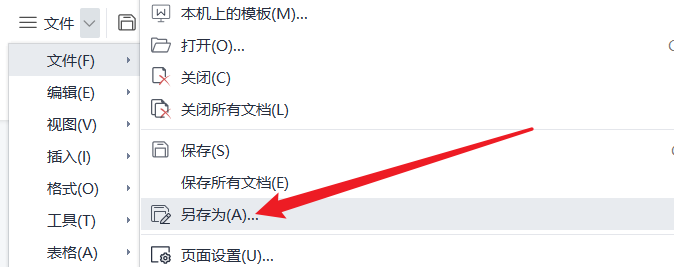
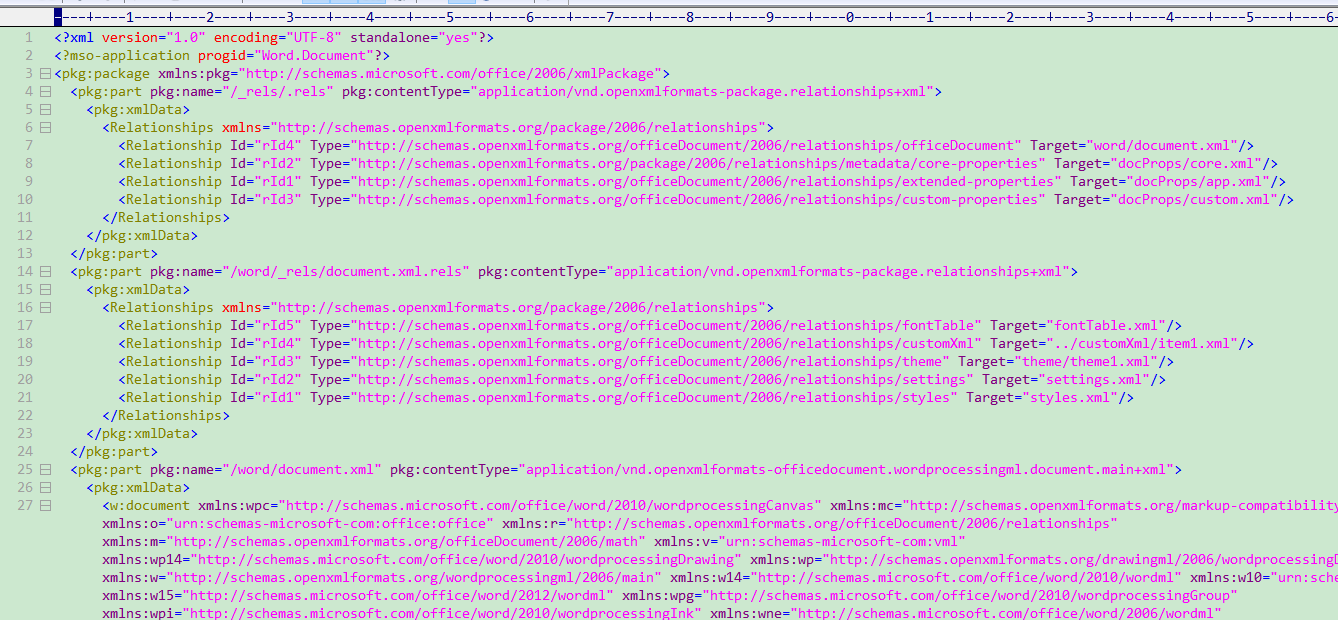
- doc文档编写完成之后,使用另存为,保存为xml格式(WPS)
- 保存的时候需要注意以下两点
- 保存位置,我这里都是存储在template同样目录下
- 保存格式选择
-
转换为ftl格式
- 使用一些强大的文本编辑工具(这里使用EditPlus),打开xml文件,进行格式化
- 格式化xml工具:https://blog.csdn.net/qq_41649001/article/details/119595800
- 格式化前后对比
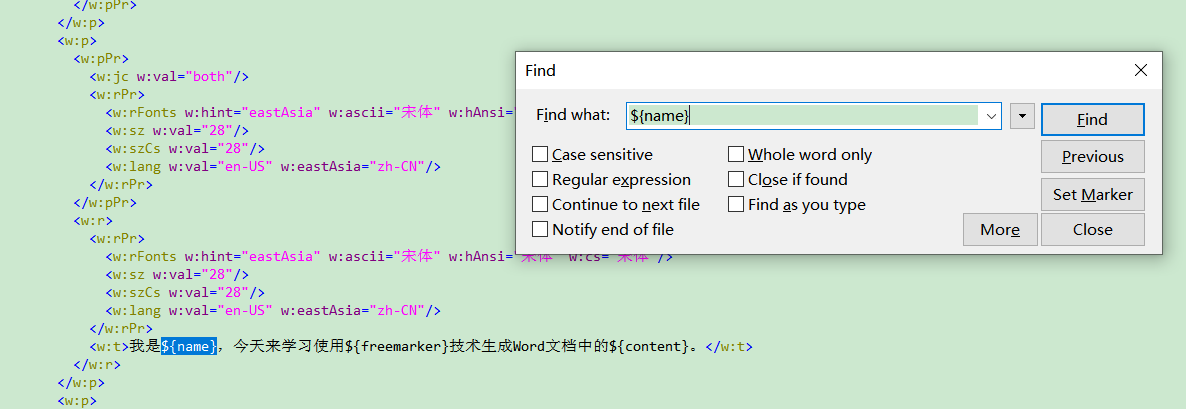
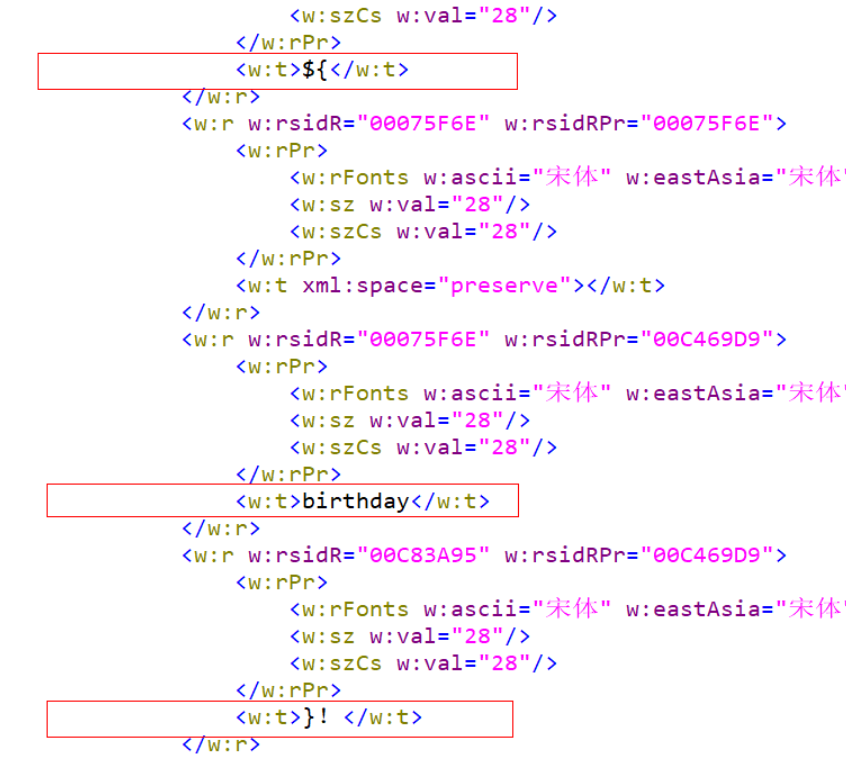
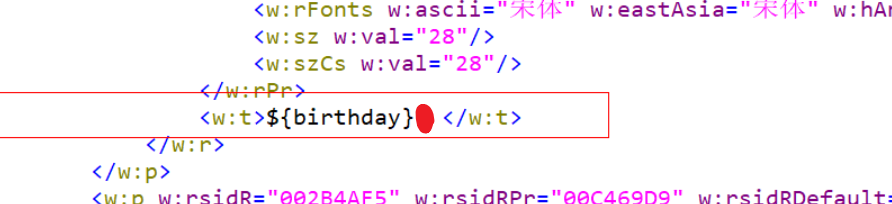
- 如果格式化后,出现${}形式的占位符中的内容被分隔开了,如下面情况,那么我们需要手动删除掉中间内容即可
- 我们可以使用ctrl+f就可以搜索到我们在doc文档中填写的${}形式的占位符,后续Freemarker会识别占位符,然后进行替换
- 然后另存为为ftl格式文件即可
- 到现在为止,我们的模板文件已经准备好了(ftl),其他两个文件可以看做是过渡文件
- 使用一些强大的文本编辑工具(这里使用EditPlus),打开xml文件,进行格式化
-
编写代码
- 编写一个Freemarker生成Word文档的工具类,减少代码冗余,以后的一些生成操作直接调用即可,放在src中utils包中
package com.fc.fcleverutils.freemarker.utils; import freemarker.template.Configuration; import freemarker.template.Template; import freemarker.template.Version; import java.io.*; import java.util.Map; /** * @ClassName WordUtil * @Description 使用Freemarker生成Word文档工具类 * @Author Fclever * @Date 2021/8/11 10:06 **/ public class WordUtil { /** * 使用Freemarker自动生成Word文档 * @param dataMap 保存Word文档中所需要的数据 * @param templatePath 模板文件的绝对路径 * @param templateFile 模板文件的名称 * @param generateFile 生成文件的路径+名称 * @throws Exception */ public static void generateWord(Map<String, Object> dataMap, String templatePath,String templateFile, String generateFile) { // 设置FreeMarker的版本 Configuration configuration = new Configuration(new Version("2.3.28")); // 设置Freemarker的编码格式 configuration.setDefaultEncoding("UTF-8"); Writer out = null; try{ // 设置FreeMarker生成Word文档所需要的模板的路径 configuration.setDirectoryForTemplateLoading(new File(templatePath)); // 设置FreeMarker生成Word文档所需要的模板名称 Template t = configuration.getTemplate(templateFile, "UTF-8"); // 创建一个Word文档的输出流 out = new BufferedWriter(new OutputStreamWriter(new FileOutputStream(new File(generateFile)), "UTF-8")); //FreeMarker使用Word模板和数据生成Word文档 t.process(dataMap, out); } catch (Exception e) { e.printStackTrace(); } if (out != null) { try { out.flush(); out.close(); } catch (IOException e) { e.printStackTrace(); } } } }- 然后在启动类中,编写获取数据代码和调用生成Word文档的工具方法
package com.fc.fcleverutils; import com.fc.fcleverutils.freemarker.utils.WordUtil; import org.springframework.boot.SpringApplication; import org.springframework.boot.autoconfigure.SpringBootApplication; import java.util.HashMap; import java.util.Map; @SpringBootApplication public class FcleverUtilsApplication { public static void main(String[] args) { SpringApplication.run(FcleverUtilsApplication.class, args); // 1. 使用Freemarker生成Word文档(普通文本) WordUtil.generateWord(getTextData(), "G:\\IdeaProjects\\FcleverUtils\\src\\main\\resources\\freemarker\\text\\template\\", "text.ftl", "G:\\IdeaProjects\\FcleverUtils\\src\\main\\resources\\freemarker\\text\\generate\\text.doc"); } /** * 获取生成普通文本所需数据 * @return */ private static Map<String, Object> getTextData() { /* * 创建一个Map对象,将Word文档需要的数据都保存到该Map对象中 */ Map<String, Object> dataMap = new HashMap<>(); dataMap.put("name", "小白"); dataMap.put("freemarker", "Freemarker"); dataMap.put("content", "普通文本"); return dataMap; } } -
运行测试
- 运行启动类,在生成路径中可以看到已经生成了text.doc
- OK,测试通过

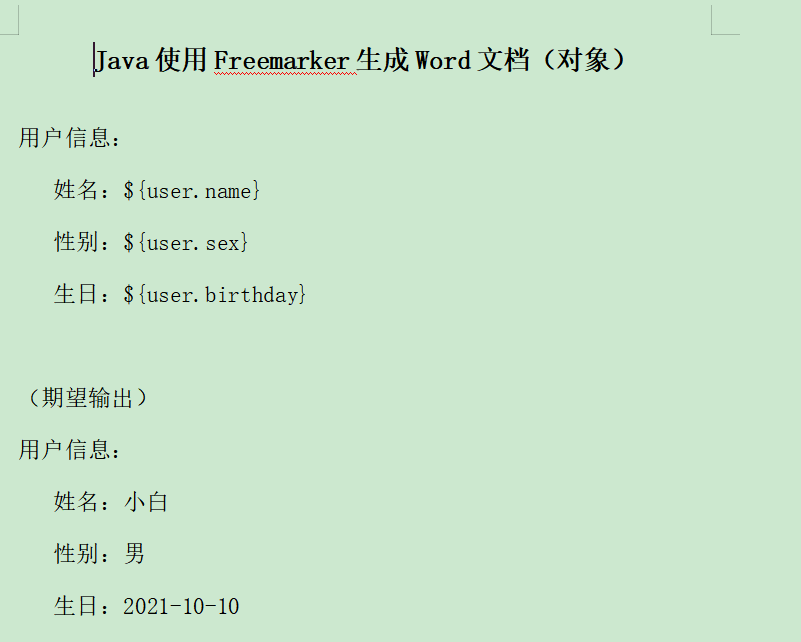
2 处理对象类型数据
-
准备Word文档
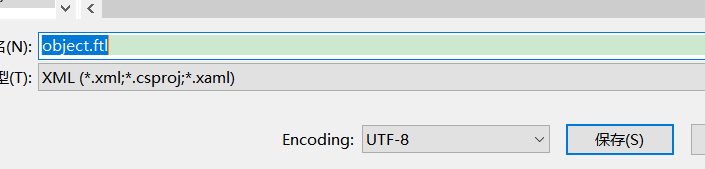
- 在resources/freemarker/object/template下创建一个object.doc文件
-
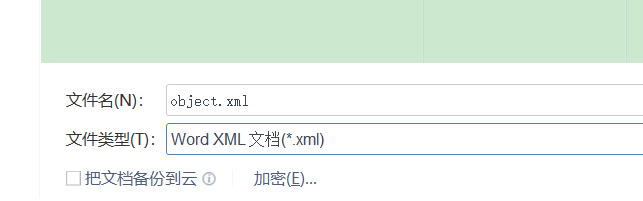
保存为xml格式
-
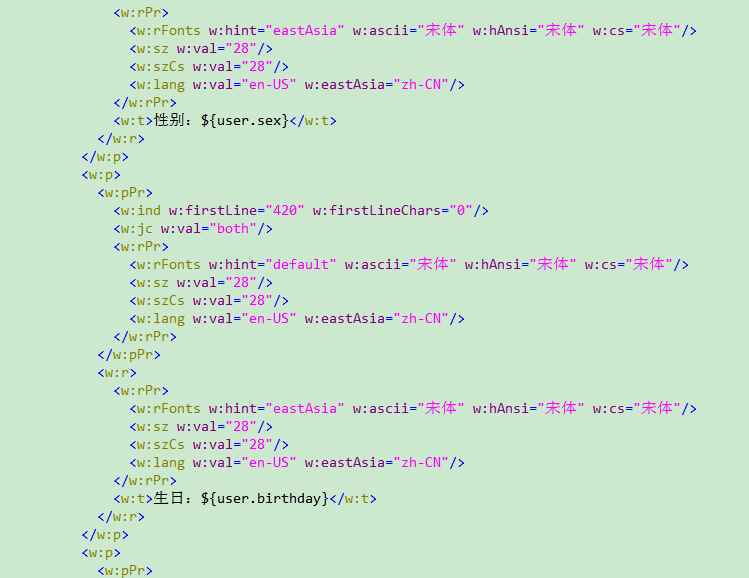
转换为ftl格式
-
编写代码
-
对于对象类型的数据和普通文本处理差不多,只需要修改代码中的数据即可
-
编写实体类
@Data @AllArgsConstructor @NoArgsConstructor public class User { private String name; private String sex; private String birthday; } -
修改启动类
package com.fc.fcleverutils;

import com.fc.fcleverutils.freemarker.object.User;
import com.fc.fcleverutils.freemarker.utils.WordUtil;
import org.springframework.boot.SpringApplication;
import org.springframework.boot.autoconfigure.SpringBootApplication;

import java.util.HashMap;
import java.util.Map;

@SpringBootApplication
public class FcleverUtilsApplication {

  public static void main(String[] args) {
    SpringApplication.run(FcleverUtilsApplication.class, args);
    // 2. 使用Freemarker生成Word文档(对象)
    WordUtil.generateWord(getObjectData(),
                          "G:\\IdeaProjects\\FcleverUtils\\src\\main\\resources\\freemarker\\object\\template\\",
                          "object.ftl", "G:\\IdeaProjects\\FcleverUtils\\src\\main\\resources\\freemarker\\object\\generate\\object.doc");
  }

  /**
     * 获取生成对象所需数据
     * @return
     */
  private static Map<String, Object> getObjectData() {
    /*
         * 创建一个Map对象,将Word文档需要的数据都保存到该Map对象中
         */
    Map<String, Object> dataMap = new HashMap<>();
    User user = new User();
    user.setName("小白");
    user.setSex("男");
    user.setBirthday("2021-101-10");
    dataMap.put("user", user);
    return dataMap;
  }

}
-
-
运行测试
- 运行启动类
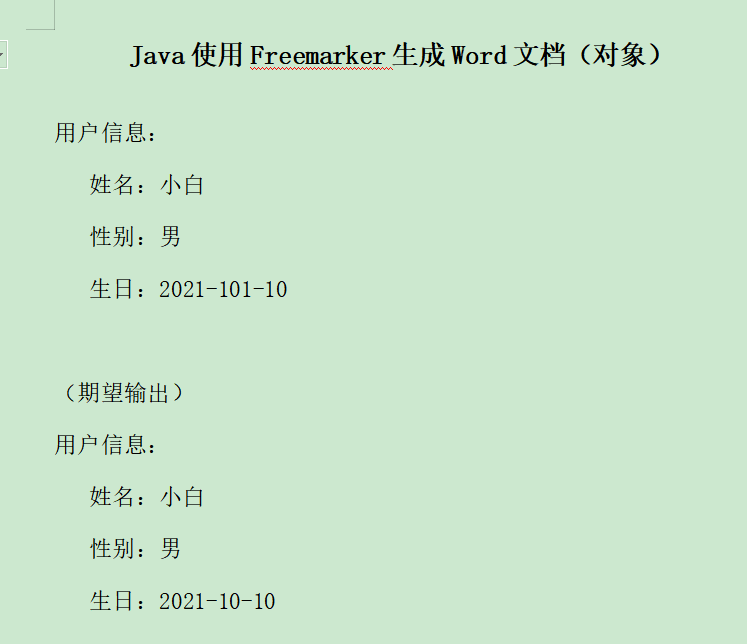
- 测试通过
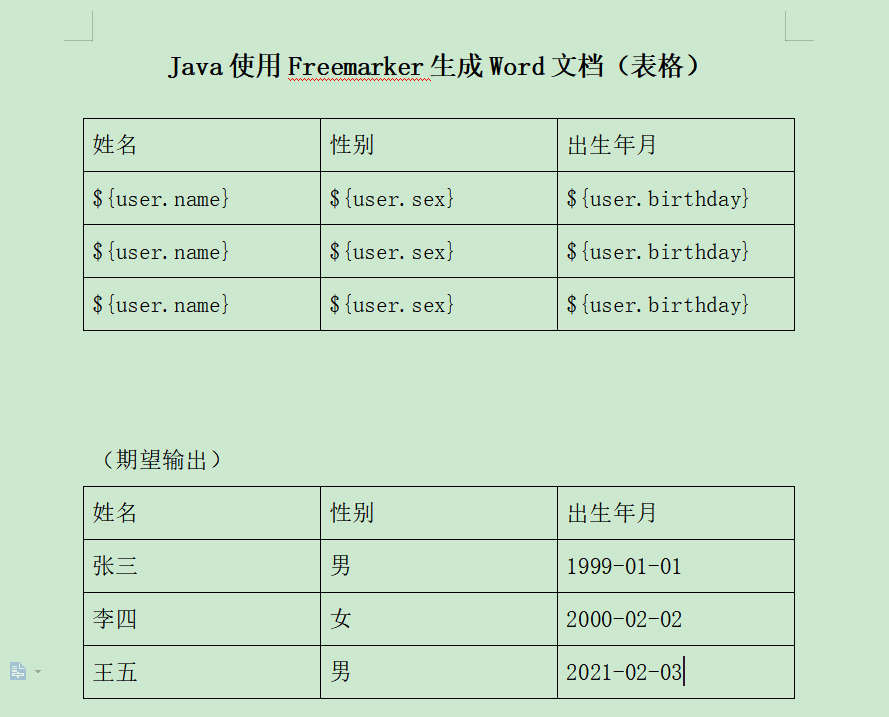
3 处理表格数据
-
准备Word文档
- resources\freemarker\table\template创建一个table.doc
-
保存为xml格式
-
注意xml格式和保存路径
-
-
最好先进行格式化,对于表格内容,需要特殊处理
-
首先,我们可以搜索表头内容和${}的内容找到表头
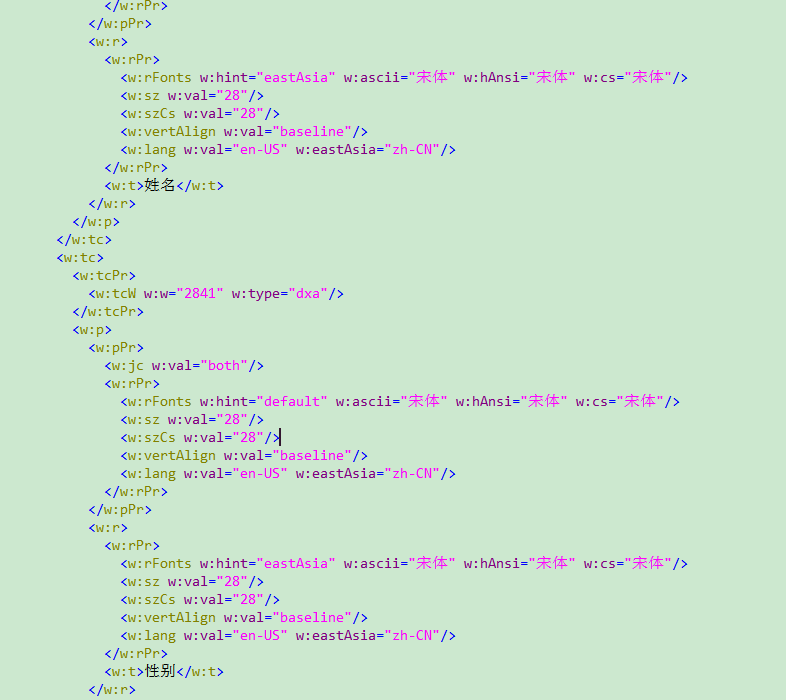
- 这里尤其需要注意一下,查找到的内容是否是准确。
-
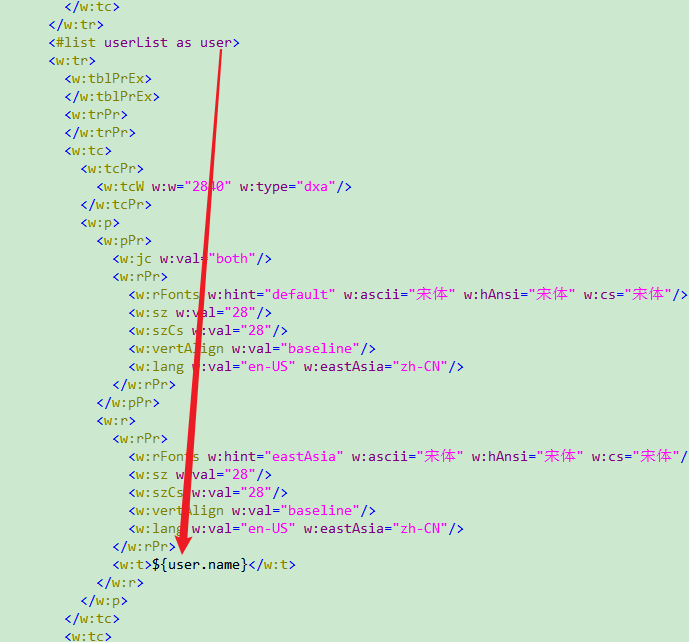
对于表格的处理, 表头所在行保留即可,表格中的数据是需要循环遍历生成的,因此我们需要使用下面个标签
<#list userList as user> </#list>- userList与代码中Map对象的Key保持一致
- as表示起别名的作用,和SQL语句别名可以类别
- user表示别名,这样在xml中就可以使用别名进行处理
-
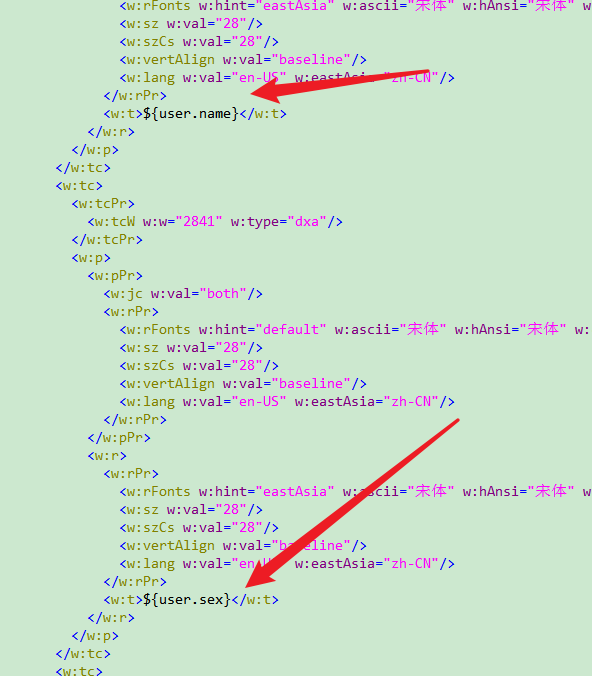
在xml中,我们可以找到存在${user.name}这样我们自定义的占位符是在<w:tr></w:tr>这样的标签中保存的,因为doc中我们写了三行数据,所以会找到三个这样的标签(这个需要细心查找一下)

- 对标签进行折叠,三对标签对应三行数据

-
这里我们只需要保留一行即可,然后其余两对标签删除掉,然后在<w:tr>标签外,嵌套一层<#list>,效果如下:
- 需要强调的是,别名可以不写,如果起了别名,那么在<w:tr>标签中获取值的时候,就应该与别名保持一致
-
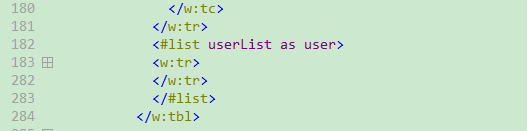
后续对表格处理比较熟悉之后,就只需要在doc中设置表头和一行用于定位标识的第一行内容即可
-
-
转换为ftl格式
-
编写代码
- 同样也是修改启动类中获取数据的代码即可
package com.fc.fcleverutils; import com.fc.fcleverutils.freemarker.pojo.User; import com.fc.fcleverutils.freemarker.utils.WordUtil; import org.springframework.boot.SpringApplication; import org.springframework.boot.autoconfigure.SpringBootApplication; import java.util.HashMap; import java.util.LinkedList; import java.util.List; import java.util.Map; @SpringBootApplication public class FcleverUtilsApplication { public static void main(String[] args) { SpringApplication.run(FcleverUtilsApplication.class, args); // 3. 使用Freemarker生成Word文档(表格) WordUtil.generateWord(getTableData(), "G:\\IdeaProjects\\FcleverUtils\\src\\main\\resources\\freemarker\\table\\template\\", "table.ftl", "G:\\IdeaProjects\\FcleverUtils\\src\\main\\resources\\freemarker\\table\\generate\\object.doc"); } /** * 获取生成表格所需数据 * @return */ private static Map<String, Object> getTableData() { /* * 创建一个Map对象,将Word文档需要的数据都保存到该Map对象中 */ Map<String, Object> dataMap = new HashMap<>(); List<User> userList = new LinkedList<>(); userList.add(new User("张三", "男", "1999-01-01")); userList.add(new User("李四", "女", "2000-02-02")); userList.add(new User("王五", "男", "2021-02-03")); dataMap.put("userList",userList); return dataMap; } } -
运行测试

- 测试通过

4 处理图片数据
-
准备Word文档
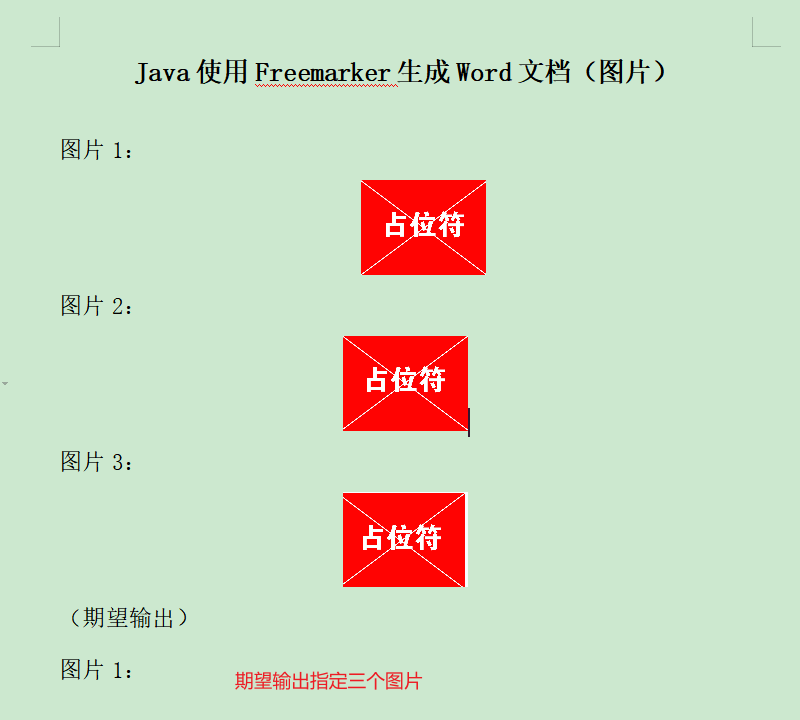
- resources\freemarker\picture\template下创建picture.doc,此外还需要准备几张图片做占位
-
保存为xml格式
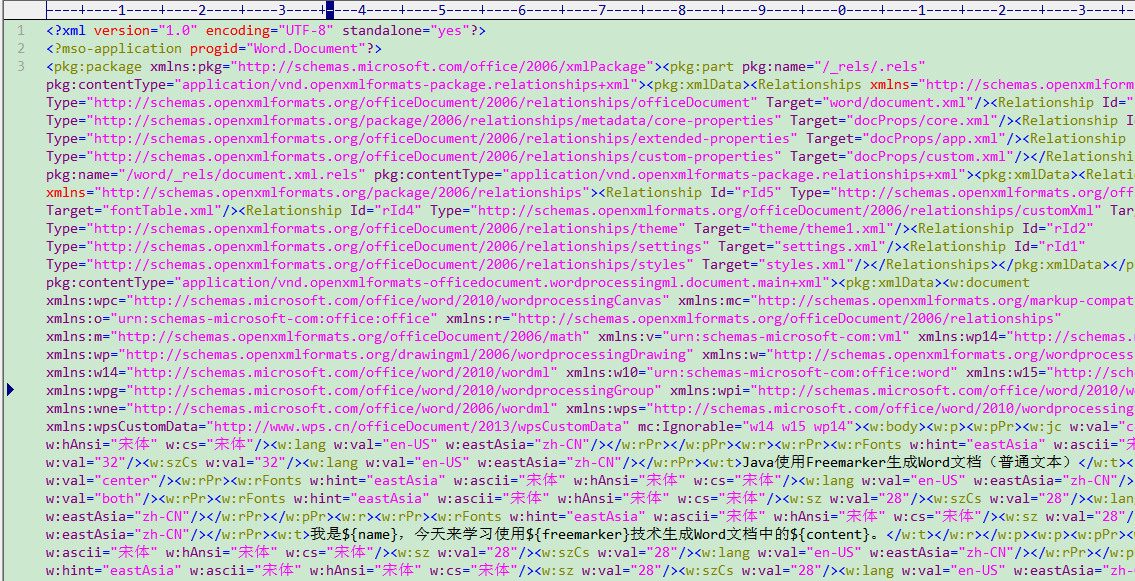
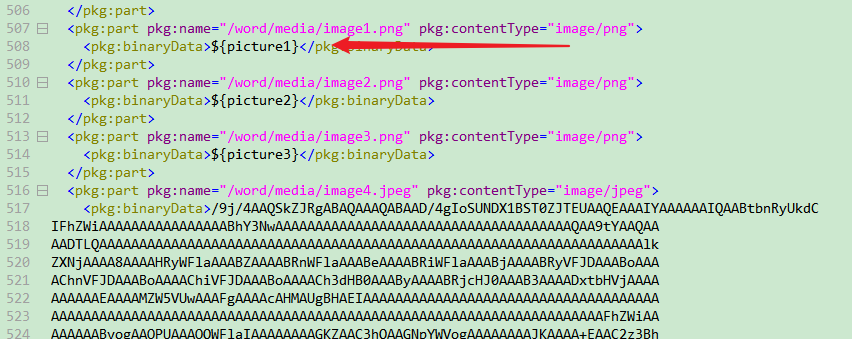
- 将xml格式化,对于图片内容的替换还是比较容易的,在浏览xml文件的时候,可以看到一些一大段的字符如下,其实这个就是图片的base64编码值
- 我们将这些base64编码值都删除掉(这些值都在<pkg:binaryData>标签中),然后将base64编码值所在的<pkg:part>标签都折叠起来,可以看到如下效果
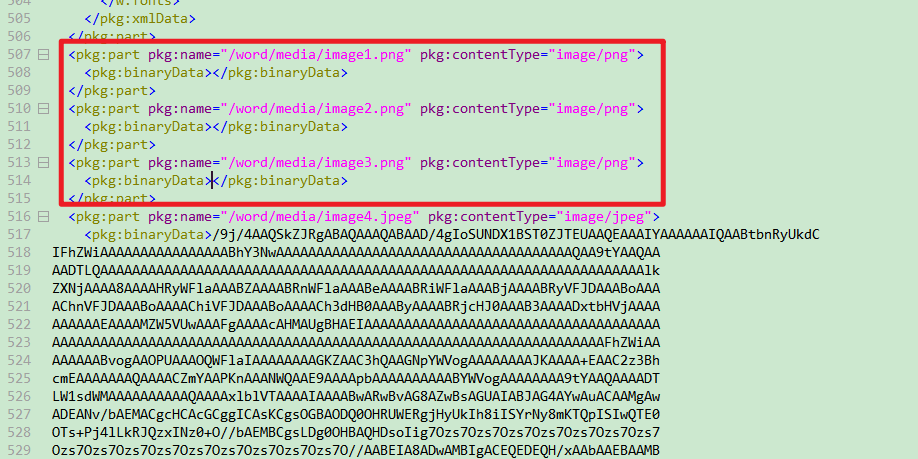
- 这里有6个图片的base64值,是因为doc文档中我放了6个图片,但是我只删除3个(删除<pkg:name 是image1、image2、image3的),因为后面3个图片是期望效果里面的图片
- 特别注意
- 做占位的图片,不能重复复制一张图片,不然在转换xml的时候,会因为图片一样,而直接使用同一个base64值
- 可以看到pkg:name很有特点,它的值都是image1.jpeg、image2.jpeg。。。是有序的,而且这个编号顺序与doc文档中从上到下的图片顺序是一致的,利用好这一点,我们就可以很容易的定位图片
- 现在开始使用占位符替换
- 后面要做的就很明显了,我们需要将我们要插入的图片,生成base64值,然后保存到Map中进行Freemarker生成即可
-
转换为ftl格式
-
编写代码
-
将图片生成Base64值工具类
package com.fc.fcleverutils.freemarker.utils; import org.springframework.util.StringUtils; import sun.misc.BASE64Encoder; import java.io.File; import java.io.FileInputStream; import java.io.IOException; import java.io.InputStream; /** * @ClassName ImageUtil * @Description 生成指定图片的base64值 * @Author Fclever * @Date 2021/8/11 13:29 **/ public class ImageUtil { /** * 将图片内容转换成Base64编码的字符串 * * @param imageFile 图片文件的全路径名称 * @return 转换成Base64编码的图片内容字符串 */ public static String getImageBase64String(String imageFile) { if (StringUtils.isEmpty(imageFile)) { return ""; } File file = new File(imageFile); if (!file.exists()) { return ""; } InputStream is = null; byte[] data = null; try { is = new FileInputStream(file); data = new byte[is.available()]; is.read(data); is.close(); } catch (IOException e) { e.printStackTrace(); } BASE64Encoder encoder = new BASE64Encoder(); return encoder.encode(data); } } -
修改启动类
package com.fc.fcleverutils;

import com.fc.fcleverutils.freemarker.pojo.User;
import com.fc.fcleverutils.freemarker.utils.ImageUtil;
import com.fc.fcleverutils.freemarker.utils.WordUtil;
import org.springframework.boot.SpringApplication;
import org.springframework.boot.autoconfigure.SpringBootApplication;

import java.util.HashMap;
import java.util.LinkedList;
import java.util.List;
import java.util.Map;

@SpringBootApplication
public class FcleverUtilsApplication {

  public static void main(String[] args) {
    SpringApplication.run(FcleverUtilsApplication.class, args);
    // 4. 使用Freemarker生成Word文档(图片)
    WordUtil.generateWord(getPictureData(),
                          "G:\\IdeaProjects\\FcleverUtils\\src\\main\\resources\\freemarker\\picture\\template\\",
                          "picture.ftl", "G:\\IdeaProjects\\FcleverUtils\\src\\main\\resources\\freemarker\\picture\\generate\\picture.doc");
  }


  /**
     * 获取生成图片所需数据
     * @return
     */
  private static Map<String, Object> getPictureData() {
    /*
         * 创建一个Map对象,将Word文档需要的数据都保存到该Map对象中
         */
    Map<String, Object> dataMap = new HashMap<>();

    String picture1 = ImageUtil.getImageBase64String("G:\\IdeaProjects\\FcleverUtils\\src\\main\\resources\\freemarker\\picture\\template\\1.jpg");
    String picture2 = ImageUtil.getImageBase64String("G:\\IdeaProjects\\FcleverUtils\\src\\main\\resources\\freemarker\\picture\\template\\2.jpg");
    String picture3 = ImageUtil.getImageBase64String("G:\\IdeaProjects\\FcleverUtils\\src\\main\\resources\\freemarker\\picture\\template\\3.jpg");

    dataMap.put("picture1",picture1);
    dataMap.put("picture2",picture2);
    dataMap.put("picture3",picture3);
    return dataMap;
  }

}
-
-
运行测试
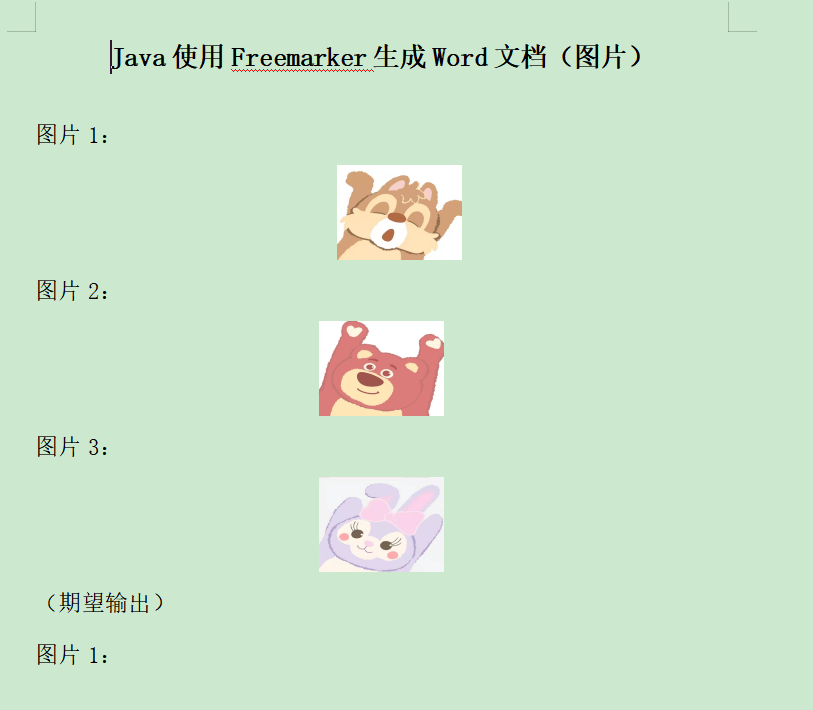
- 从生成结果中还可以验证一件事,生成图片的宽高与原来占位符图片的宽高是一致的

5 处理附件插入
-
准备附件
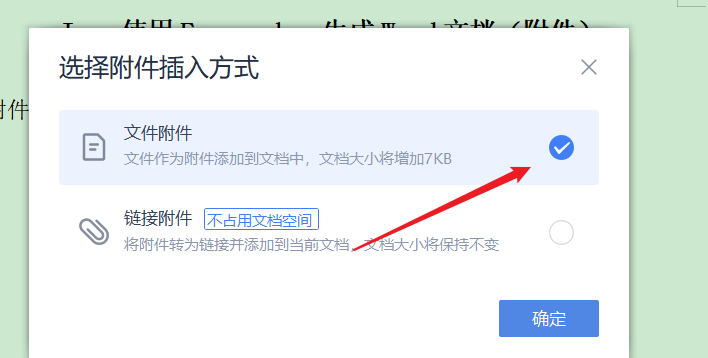
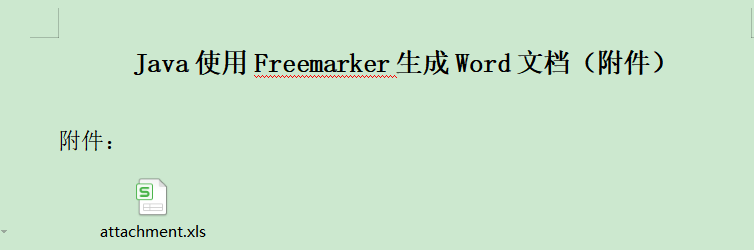
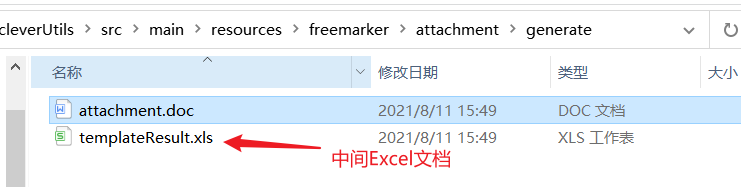
- 这里准备一个空白的Excel文件attachment.xls,插入到Word文档中做占位符

-
准备Word文档
- 1
- 插入刚刚创建的空白附件
- 后面我们要实现的就是,通过代码模拟一些数据,然后生成Excel文档,替换掉充当占位符的附件内容
-
保存为xml格式
- 将xml格式化之后,可以看到里面有两串字符


- 第一个图中的值就是占位符Excel内容转换成的Base64值
- 第二个图示Word中插入Excel后,显示的小图标上图片的base64值
- 我们这里只需要替换掉第一个值就可以实现改变附件内容了
- 使用${}进行替换
-
转换为ftl格式
-
编写代码
-
具体流程
- 代码使用集合模拟数据,效果如下
- 然后使用EasyExcel技术,将模拟的数据填充到一个Excel模板中
- 然后通过文件流的形式读取Excel
- 最后将文件流转成Base64值,保存到Map中
- 使用Freemarker输出文档
- 代码使用集合模拟数据,效果如下
-
项目引入EasyExcel依赖
<!--EasyExcel--> <dependency> <groupId>com.alibaba</groupId> <artifactId>easyexcel</artifactId> <version>2.1.6</version> </dependency> -
实体
@Data @AllArgsConstructor @NoArgsConstructor public class User { private String name; private String sex; private String birthday; } -
创建EasyExcel填充的Excel模板
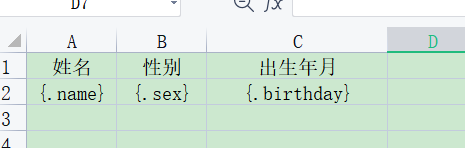
- 填充语法是依据EasyExcel的语法
- 属性名和实体中变量名对应
- 加.号表示为列表
-
通过EasyExcel生成Excel
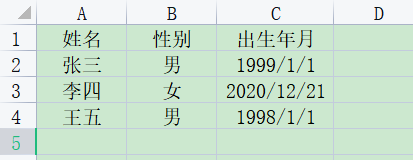
/** * 通过EasyExcel生成Excel,并返回文件对象 * @return */ private static File templateToExcel() { // 模板注意 用{} 来表示你要用的变量 如果本来就有"{","}" 特殊字符 用"\{","\}"代替 // 填充list 的时候还要注意 模板中{.} 多了个点 表示list // 模板文件 String templateFileName = "G:\\IdeaProjects\\FcleverUtils\\src\\main\\resources\\freemarker\\attachment\\template\\template.xls"; // 输出文件路径 String resultFileName = "G:\\IdeaProjects\\FcleverUtils\\src\\main\\resources\\freemarker\\attachment\\generate\\templateResult.xls"; LinkedList<User> list = new LinkedList<>(); list.add(new User("张三", "男", "1999-01-01")); list.add(new User("李四", "女", "2020-12-21")); list.add(new User("王五", "男", "1998-01-01")); // 这里 会填充到第一个sheet, 然后文件流会自动关闭 EasyExcel.write(resultFileName).withTemplate(templateFileName).sheet().doFill(list); return new File(resultFileName); } -
将生成Excel转成Base64
/** * 将文件转为Base64值 * * @param file 文件对象 * @return */ public static String convertToBase64(File file) { byte[] fileBytes = null; FileInputStream fis = null; try { fis = new FileInputStream(file); fileBytes = new byte[(int) file.length()]; fis.read(fileBytes); fis.close(); } catch (Exception e) { e.printStackTrace(); } return Base64.getEncoder().encodeToString(fileBytes); } -
使用Freemarker输出文档
package com.fc.fcleverutils;

import com.alibaba.excel.EasyExcel;
import com.alibaba.excel.ExcelWriter;
import com.alibaba.excel.write.metadata.WriteSheet;
import com.fc.fcleverutils.freemarker.pojo.User;
import com.fc.fcleverutils.freemarker.utils.FileToBase64;
import com.fc.fcleverutils.freemarker.utils.ImageUtil;
import com.fc.fcleverutils.freemarker.utils.WordUtil;
import org.springframework.boot.SpringApplication;
import org.springframework.boot.autoconfigure.SpringBootApplication;

import java.io.File;
import java.util.HashMap;
import java.util.LinkedList;
import java.util.List;
import java.util.Map;

@SpringBootApplication
public class FcleverUtilsApplication {

    public static void main(String[] args) {
        SpringApplication.run(FcleverUtilsApplication.class, args);
        // 5.  使用Freemarker生成Word文档(附件)
        WordUtil.generateWord(getAttachmentData(),
                "G:\\IdeaProjects\\FcleverUtils\\src\\main\\resources\\freemarker\\attachment\\template\\",
                "attachment.ftl", "G:\\IdeaProjects\\FcleverUtils\\src\\main\\resources\\freemarker\\attachment\\generate\\attachment.doc");
    }

    /**
     * 通过EasyExcel生成Excel,并返回文件对象
     * @return
     */
    private static File templateToExcel() {
        // 模板注意 用{} 来表示你要用的变量 如果本来就有"{","}" 特殊字符 用"\{","\}"代替
        // 填充list 的时候还要注意 模板中{.} 多了个点 表示list
        // 模板文件
        String templateFileName = "G:\\IdeaProjects\\FcleverUtils\\src\\main\\resources\\freemarker\\attachment\\template\\template.xls";
        // 输出文件路径
        String resultFileName = "G:\\IdeaProjects\\FcleverUtils\\src\\main\\resources\\freemarker\\attachment\\generate\\templateResult.xls";
        LinkedList<User> list = new LinkedList<>();
        list.add(new User("张三", "男", "1999-01-01"));
        list.add(new User("李四", "女", "2020-12-21"));
        list.add(new User("王五", "男", "1998-01-01"));
        // 这里 会填充到第一个sheet, 然后文件流会自动关闭
        EasyExcel.write(resultFileName).withTemplate(templateFileName).sheet().doFill(list);
        return new File(resultFileName);
    }


    /**
     * 获取生成附件所需数据
     * @return
     */
    private static Map<String, Object> getAttachmentData() {
        /*
         * 创建一个Map对象,将Word文档需要的数据都保存到该Map对象中
         */
        Map<String, Object> dataMap = new HashMap<>();

        // 根据Excel模板生成Excel
        File file = templateToExcel();
        // 读取Excel转Base64值
        String base64 = FileToBase64.convertToBase64(file);

        dataMap.put("attachment", base64);
        return dataMap;
    }

}
-
-
运行测试
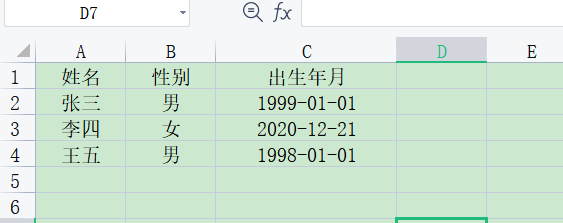
- 运行启动类,查看结果

- 进入文档,双击打开附件之后,内容已经填充完毕


6 整个项目完整代码
-
整理比较匆忙,还有很多可以改善的地方,大家根据情况发挥就好了
private static Map<String, Object> getAttachmentData() {
/*
* 创建一个Map对象,将Word文档需要的数据都保存到该Map对象中
*/
Map<String, Object> dataMap = new HashMap<>();// 根据Excel模板生成Excel File file = templateToExcel(); // 读取Excel转Base64值 String base64 = FileToBase64.convertToBase64(file); dataMap.put("attachment", base64); return dataMap; }}
-
运行测试
-
运行启动类,查看结果
-
-
进入文档,双击打开附件之后,内容已经填充完毕
-

-
-
整理比较匆忙,还有很多可以改善的地方,大家根据情况发挥就好了
-
代码:https://www.aliyundrive.com/s/cnrDfnL6uUr
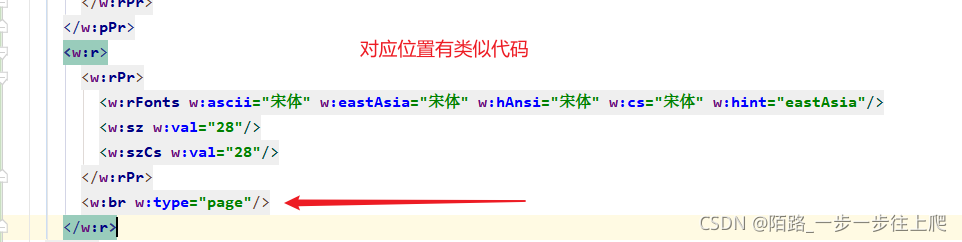
分页符
-
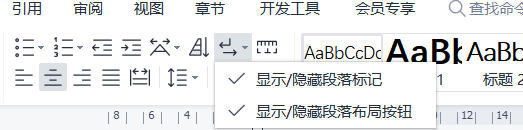
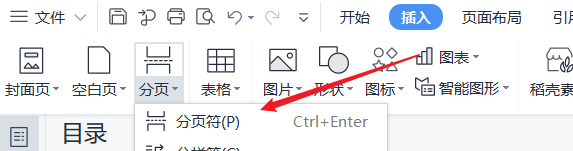
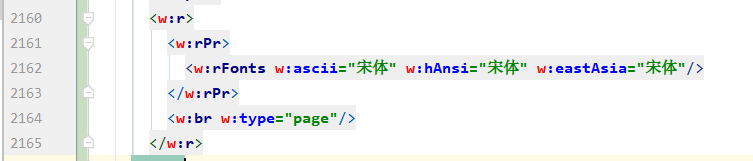
文档中先设置插入分页符号,需要打开段落标记才能看到
-
-
-
-


 1460
1460


 被折叠的 条评论
为什么被折叠?
被折叠的 条评论
为什么被折叠?
 到【灌水乐园】发言


