


上接Vue基础语法【上】。
10.阶段性案例 - 图书购物车
10.1.界面的搭建(代码)
10.1.1.html代码
<!DOCTYPE html>
<html lang="en">
<head>
  <meta charset="UTF-8">
  <title>Title</title>
  <link rel="stylesheet" href="style.css">
  <link rel="stylesheet" href="main.js">
</head>
<body>

  <div id="app">
  <table>
    <thead>
    <tr>
      <th></th>
      <th>书籍名称</th>
      <th>出版日期</th>
      <th>价格</th>
      <th>购买数量</th>
      <th>操作</th>
    </tr>
    </thead>
    <tbody>
    <tr v-for="book in books">
<!--      这里不使用td v-for的原因是,某些列需要加进button-->
<!--      <td v-for="value in book">{{value}}</td>-->
      <td>{{book.id}}</td>
      <td>{{book.name}}</td>
      <td>{{book.date}}</td>
      <td>{{book.price}}</td>
      <td>
        <button>-</button>
        {{book.count}}
        <button>+</button>
      </td>
      <td>
        <button>移除</button>
      </td>
    </tr>
    </tbody>
  </table>
  </div>
<!--因为是用vue来写整个案例,所以js文件的引入顺序不能错-->
  <script src="../js/vue.js"></script>
  <script src="main.js"></script>


</body>
</html>
10.1.2.js代码
const app = new Vue({
  el: '#app',
  data: {
    books: [
      {
        id: 1,
        name: '灵笼美术设定集',
        date: '2020-11',
        price: 89,
        count: 1
      },
      {
        id: 2,
        name: '代码大全',
        date: '2006-9',
        price: 59,
        count: 1
      },
      {
        id: 3,
        name: '现代操作系统',
        date: '2015-2',
        price: 79,
        count: 1
      },
      {
        id: 4,
        name: 'Unix编程艺术',
        date: '2009-8',
        price: 77,
        count: 1
      }
    ]
  }
})
10.1.3.css代码
table {
  border: 1px solid #e9e9e9;
  border-collapse: collapse;
  border-spacing: 0;
}

th, td {
  padding: 8px 16px;
  border: 1px solid #e9e9e9;
  text-align: left;
}

th {
  background-color: #f7f7f7;
  color: #5c6b77;
  font-weight: 600;
}
10.1.4.效果图
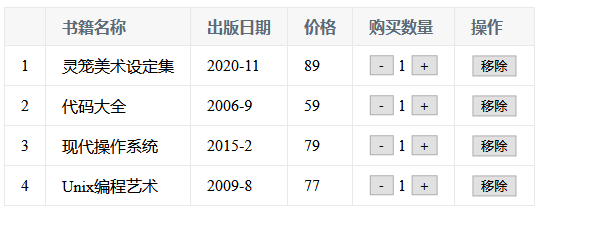
10.2.过滤器的使用
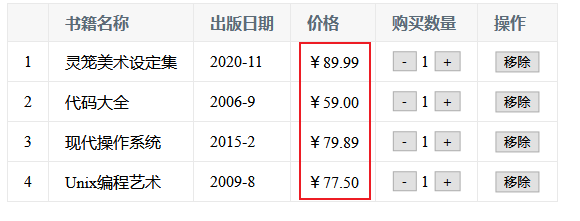
细节处理之小数点的处理
js里面给数字保留两位小数:数字.toFixed
由于,商品的单价常常都不是整数价格,经常小数点后面还会有小数,而且,一般情况下,如果小数点后面是.00
,那么在浏览器里就会以整数的形式去显示,这样很不符合用户需求,所以需要对商品单价的显示进行处理。
10.2.1.html的修改
<tr v-for="book in books">
<!--  这里不使用td v-for的原因是,某些列需要加进button-->
<!--  <td v-for="value in book">{{value}}</td>-->
      <td>{{book.id}}</td>
      <td>{{book.name}}</td>
      <td>{{book.date}}</td>
<!--  保留两位小数-->
<!--  币种符号的拼接方式可复用性并不强-->
<!--  <td>{{'¥' + price.toFixed(2)}}</td>-->
<!--  可以采用methods的方式增强可复用性-->
<!--  <td>{{getFinalPrice(book.price)}}</td>-->
<!--  还可以采用过滤器来过滤显示-->
      <td>{{book.price | showPrice}}</td>

      <td>
        <button>-</button>
        {{book.count}}
        <button>+</button>
      </td>
      <td>
        <button>移除</button>
      </td>
    </tr>
10.2.2.js的修改
// methods:{
  //   getFinalPrice(price){
  //     return '¥' + price.toFixed(2)
  //   }
  // },
  filters:{
    showPrice(price){
      return '¥' + price.toFixed(2)
    }
10.2.3.效果图
10.3.改变购买数量
按照正常逻辑来讲,商品的数量是不可能低于0个以下的,而且如果商品数量为0个的时候,这时商品应该是不在购物车里的,所以要限制商品的数量≥1个。而商品的移除交给移除按钮来操作。
10.3.1.html的修改
<!--        通过动态绑定button的disable属性来控制商品数量的下限-->
        <button @click="decrement(index)" :disabled="book.count <= 1 ">-</button>
10.3.2.js的修改
methods:{
    // getFinalPrice(price){
    //   return '¥' + price.toFixed(2)
    // },
    decrement(index) {
      this.books[index].count--
    },
    increment(index) {
      this.books[index].count++
    }
  },
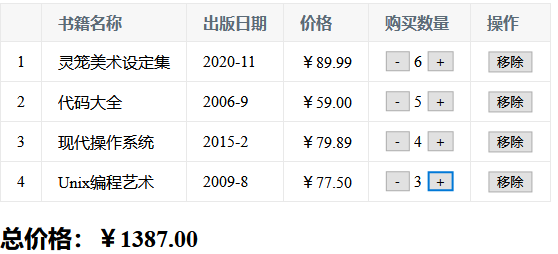
10.4.移除按钮以及最终价格的显示
🔴移除按钮注意点:
- 当购物车内没有商品的时候应该有一定的提示;
- 且在购物车有东西的时候该提示不应该存在,也就是动态显示购物车状态。
🔴商品总价的注意点:
- 总价这类东西用计算属性最好,到后面可以用reduce来计算更加简单;
- 总价的显示应该也是动态的;
- 总价的格式最好也有保留几位小数的规定。
10.4.1.html代码
<div id="app">
  <div v-if="books.length">
    <table>
      <thead>
      <tr>
        <th></th>
        <th>书籍名称</th>
        <th>出版日期</th>
        <th>价格</th>
        <th>购买数量</th>
        <th>操作</th>
      </tr>
      </thead>
      <tbody>
      <tr v-for="(book, index) in books">
        <!--  这里不使用td v-for的原因是,某些列需要加进button-->
        <!--  <td v-for="value in book">{{value}}</td>-->
        <td>{{book.id}}</td>
        <td>{{book.name}}</td>
        <td>{{book.date}}</td>
        <!--  保留两位小数-->
        <!--  币种符号的拼接方式可复用性并不强-->
        <!--  <td>{{'¥' + price.toFixed(2)}}</td>-->
        <!--  可以采用methods的方式增强可复用性-->
        <!--  <td>{{getFinalPrice(book.price)}}</td>-->
        <!--  还可以采用过滤器来过滤显示-->
        <td>{{book.price | showPrice}}</td>

        <td>
          <!--        通过动态绑定button的disable属性来控制商品数量的下限-->
          <button @click="decrement(index)" :disabled="book.count <= 1 ">-</button>
          {{book.count}}
          <button @click="increment(index)">+</button>
        </td>
        <td>
          <button @click="removeHandler">移除</button>
        </td>
      </tr>
      </tbody>
    </table>
    <h2>总价格:{{totalPrice | showPrice}}</h2>
  </div>
  <h2 v-else>购物车为空</h2>
</div>
10.4.2.js代码
methods:{
    // getFinalPrice(price){
    //   return '¥' + price.toFixed(2)
    // },
    decrement(index) {
      this.books[index].count--
    },
    increment(index) {
      this.books[index].count++
    },
    removeHandler(index){
      this.books.splice(index, 1)
    }
  },
  computed:{
    totalPrice(){
      let totalPrice = 0
      for(let i = 0; i < this.books.length; i++){
        totalPrice += this.books[i].price*this.books[i].count
      }
      return totalPrice
    }
  },
10.4.3.效果图
10.4.4.高阶函数的使用
编程范式:命令式编程和声明式编程
编程范式:面向对象编程(一等公民→对象)、函数式编程(一等公民→函数)
首先,我们拿一个案例来比较:
const nums = [10, 30, 40, 50, 89, 100, 789]
假设对这对数组提出以下的处理要求:
- 取出小于100的数字并在控制台输出
- 所有小于100的数字*2之后逐个输出
- 将2.中所有的数字相加,并输出
😑通常的做法
-
取出小于100的数字并在控制台输出
let newNums = [] for (let n of nums) { if (n < 100) { newNums.push(n) } } console.log(newNums) -
所有小于100的数字*2之后逐个输出
let newNums2 = [] for (let n of nums) { if (n < 100) { newNums2.push(n * 2) } } console.log(newNums2) -
将2.中所有的数字相加,并输出
let total = 0
for (let n of nums) {
  total += n
}
console.log(total)
😲高阶函数
-
取出小于100的数字并在控制台输出
// filter函数的使用 // filter中的回调函数有一个要求,必须返回一个Boolean值 // 当返回true时,函数内部会有自动将这次回调的n加入到新的数组中 // 当返回false时,函数内部会过滤掉这次的n let newNums3 = nums.filter(function (n) { // return true return 111 < 100 // return n < 100 }) console.log(newNums3) -
所有小于100的数字*2之后逐个输出
// map函数的使用 let newNums4 = nums.map(function (n) { return n * 2 }) console.log(newNums4); -
将2.中所有的数字相加,并输出
// reduce函数的使用
// 对数组中所有的的内容进行汇总
// preValue是上一个返回的值
let total2 = nums.reduce(function (preValue, n) {
  return preValue + n
}, 0)
// 0是preValue最开始的默认值
console.log(total2);
对于reduce()函数的示例的解析呢,如下:
第一次:preValue 0 n 10
第二次:preValue 10 n 30
第三次:preValue 40 n 40
第四次:preValue 80 n 50
第五次:preValue 130 n 89
第六次:preValue 219 n 100
第七次:preValue 319 n 789
🔗接下来是链式函数的使用:
let total3 = nums.filter(function (n) {
  return n < 100
}).map(function (n) {
  return n * 2
}).reduce(function (preValue, n) {
  return preValue + n
})
console.log(total3);
😉此外,还可以用=>——ES6中的arrow function,来简化链式函数的使用:
let total4 = nums.filter(n => n < 100).map(n => n * 2).reduce((preValue, n) => preValue + n)
console.log(total4);
有了上面的例子使用,就可以用高阶函数来简化购物车总价格的计算,替换掉原来的循环求总价格:
let totalPrice = 0
// 1.普通的for循环
for(let i = 0; i < this.books.length; i++){
totalPrice += this.books[i].price*this.books[i].count
}

// 2.for (let i in this.books)
for (let i in this.books) {
console.log(i)
totalPrice += this.books[i].price * this.books[i].count
// const book = this.books[i]
// totalPrice += book.price*book.count
}

// 3.for(let item of this.books)
for (let item of this.books) {
totalPrice += item.price * item.count
}

return totalPrice
// 高阶函数reduce的使用
return this.books.reduce(function (preValue, book) {
	return preValue + book.price * book.count
}, 0)
11.v-model
11.1.v-model的基本使用
表单控件在实际开发中是非常常见的,尤其是用户信息的提交,需要大量的表单。
Vue中使用v-model指令来实现表单元素和数据的双向绑定。
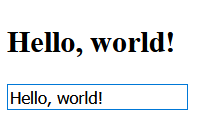
下面给出一个v-model的简单案例:
<div id="app">
  <input type="text" v-model="message">
{{message}}
</div>

<script src="../js/vue.js"></script>
<script type="text/javascript">
  const app = new Vue({
    el: '#app',
    data: {
      message: 'Hello, world!',

    },
  })
</script>
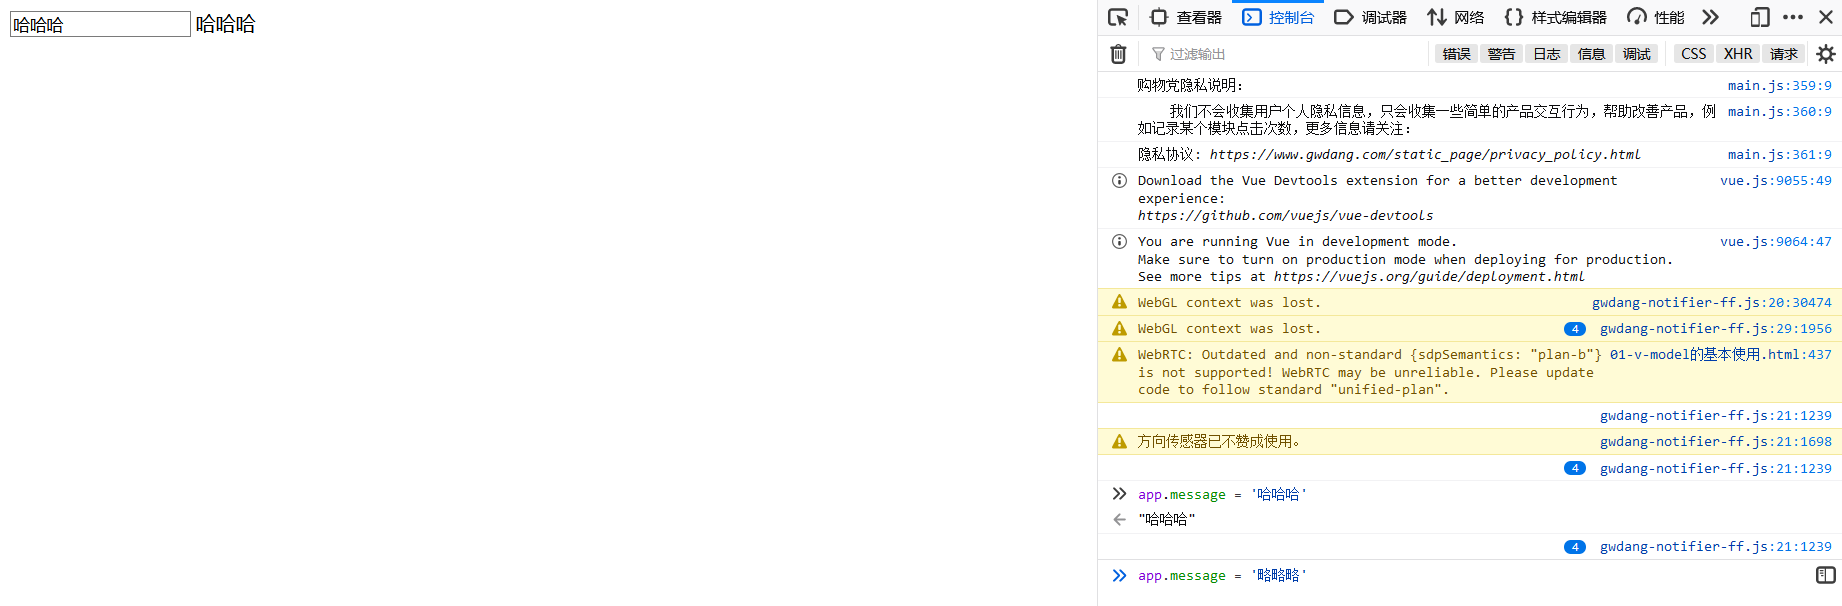

针对案例的简单解析:
- 当在输入框输入内容时,因为input中的v-model绑定了message,所以会实时将输入的内容传递给message,message发生改变
- 当message发生改变,因为上面使用mustache语法,将message的值插入到DOM中,所以DOM会有响应式改变
- 至此,通过v-model实现了数据的双向绑定
⭐当然,也可以将v-model用于textarea标签
<textarea v-model="message"></textarea>
<p>输入的内容是:{{message}}</p>
11.2.v-model的原理
简要解析:v-model实际上可以看成是v-bind指令和v-on指令的结合
- v-bind绑定一个value属性
- v-on指令给当前元素绑定input事件
<input type="text" v-model="message">
等同于
<input type="text" v-bind:value="message" v-on:input="message = $event.target.value">
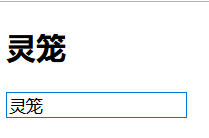
示例详解:
<div id="app">
<!--  <input type="text" v-model="message">-->
	<h2>{{message}}</h2>
<!--  v-model相当于两个指令的结合——v-bind动态绑定属性和v-on事件绑定-->
<!--  <input type="text" :value="message" @input="valueChange">-->
<!--  input标签的input事件-->
  <input type="text" :value="message" @input="message = $event.target.value">

</div>

<script src="../js/vue.js"></script>
<script type="text/javascript">
	const app = new Vue({
		el: '#app',
		data: {
			message: 'Hello, world!',

		},
    methods:{
		  // 一旦界面上产生了一个事件,浏览器会生成一个event对象,所以可以通过event对象来获取在input中输入的值
		  valueChange(event){
		    this.message = event.target.value
      }
    }
	})
</script>
效果:
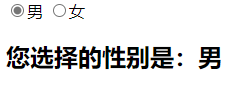
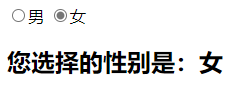
11.3.v-model和radio的使用
<div id="app">
<!--  加上name可以让两个单选框互斥,有v-model="sex"之后也可以实现互斥-->
  <label for="male">
    <input type="radio" id="male" value="男" v-model="sex">男
  </label>
  <label for="female">
    <input type="radio" id="female" value="女" v-model="sex">女
  </label>
  <h2>您选择的性别是:{{sex}}</h2>
</div>

<script src="../js/vue.js"></script>
<script type="text/javascript">
	const app = new Vue({
		el: '#app',
		data: {
			message: 'Hello, world!',
      sex: '男'
		},
	})
</script>
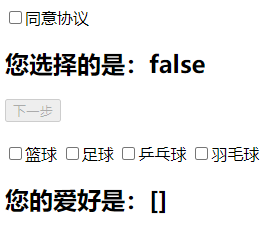
11.4.v-model结合checkbox
- 简单模拟用户同意协议才能点击下一步
- 模拟用户多选选项,以便之后提交表单,服务器可以收到用户提交的数据
<div id="app">
  <!--  1.checkbox单选框-->
  <!--  label的for属性绑定了input的id之后,点击label的文本就可以触发控件checkbox-->
    <label for="agree">
      <input type="checkbox" id="agree" v-model="isAgree">同意协议
    </label>
    <h2>您选择的是:{{isAgree}}</h2>
    <button :disabled="!isAgree">下一步</button>
  <br><br>

  <!--  2.checkbox多选框-->
  <!--    value用于之后获取文字,并不是用来显示的-->
  <input type="checkbox" value="篮球" v-model="hobbies">篮球
  <input type="checkbox" value="足球" v-model="hobbies">足球
  <input type="checkbox" value="乒乓球" v-model="hobbies">乒乓球
  <input type="checkbox" value="羽毛球" v-model="hobbies">羽毛球
  <h2>您的爱好是:{{hobbies}}</h2>
</div>

<script src="../js/vue.js"></script>
<script type="text/javascript">
  const app = new Vue({
    el: '#app',
    data: {
      message: 'Hello, world!',
      isAgree: false, // 单选框
      hobbies: [] //多选框
    },
  })
</script>

11.5.v-mdoel结合select
- 实现用户打开下拉单选框,选择一项,以期用户在向服务器提交表单时,服务器可以获得用户提交的数据
<div id="app">
  <!--1.选择一个,单选下拉列表-->
  <select name="ABC" id="" v-model="fruit">
    <option value="苹果🍎">苹果🍎</option>
    <option value="香蕉🍌">香蕉🍌</option>
    <option value="猕猴桃🥝">猕猴桃🥝</option>
    <option value="葡萄🍇">葡萄🍇</option>
    <option value="橙子🍊">橙子🍊</option>
  </select>
  <h2>您选择的水果是:{{fruit}}</h2>
</div>

<script src="../js/vue.js"></script>
<script type="text/javascript">
  const app = new Vue({
    el: '#app',
    data: {
      message: 'Hello, world!',
      fruit: '',
      fruits: [],
    },
  })
</script>
- 当用户需要多选选项时,怎么解决?
- 给select标签添加mutiple属性(无需为属性赋值),const类型app常量中,data属性添加子属性fruits数组,赋值为空
- 用户按住CTRL并单击下拉列表选项,即可多选
<select name="ABC" id="" v-model="fruits" multiple>
fruits: [],

11.6.input中的值绑定
何为input的值绑定?
- 动态的给input中的value赋值
在本章的前面几个小节中,定义input的时候,value都是直接给定的。
但是在实际的项目开发中,input的值可能是从网络获取或者直接定义在data属性里的。
因此可以通过v-bind:value动态地绑定value值。
所以input中的值绑定也就是👉v-bind在input中的应用。
<div id="app">
  <!--  1.checkbox单选框-->
  <!--  label的for属性绑定了input的id之后,点击label的文本就可以触发控件checkbox-->
  <label for="agree">
    <input type="checkbox" id="agree" v-model="isAgree">同意协议
  </label>
  <h2>您选择的是:{{isAgree}}</h2>
  <button :disabled="!isAgree">下一步</button>
  <br><br>

  <!--  2.checkbox多选框-->
  <!--    value用于之后获取文字,并不是用来显示的-->
  <input type="checkbox" value="篮球" v-model="hobbies_0">篮球
  <input type="checkbox" value="足球" v-model="hobbies_0">足球
  <input type="checkbox" value="乒乓球" v-model="hobbies_0">乒乓球
  <input type="checkbox" value="羽毛球" v-model="hobbies_0">羽毛球
  <h2>您的爱好是:{{hobbies_0}}</h2>

  <!--  input的值绑定-->
  <!--  添加label标签的作用:可以使得用户点击复选框之后文本也可以选中复选框-->
  <label :for="item" v-for="item in originHobbies">
    <input type="checkbox" :id="item" :value="item" v-model="hobbies_1">{{item}}
  </label>
  <h2>您的爱好是:{{hobbies_1}}</h2>
</div>

<script src="../js/vue.js"></script>
<script type="text/javascript">
  const app = new Vue({
    el: '#app',
    data: {
      message: 'Hello, world!',
      isAgree: false, // 单选框
      hobbies_0: [], //多选框
      hobbies_1: [],
      originHobbies: ['篮球', '足球', '羽毛球', '乒乓球', '高尔夫球', '台球']
    },
  })
</script>

11.7.v-model的修饰符
<!--	1.lazy修饰符-->
<!--  lazy修饰符的作用:使得只有input失去焦点时,数据才会实现双向绑定-->
<input type="text" v-model.lazy="message">
<h2>{{message}}</h2>
<!--  2.number修饰符-->
<input type="text" v-model="age_0">type="text" v-model
<h2>{{age_0}} - {{typeof age_0}}</h2>
<input type="number" v-model="age_1">type="number" v-model
<h2>{{age_1}} - {{typeof age_1}}</h2>
<input type="number" v-model.number="age_2">type="number" v-model.number
<h2>{{age_2}} - {{typeof age_2}}</h2>
<!--  3.trim修饰符-->
<input type="text" v-model.trim="name">
<h2>{{name}}</h2>
const app = new Vue({
  el: '#app',
  data: {
    message: 'Hello, world!',
    age_0: 0,
    age_1: 0,
    age_2: 0,
    name: '',
  },
})
![[外链图片转存失败,源站可能有防盗链机制,建议将图片保存下来直接上传(img-SbMGRSCb-1623245953887)(https://i.loli.net/2021/06/09/JjT8PeBM3Xslfd4.png)]](https://img-blog.csdnimg.cn/20210609214132743.png?x-oss-process=image/watermark,type_ZmFuZ3poZW5naGVpdGk,shadow_10,text_aHR0cHM6Ly9ibG9nLmNzZG4ubmV0L3FxXzQxNjk3MjMw,size_16,color_FFFFFF,t_70)
![[外链图片转存失败,源站可能有防盗链机制,建议将图片保存下来直接上传(img-hDlFWHwa-1623245953888)(https://i.loli.net/2021/06/09/LBI7R58WopfP9HC.png)]](https://img-blog.csdnimg.cn/20210609214146321.png?x-oss-process=image/watermark,type_ZmFuZ3poZW5naGVpdGk,shadow_10,text_aHR0cHM6Ly9ibG9nLmNzZG4ubmV0L3FxXzQxNjk3MjMw,size_16,color_FFFFFF,t_70)
- lazy修饰符使得input只有在失去焦点的时候,数据才能够实现双向绑定中的input数据绑定到data中
- 可以看到在
type = "text",v-model没有修饰符的情况下,即便age_0的初始数据类型为number,但当用户修改了input中的值时,实现数据双向绑定的过程时,age_0的数据类型变成了string。这是某些项目开发中是不合符需求的。 - 即便
type = "number",v-model仍然没有修饰符的情况下,age_1的初始数据类型为number,但当用户修改了input中的值时,实现数据双向绑定的过程时,age_1的数据类型变成了string,也就是说type等于何值对v-model会将绑定的数据值自动变为string这一点没有任何影响。 - 当
v-model.number时,数据的双向绑定不会影响age_2的数据类型。


 106
106


 被折叠的 条评论
为什么被折叠?
被折叠的 条评论
为什么被折叠?
 到【灌水乐园】发言


