


谷粒学院day08——课程章节与小节的实现
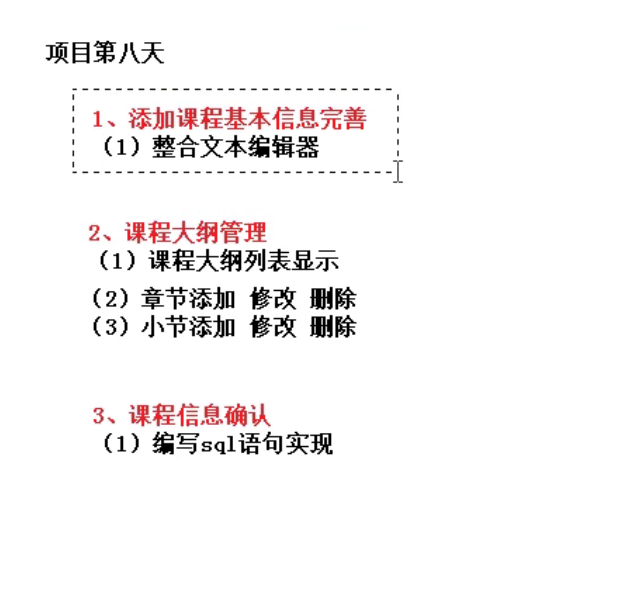
1.添加课程基本信息完善
1.1 整合文本编辑器
从教学资源中将下图中的两个文件夹下的内容拷贝到项目对应的文件夹目录下(复制教学资源的componet,static下的timymce到项目的component,static下,如果没有下载教学资源也可以通过之前下载的vue-element-admin-master找到对应文件)。

(1)配置html变量
在配置文件中\build\webpack.dev.conf.js中进行如下配置:配置html变量,这是为了使项目能够找到刚才复制插件的路径。

new HtmlWebpackPlugin({
    ......,
    templateParameters: {
    	BASE_URL: config.dev.assetsPublicPath + config.dev.assetsSubDirectory
    }
})
(2)引入脚本
在index.html文件中增加如下部分。引入中文包会爆红,但是并不影响框架本身的运行。

 <script src=<%=BASE_URL %>/tinymce4.7.5/tinymce.min.js></script>
 <script src=<%=BASE_URL %>/tinymce4.7.5/langs/zh_CN.js></script>
(3)在我们的info.vue中使用插件
先引入这个插件吧。
//引入Tinymce富文本编辑器组件
import Tinymce from '@/components/Tinymce';

export default {
    ....
  components: { Tinymce },
}
然后把之前的课程简介的ui组件替换下。
<!-- 课程简介-->
<el-form-item label="课程简介">
<tinymce :height="300" v-model="courseInfo.description"/>
</el-form-item>
最后在文件的最后增加样式,调整上传图片的按钮高度,关键字scoped表示该样式只在当前页面有效。
<style scoped>
  .tinymce-container {
  line-height: 29px;
  }
</style>
最后效果如下图。

下面完整的添加一个课程,测试效果如下。

数据成功添加了,不过subject_parent_id似乎没有值。这是因为后端接口传的数据CourseInfoForm中没有这个属性。新增如下。
 @ApiModelProperty(value = "一级分类ID")
 private String subjectParentId;
注意属性名与前端使用要保持一致(参考下图)。

重新测试验证bug解决了。
2.课程大纲管理
课程大纲也是一个列表,其实与之前做的课程分类列表功能基本类似。
2.1 后端实现
(1)创建实体类
com.wangzhou.eduservice.entity.chapter.ChapterVo
/**
 * 课程章节
 */
@Data
public class ChapterVo {
    private String id;
    private String title;
    private List<VideoVo> children = new ArrayList<>();
}
com.wangzhou.eduservice.entity.chapter.VideoVo
/**
 * 课程小节
 */
@Data
public class VideoVo {
    private String id;
    private String title;
}
(2)Controller
/**
 * <p>
 * 课程 前端控制器
 * </p>
 *
 * @author wangzhou
 * @since 2021-11-12
 */
@RestController
@RequestMapping("/eduservice/edu-chapter")
public class EduChapterController {

    @Autowired
    private EduChapterService eduChapterService;

    /**
     * 根据课程id获取课程的章节、小节
     * @return
     */
    @GetMapping("/getChapterVideo/{courseId}")
    public R getChapterVideo(@PathVariable String courseId) {
        List<ChapterVo> list = eduChapterService.getChapterVideo(courseId);
        return R.ok().data("list", list);
    }

}
(3)Service
/**
 * <p>
 * 课程 服务实现类
 * </p>
 *
 * @author wangzhou
 * @since 2021-11-12
 */
@Service
public class EduChapterServiceImpl extends ServiceImpl<EduChapterMapper, EduChapter> implements EduChapterService {
    @Autowired
    private EduVideoService eduVideoService;

    @Override
    public List<ChapterVo> getChapterVideo(String courseId) {
        // 1.根据课程id查取所有章节
        QueryWrapper<EduChapter> chapterWrapper = new QueryWrapper<>();
        chapterWrapper.eq("course_Id", courseId);
        List<EduChapter> chapterList = baseMapper.selectList(chapterWrapper);

        // 2.根据id课程查取所有小节
        QueryWrapper<EduVideo> videoWrapper = new QueryWrapper<>();
        videoWrapper.eq("course_Id", courseId);
        List<EduVideo> videoList = eduVideoService.list(videoWrapper);

        // 3.遍历所有课程章节进行封装
        List<ChapterVo> finalChapterList = new ArrayList<>();
        for (int i = 0; i < chapterList.size(); i++) {
            EduChapter eduChapter = chapterList.get(i);
            ChapterVo chapterVo = new ChapterVo();
            BeanUtils.copyProperties(eduChapter, chapterVo);

            // 4.遍历所有课程小节进行封装
            List<VideoVo> videoVoList = new ArrayList<>();
            for (int j = 0; j < videoList.size(); j++) {
                EduVideo eduVideo = videoList.get(j);
                if(eduVideo.getChapterId().equals(eduChapter.getId())) {
                    VideoVo videoVo = new VideoVo();
                    BeanUtils.copyProperties(eduVideo, videoVo);
                    videoVoList.add(videoVo);
                }

            }
            chapterVo.setChildren(videoVoList);
            finalChapterList.add(chapterVo);
        }
        return finalChapterList;
    }
}
(3)测试
在数据库中造一些数据。使用swagger-ui测试结果如下。
{
  "success": true,
  "code": 20000,
  "message": "成功",
  "data": {
    "list": [
      {
        "id": "1181729226915577857",
        "title": "第七章:I/O流",
        "children": [
          {
            "id": "1189471423678939138",
            "title": "test"
          },
          {
            "id": "1189476403626409986",
            "title": "22"
          }
        ]
      },
      {
        "id": "15",
        "title": "第一章:Java入门",
        "children": [
          {
            "id": "17",
            "title": "第一节:Java简介"
          },
          {
            "id": "18",
            "title": "第二节:表达式和赋值语句"
          },
          {
            "id": "19",
            "title": "第三节:String类"
          },
          {
            "id": "20",
            "title": "第四节:程序风格"
          }
        ]
      },
      {
        "id": "32",
        "title": "第二章:控制台输入和输出",
        "children": [
          {
            "id": "1182499307429339137",
            "title": "第一节"
          }
        ]
      },
      {
        "id": "44",
        "title": "第三章:控制流",
        "children": [
          {
            "id": "1189434737808990210",
            "title": "测试"
          }
        ]
      },
      {
        "id": "48",
        "title": "第四章:类的定义",
        "children": []
      },
      {
        "id": "63",
        "title": "第五章:数组",
        "children": []
      },
      {
        "id": "64",
        "title": "第六章:继承",
        "children": []
      }
    ]
  }
}
2.2 前端实现
我们可以采用之前课程列表的方法实现前端,即直接使用模板。下面我们通过自己写底层来实现课程大纲的树形结构展示。
新建chapter.js。
export default {
  // 根据课程id获取章节、小节信息
  getChapterVideo(courseId) {
    return request({
      url: '/eduservice/edu-chapter/getChapterVideo' + courseId,
      method: 'get'
    })
  }
}
chapter.vue.
<script>
import chapter from "@/api/edu/chapter.js";
export default {
  data() {
    return {
      saveBtnDisabled: false,
      chapterVideoList:[],
      courseId:''
    };
  },
  methods: {
    //跳转到上一步
    previous() {
      this.$router.push({ path: "/course/info/1" });
    },
    next() {
      //跳转到第三步
      this.$router.push({ path: "/course/publish/1" });
    },
    getChapterVideo(){
      chapter.getChapterVideo(this.courseId)
        .then(resp => {
          this.chapterVideoList = resp.data.list
        })
    }

  },
  created() {
    if(this.$route.params && this.$route.params.id) {
      this.courseId = this.$route.params.id
    }
    this.getChapterVideo()
  },
};
</script>
增加ui组件展示数据。
.<template>
  <div class="app-container">
    <h2 style="text-align: center">发布新课程</h2>
    <el-steps
      :active="2"
      process-status="wait"
      align-center
      style="margin-
bottom: 40px;"
    >
      <el-step title="填写课程基本信息" />
      <el-step title="创建课程大纲" />
      <el-step title="最终发布" />
    </el-steps>

      <ul>
      <li v-for="chapter in chapterVideoList" :key="chapter.id">
        <p>
          {{ chapter.title }}
        </p>

        <ul>
          <li v-for="video in chapter.children" :key="video.id">
            {{ video.title }}
          </li>
        </ul>
      </li>
    </ul>


    <el-form label-width="120px">
      <el-form-item>
        <el-button @click="previous">上一步</el-button>
        <el-button :disabled="saveBtnDisabled" type="primary" @click="next"
          >下 一步</el-button
        >
      </el-form-item>
    </el-form>
  </div>
</template>
记得后端接口添加@CrossOrigin注解解决跨域问题,测试效果如下。

最后可以稍微加一点点样式。
.<template>
  <div class="app-container">
    <h2 style="text-align: center">发布新课程</h2>
    <el-steps
      :active="2"
      process-status="wait"
      align-center
      style="margin-
bottom: 40px;"
    >
      <el-step title="填写课程基本信息" />
      <el-step title="创建课程大纲" />
      <el-step title="最终发布" />
    </el-steps>

      <ul>
      <li v-for="chapter in chapterVideoList" :key="chapter.id">
        <p>
          {{ chapter.title }}
          <span>
            <el-button type="text">添加课时</el-button>
            <el-button style="" type="text">编辑</el-button>
            <el-button type="text">删除</el-button>
          </span>
        </p>

        <!-- 视频 -->
        <ul class="chapterList videoList">
          <li v-for="video in chapter.children" :key="video.id">
            <p>
              {{ video.title }}
              <span class="acts">
                <el-button type="text">编辑</el-button>
                <el-button type="text">删除</el-button>
              </span>
            </p>
          </li>
        </ul>
      </li>
    </ul>


    <el-form label-width="120px">
      <el-form-item>
        <el-button @click="previous">上一步</el-button>
        <el-button :disabled="saveBtnDisabled" type="primary" @click="next"
          >下 一步</el-button
        >
      </el-form-item>
    </el-form>
  </div>
</template>
3.修改课程功能
点击下图中上一步可以回到课程添加页面,对课程进行修改,下面来实现这一过程。

业务其实很简单:做数据回写,对回写的数据更新到数据库。
3.1 后端实现
要实现两个接口。(1)根据课程id查询到该课程基本信息,(2)修改基本课程信息。
CourseController
 // 查询课程信息
    @GetMapping("/getCourseInfo/{courseId}")
    public R getCourseInfo(@PathVariable String courseId) {
        CourseInfoForm courseInfoForm= eduCourseService.getCourseInfo(courseId);
        return R.ok().data("courseInfoForm", courseInfoForm);
    }

 // 修改课程信息
    @PostMapping("/updateCourseInfo")
    public R updateCourseInfo(@RequestBody CourseInfoForm courseInfoForm) {
        eduCourseService.updateCourseInfo(courseInfoForm);
        return R.ok();
    }
EduCourseServiceImpl
    @Override
    public CourseInfoForm getCourseInfo(String courseId) {
        CourseInfoForm courseInfoForm = new CourseInfoForm();
        // 1.查询课程表
        EduCourse eduCourse= baseMapper.selectById(courseId);
        BeanUtils.copyProperties(eduCourse, courseInfoForm);
        // 2.查询描述表
        EduCourseDescription eduCourseDescription = eduCourseDescriptionService.getById(courseId);
        courseInfoForm.setDescription(eduCourseDescription.getDescription());
        return courseInfoForm;
    }

  @Override
    public void updateCourseInfo(CourseInfoForm courseInfoForm) {
        // 1.修改课程表
        EduCourse eduCourse = new EduCourse();
        BeanUtils.copyProperties(courseInfoForm, eduCourse);
        int update = baseMapper.updateById(eduCourse);
        if(update <= 0) {
            throw new GuliException(20001, "修改课程失败");
        }
        // 2.修改描述表
        EduCourseDescription eduCourseDescription = new EduCourseDescription();
        eduCourseDescription.setDescription(courseInfoForm.getDescription());
        eduCourseDescriptionService.updateById(eduCourseDescription);
    }
3.2 前端实现
course.js
    //根据课程id 查询课程基本信息
    getCourseInfoById(courseId){
        return request({
            url:`/eduservice/edu-course/getCourseInfo/${courseId}`,
            method: 'get',
        })
    },
    //修改课程信息
    updateCourseInfo(courseInfoForm){
        return request({
            url:"/eduservice/edu-course/updateCourseInfo",
            method: 'post',
            data: courseInfoForm,
        })
    }
info.vue修改跳转url。
     //跳转到上一步
    previous() {
      this.$router.push({ path: "/course/info/" + this.courseId });
    },
    next() {
      //跳转到第三步
      this.$router.push({ path: "/course/publish/"+ this.courseId });
    }
}
最后在info.vue中实现数据回写。
methods: {
 getCourseInfo() {
    course.getCourseInfoById(this.courseId)
    .then((resp) => {
      this.courseInfoform = resp.data.courseInfoForm // 这里注意下大小写,前端命名不规范,导致了这个小问题
    })
  }

  },
  created() {
      if(this.$route.params && this.$route.params.id) {
        this.courseId = this.$route.params.id
        this.getCourseInfo()
      }
  }
测试。发现按一个小bug:课程二级分类显示的是id。

怎么回事?下拉列表数据的默认显示原理是:根据存储下拉选项的list的id与需要默认显示的id进行一一比较,将匹配的list中的数据进行回写。一级分类在页面中对subjectOneList默认进行了初始化,但二级分类subjectTwoList没有。下面具体解决下,看下代码就可以更好的理解这个过程了。
methods: {
	getCourseInfo() {
    course.getCourseInfoById(this.courseId)
    .then((resp) => {
      // 获取当前课程信息
      this.courseInfoform = resp.data.courseInfoForm

      // 查询所有一级课程分类,初始化subjectOneList
     subject.getAllSubject()
     .then((response) => {
        this.subjectOneList = response.data.list
         for(var i = 0; i<this.subjectOneList.length; i++) {
          // 从当前课程信息中获取一级课程分类id,与所有以及课程分类的id比较,相等则显示所有二级分类id
          var oneSubject = this.subjectOneList[i]
          if(oneSubject.id == this.courseInfoform.subjectParentId) {
             this.subjectTwoList = oneSubject.children
          }
      }
     })

    })
  }

  },
  created() {
      // 修改
      if(this.$route.params && this.$route.params.id) {
        this.courseId = this.$route.params.id
        this.getCourseInfo()
        this.getListTeacher()
      } else{
        // 添加
         this.getListTeacher()
         this.getOneSubject()
      }
  }
这里还有一个小bug:上一步回显数据后点击添加课程,回显的数据还在。下面解决下。
  watch: {
    $route(to, from) {
      //路由变化方式,当路由发送变化,方法就执行
      console.log("watch $route");
      this.courseInfo={}
    }
  }

最后把saveOrUpdate做下调整。
    addCourse() {
       course.addCourseInfo(this.courseInfoform).then(resp => {
        this.$message({
          message: "添加课程信息成功",
          type: "success",
        })
        //跳转到第二步,并带着这个课程生成的id
        this.$router.push({ path: "/course/chapter/"+resp.data.courseId });
      });
    },
    updateCourse() {
       course.updateCourseInfo(this.courseInfoform).then(resp => {
        this.$message({
          message: "修改课程信息成功",
          type: "success",
        })
        //跳转到第二步,并带着这个课程生成的id,注意update时后端没有返回id,但是我们可以通过下面方式拿到
        this.$router.push({ path: "/course/chapter/"+ this.courseId });
      });
    },
    saveOrUpdate() {
      if(this.courseInfoform.id) {
            this.updateCourse()
      } else {
        this.addCourse()
      }
    },
4.课程章节的增删改
4.1添加课程章节
(1)UI
做个小按钮。
<el-button type="text" @click="editChapter(chapter.id)">编辑</el-button>
[外链图片转存失败,源站可能有防盗链机制,建议将图片保存下来直接上传(img-iqjMNCab-1641641538981)(C:/Users/24724/AppData/Roaming/Typora/typora-user-images/image-20211207210533035.png)]
按钮效果如下,丑丑的。

然后点击添加,需要显示添加课程信息的表单,表单ui如下。
<!-- 添加和修改章节表单 -->
<el-dialog :visible.sync="dialogChapterFormVisible" title="添加章节">
    <el-form :model="chapter" label-width="120px">
        <el-form-item label="章节标题">
            <el-input v-model="chapter.title"/>
        </el-form-item>
        <el-form-item label="章节排序">
            <el-input-number v-model="chapter.sort" :min="0" controls-position="right"/>
        </el-form-item>
    </el-form>
    <div slot="footer" class="dialog-footer">
        <el-button @click="dialogChapterFormVisible = false">取 消</el-button>
        <el-button type="primary" @click="saveOrUpdate">确 定</el-button>
    </div>

</el-dialog>
上面的dialogChapterFormVisible用于控制弹框的显示与隐藏。我们在data中设置它的默认值为false,上面使使用了chapter,也进行下初始化。
 data() {
    return {
      saveBtnDisabled: false,
      chapterVideoList:[],
      courseId:'',
      dialogChapterFormVisible:false, // 章节弹框默认设置为关
      chapter:{} // 封装章节
    };
  }
最后将之前编辑的按钮修改下,绑定dialogChapterFormVisible属性。
<el-button type="text" @click="dialogChapterFormVisible = true">添加章节</el-button>
测试结果如下。

(2)后端
这里顺便把课程章节增删改查的接口一次写完。EduChapterController.
 @PostMapping("/addChapter")
    public R addChapter(@RequestBody EduChapter chapter) {
        eduChapterService.save(chapter);
        return R.ok();
    }

    @GetMapping("/getChapter/{courseId}")
    public R getChapterById(@PathVariable String courseId) {
        EduChapter eduChapter= eduChapterService.getById(courseId);
        return R.ok().data("chapter", eduChapter);
    }

    @PostMapping("/updateChapter")
    public R updateChapter(@RequestBody EduChapter chapter) {
        eduChapterService.updateById(chapter);
        return R.ok();
    }

    @DeleteMapping("/deleteChapter")
    public R deleteChapter(@PathVariable String courseId) {
        Boolean flag = eduChapterService.removeById(courseId);
        if(flag) {
            return R.ok();
        } else {
            return R.error();
        }

    }
上面的接口看似很好,不过却又一个小小的问题,我们在删除章节的时候,直接调用removeById方法,这样章节确实被删除了,但是该章节的小节却处于很尴尬的位置:不再属于任何小节(如下图)。这可不行哦。

实际上,在实际开发中,对于类似删除一二级分类中的一级分类的问题,我们需要自己在service层实现删除的业务逻辑。通常我们会有两种实现逻辑:
- 删除章节时下面的小节会一起被删除了
- 如果存在小节,则不允许删除章节,必须等小节被删除后再删除章节
下面实现第二种逻辑。
再controller改改调用的service方法名。

EduChapterServiceImpl实现方法
  @Override
    public Boolean deleteChapter(String courseId) {
        QueryWrapper<EduVideo> wrapper = new QueryWrapper<>();
        wrapper.eq("course_id", courseId);
        // 只需要判断是不是有video,而不需要真的要获取video
        int count = eduVideoService.count(wrapper);
        if(count > 1) {
            throw new GuliException(20001, "不能删除");
        } else {
            int delete =  baseMapper.deleteById(courseId);
            return delete > 0;
        }

    }
(3)前端接口
chapter.js。
  // 添加章节
  addChapter(chapter) {
    return request({
      url: '/eduservice/edu-chapter/addChapter/',
      method: 'post',
      data: chapter
    })
  },
  // 根据id查询章节
  getChapter(courseId) {
    return request({
      url: '/eduservice/edu-chapter/getChapter/' + courseId,
      method: 'get'
    })
  },
  // 修改章节
  updateChapter(chapter) {
    return request({
      url: '/eduservice/edu-chapter/updateChapter/',
      method: 'post',
      data: chapter
    })
  },
  deleteChapter(courseId) {
    return request({
      url: '/eduservice/edu-chapter/deleteChapter/' + courseId,
      method: 'delete'
    })
  }
(4)前端调用接口展示数据
实现下图中“确定”按钮绑定的表单提交的方法saveOrUpdate。

chapter.vue
   saveOrUpdate() {
      chapter.addChapter(this.chapter)
      .then(resp => {
        // 1.关闭弹框
        this.dialogChapterFormVisible = false
        // 2.提示成功
         this.$message({
          message: "添加课程章节成功",
          type: "success",
        })
        // 3.刷新页面(重新查询数据即可)
        this.getChapterVideo()
      })
   }
是不是感觉:简单、枯燥且乏味。测试下。

报了一个错误,很明显这是后端报出来的,看看后端吧。告诉我们courseid没有给默认值。

看看数据库,courseId是必须传值的。

而data中的chapter也没有给courseId默认值。

我们其实之前已经拿到了courseId了。

因此,我们再传EduChapter前将数据封装到EduChapter中就可以了。
  saveOrUpdate() {
      this.chapter.courseId = this.courseId,
      chapter.addChapter(this.chapter)
      .then(resp => {
        // 1.关闭弹框
        this.dialogChapterFormVisible = false
        // 2.提示成功
         this.$message({
          message: "添加课程章节成功",
          type: "success",
        })
        // 3.刷新页面(重新查询数据即可)
        this.getChapterVideo()
      })
   }
  }
还有记得后端的EduChapter中时间相关属性要加注解。

再测试就成功了。

还有一个小bug,第二次点添加章节时,之前添加的表单数据没有清空。解决如下。事件@Click改为绑定方法,在方法中清空数据。

<el-button type="text" @click="openChapterDialog">添加章节</el-button>
 openChapterDialog() {
     this.dialogChapterFormVisible = true,
     this.chapter.title = ''
     this.chapter.sort = 0
   }
  }
4.2 修改课程章节
注意到添加完章节后,显示的课程章节中有编辑的选项,这是我们之前实现的ui,现在我们来把这个ui的功能实现。
将编辑button与方法绑定。

实现修改功能。
 saveChapter() {
      this.chapter.courseId = this.courseId,
      chapter.addChapter(this.chapter)
      .then(resp => {
        // 1.关闭弹框
        this.dialogChapterFormVisible = false
        // 2.提示成功
         this.$message({
          message: "添加课程章节成功",
          type: "success",
        })
        // 3.刷新页面(重新查询数据即可)
        this.getChapterVideo()
      })
   },
   openChapterDialog() {
     this.dialogChapterFormVisible = true,
     this.chapter.title = ''
     this.chapter.sort = 0
   },
   openEditChapter(chapterId) {
     this.dialogChapterFormVisible = true,
     chapter.getChapter(chapterId)
     .then(resp => {
       this.chapter = resp.data.chapter
     })
   },
   //修改章节
    updateChapter() {
      //设置课程id到chapter对象中
      this.chapter.courseId = this.courseId;
      chapter.updateChapter(this.chapter).then((resp) => {
        //关闭弹框
        this.dialogChapterFormVisible = false;
        //提示信息
        this.$message({
          message: "修改章节成功",
          type: "success",
        });
        //刷新页面
        this.getChapterVideo();
      });
    },
    saveOrUpdate() {
      if (this.chapter.id) {
        //修改章节
        this.updateChapter();
      } else {
        //新增章节
        this.saveChapter();
      }
    }
4.3 删除课程章节

         //删除章节
    removeById(chapterId) {
      this.$confirm("此操作将永久删除章节信息, 是否继续?", "提示", {
        confirmButtonText: "确定",
        cancelButtonText: "取消",
        type: "warning",
      }).then(() => {
        //点击确定,执行then方法
        chapter.deleteChapter(chapterId).then((resp) => {
          //删除成功
          //提示信息
          this.$message({
            type: "success",
            message: "删除成功!",
          });
          //刷新页面
          this.getChapterVideo();
        });
      });
5.课程小节的增删改查
我们先实现后端的接口。
/**
 * <p>
 * 课程视频 前端控制器
 * </p>
 *
 * @author wangzhou
 * @since 2021-11-12
 */
@RestController
@RequestMapping("/eduservice/edu-video")
@CrossOrigin
public class EduVideoController {
    @Autowired
    private EduVideoService service;
    // 添加小节
    @PostMapping("/addVideo")
    public R addVideo(@RequestBody EduVideo video) {
        service.save(video);
        return R.ok();
    }
    // 删除小节 Todo 删除小节时也要删除小节下的对应的视频
    @DeleteMapping("/deleteVideo/{videoId}")
    public R deleteVideo(@PathVariable String videoId) {
        Boolean flag = service.removeById(videoId);
        if(flag) {
            return R.ok();
        } else {
            return R.error();
        }
    }

    // 查找小节
    @GetMapping("/getVideoById/{videoId}")
    public R getVideoById(@PathVariable String videoId) {
        EduVideo video = service.getById(videoId);
        return R.ok().data("video", video);
    }

    // 修改小节
    @PostMapping("/updateVideo")
    public R updateVideo(@RequestBody EduVideo video) {
        service.updateById(video);
        return R.ok();
    }

}
友情提示,EduVideo中的@TableField注解记得加一下。
接下来就是前端实现下接口,新建video.js。
import request from '@/utils/request'

export default {
  // 添加小节
  addVideo(video) {
    return request({
      url: '/eduservice/edu-video/addVideo/',
      method: 'post',
      data: video
    })
  },
  // 根据id查询小节
  getVideo(videoId) {
    return request({
      url: '/eduservice/edu-video/getVideoById/' + videoId,
      method: 'get'
    })
  },
  // 修改小节
  updateVideo(video) {
    return request({
      url: '/eduservice/edu-video/updateVideo/',
      method: 'post',
      data: video
    })
  },
  // 删除小节
  deleteVideo(videoId) {
    return request({
      url: '/eduservice/edu-video/deleteVideo/' + videoId,
      method: 'delete'
    })
  }
}
目前都是很简单的平平无奇的操作。那么接下来在前端中chapter.vue开始调用接口实现功能吧。
.<template>
  <div class="app-container">
    <h2 style="text-align: center">发布新课程</h2>
    <el-steps
      :active="2"
      process-status="wait"
      align-center
      style="margin-
bottom: 40px;"
    >
      <el-step title="填写课程基本信息" />
      <el-step title="创建课程大纲" />
      <el-step title="最终发布" />
    </el-steps>

      <ul>
      <li v-for="chapter in chapterVideoList" :key="chapter.id">
        <p>
          {{ chapter.title }}
          <span>
            <el-button type="text" @click="openVideoDialog(chapter.id)">添加课时</el-button>
            <el-button style="" type="text" @click="openEditChapter(chapter.id)">编辑</el-button>
            <el-button type="text"  @click ="removeById(chapter.id)">删除</el-button>
          </span>
        </p>

        <!-- 视频 -->
        <ul class="chapterList videoList">
          <li v-for="video in chapter.children" :key="video.id">
            <p>
              {{ video.title }}
              <span class="acts">
                <el-button type="text" @click="openEditVideo(video.id)">编辑</el-button>
                <el-button type="text" @click="removeVideo(video.id)">删除</el-button>
              </span>
            </p>
          </li>
        </ul>
      </li>
    </ul>

  <el-button type="text" @click="openChapterDialog">添加章节</el-button>
  <!-- 添加和修改章节表单 -->
    <el-dialog :visible.sync="dialogChapterFormVisible" title="添加章节">
        <el-form :model="chapter" label-width="120px">
            <el-form-item label="章节标题">
                <el-input v-model="chapter.title"/>
            </el-form-item>
            <el-form-item label="章节排序">
                <el-input-number v-model="chapter.sort" :min="0" controls-position="right"/>
            </el-form-item>
        </el-form>
        <div slot="footer" class="dialog-footer">
            <el-button @click="dialogChapterFormVisible = false">取 消</el-button>
            <el-button type="primary" @click="saveOrUpdate">确 定</el-button>
        </div>

    </el-dialog>

    <!--添加小节表单-->
    <!-- 添加和修改课时表单 -->
    <el-dialog :visible.sync="dialogVideoFormVisible" title="添加课时">
      <el-form :model="video" label-width="120px">
        <el-form-item label="课时标题">
          <el-input v-model="video.title" />
        </el-form-item>
        <el-form-item label="课时排序">
          <el-input-number
            v-model="video.sort"
            :min="0"
            controls-
            position="right"
          />
        </el-form-item>
        <el-form-item label="是否免费">
          <el-radio-group v-model="video.free">
            <el-radio :label="true">免费</el-radio>
            <el-radio :label="false">默认</el-radio>
          </el-radio-group>
        </el-form-item>
        <el-form-item label="上传视频">
          <!-- TODO -->
        </el-form-item>
      </el-form>
      <div slot="footer" class="dialog-footer">
        <el-button @click="dialogVideoFormVisible = false">取 消</el-button>
        <el-button
          :disabled="saveVideoBtnDisabled"
          type="primary"
          @click="saveOrUpdateVideo()"
          >确 定</el-button
        >
      </div>
    </el-dialog>


    <el-form label-width="120px">
      <el-form-item>
        <el-button @click="previous">上一步</el-button>
        <el-button :disabled="saveBtnDisabled" type="primary" @click="next"
          >下 一步</el-button
        >
      </el-form-item>
    </el-form>

  </div>
</template>

<script>
import chapter from "@/api/edu/chapter.js";
import video from "@/api/edu/video.js";

export default {
  data() {
    return {
      saveBtnDisabled: false,
      chapterVideoList:[],
      courseId:'',
      dialogChapterFormVisible:false, // 章节弹框默认设置为关
      dialogVideoFormVisible:false, // 小节弹框默认设置为关
      chapter:{
        title:'',
        sort:0
      }, // 封装章节
      video: {
        title:'',
        sort:0,
        free:0,
        videoSourceId:''
      } //封装小节
    };
  },
  methods: {
    // ------------------ 小节 -------------
    openVideoDialog(id) {
        //清空之前的数据
      this.video = {};
       //设置章节id
      this.video.chapterId = id;
      //显示弹框
      this.dialogVideoFormVisible = true;
    },
    openEditVideo(videoId) {
      //显示弹框
      this.dialogVideoFormVisible = true;
      video.getVideo(videoId)
      .then(resp =>{
         this.video = resp.data.video
      })

    },
    // saveVideoBtnDisabled() {

    // },
            //添加小节
    addVideo() {
      //设置课程id
      this.video.courseId = this.courseId;
      video.addVideo(this.video).then((resp) => {
        //关闭弹框
        this.dialogVideoFormVisible = false;
        //提示信息
        this.$message({
          message: "添加小节成功",
          type: "success",
        });
        //刷新页面
        this.getChapterVideo();
      });
    },

    saveOrUpdateVideo() {
      if(this.video.id) {
        this.updateVideo();
      } else {
        this.addVideo();
      }
    },

        //修改小节表单回显
    getVideoById(videoId) {
      //弹出小节弹窗
      this.dialogVideoFormVisible = true;
      video.getVideoById(videoId).then((resp) => {
        this.video = resp.data.video;
      });
    },


        //小节修改
    updateVideo() {
      //   //设置课程id
      // this.video.courseId = this.courseId;
      video.updateVideo(this.video).then((resp) => {
        //关闭弹框
        this.dialogVideoFormVisible = false;
        //提示信息
        this.$message({
          message: "修改小节成功",
          type: "success",
        });
        //刷新页面
        this.getChapterVideo();
      });
    },

        //删除小节
    removeVideo(videoId) {
      this.$confirm("此操作将永久删除小节信息, 是否继续?", "提示", {
        confirmButtonText: "确定",
        cancelButtonText: "取消",
        type: "warning",
      }).then(() => {
        //点击确定,执行then方法
        video.deleteVideo(videoId).then((resp) => {
          //删除成功
          //提示信息
          this.$message({
            type: "success",
            message: "删除成功!",
          });
          //刷新页面
          this.getChapterVideo();
        });
      });
    },


    // ------------------ 章节 -------------
    //跳转到上一步
    previous() {
      this.$router.push({ path: "/course/info/" + this.courseId });
    },
    next() {
      //跳转到第三步
      this.$router.push({ path: "/course/publish/"+ this.courseId });
    },
    getChapterVideo(){
      chapter.getChapterVideo(this.courseId)
        .then(resp => {
          this.chapterVideoList = resp.data.list
        })
    },

   saveChapter() {
      this.chapter.courseId = this.courseId,
      chapter.addChapter(this.chapter)
      .then(resp => {
        // 1.关闭弹框
        this.dialogChapterFormVisible = false
        // 2.提示成功
         this.$message({
          message: "添加课程章节成功",
          type: "success",
        })
        // 3.刷新页面(重新查询数据即可)
        this.getChapterVideo()
      })
   },
   openChapterDialog() {
     this.dialogChapterFormVisible = true,
     this.chapter.title = ''
     this.chapter.sort = 0
   },
   openEditChapter(chapterId) {
     this.dialogChapterFormVisible = true,
     chapter.getChapter(chapterId)
     .then(resp => {
       this.chapter = resp.data.chapter
     })
   },
   //修改章节
    updateChapter() {
      //设置课程id到chapter对象中
      this.chapter.courseId = this.courseId;
      chapter.updateChapter(this.chapter).then((resp) => {
        //关闭弹框
        this.dialogChapterFormVisible = false;
        //提示信息
        this.$message({
          message: "修改章节成功",
          type: "success",
        });
        //刷新页面
        this.getChapterVideo();
      });
    },
    saveOrUpdate() {
      if (this.chapter.id) {
        //修改章节
        this.updateChapter();
      } else {
        //新增章节
        this.saveChapter();
      }
    },
       //删除章节
    removeById(chapterId) {
      this.$confirm("此操作将永久删除章节信息, 是否继续?", "提示", {
        confirmButtonText: "确定",
        cancelButtonText: "取消",
        type: "warning",
      }).then(() => {
        //点击确定,执行then方法
        chapter.deleteChapter(chapterId).then((resp) => {
          //删除成功
          //提示信息
          this.$message({
            type: "success",
            message: "删除成功!",
          });
          //刷新页面
          this.getChapterVideo();
        });
      });
    }


  },

  created() {
    if(this.$route.params && this.$route.params.id) {
      this.courseId = this.$route.params.id
    }
    this.getChapterVideo()
  },
};
</script>

<style>
</style>


 203
203

 被折叠的 条评论
为什么被折叠?
被折叠的 条评论
为什么被折叠?
 到【灌水乐园】发言


