


欢迎使用Markdown编辑器
提示:文章写完后,目录可以自动生成,如何生成可参考右边的帮助文档
前言
提示:这里可以添加本文要记录的大概内容:
因公司需求,需将客户电子签名合成在责任书,并转成PDF文档存档,后期可下载PDF文件,所以操作了word合并文字图片,转PDF,下载PDF;
提示:以下是本篇文章正文内容,下面案例可供参考
一、引入jar包
	<plugin>
		<groupId>org.apache.maven.plugins</groupId>
		<artifactId>maven-resources-plugin</artifactId>
		<version>3.1.0</version>
		<configuration>
			<nonFilteredFileExtensions>
			<!--这个是为了避免操作docx文档时出错-->
				<nonFilteredFileExtension>docx</nonFilteredFileExtension>
			</nonFilteredFileExtensions>
		</configuration>
	</plugin>
	<!--这个是为了下载e-iceblue的jar包-->
	<repositories>
		<repository>
			<id>com.e-iceblue</id>
			<name>e-iceblue</name>
			<url>https://repo.e-iceblue.cn/repository/maven-public/</url>
		</repository>
	</repositories>
	<dependency>
		<groupId> e-iceblue </groupId>
		<artifactId>spire.doc.free</artifactId>
		<!--注意这里的版本,之前使用的4.1.0文件头会有一串提示-->
		<version>3.9.0</version>
	</dependency>
	<dependency>
		<groupId>com.deepoove</groupId>
		<artifactId>poi-tl</artifactId>
		<version>1.10.0</version>
	</dependency>
	<dependency>
		<groupId>fr.opensagres.xdocreport</groupId>
		<artifactId>fr.opensagres.poi.xwpf.converter.pdf-gae</artifactId>
		<version>2.0.1</version>
	</dependency>
	<dependency>
		<groupId>cn.afterturn</groupId>
		<artifactId>easypoi-base</artifactId>
		<version>4.1.0</version>
	</dependency>
	<dependency>
		<groupId>cn.afterturn</groupId>
		<artifactId>easypoi-web</artifactId>
		<version>4.1.0</version>
	</dependency>
	<dependency>
		<groupId>cn.afterturn</groupId>
		<artifactId>easypoi-annotation</artifactId>
		<version>4.1.0</version>
	</dependency>
二、使用步骤
1.前端上传电子签名图片
这一步公司里是用的C端操作的所以没有代码示例,但是操作其实也很简单的就是按前端上传文件的格式调用dfs文件服务接口上传,返回上传地址:类似e9c37ab8f83d4cada7f73cf3c9d877e0这样的;然后走完业务流程保存本次操作,将e9c37ab8f83d4cada7f73cf3c9d877e0随其他参数一起传送给java后端;后端根据这个地址下载电子签名图片并插入word模板中;这里电子签名的上传下载就不作详细说明了;
2.java下载电子签名图片并插入word再转PDF后上传
先看看我们的word模板设置

这里需要将卡号、电子签名图片、签字年月日填入对应的文档;
1、首先我们从fds服务器下载电子签名图片,此时下载的是byte数组,需要进行处理后插入word文档;
代码如下(示例):
//这里的文件下载就是FastDNS的服务下载,需要朋友们自己搭建下网上教程很多也比较简单
		byte[] bytes = fileUpDownloadService.download(fundContract.getSignatureImagePath());
		Map<String,Object> map = new HashMap<>();
		map.put("cardNo","323232323232");//卡号对应的值
		map.put("year","2022");//年
		map.put("month","07");//月
		map.put("day","15");//日
		//大家注意此处没有处理图片,是把图片的设置值放在了工具类处理的
		fastDFSUtil.getFileByBytes(bytes, UuidUtils.generateUuid(),map);
2、下面是工具类的示例代码,只是做demo所以没有怎么整理
package com.jy.util;

import com.deepoove.poi.XWPFTemplate;
import com.deepoove.poi.data.PictureType;
import com.deepoove.poi.data.Pictures;
import com.jy.service.IFileUpDownloadService;
import com.spire.doc.Document;
import com.spire.doc.FileFormat;
import org.springframework.beans.factory.annotation.Autowired;
import org.springframework.mock.web.MockMultipartFile;
import org.springframework.stereotype.Component;
import org.springframework.web.multipart.MultipartFile;
import java.io.*;
import java.util.Map;

/**
 * @Author jy
 * @Date 2022/7/5 15:21
 * @Version 1.0
 */
@Component
public class FastDFSUtil {
    @Autowired
    private IFileUpDownloadService fileUpDownloadService;
    /**
     *
     * @param bytes
     * @param fileName
     * @param map
     */
    public void getFileByBytes(byte[] bytes, String fileName, Map<String, Object> map) {
        String rootPath = System.getProperty("user.dir");
        String filePath = rootPath+"\\card\\src\\main\\resources\\templates\\images";
        BufferedOutputStream bos = null;
        FileOutputStream fos = null;
        File file;
        Document document = null;
        try {
            File dir = new File(filePath);
            if (!dir.exists() && dir.isDirectory()) {// 判断文件目录是否存在
                dir.mkdirs();
            }
            file = new File(filePath + "\\" + fileName);
            fos = new FileOutputStream(file);
            bos = new BufferedOutputStream(fos);
            bos.write(bytes);
            map.put("image", Pictures.ofStream(new FileInputStream(filePath + "\\"+fileName), PictureType.PNG)
                        .size(50, 25).create());
            XWPFTemplate template = XWPFTemplate.compile(filePath+"\\test.docx").render(map);
            template.write(new FileOutputStream(filePath+"\\test11.docx"));
            //保存为PDF格式
            document = new Document();
            document.loadFromFile(filePath+"\\test11.docx");
            //保存结果文件
            document.saveToFile(filePath + "\\test11.pdf", FileFormat.PDF);
            //上传文件
            File pdf = new File(filePath + "\\test11.pdf");
            MultipartFile multipartFile = new MockMultipartFile(pdf.getName(), pdf.getName(),
                    null, new FileInputStream(pdf));
            String upload = fileUpDownloadService.upload(multipartFile);
            //这里打印出上传后返回的保存地址,待会复制出来下载的时候使用
            System.out.println(upload);
        } catch (Exception e) {
            e.printStackTrace();
        } finally {
            if (bos != null) {
                try {
                    bos.close();
                } catch (IOException e) {
                    e.printStackTrace();
                }
            }
            if (fos != null) {
                try {
                    fos.close();
                } catch (IOException e) {
                    e.printStackTrace();
                }
            }
            if (document !=null){
                document.close();
            }
        }
    }
    /**
     根据byte数组,生成文件
     **/
    public static void getFile(byte[] bfile, String filePath,String fileName) {
        BufferedOutputStream bos = null;
        FileOutputStream fos = null;
        File file = null;
        try {
            File dir = new File(filePath);
            if(!dir.exists()&&dir.isDirectory()){//判断文件目录是否存在
                dir.mkdirs();
            }
            file = new File(filePath+"\\"+fileName);
            fos = new FileOutputStream(file);
            bos = new BufferedOutputStream(fos);
            bos.write(bfile);
        } catch (Exception e) {
            e.printStackTrace();
        } finally {
            if (bos != null) {
                try {
                    bos.close();
                } catch (IOException e1) {
                    e1.printStackTrace();
                }
            }
            if (fos != null) {
                try {
                    fos.close();
                } catch (IOException e1) {
                    e1.printStackTrace();
                }
            }
        }
    }
    /**
     * * 输出指定文件的byte数组
     * @param filePath 文件路径
     * @param os 输出流
     * @return
     */
    public static void writeBytes(String filePath, OutputStream os) throws IOException{
        FileInputStream fis = null;
        try{
            File file = new File(filePath);
            if (!file.exists()){
                throw new FileNotFoundException(filePath);
            }
            fis = new FileInputStream(file);
            byte[] b = new byte[1024];
            int length;
            while ((length = fis.read(b)) > 0){
                os.write(b, 0, length);
            }
        }catch (IOException e){
            throw e;
        }finally{
            if (os != null){
                try{
                    os.close();
                } catch (IOException e1){
                    e1.printStackTrace();
                }
            }
            if (fis != null){
                try{
                    fis.close();
                } catch (IOException e1){
                    e1.printStackTrace();
                }
            }
        }
    }
}
3、根据自己的业务需求触发请求后,我们可以得到以下文件:电子签名图片、插入数据后的word文档、转换为PDF的文档


 4、至此我们就完成了整个需求的一大半,word的赋值转换,PDF的上传;接下来就是需求的另一个点,我们需要在其他列表页面下载之前上传的PDF;

以上是页面效果,我们需要下载这个签字版的PDF文件
3.java下载PDF
1、首先我们从fds服务器下载电子签名图片,此时下载的是byte数组,需要进行处理后插入word文档;
代码如下(示例):
<div>
<div class="breadcrumb">
附件
</div>
<p>《市场交易管理规则》告知书 <a class="" style="color: #007BFF" href="javascript:void(0);" onclick="getPDF('1')">下载</a></p>
<p>《市场食品质量安全责任书》 <a class="" style="color: #007BFF" href="javascript:void(0);" onclick="getPDF('2')" >下载</a></p>
</div>
<script>
function getPDF(num) {
var name = "";
if (num==1){
name = "《市场交易管理规则》告知书";
} else {
name = "《市场食品质量安全责任书》";
}
//const queryParams = generateFormCondition2Json({ num: num });
$.ajax({
type: "GET",
url: "${contextPath}/contract/getImage.action?num="+num,//这里的参数是根据各自的业务需求传递
//data: JSON.stringify(queryParams),
headers:{"content-type":"application/json; charset=utf-8"}, //请求头类型
//responseType: 'blob',//按这种方式PDF打开空白,改成下面这种才行,具体什么问题不清楚,找前端同事问的
xhrFields: {
responseType: 'arraybuffer'
},
success: function (ret) {
console.log(ret)
bui.loading.hide();
if (ret) {
downloadFile(ret,name);
} else {
bs4pop.alert("", {type: 'error'});
}
},
error: function () {
bui.loading.hide();
bs4pop.alert('远程访问失败', {type: 'error'});
}
});
}
function downloadFile(data,name) {
let blob = new Blob([data], { type: "application/pdf" });
let url = window.URL.createObjectURL(blob);
const link = document.createElement("a"); // 创建a标签
link.href = url;
link.download = name; // 重命名文件
link.click();
URL.revokeObjectURL(link.href); // 释放内存
}
</script>
后端代码如下:
public void getImage(HttpServletRequest request, HttpServletResponse response) throws IOException {
//根据之前上传时返回的地址下载文件
byte[] bytes = fileUpDownloadService.download("ad892f8784444e599160ad9cfa373347");
//你的文件所存放的地址
String rootPath = System.getProperty("user.dir");
String filePath = rootPath+"\\card\\src\\main\\resources\\templates\\images\\";
String uuid = UUID.randomUUID().toString();
String pdfName = uuid+".pdf";
fastDFSUtil.getFile(bytes,filePath,pdfName);
String pdfDownPath = filePath+pdfName;
response.setCharacterEncoding("utf-8");
response.setHeader("content-type", "application/octet-stream;charset=UTF-8");
response.setContentType("application/octet-stream;charset=UTF-8");
response.setHeader("Content-Disposition", "attachment;filename=" + java.net.URLEncoder.encode(pdfDownPath.trim(), "UTF-8"));
fastDFSUtil.writeBytes(pdfDownPath, response.getOutputStream());
File file = new File(filePath);
if (file.exists()) {
DataOutputStream temps = new DataOutputStream(response.getOutputStream());
DataInputStream in = new DataInputStream(new FileInputStream(pdfDownPath));
byte[] b = new byte[2048];
while ((in.read(b)) != -1) {
temps.write(b);
temps.flush();
}
in.close();
temps.close();
} else {
log.error("文件不存在!");
}
//return bytes;
}
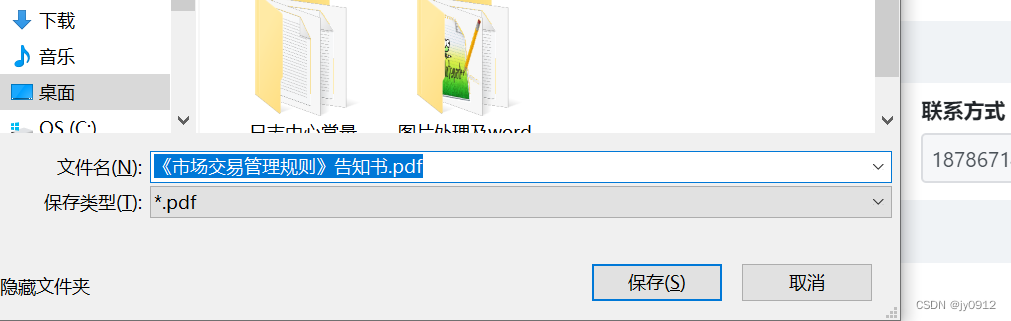
点击下载后的效果即为:
# 总结
以上就是全部内容,代码写得比较乱,主要是实现功能,具体的工具类还可以再细分,以及在word填充值的入参方面还可以再处理下,对转换的文本格式,及图片大小,还有填充的内容这些都是可以扩展的;再有就是确实不擅长前端,所以只能问问同事;后端jar的引用花了一点时间处理,因为可能版本不同就会造成一些影响;给自己留一个工具类,同时也希望能给需要的你一些帮助吧!一起加油!!!


 2102
2102

 被折叠的 条评论
为什么被折叠?
被折叠的 条评论
为什么被折叠?
 到【灌水乐园】发言


