


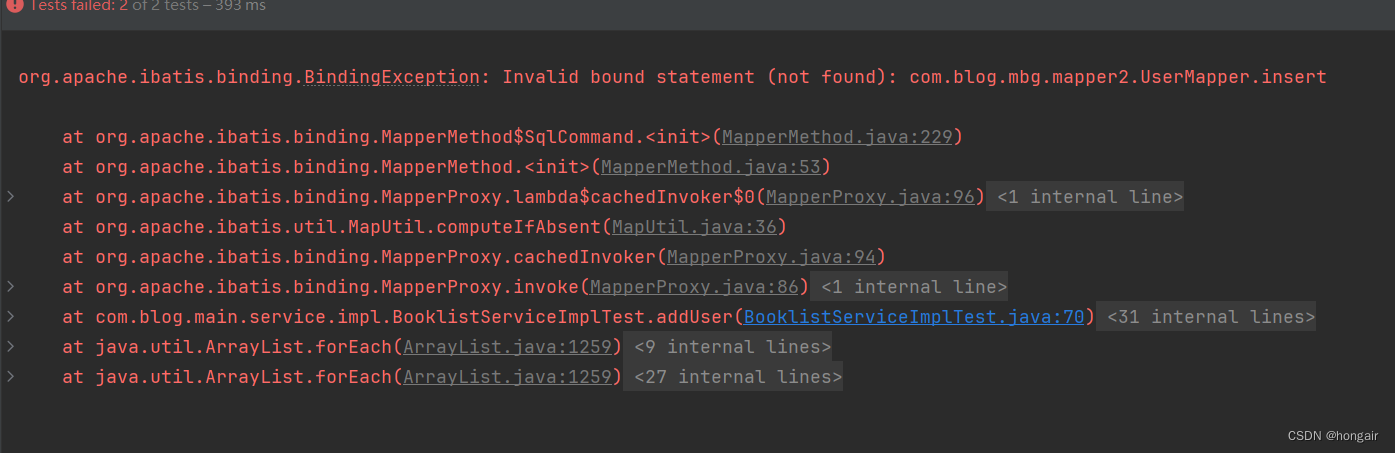
org.apache.ibatis.binding.BindingException: Invalid bound statement (not found): com.blog.mbg.mapper2.UserMapper.insert错误(解决)
从mybatis升级到mybatisPlus
错误信息
使用mapper进行CRUD
运行发现org.apache.ibatis.binding.BindingException: Invalid bound statement (not found): xxxMapper.insert错误
搜索相关错误,都是类似该篇文章的解答
但尝试后都没有解决
排查过程
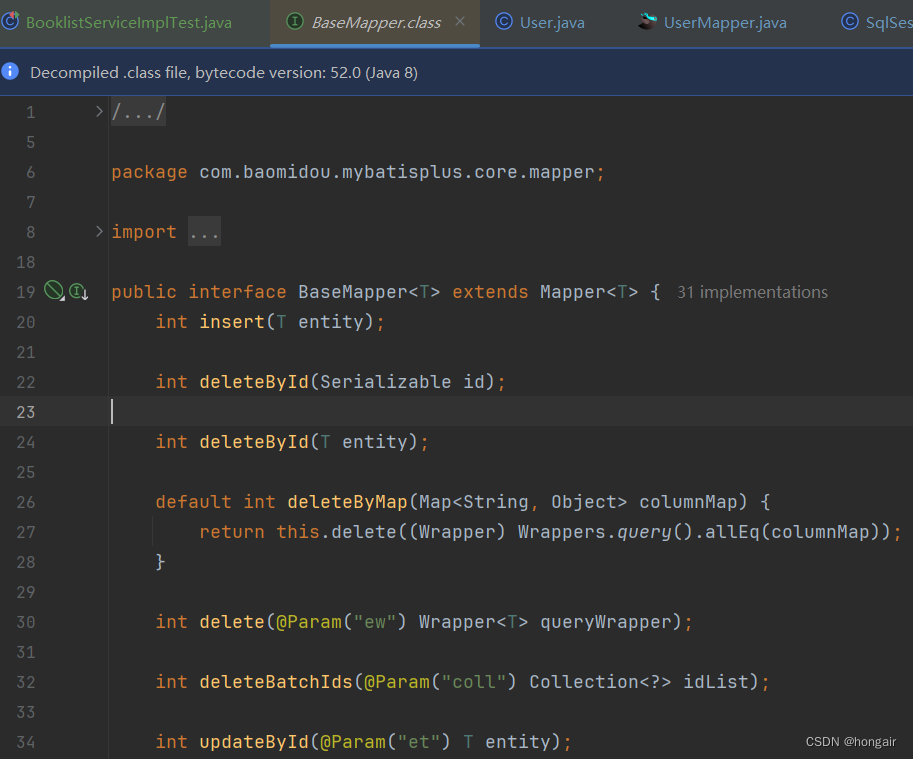
上面的错误可知是SQL语句没有声明,但mybatis正是帮我们干这个事的,理论上是不需要自己写的,点击UserMapper的insert方法,其进行了跳转,说明应该是有声明的
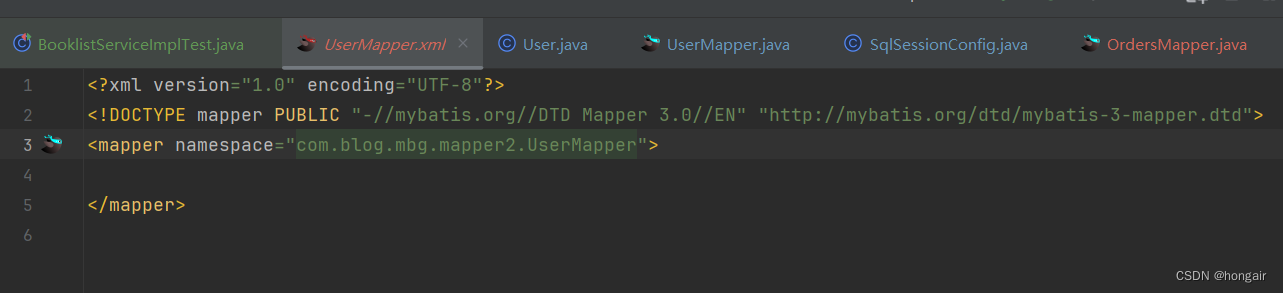
查看resource中的XXXmapper.xml文件,发现其只有声明内容,没有SQL语句
本以为是在自动生成文件时产生错误,但网上搜索没有找到相同问题,且查询官方配置文档,也没有提到相关配置
于是在GitHub上找了个mybatisPlus的简单项目,运行 自动生成代码 文件后发现,其xml文件也同样没有SQL语句,但写了个测试方法,发现其可以成功运行,查询插入都可以!
接着干了一件很蠢但很有效的事情,直接把可以成功运行的文件搬到自己的项目中,发现无论如何都不能成功,且报错与此前相同
但此时我注意到报错的代码,显示的都是ibatis开头,似乎与mybatisPlus无关,开始怀疑是否使用正确,但看代码都完全一样,于是两个项目同时开始debug,查看哪一步不一样
下面是debug的第一步结果
自己的项目(失败)
 GitHub项目(成功)
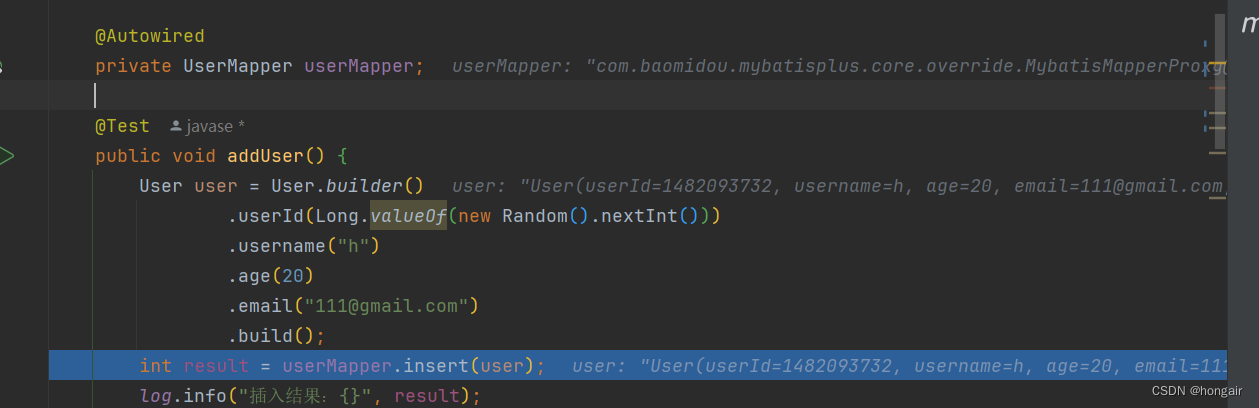
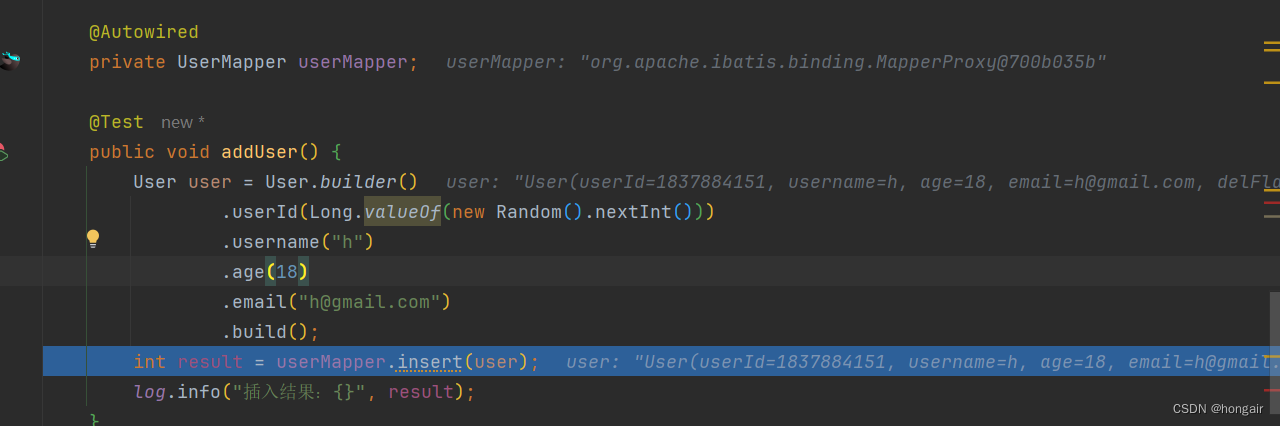
对比发现,失败的mapper对象是org.apache.ibatis.binding.MapperProxy类型,而成功的是com.baomidou.mybatisplus.core.override.MybatisMapperProxy类型,也就是说旧的不是mybatisplus处理的
排查项目中所有使用mybatis的地方,与成功的项目对比,发现只有一个地方不同,就是失败的项目中自己配置了SqlSession,其配置代码如下
@Bean
    @Primary
    public SqlSessionFactory sqlSessionFactory(DataSource dataSource) throws Exception {
        // 设置驼峰命名法映射
        org.apache.ibatis.session.Configuration configuration = new org.apache.ibatis.session.Configuration();
        configuration.setMapUnderscoreToCamelCase(true);
        configuration.addInterceptor(new MybatisPlusInterceptor());
        SqlSessionFactoryBean bean = new SqlSessionFactoryBean();
        bean.setDataSource(dataSource);
        bean.setConfiguration(configuration);
        bean.setMapperLocations(new PathMatchingResourcePatternResolver().getResources("classpath:com/blog/mbg/mapper/*.xml"));
        return bean.getObject();
    }
将这段代码注释掉,重新运行,发现成功运行了!
解决
定位到问题就好解决了,搜索“mybatisplus sqlSessionFactory”,找到相关文章,参考着将SqlSession配置修改为如下
@Bean
    @Primary
    public MybatisSqlSessionFactoryBean sqlSessionFactory(DataSource dataSource) throws Exception {
        // 设置驼峰命名法映射
        MybatisConfiguration configuration = new MybatisConfiguration();
        configuration.setMapUnderscoreToCamelCase(true);
        configuration.addInterceptor(new MybatisPlusInterceptor());
        MybatisSqlSessionFactoryBean bean = new MybatisSqlSessionFactoryBean();
        bean.setDataSource(dataSource);
        bean.setConfiguration(configuration);
        bean.setMapperLocations(new PathMatchingResourcePatternResolver().getResources("classpath:com/blog/mbg/mapper/*.xml"));
        return bean;
    }
即将SqlSessionFactory改成MybatisSqlSessionFactoryBean,其他的按照IDE提示进行相应修改即可
如下修改也可以
@Bean
    @Primary
    public SqlSessionFactory sqlSessionFactory(DataSource dataSource) throws Exception {
        // 设置驼峰命名法映射
        MybatisConfiguration configuration = new MybatisConfiguration();
        configuration.setMapUnderscoreToCamelCase(true);
        configuration.addInterceptor(new MybatisPlusInterceptor());
        MybatisSqlSessionFactoryBean bean = new MybatisSqlSessionFactoryBean();
        bean.setDataSource(dataSource);
        bean.setConfiguration(configuration);
        bean.setMapperLocations(new PathMatchingResourcePatternResolver().getResources("classpath:com/blog/mbg/mapper/*.xml"));
        return bean.getObject();
    }
本质都是把bean给修改
问题分析
参考文章
简单而言就是,代码层面有一个Mapper接口,一个Service接口,一个Service实现类(继承了ServiceImpl, 且里面注入了一个BaseMapper)
// mapper
public interface UserMapper extends BaseMapper<User>

//service
public interface IUserService extends IService<User>

//serviceImpl

public class UserServiceImpl extends ServiceImpl<UserMapper, User> implements IUserService
重点在于UserMapper实例化的过程,在注入当前Service时,要先去注入BaseMapper,在注入BaseMapper时,进行了动态代理
spring根据beanName得到了一个bean实例,但是这个bean实例是一个MapperFactoryBean(实现了FactoryBean),根据spring源码所以要调用FactoryBean的getObject方法取到真正的实例。
最后调用了jdk的Proxy.newProxyInstance生成了OrderMapper的代理类,并将MybatisMapperProxy作为代理接口实现类被传入,即属性h


 499
499

 被折叠的 条评论
为什么被折叠?
被折叠的 条评论
为什么被折叠?
 到【灌水乐园】发言


