


SpringBoot中获取application.yml文件内容
原始方式pro.load()与 pro.getProperty()配合的方式
  构造器
 		Properties pro=new Properties();
 	读取配置文件的步骤  ★
 		a. pro加载配置文件
 			pro.load(InputStream in);
 			pro.load(Reader in);
 		b. 根据key值取value值
 			pro.getProperty(String key);根据key值取value值  如果没有key值返回null
 			pro.getProperty(String key,String defaultvalue);根据key值取value值  如果没有key值返回defaultvalue
 	设置键值对信息到配置文件
 		a. 设置键值对信息
 			pro.setProperty(String key, String value);
 		b. 应用到配置文件上
 			pro.store(OutputStream out, String commons);//comment是注释的意思
 			pro.store(Writer out, String commons);
public class Demo5 {

	public static void main(String[] args) {
		//通过java代码拿到配置文件中的信息
		Properties pro=new Properties();

		try {
			//1. pro加载配置文件
			pro.load(new FileInputStream("src\\db.properties"));
			//2. 取值    根据key值取value值
			String username = pro.getProperty("url1","123");
			System.out.println(username);

		} catch (FileNotFoundException e) {
			e.printStackTrace();
		} catch (IOException e) {
			e.printStackTrace();
		}

		/*Properties pro=new Properties();
		//1. 设置键值对数据
		pro.setProperty("name", "john");
		pro.setProperty("age", "18");
		//2. 应用到配置文件上
		try {
			pro.store(new FileOutputStream("src\\person.properties"), "person");


		} catch (FileNotFoundException e) {
			// TODO Auto-generated catch block
			e.printStackTrace();
		} catch (IOException e) {
			// TODO Auto-generated catch block
			e.printStackTrace();
		}*/


	}

}
@Value注解方式
@Value使用必须在使用的类必须能够扫描到
 /** 模板编号(N) */
    @Value("${unifiedability.mail.templateNum}")
    private String templateNum;
application.yml
unifiedability:
	mail:
	    templateNum: 11111111111111111111#一串数字
@ConfigurationProperties(prefix = “前缀内容”)与@EnableConfigurationProperties({映射类.class})配合的方式
application.yml
baidu:
  token:
    APP_ID: ""
    API_KEY: ""
    SECRET_KEY: ""
映射实体类
package com.adun.demo.properties;

import lombok.Data;
import org.springframework.boot.context.properties.ConfigurationProperties;
import org.springframework.stereotype.Repository;

@ConfigurationProperties(prefix = "baidu.token")
@Data
public class BaiduProperties {
    private String APP_ID;
    private String API_KEY;
    private String SECRET_KEY;
}
使用映射类方式一
package com.adun.demo.service.impl;

import com.adun.demo.properties.BaiduProperties;
import com.adun.demo.service.BaiduSpeakService;
import com.adun.demo.vo.TextVo;
import com.baidu.aip.speech.AipSpeech;
import com.baidu.aip.speech.TtsResponse;
import com.baidu.aip.util.Util;
import lombok.extern.slf4j.Slf4j;
import org.json.JSONObject;
import org.springframework.beans.factory.annotation.Autowired;
import org.springframework.boot.context.properties.EnableConfigurationProperties;
import org.springframework.stereotype.Service;

import java.io.IOException;
import java.util.HashMap;

@Slf4j
@EnableConfigurationProperties({BaiduProperties.class})
@Service
public class BaiduSpeakServiceImpl implements BaiduSpeakService {
    @Autowired
    private BaiduProperties baiduProperties;


    @Override
    public void saveAudio(TextVo textVo) {
        log.info("saveAudio:已进入");
        // 初始化一个AipSpeech
        AipSpeech client = new AipSpeech(baiduProperties.getAPP_ID(), baiduProperties.getAPI_KEY(), baiduProperties.getSECRET_KEY());

        // 可选:设置网络连接参数
        client.setConnectionTimeoutInMillis(2000);
        client.setSocketTimeoutInMillis(60000);

        //可选配置语速
        HashMap<String, Object> options = new HashMap<String, Object>();
        if(textVo.getSpd()!=null){
            options.put("spd", textVo.getSpd());
        }
        if(textVo.getPit()!=null){
            options.put("pit", textVo.getPit());
        }
        if(textVo.getPer()!=null){
            options.put("per", textVo.getPer());
        }

        // 可选:设置代理服务器地址, http和socket二选一,或者均不设置
        //client.setHttpProxy("proxy_host", proxy_port);  // 设置http代理
        //client.setSocketProxy("proxy_host", proxy_port);  // 设置socket代理

        // 可选:设置log4j日志输出格式,若不设置,则使用默认配置
        // 也可以直接通过jvm启动参数设置此环境变量
        //System.setProperty("aip.log4j.conf", "log4j.properties");

        // 调用接口
        TtsResponse res = client.synthesis(textVo.getText(), "zh", 1, options);
        byte[] data = res.getData();
        JSONObject res1 = res.getResult();
        if (data != null) {
            try {
                Util.writeBytesToFileSystem(data, "D:/"+textVo.getName());
            } catch (IOException e) {
                e.printStackTrace();
            }
        }
        if (res1 != null) {
            System.out.println(res1.toString(2));
        }
    }
}
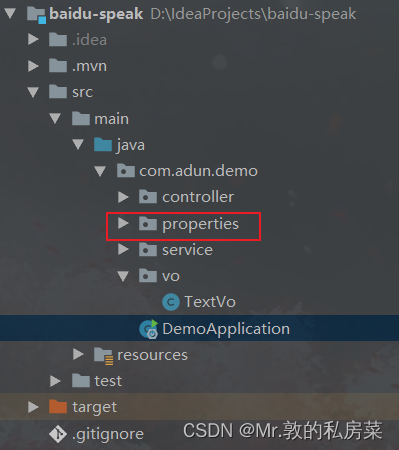
使用映射类方式二
如果有许多的映射类需要生效,我们可以将所有的Properties映射类放入同一个包中,在启动类中使用@ConfigurationPropertiesScan(“映射类包路径”)进行扫描
项目结构
package com.adun.demo;

import org.springframework.boot.SpringApplication;
import org.springframework.boot.autoconfigure.SpringBootApplication;
import org.springframework.boot.context.properties.ConfigurationPropertiesScan;

@SpringBootApplication
@ConfigurationPropertiesScan("com.atguigu.demo.properties")
public class DemoApplication {

    public static void main(String[] args) {

        SpringApplication.run(DemoApplication.class, args);
    }
}
@PropertySource注解
基于@PropertySource注解读取配置
@PropertySource注解是Spring框架中的注解之一,它用于指定一个或多个属性文件的位置,以便在应用程序中读取属性值。使用该注解可以在不同的环境中配置不同的属性文件,比如开发环境、测试环境和生产环境等。
@PropertySource注解通常与@Value注解一起使用,@Value注解用于注入属性值,@PropertySource注解则用于指定属性文件的位置。
该注解有两个属性:
-
value:指定一个或多个属性文件的位置。多个文件可以用逗号或空格分隔。路径可以是类路径(classpath:)或文件系统路径(file:)。
-
ignoreResourceNotFound:如果设置为true,当指定的属性文件不存在时不会抛出异常,默认为false。
例如,以下代码片段展示了如何使用@PropertySource注解:
@Configuration
@PropertySource("classpath:application.properties")
public class AppConfig {

    @Value("${my.property}")
    private String myProperty;

    // ...
}
在上面的示例中,@PropertySource注解指定了"application.properties"文件的位置,@Value注解注入了"my.property"属性的值。


 7602
7602


 被折叠的 条评论
为什么被折叠?
被折叠的 条评论
为什么被折叠?
 到【灌水乐园】发言


