


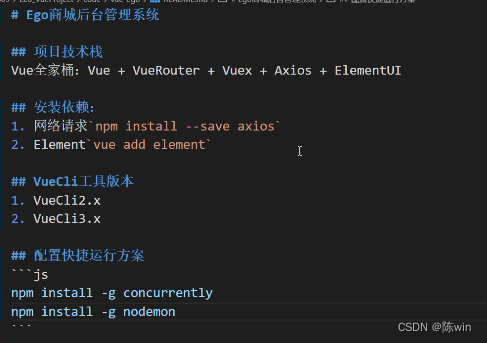
vue实战项目-ego商城
搭建项目
提前cmd查一下vue -V查看vuecli的版本,我本来的版本太高跟这个教程完全对不上,所以重新下载了低版本的vuecli
从5.0.4降到3.11.0,因为elementUI只能支持到vuecli3的版本
低版本vuecli安装教程
在VScode里面直接输入vue create ego_cz即可,后面的ego_cz是项目名

但是一开始报错Error: command failed: npm install --loglevel error --legacy-peer-deps
后来发现需要用管理员身份打开IDEA才可以。
搭建项目过程就不讲了,有router和vuex就可以了。
创建好项目之后,cd ego_cz,进入自己的项目目录。
接下来去安装依赖
1.axios //npm install --save axios
2.element //vue add element 选择部份依赖即可
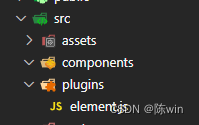
安装完依赖,直接去element官网,快速上手部分找到全部组件,用这些替换plugins目录下的element.js内容
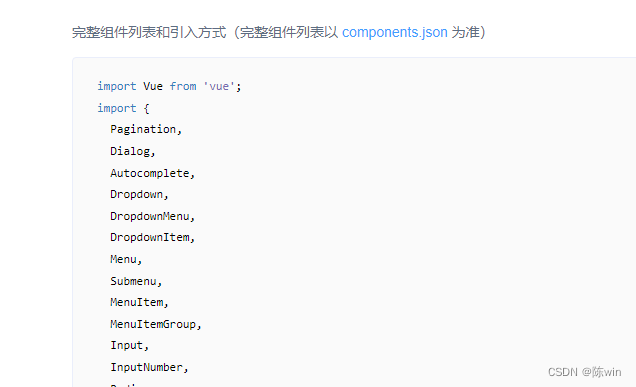
里面全是vue2的写法,所以想用这个必须降低vuecli的版本号。唉,搞这个也搞半天。
之后执行npm run serve,查看能否正常进入vue展示页面,并且在中间有个el-button的按钮。这代表依赖都装好了。
页面搭建
views目录下是我们的页面文件,把里面的aboutview删掉以及component目录下的helloword都删掉。
注意:文件name设置不能使用简单的一个词,不然会报错,类似下图:

所以我把每个view文件后面都添加了View让其变得复杂。
首先在views目录下建立LayoutView.vue文件,作为整体的布局。
里面包含首页、产品管理、规格参数、广告分类四大子模块
因此我们为这四个模块建立了一个目录交main,首页就是HomeView.vue不用动,另外要在目录里创建三个文件
分别是:ProductView.vue,ParamsView.vue,ADCategory.vue
为了解决报错问题,我们要将与之前删掉的aboutbiew和helloword相关的文件内容都删掉,并且要改变router设置。
//App.vue
<template>
  <div id="app">
    <router-view></router-view>
  </div>
</template>
//LayoutView.vue
<template>
    <div>
        <!-- 登录界面 -->
        <router-view></router-view>
    </div>
</template>

<script>
export default {

    name:'LayoutView',
}
</script>
//ProductView.vue
<template>
    <div>
        商品管理
    </div>
</template>
<script>
export default {

name:'ProductView',
}
</script>
其他两个同理,先简单写出来,测试路由是否可行
接下来去解决路由问题,打开router里面的index.js,首先从文件中引入LayoutView,把本来的homeview改成我们的LayoutView,在给这个路径下面添加子模块路由。
//  src/router/index.js
import Vue from 'vue'
import VueRouter from 'vue-router'
import HomeView from '../views/main/HomeView.vue'
import LayoutView from '../views/LayoutView.vue'
Vue.use(VueRouter)

const routes = [
  {

    path: '/',
    name: 'LayoutView',
    component: LayoutView,
    children: [
    //以下都是layout子元素
      {

        //path啥也不加进来的就是home这个页面
        path: '',
        name: 'Home',
        component:HomeView
      },
      {

        // 加上product就进入了产品页面
        path: 'product',
        name: 'ProductView',
        component:() => import('../views/main/ProductView.vue')
      },
      {

        path: 'params',
        name: 'ParamsView',
        component:() => import('../views/main/ParamsView.vue')
      },
      {

        path: 'ad',
        name: 'ADCategory',
        component:() => import('../views/main/ADCategory.vue')
      },
    ]
  },
]
路由设置完成,运行路由加上path部分查看页面跳转。

为了实现基本的css
我们在assets下面新建css目录,在里面新建common.css文件
body, div, dl, dt, dd, ul, ol, li, h1, h2, h3, h4, h5, h6, pre, form, fieldset, legend, input, textarea, button, p, blockquote, th, td
{
   margin: 0;padding: 0;}
body{
   text-align: center;}
li{
    list-style: none;}
a{
   text-decoration: none;}
input,button,img{
   border: none}
.active{

    color:#409EFF
}
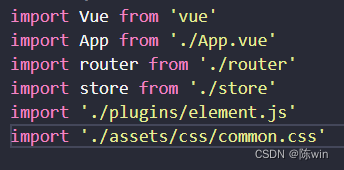
并且记得在main.js里面导入这个css文件
登录UI实现
路由限制(没有登陆时不得进入主页)
在router目录下建立permission.js
import router from "./index";   //引入路由对象  在index.js文件里面export default router
//用户未登录时,无法进入这个首页,所以要设置路由权限
router.beforeEach((to, from, next) => {

    if (to.meta.isLogin) {

        let token = false;
        if (token) {

            // 已经登陆直接进入
            next();
        } else {

            next({

                // 没有登陆就改变路由进入登录界面
                name:'LoginView'
            })
        }
    } else {

        next();
    }
})
在main.js里面添加引用
import './router/permission'
登录注册页面(写到同一个页面上)
在最外层写一层div确定登陆注册框大概位置,在里面写一层elementUI里面的card,并确定好其大小。
lang='less’会报错,npm安装依赖即可
//html部分
<template>
    <!-- 登录注册界面,与Layout级别一样 -->
    <div class="login">
        <el-card class="box-card">
            <!-- slot插槽,可以往里面填写想要的内容 -->
        <div slot="header" class="clearfix">
            <span>Ego商城</span>
        </div>
        内容部分
    </el-card>
    </div>
</template>
//css样式
<style scoped lang='less'>
// lang=“less” 可以敲层级关系的样式
// scoped 使style内的样式只作用于当前的界面
.login{

    width: 1200px;
    margin:0 auto;
    .box-card{

        width: 500px;
        margin: 100px
最低0.47元/天 解锁文章


 1022
1022


 被折叠的 条评论
为什么被折叠?
被折叠的 条评论
为什么被折叠?
 到【灌水乐园】发言


