


一、grains简介
- Grains是SaltStack的一个组件,存放在saltstack的minion端
- 当salt-minion启动时会把收集到的数据静态存放在Grains当中,只有当minion重启时才会进行数据的更新
- 由于grains是静态数据,因此不推荐经常求修改它。
- 应用场景:
- 信息查询,可用作CMDB
- 在target中使用,匹配minion
- 在state系统中使用,匹配管理模块
二、grains中常用指令
1.grians查看
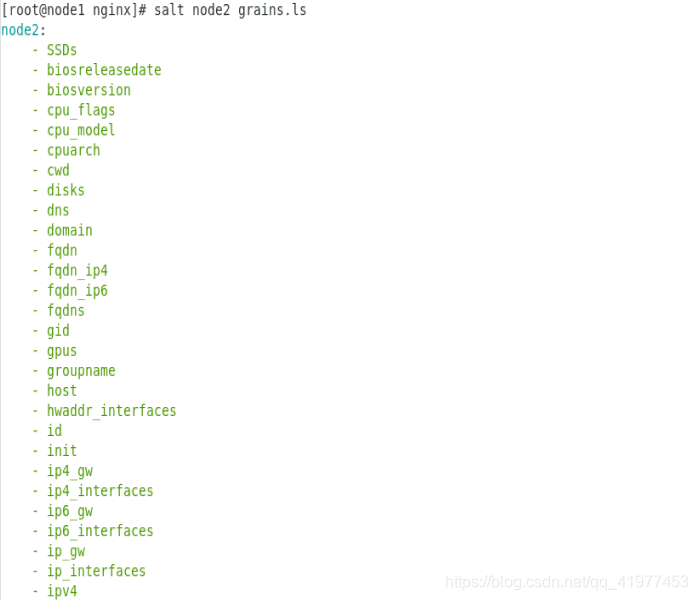
[root@node1 nginx]# salt node2 grains.ls | wc -l  #查看有多少个
78
[root@node1 nginx]# salt node2 grains.item ipv4  #具体显示每一个
node2:
    ----------
    ipv4:
        - 127.0.0.1
        - 172.25.7.132
[root@node1 nginx]# salt node2 grains.item fqdn
node2:
    ----------
    fqdn:
        node2
[root@node1 nginx]# salt node2 grains.ls #所有的列出

2.grains的添加
如果grains不够用,有两种方法添加grains:
(1)在minion文件里,添加完需要重启服务。以node2为例:
vim /etc/salt/minion
[root@node2 salt]# systemctl restart salt-minion

(2)在/etc/salt/里,新建grains ,以node3为例:
[root@node3 salt]# vim grains
hahaha: nginx
[root@node1 nginx]# salt node3 saltutil.sync_grains #在master同步一下
node3:
[root@node1 nginx]# salt node3 grains.item hahaha
node3:
----------
hahaha:
nginx
3)在salt-master端建立_grains目录:
[root@node1 salt]# pwd
/srv/salt
[root@node1 salt]# mkdir  _grains
[root@node1 salt]# cd _grains/
[root@node1 _grains]# vim my_grain.py
	def my_grain():
	  grains = {}
	  grains['salt'] = 'stack'
	  grains['hello'] = 'world'
	  return grains
[root@node1 _grains]# salt '*' saltutil.sync_grains  #同步到所有minion里
node2:
node3:
[root@node1 _grains]# salt '*' grains.item salt
node3:
    ----------
    salt:
        stack
node2:
    ----------
    salt:
        stack
3.grains,在target中匹配minion:
[root@node1 _grains]# salt -G hahaha:nginx cmd.run hostname
node3:
node3
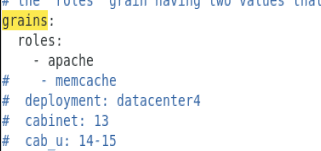
[root@node1 _grains]# salt -G roles:apache cmd.run hostname
node2:
node2
[root@node1 _grains]# salt -G salt:stack cmd.run hostname
node2:
node2
node3:
node3
4.在top文件中匹配
[root@node1 salt]# ls
apache  _grains  _modules  nginx  top.sls
[root@node1 salt]# vim top.sls
base:
  'roles:apache':
    - match: grain
    - apache
  'hahaha:nginx':
    - match: grain
    - nginx
[root@node1 salt]# salt '*' state.highstate  #高级模式,自动读取top.sls文件
三、pillar简介
- pillar和grains一样也是一个数据系统,但是应用场景不同
- pillar是将信息动态的存放在master端,主要存放私密,敏感信息(如用户密码等),而且可以制定某一个minion才可以看到对应的信息
- pillar更加适合在配置管理中运用
1.pillar的默认目录是在/srv/pillar,若没此目录,则需创建。
[root@node1 pillar]# pwd
/srv/pillar
[root@node1 pillar]# vim web.sls
	{% if grains['fqdn'] == 'node3' %}
	webserver: jj
	{% elif grains['fqdn'] == 'node2' %}
	webserver: kk
	{% endif %}
	port: 80
[root@node1 pillar]# vim top.sls
	base:
	  '*':
	   - web
[root@node1 pillar]# salt '*' pillar.items
node2:
    ----------
    port:
        80
    webserver:
        kk
node3:
    ----------
    port:
        80
    webserver:
        jj
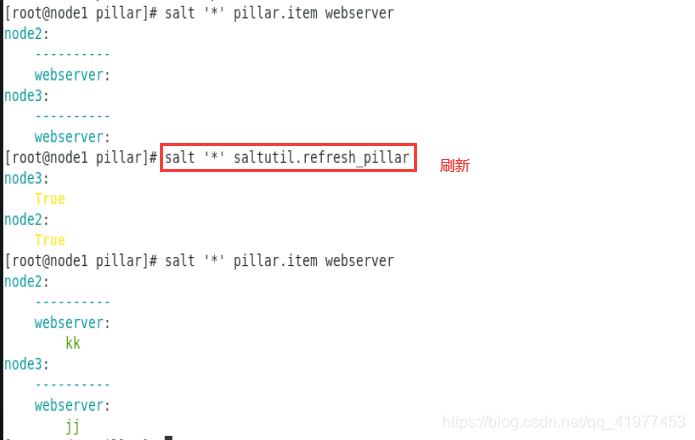
刷新pillar数据:
- [root@node1 pillar]# salt ‘*’ saltutil.refresh_pillar
查询pillar数据:
- salt ‘*’ pillar.items
- salt ‘*’ grains.item roles
2.pillar数据匹配
[root@node1 pillar]# cat /srv/pillar/web.sls
{% if grains['fqdn'] == 'node3' %}
webserver: nginx
{% elif grains['fqdn'] == 'node2' %}
webserver: httpd
{% endif %}
port: 80

[root@node1 apache]# vim /srv/salt/apache/init.sls
install-apache:
  pkg.installed:
    - pkgs:
      - {{ pillar['webserver'] }}
      - httpd-tools
      - php
  service.running:
    - name: {{ pillar['webserver'] }}
    - enable: True
    - watch:
      - file: /etc/httpd/conf/httpd.conf
/etc/httpd/conf/httpd.conf:
  file.managed:
    - source: salt://apache/httpd.conf
四、Jinja模版
- Jinja是一种基于python 的模板引擎,在SLS文件里可以直接使用jinja 模版来做一些操作
- 通过jinaja模版可以为不同服务器定义各自的容量
- 两种分割符:{%…%}和{{…}},前者用于执行诸如for循环或赋值的语句,后者可以把表达式的结果打印模版上。通俗的说就是赋值和引用。
1.jina最基本的用法控制结构包装条件:
[root@node1 salt]# vim /srv/salt/test.sls
/mnt/testfile:
  file.append:
    {% if grains['fqdn'] == 'node2' %}
    - text: node3          #先是node2执行一次,改为node3,node4再执行一次。同样的内容不变,不同的内容追加
    - text: ndoe4
    {% elif grains['fqdn'] == 'node3' %}
    - text: node3
    {% endif %}
[root@node1 salt]# salt '*' state.sls test
[root@node2 salt]# cat /mnt/testfile
node2
nod3
ndoe4
[root@node3 salt]# cat /mnt/testfile
node3
2.jinja在普通模版中的使用
[root@node1 apache]# pwd
/srv/salt/apache
[root@node1 apache]# vim httpd.conf #见下图,将listen,引用端口
[root@node1 apache]# vim init.sls
install-apache:
pkg.installed:
- pkgs:
- {{ pillar['webserver'] }}
- httpd-tools
- php
service.running:
- name: {{ pillar['webserver'] }}
- enable: True
- watch:
- file: /etc/httpd/conf/httpd.conf
file.managed:
- source: salt://apache/httpd.conf
- name: /etc/httpd/conf/httpd.conf
- template: jinja
- context:
port: 8080
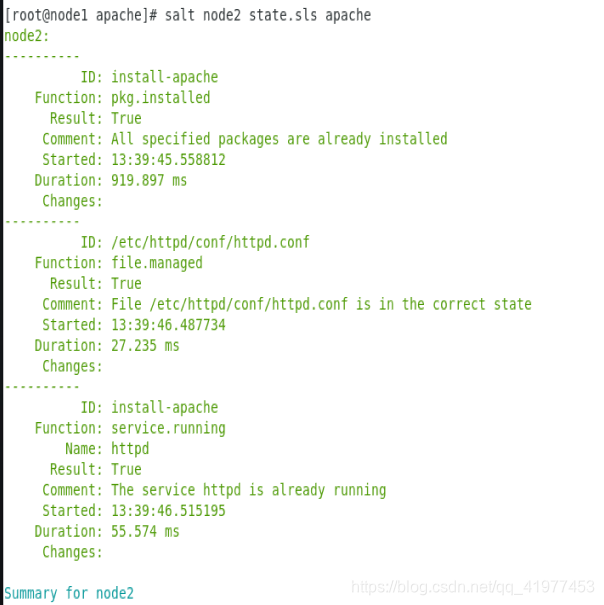
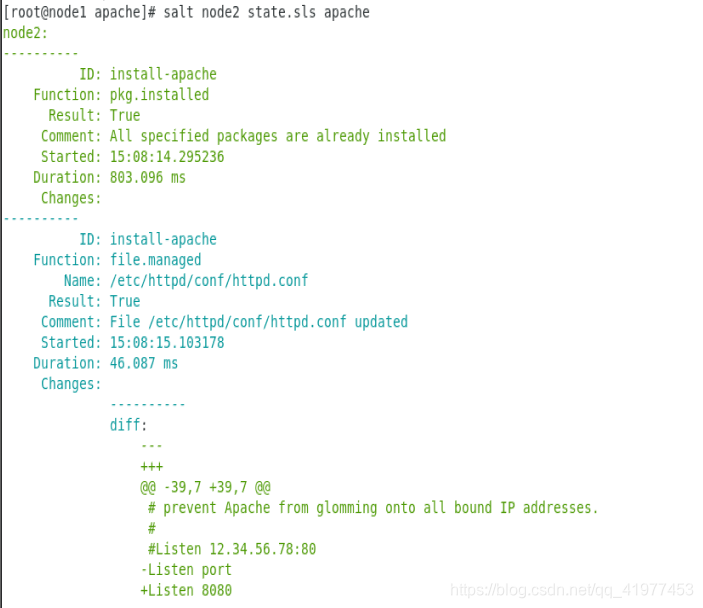
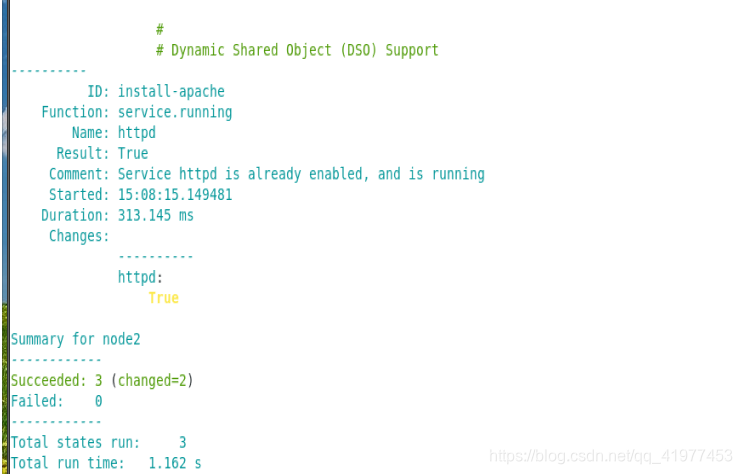
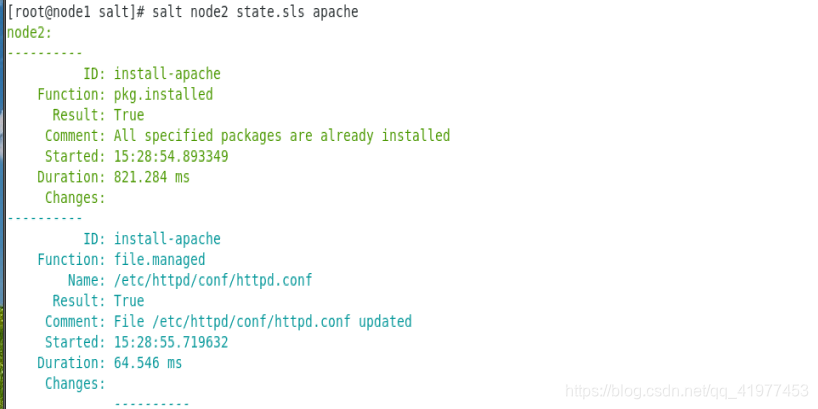
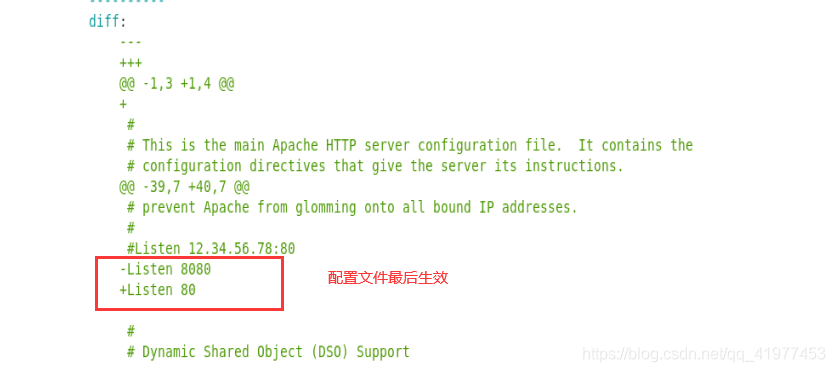
[root@node1 apache]# salt node2 state.sls apache
将配置文件中的端口改为变量引用:

执行成功
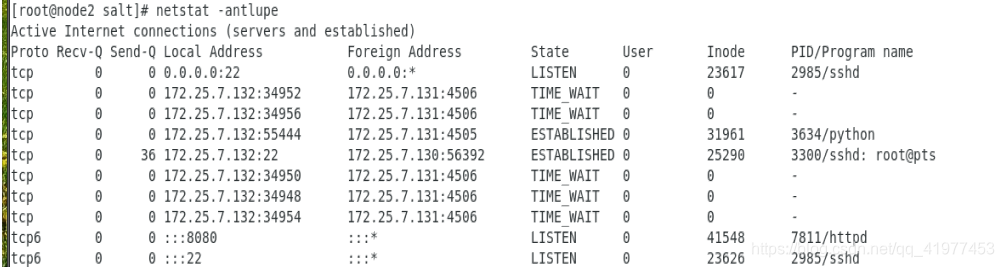
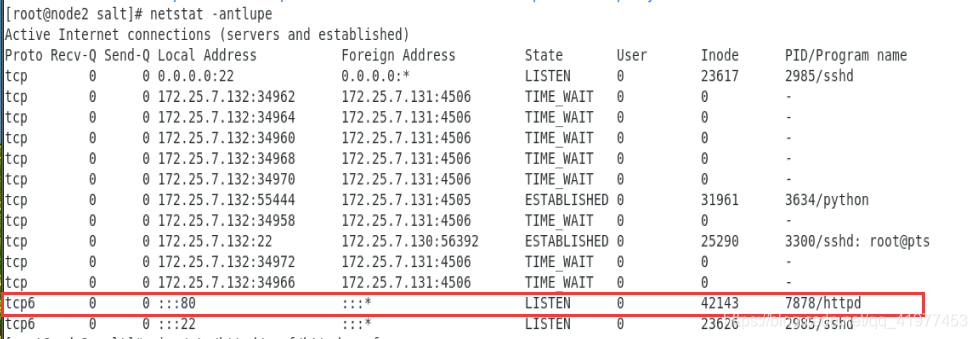
在node2查看端口:
3.import方式,可在state文件之间共享
定义变量文件:
vim lib.sls
  {% set port = 80 %}
导入模版文件:
vim httpd.conf
 {% from 'lib.sls' import port %}
 Listen {{ port }}

[root@node1 salt]# vim lib.sls
  {% set port = 80 %}

[root@node1 salt]# vim apache/init.sls
install-apache:
  pkg.installed:
    - pkgs:
      - {{ pillar['webserver'] }}
      - httpd-tools
      - php
  service.running:
    - name: {{ pillar['webserver'] }}
    - enable: True
    - watch:
      - file: /etc/httpd/conf/httpd.conf
  file.managed:
    - source: salt://apache/httpd.conf
    - name: /etc/httpd/conf/httpd.conf
    - template: jinja
    - context:
      port: 8080
[root@node1 salt]# vim apache/httpd.conf


[root@node1 salt]# salt node2 state.sls apache
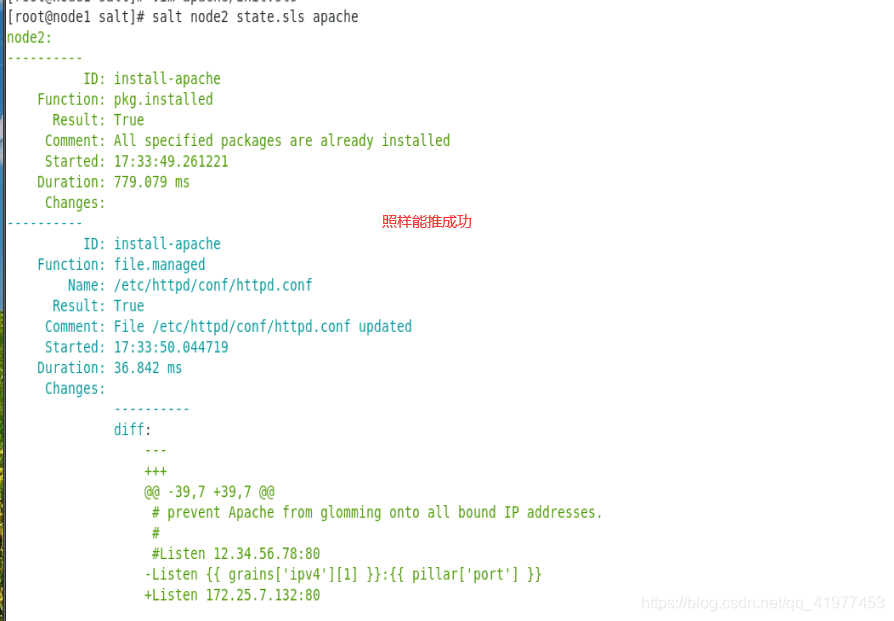
4.变量,grains引用:
 直接引用grains变量:
Listen {{ grains['ipv4'][1] }}
 直接引用pillar变量:
Listen {{ pillar['port']}}
 在state文件中引用:
 - template: jinja
   - content:
     bind: {{ pillar['port'] }}
[root@node1 salt]# vim apache/init.sls
install-apache:
  pkg.installed:
    - pkgs:
      - {{ pillar['webserver'] }}
      - httpd-tools
      - php
  service.running:
    - name: {{ pillar['webserver'] }}
    - enable: True
    - watch:
      - file: /etc/httpd/conf/httpd.conf
  file.managed:
    - source: salt://apache/httpd.conf
    - name: /etc/httpd/conf/httpd.conf
    - template: jinja
    - context:
      port: 8080
      bind: {{ grains['ipv4'][1] }}    #file.managed,
[root@node1 salt]# vim apache/httpd.conf

[root@node1 salt]# salt node2 state.sls apache
[root@node2 salt]# vim /etc/httpd/conf/httpd.conf

也可直接将变量直接写进httpd.conf里:


5.用pillar安装keeplived
[root@node1 salt]# pwd
/srv/salt
[root@node1 salt]# mkdir keepalived
[root@node1 keepalived]# vim init.sls #首先安装keeplived,获取keepalived.conf文件
install-keepalived:
pkg.installed:
- name: keepalived
[root@node1 keepalived]# vim init.sls
[root@node1 keepalived]# salt '*' state.sls keepalived
[root@node1 keepalived]# scp node2:/etc/keepalived/keepalived.conf .
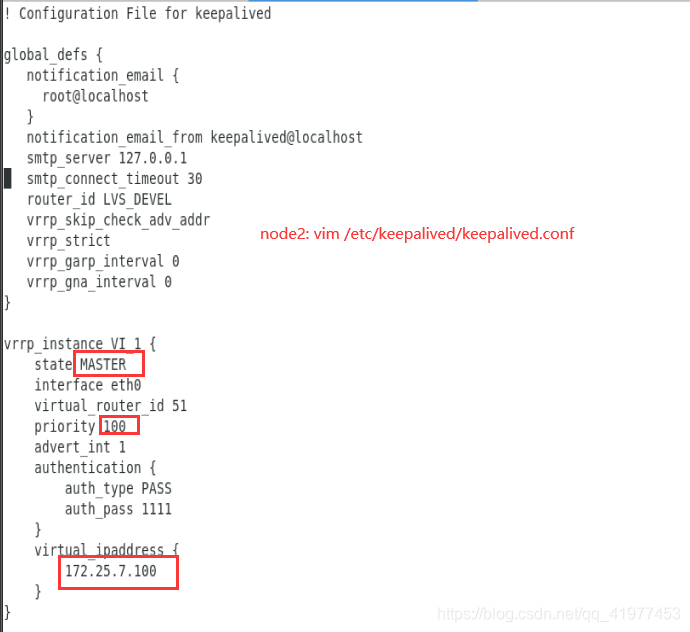
[root@node1 keepalived]# vim keepalived.conf #编辑配置文件,写入变量
! Configuration File for keepalived
global_defs {
notification_email {
root@localhost
}
notification_email_from keepalived@localhost
smtp_server 127.0.0.1
smtp_connect_timeout 30
router_id LVS_DEVEL
vrrp_skip_check_adv_addr
vrrp_strict
vrrp_garp_interval 0
vrrp_gna_interval 0
}
vrrp_instance VI_1 {
state {{ STATE }} #变量
interface eth0
virtual_router_id 51
priority {{ PRI }} #优先级变量
advert_int 1
authentication {
auth_type PASS
auth_pass 1111
}
virtual_ipaddress {
{{ VIP }} #VIP变量
}
}
[root@node1 keepalived]# vim init.sls
install-keepalived:
pkg.installed:
- name: keepalived
file.managed:
- name: /etc/keepalived/keepalived.conf
- source: salt://keepalived/keepalived.conf
- template: jinja
- context:
STATE: {{ pillar['state'] }}
PRI: {{ pillar['pri'] }}
VIP: {{ pillar['vip'] }}
service.running:
- name: keepalived
- watch:
- file: /etc/keepalived/keepalived.conf
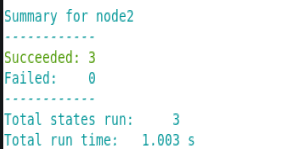
[root@node1 keepalived]# salt '*' state.sls keepalived
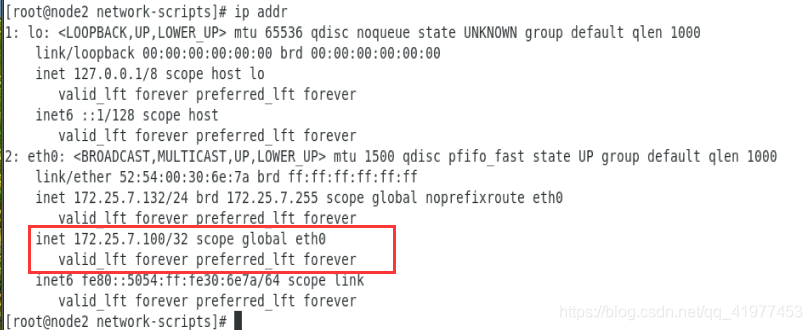
执行成功,node2上查看:
五、Job管理
-
master在下发指令任务时,会附带上产生的jid。
-
minion在接受指令开始执行时,会在本地的/var/cache/salt/minion/pron目录下产生该jid命名的文件,用于在执行过程中master查看当前任务的执行情况。
-
指令执行完毕将结果传送给master后,删除该临时文件
-
job缓存默认保存24小时
vim /etc/salt/master
keep_jobs:24 -
master端Job缓存目录
/var/cache/salt/master/jobs
列出当前maser jobs cache中所有job
[root@node1 salt]# salt-run jobs.list_jobs
20200314023346224743:
    ----------
    Arguments:
    Function:
        test.pinh
    StartTime:
        2020, Mar 14 02:33:46.224743
    Target:
        *
    Target-type:
        glob
    User:
        root
       .....  等等
查看某个jid的详细信息:
[root@node1 salt]# salt-run jobs.lookup_jid 20200314023348809486
node2:
    True
node3:
    True
将master收集的jid都传到数据库里:
在node1上安装 mariadb-server和MySQL-python
[root@node1 keepalived]# vim /etc/salt/master
master_job_cache: mysql
mysql.host: 'localhost'
mysql.user: 'salt'
mysql.pass: 'salt'
mysql.db: 'salt'
mysql.port: 3306
[root@node1 ~]# systemctl restart salt-master #重启服务
[root@node1 keepalived]# yum install -y mariadb-server MySQL-python
[root@node1 keepalived]# systemctl start mariadb #开启服务
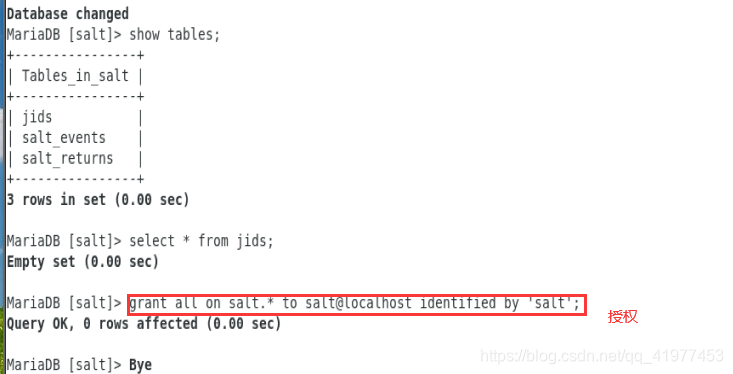
[root@node1 ~]# vim salt.sql
mysql_secure_installation #安全初始化
[root@node1 ~]# mysql < salt.sql #导入数据模版
[root@node1 ~]# mysql
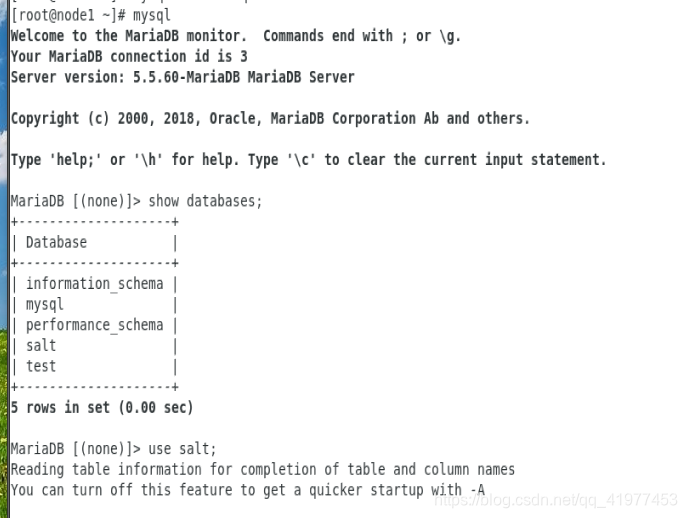
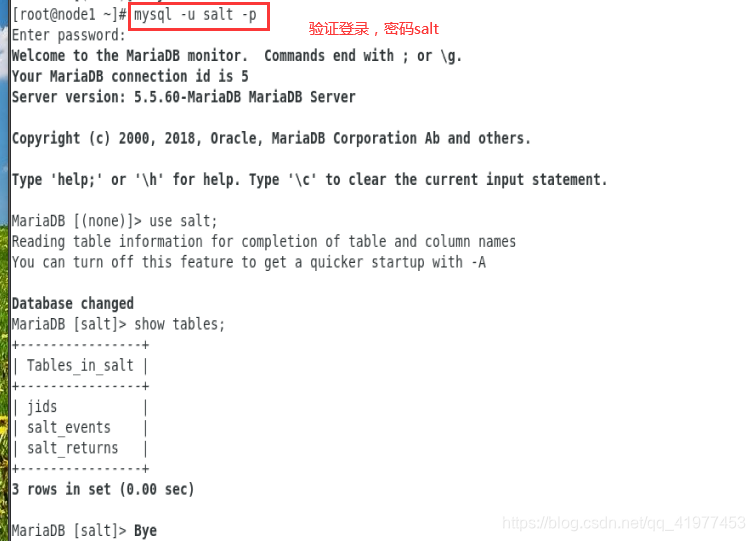
在命令行运行指令:
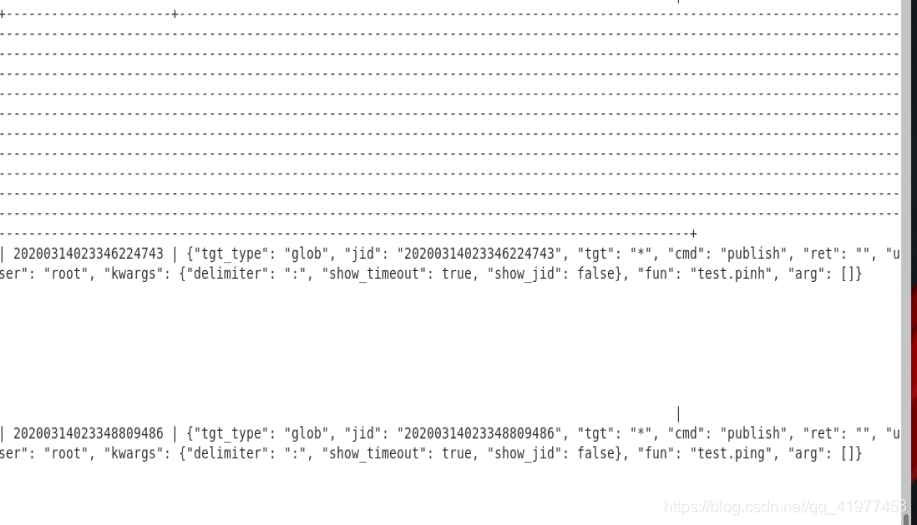
[root@node1 salt]# salt ‘’ test.ping
[root@node1 salt]# salt '’ state.sls keepalived
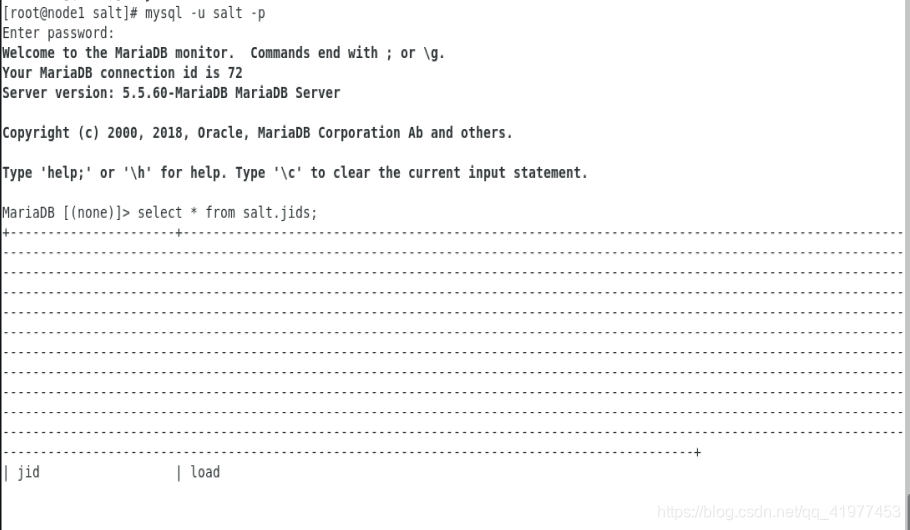
再次进入数据库查看,可看到jid信息:
六、salt-ssh 与salt-syndic
1.salt-ssh
不需要在minion端装什么软件,之前在node2上装有salt-minion,现在关闭该服务
[root@node2 ~]# systemctl stop salt-minion
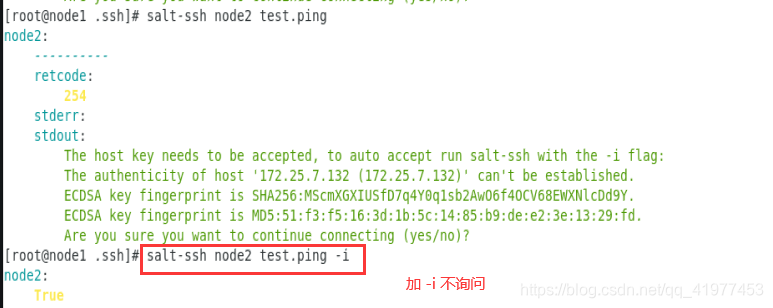
[root@node1 .ssh]#yum install -y salt-ssh
若/root/.ssh/known_hosts 有node2解析,则直接可以,若没有,会询问是否连接,加-i 参数不询问。
或者在/root/.ssh建立config目录:
[root@node1 .ssh]# vim config
StrictHostKeyChecking no
则不用再输-i,没有询问。
2. salt-syndic
salt-syndic其实就是个代理,隔离master与minion,syndic必须运行在master上,再连接到另一个topmaster上。Topmaster下发的状态需要通过syndic传递给下级master,minion传递给master的数据也是有syndic传递给topmaster。
topmaster并不知道有多少个minion,syndic与topmaster的fie_roots和pillar_roots目录要保持一致。
| node1 | salt-master |
|---|---|
| node2 | salt-minion |
| node3 | salt-minon |
| node4 | salt-master,salt-syndic |
 salt-master配置:
 [root@node1 .ssh]# yum install -y salt-syndic
[root@node1 ~]# systemctl restart salt-syndic
[root@node1 ~]# vim /etc/salt/master
[root@node1 ~]vim /etc/salt/master
syndic_master: 172.25.7.134
[root@node1 ~]# systemctl restart salt-master

topmaster端:
[root@node4 ~]# vim /etc/salt/master
order_masters: True
[root@node4 ~]# systemctl start salt-master
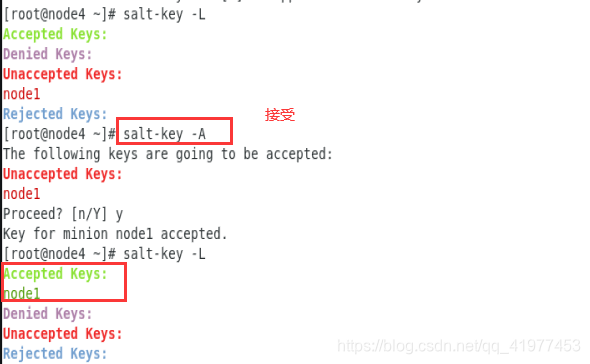

七、salt-api配置
[root@node1 ~]# yum install -y salt-api #安装salt-api
[root@node1 ~]# vim /etc/salt/master.d/eauth.conf
external_auth:
pam:
saltapi:
- .*
- '@wheel'
- '@runner'
- '@jobs'
[root@node1 master.d]# useradd -s /sbin/nologin saltapi #建立用户
[root@node1 master.d]# passwd saltapi #修改密码
Changing password for user saltapi.
New password:
BAD PASSWORD: The password is shorter than 8 characters
Retype new password:
passwd: all authentication tokens updated successfully.
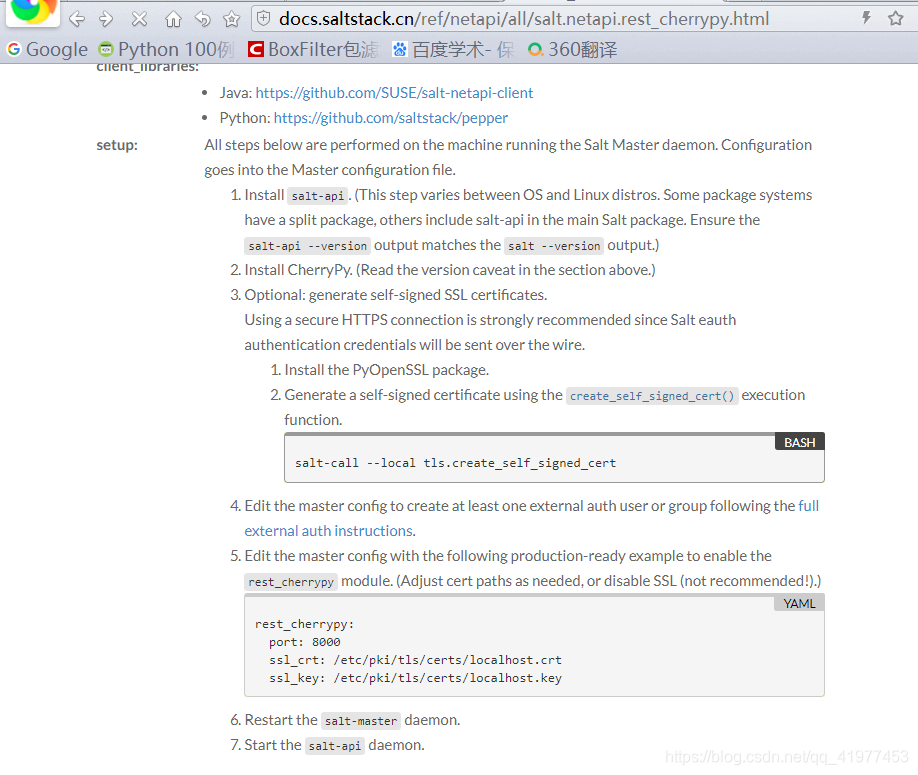
[root@node1 master.d]# vim api.conf
[root@node1 master.d]# cat api.conf
rest_cherrypy:
port: 8000
ssl_crt: /etc/pki/tls/certs/localhost.crt
ssl_key: /etc/pki/tls/private/localhost.key
[root@node1 master.d]# cd /etc/pki/tls/private/
[root@node1 private]# openssl genrsa 2048 > localhost.key
Generating RSA private key, 2048 bit long modulus
.....................+++
..........................................+++
e is 65537 (0x10001)
[root@node1 private]# cd ../certs/
[root@node1 certs]# make testcert
umask 77 ; \
/usr/bin/openssl req -utf8 -new -key /etc/pki/tls/private/localhost.key -x509 -days 365 -out /etc/pki/tls/certs/localhost.crt
You are about to be asked to enter information that will be incorporated
into your certificate request.
What you are about to enter is what is called a Distinguished Name or a DN.
There are quite a few fields but you can leave some blank
For some fields there will be a default value,
If you enter '.', the field will be left blank.
-----
Country Name (2 letter code) [XX]:cn
State or Province Name (full name) []:shanxi
Locality Name (eg, city) [Default City]:xian
Organization Name (eg, company) [Default Company Ltd]:westos
Organizational Unit Name (eg, section) []:linux
Common Name (eg, your name or your server's hostname) []:node1
Email Address []:root@123
[root@node1 certs]# systemctl restart salt-master
[root@node1 certs]# systemctl start salt-api
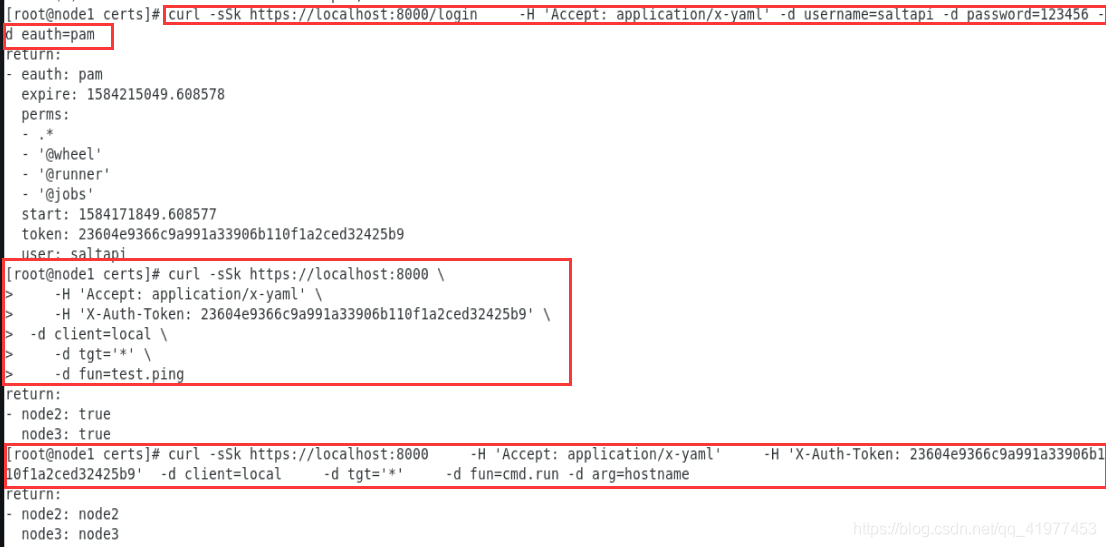
例子:
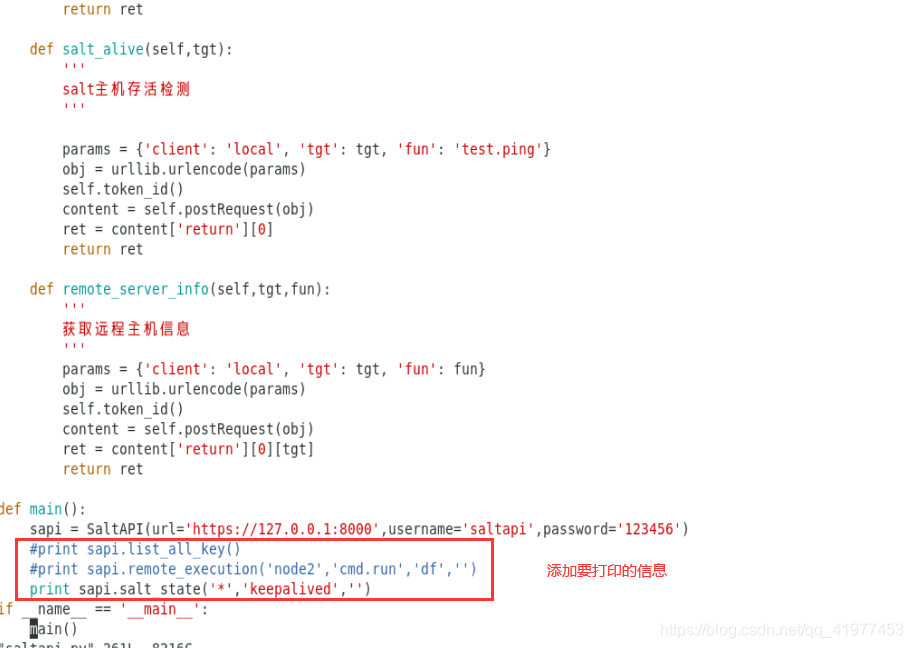
github上的代码:https://github.com/qitan/SOMS/blob/master/deploy/saltapi.py
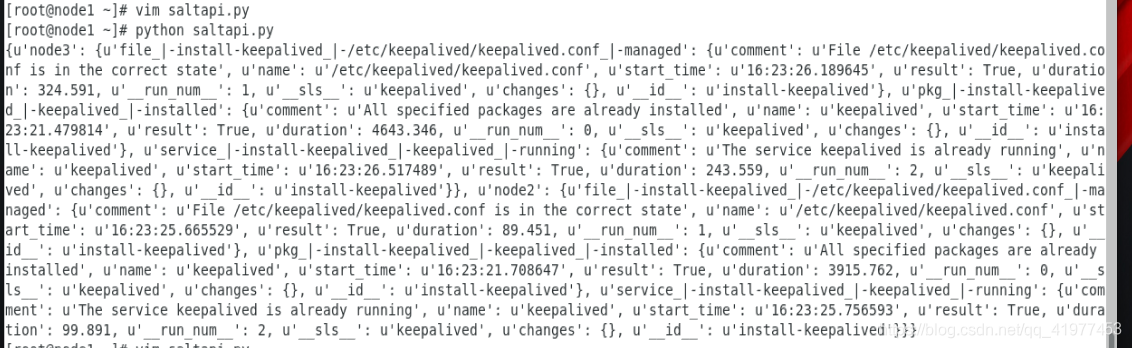
[root@node1 ~]# vim saltapi.py


 423
423


 被折叠的 条评论
为什么被折叠?
被折叠的 条评论
为什么被折叠?
 到【灌水乐园】发言


