


说明:Spring Boot自带的 @Async 注解,加在方法上,可以异步执行。当你需要做异步操作时,与其引入庞大的MQ组件,不妨尝试用这个注解。本文介绍如何使用 @Async 注解,及使用上的一些注意事项。
搭建Demo
首先,搭建一个Demo,pom.xml文件如下:
<?xml version="1.0" encoding="UTF-8"?>
<project xmlns="http://maven.apache.org/POM/4.0.0"
         xmlns:xsi="http://www.w3.org/2001/XMLSchema-instance"
         xsi:schemaLocation="http://maven.apache.org/POM/4.0.0 http://maven.apache.org/xsd/maven-4.0.0.xsd">
    <modelVersion>4.0.0</modelVersion>

    <parent>
        <groupId>org.springframework.boot</groupId>
        <artifactId>spring-boot-starter-parent</artifactId>
        <version>2.7.12</version>
        <relativePath/>
    </parent>

    <groupId>com.hezy</groupId>
    <artifactId>async_demo</artifactId>
    <version>1.0-SNAPSHOT</version>

    <properties>
        <maven.compiler.source>8</maven.compiler.source>
        <maven.compiler.target>8</maven.compiler.target>
        <project.build.sourceEncoding>UTF-8</project.build.sourceEncoding>
    </properties>

    <dependencies>
        <dependency>
            <groupId>org.springframework.boot</groupId>
            <artifactId>spring-boot-starter-web</artifactId>
        </dependency>

        <dependency>
            <groupId>org.projectlombok</groupId>
            <artifactId>lombok</artifactId>
        </dependency>

        <dependency>
            <groupId>com.alibaba</groupId>
            <artifactId>druid-spring-boot-starter</artifactId>
            <version>1.2.8</version>
        </dependency>

        <dependency>
            <groupId>org.mybatis.spring.boot</groupId>
            <artifactId>mybatis-spring-boot-starter</artifactId>
            <version>2.2.2</version>
        </dependency>

        <dependency>
            <groupId>com.mysql</groupId>
            <artifactId>mysql-connector-j</artifactId>
            <scope>runtime</scope>
        </dependency>
    </dependencies>

</project>
实体类,User
import lombok.Data;

import java.io.Serializable;

@Data
public class User implements Serializable {

    private String id;

    private String username;

    private String password;

    private String test;
}
DTO,用于接收参数和返回数据
import lombok.Data;

import java.io.Serializable;

@Data
public class UserDTO implements Serializable {

    private String id;

    private String username;

    private String password;
}
AsyncController,用于演示
import com.hezy.pojo.UserDTO;
import com.hezy.service.UserServiceImpl;
import lombok.extern.log4j.Log4j2;
import org.springframework.beans.factory.annotation.Autowired;
import org.springframework.web.bind.annotation.*;

import java.util.List;

@RestController
@RequestMapping("async")
@Log4j2
public class AsyncController {

    @Autowired
    private UserServiceImpl userService;

    @PostMapping("test1")
    public List<UserDTO> testAsync1(@RequestBody UserDTO userDTO) {
        log.info("进入接口");
        return userService.insert1(userDTO);
    }
}
UserServiceImpl,先插入,插入后查询
import com.hezy.mapper.UserMapper;
import com.hezy.pojo.UserDTO;
import lombok.extern.log4j.Log4j2;
import org.springframework.beans.factory.annotation.Autowired;
import org.springframework.stereotype.Service;
import org.springframework.transaction.annotation.Transactional;

import java.util.List;

@Service
@Log4j2
public class UserServiceImpl {

    @Autowired
    private AsyncServiceImpl asyncService;

    @Autowired
    private UserMapper userMapper;

    @Transactional(rollbackFor = Exception.class)
    public List<UserDTO> insert1(UserDTO userDTO) {
        log.info("进入service");
        asyncService.insertDTO1(userDTO);
        return userMapper.selectAll();
    }
}
AsyncServiceImpl,异步操作实现类
import com.hezy.mapper.UserMapper;
import com.hezy.pojo.UserDTO;
import org.springframework.beans.factory.annotation.Autowired;
import org.springframework.scheduling.annotation.Async;
import org.springframework.stereotype.Service;

@Service
public class AsyncServiceImpl {

    @Autowired
    private UserMapper userMapper;

    @Async
    public void insertDTO1(UserDTO userDTO) {
        userMapper.insertUser(userDTO);
    }
}
UserMapper,数据库操作
import com.hezy.pojo.UserDTO;
import org.apache.ibatis.annotations.Insert;
import org.apache.ibatis.annotations.Mapper;
import org.apache.ibatis.annotations.Param;
import org.apache.ibatis.annotations.Select;

import java.util.List;

@Mapper
public interface UserMapper {

    @Insert("insert into i_users (id, username, password) values(#{user.id}, #{user.username}, #{user.password})")
    void insertUser(@Param("user") UserDTO user);

    @Select("select * from i_users")
    List<UserDTO> selectAll();
}
启动类,需要加 @EnableAsync 注解
import org.mybatis.spring.annotation.MapperScan;
import org.springframework.boot.SpringApplication;
import org.springframework.boot.autoconfigure.SpringBootApplication;
import org.springframework.scheduling.annotation.EnableAsync;

@EnableAsync
@SpringBootApplication
@MapperScan("com.hezy.mapper")
public class Start {
    public static void main(String[] args) {
        SpringApplication.run(Start.class, args);
    }
}
测试
为了效果明显,AsyncServiceImpl 里面的insertDTO1方法,使线程休眠5秒钟,如下:
    @Async
    public void insertDTO1(UserDTO userDTO) {
        try {
            Thread.sleep(5000);
        } catch (InterruptedException e) {
            throw new RuntimeException(e);
        }
        userMapper.insertUser(userDTO);
    }
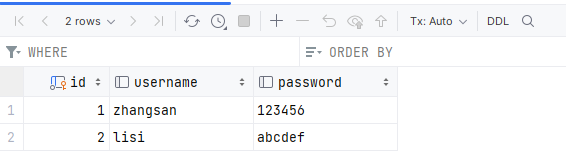
接下来,调用接口,新增一条记录。新增前,数据库如下:
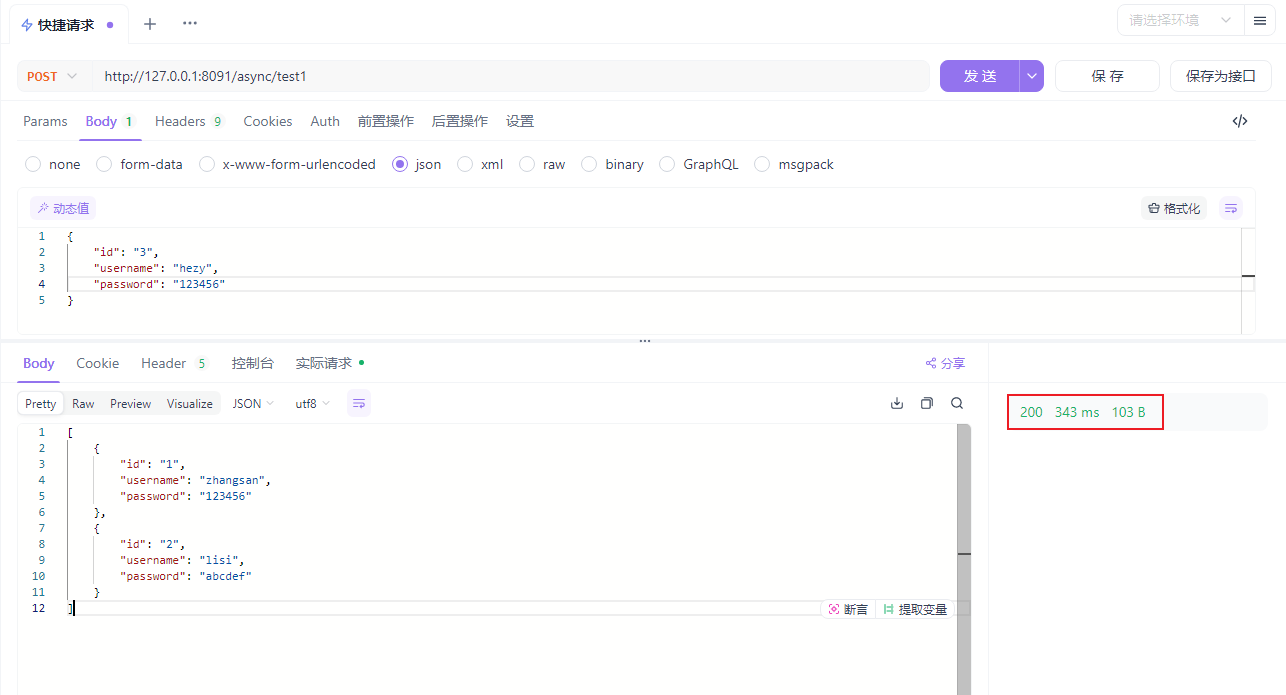
可以看到调用接口后,马上返回结果了。
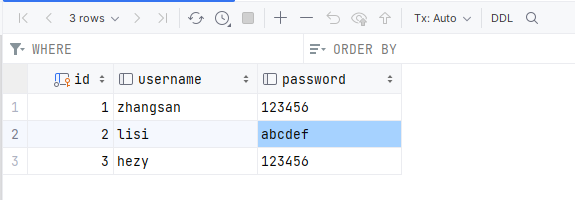
数据库添加成功
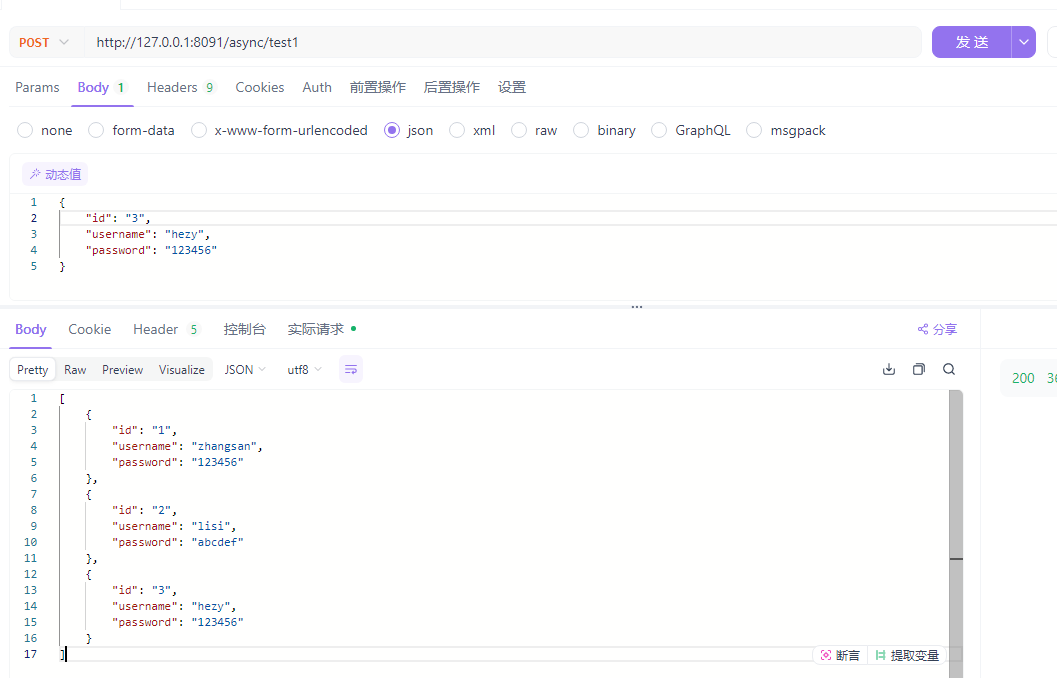
这里隐含一个问题:需要考虑到异步操作的后续查询,可能会因为异步操作未完成而未能查询到预期的数据。把线程休眠代码去掉,还是未能查询出此次新增的记录,但不使用 @Async 注解,同步操作,插入后的查询是能查出完整的数据库记录的,如下:
(同步操作)
    // @Async
    public void insertDTO1(UserDTO userDTO) {
        userMapper.insertUser(userDTO);
    }
(能查出完整的数据库记录)
另外,需要注意:
-
@Async 只能在被Spring管理的Bean内生效,即类被打上@Componet或@Service注解
-
不能在本类中生效,被调用的异步方法不能是本类的成员方法;
更进一步
接着,再来讨论使用 @Async 异步操作的事务问题,如下,在异步操作里手动制造一个异常
(AsyncController,新增一个接口)
    @PostMapping("test2")
    public List<UserDTO> testAsync2(@RequestBody UserDTO userDTO) {
        log.info("进入接口");
        return userService.insert2(userDTO);
    }
(UserServiceImpl)
    @Transactional(rollbackFor = Exception.class)
    public List<UserDTO> insert2(UserDTO userDTO) {
        log.info("进入service");
        asyncService.insertDTO2(userDTO);
        return userMapper.selectAll();
    }
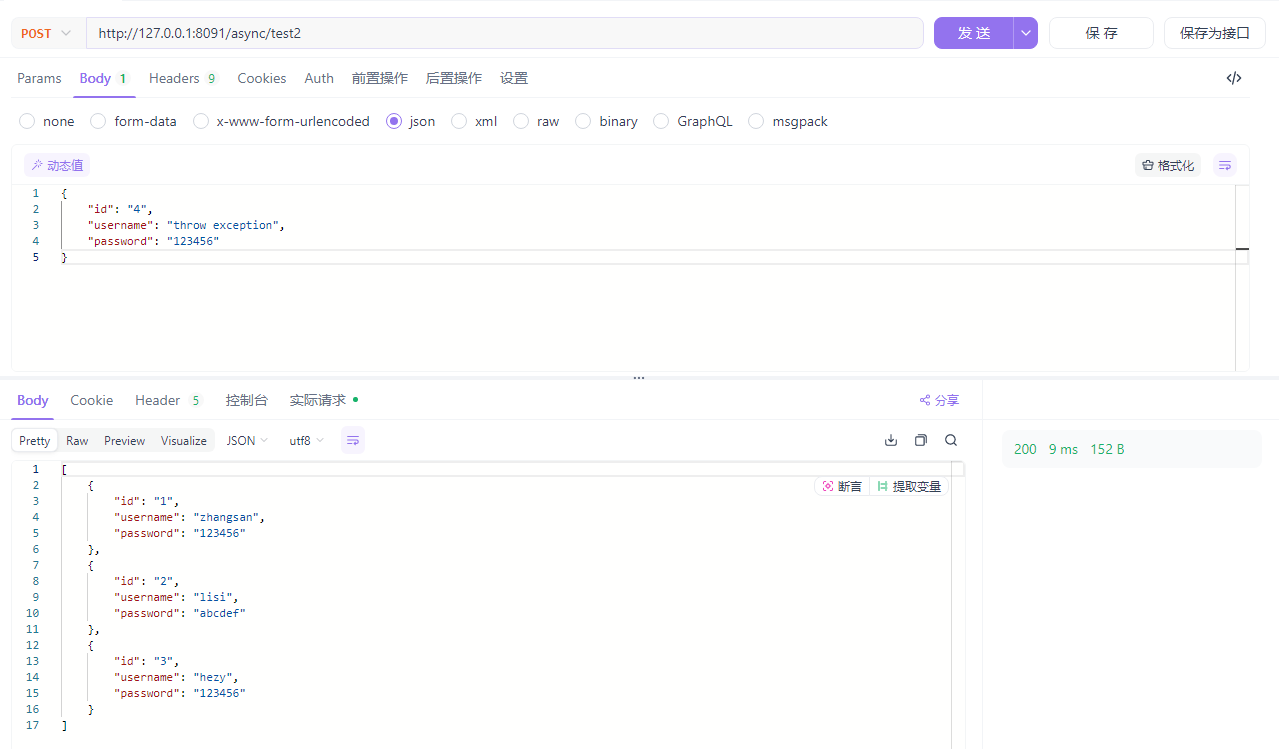
(在异步操作里手动制造一个异常)
    @Async
    public void insertDTO2(UserDTO userDTO) {
        try {
            Thread.sleep(5000);
        } catch (InterruptedException e) {
            throw new RuntimeException(e);
        }
        userMapper.insertUser(userDTO);

        // 手动制造一个异常,测试事务
        int i = 1 / 0;
    }
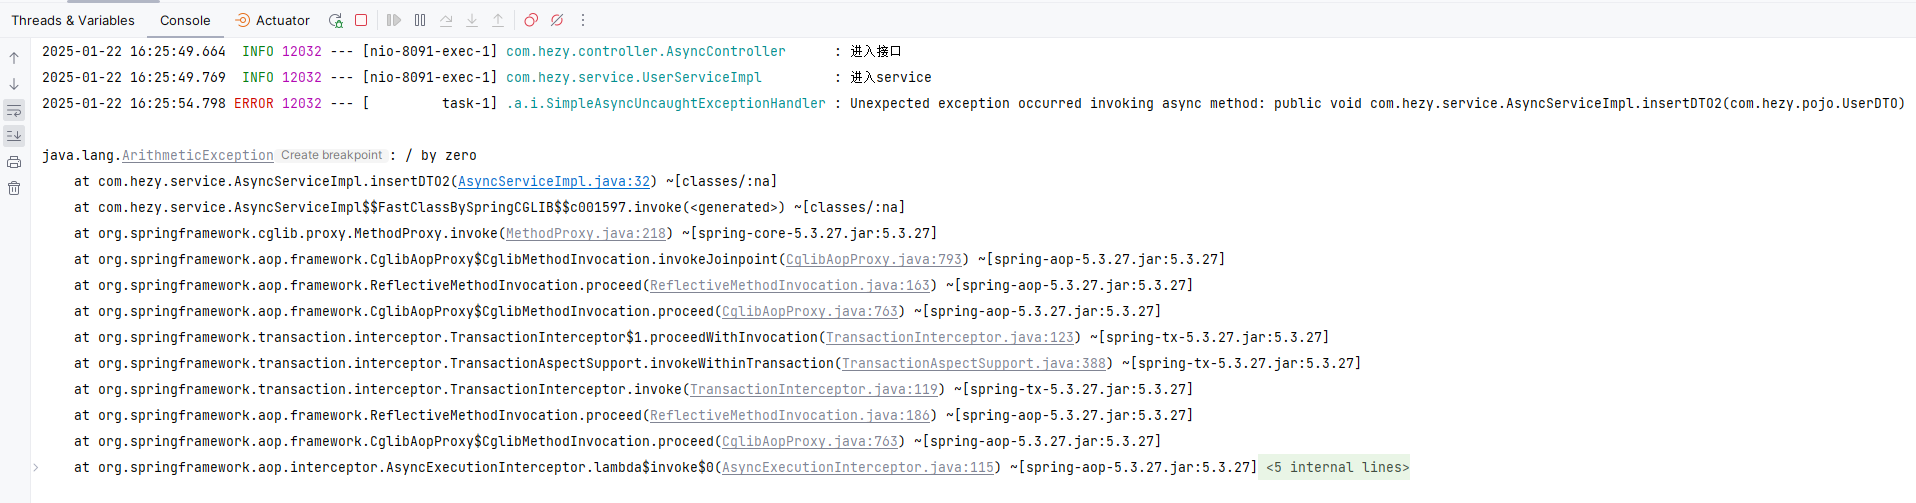
调用接口,触发异常,接口没有返回异常(思考:或许这是个启发,如果你有段逻辑,调用了某个方法,为了避免此方法内抛出了异常而阻塞主逻辑,就可以将此方法改为异步操作。当然,也需要业务上允许,如果主逻辑需要此方法的返回结果,就不能考虑异步)
延迟5秒后,控制台抛出了异常

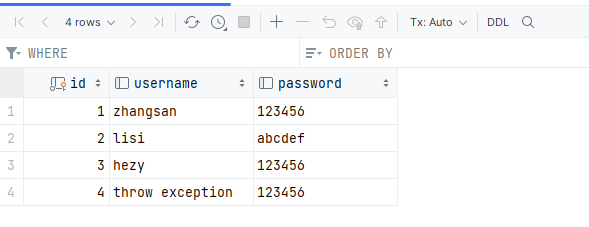
事务没有控制住,数据插入成功。不加 @Async 注解,这种情况事务是能控制住的。
所以,要在异步操作内控制事务,需要在异步方法上再加上一个事务注解,如下:
    @Transactional(rollbackFor = Exception.class)
    @Async
    public void insertDTO2(UserDTO userDTO) {
        try {
            Thread.sleep(5000);
        } catch (InterruptedException e) {
            throw new RuntimeException(e);
        }
        userMapper.insertUser(userDTO);

        // 手动制造一个异常,测试事务
        int i = 1 / 0;
    }
重试,添加一条记录
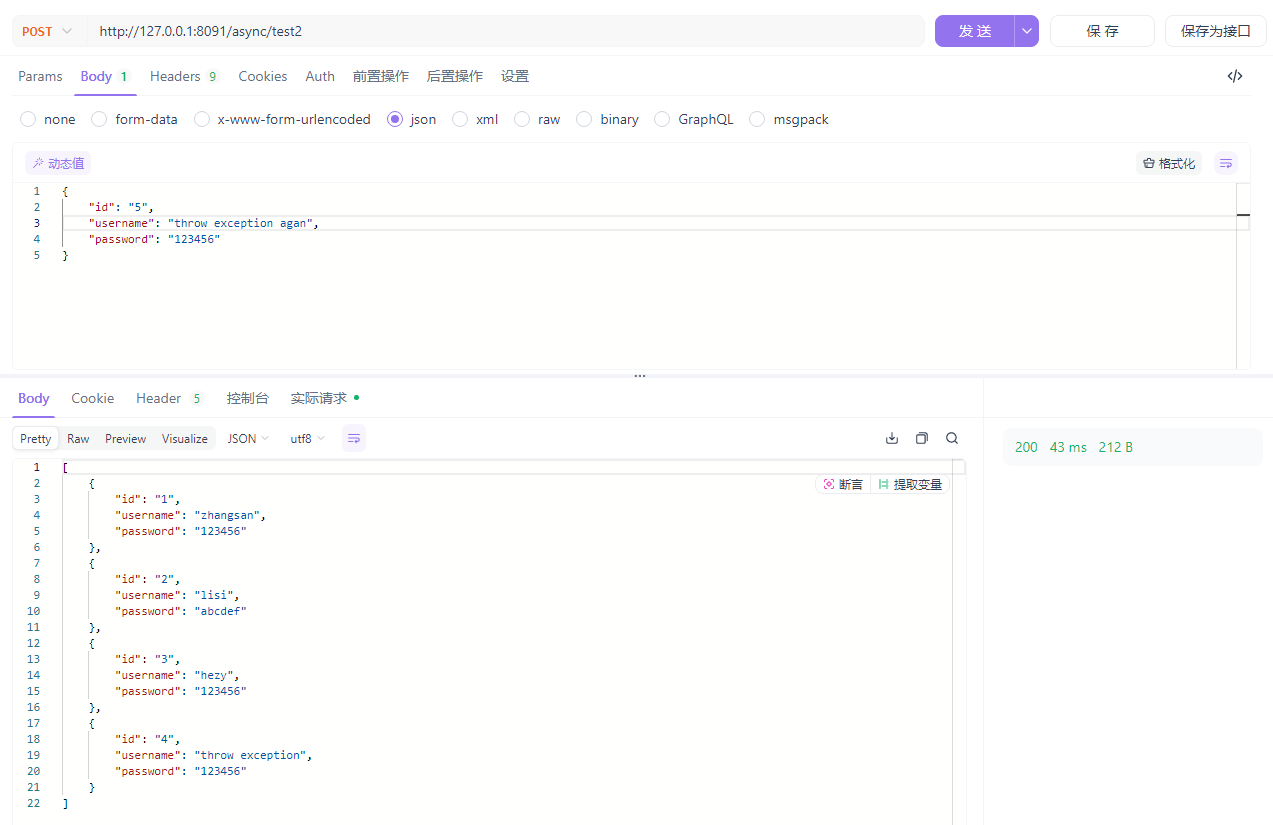
休眠5秒后,代码执行,控制台抛出异常
刷新数据库,没有新增成功,事务生效了。

总结
本文介绍了在Spring Boot中 @Async 的使用,使用 @Async 时,总结以下几点:
-
启动类需要加 @EnableAsync 注解;
-
只能在被Spring管理的Bean内生效,即类被打上 @Componet 或 @Service 注解
-
不能在本类中生效,调用的异步方法不能是本类的成员方法;
-
异步操作的后续查询,可能会因为异步操作未完成而未能查询到预期的数据;
-
调用异步操作方法上的声明式事务无法控制异步操作内的事务,如需把控异步操作内的事务,需另外在异步操作方法上加事务注解;


 620
620

 被折叠的 条评论
为什么被折叠?
被折叠的 条评论
为什么被折叠?
 到【灌水乐园】发言


