


软件版本
							hadoop-2.7.7【hadoop-2.7.7.tar.gz】
							flume-1.7.0【apache-flume-1.7.0-bin.tar.gz】
单击配置
- Hadoop集群【略】
- 解压Flume【略】
- 配置
/usr/apps/flume-1.7.0/conf/flume-env.sh
# 复制Flume配置模板文件
cp flume-env.sh.template flume-env.sh
# 修改flume-env.sh
[root@master conf]# vim flume-env.sh
# 修改Java环境变量
# 第22行
export JAVA_HOME=/usr/apps/jdk1.8.0
log4j.properties是日志输出文件夹,若要指定日志输出则修改,默认不修改,默认存放位置为flume文件夹根目录,即:/usr/apps/flume-1.7.0下,输出日志文件名字为:flume.log
- 编辑启动配置文件
flume没有启动进程,只有启动命令【目前理解】
- 在flume目录创建
job文件夹
[root@master flume-1.7.0]# mkdir job
进入到job文件夹,创建并编写配置文件
- 监听文件:
pro.sources = s1
pro.channels = c1
pro.sinks = k1

pro.sources.s1.type = exec
pro.sources.s1.command = tail -F /usr/apps/tmp/logs.log

pro.channels.c1.type = memory
pro.channels.c1.capacity = 1000
pro.channels.c1.transactionCapacity = 100

pro.sinks.k1.type = org.apache.flume.sink.kafka.KafkaSink
pro.sinks.k1.kafka.topic = log-test
pro.sinks.k1.kafka.bootstrap.servers = master:9092,slave1:9092,slave2:9092
pro.sinks.k1.kafka.flumeBatchSize = 20
pro.sinks.k1.kafka.producer.acks = 1
pro.sinks.k1.kafka.producer.linger.ms = 1
pro.sinks.k1.kafka.producer.compression.type = snappy

pro.sources.s1.channels = c1
pro.sinks.k1.channel = c1
- 监听端口(Port)
# Name the components on this agent
# 分别给agent中组件定义别名
a1.sources = s1
a1.sinks = k1
a1.channels = c1

# Describe/configure the source
# 配置接收方法、地址和端口号
a1.sources.s1.type = netcat
a1.sources.s1.bind = localhost
a1.sources.s1.port = 55555

# Use a channel which buffers events in memory
# 定义channel类型
a1.channels.c1.type = memory
a1.channels.c1.capacity = 1000
a1.channels.c1.transactionCapacity = 100

# Describe the sink
# 定义sink
a1.sinks.k1.type = org.apache.flume.sink.kafka.KafkaSink
a1.sinks.k1.kafka.topic = port-test
a1.sinks.k1.kafka.bootstrap.servers = master:9092,slave1:9092,slave2:9092
a1.sinks.k1.kafka.flumeBatchSize = 20
a1.sinks.k1.kafka.producer.acks = 1
a1.sinks.k1.kafka.producer.linger.ms = 1
a1.sinks.k1.kafka.producer.compression.type = snappy

# Bind the source and sink to the channel
# 把source和sink用channel连接
a1.sources.s1.channels = c1
a1.sinks.k1.channel = c1
- 监听目录
# Name the components on this agent
# 分别给agent中组件定义别名
a1.sources = s1
a1.sinks = k1
a1.channels = c1

# Describe/configure the source
# 配置接收方法、地址和端口号
a2.sources.r2.type = spooldir
a2.sources.r2.spoolDir = /usr/apps/flume-1.7.0/upload

# Use a channel which buffers events in memory
# 定义channel类型
a1.channels.c1.type = memory
a1.channels.c1.capacity = 1000
a1.channels.c1.transactionCapacity = 100

# Describe the sink
# 定义sink
a1.sinks.k1.type = org.apache.flume.sink.kafka.KafkaSink
a1.sinks.k1.kafka.topic = port-test
a1.sinks.k1.kafka.bootstrap.servers = master:9092,slave1:9092,slave2:9092
a1.sinks.k1.kafka.flumeBatchSize = 20
a1.sinks.k1.kafka.producer.acks = 1
a1.sinks.k1.kafka.producer.linger.ms = 1
a1.sinks.k1.kafka.producer.compression.type = snappy

# Bind the source and sink to the channel
# 把source和sink用channel连接
a1.sources.s1.channels = c1
a1.sinks.k1.channel = c1
- 启动命令
/usr/apps/flume-1.7.0/bin/flume-ng agent -c /usr/apps/flume-1.7.0/conf/ -f /usr/apps/flume-1.7.0/job/flume-kafka-job.conf -n a1 -Dflume.root.logger=INFO,console
- 监听命令
/usr/apps/kafka_2.11-2.0.0/bin/kafka-console-consumer.sh --bootstrap-server master:9092 --topic test --from-beginning
--from-beginning是从头监听,可不写
# 进入到job文件夹
[root@master flume-1.7.0]# cd job/
# 编写配置文件
[root@master job]# vim netcat-flume-logger.conf
说明:该配置文件为摘抄flume官网中用户日志简单例子,附上链接:
Flume 1.7.0 User Guide — Apache Flume
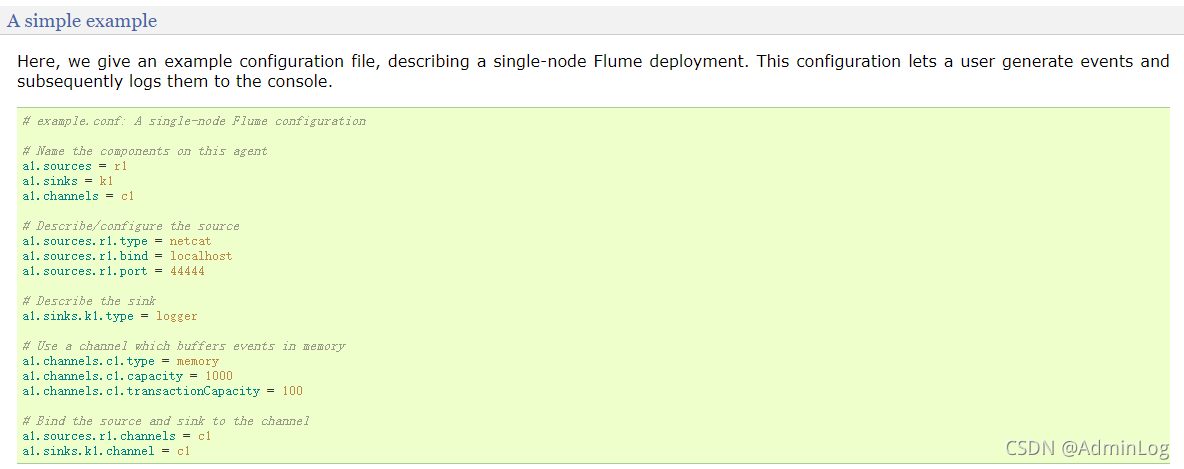
配置文件如下:
# Name the components on this agent
a1.sources = r1
a1.sinks = k1
a1.channels = c1

# Describe/configure the source
a1.sources.r1.type = netcat
a1.sources.r1.bind = localhost
a1.sources.r1.port = 44444

# Describe the sink
a1.sinks.k1.type = logger

# Use a channel which buffers events in memory
a1.channels.c1.type = memory
a1.channels.c1.capacity = 1000
a1.channels.c1.transactionCapacity = 100

# Bind the source and sink to the channel
a1.sources.r1.channels = c1
a1.sinks.k1.channel = c1
- 启动flume
#  官方案例
$ bin/flume-ng agent --conf conf --conf-file example.conf --name a1 -Dflume.root.logger=INFO,console
# 真实启动案例
[root@master flume-1.7.0]# bin/flume-ng agent --conf conf/ --conf-file job/netcat-flume-logger.conf --name a1 -Dflume.root.logger=INFO,console
- 简化启动代码
# 官方案例
$ bin/flume-ng agent -n $agent_name -c conf -f conf/flume-conf.properties.template
# 真实启动案例
[root@master flume-1.7.0]# bin/flume-ng agent -c conf/ -f job/netcat-flume-logger.conf -n a1 -Dflume.root.logger=INFO,console
读取hive到控制台
- 官方示例
a1.sources = r1
a1.channels = c1
a1.sources.r1.type = exec
a1.sources.r1.command = tail -F /var/log/secure
# 大写的F为失败后会进行N次尝试写入
# 小写的F为失败后不再进行尝试写入
a1.sources.r1.channels = c1
- 实操示例
# Name the components on this agent
a1.sources = r1
a1.sinks = k1
a1.channels = c1

# Describe/configure the source
a1.sources.r1.type = exec
a1.sources.r1.command = tail -f /tmp/root/hive.log

# Describe the sink
a1.sinks.k1.type = logger

# Use a channel which buffers events in memory
a1.channels.c1.type = memory
a1.channels.c1.capacity = 1000
a1.channels.c1.transactionCapacity = 100

# Bind the source and sink to the channel
a1.sources.r1.channels = c1
a1.sinks.k1.channel = c1
若要更改日志文件请在hive的conf目录中log文件修改,但该文件初始为模板文件
读取hive日志到HDFS
# Name the components on this agent
a2.sources = r2
a2.sinks = k2
a2.channels = c2

# Describe/configure the source
a2.sources.r2.type = exec
a2.sources.r2.command = tail -F /usr/apps/hive-2.3.4/logs/hive.log
# a2.sources.r2.shell = /bin/bash -c

# Describe the sink
a2.sinks.k2.type = hdfs
a2.sinks.k2.hdfs.path = hdfs://master:9000/flume/%Y%m%d/%H

# 上传文件的前缀
a2.sinks.k2.hdfs.filePrefix = logs-

# 是否按照时间滚动文件夹
a2.sinks.k2.hdfs.round = true
# 多少时间单位创建一个新的文件夹
a2.sinks.k2.hdfs.roundValue = 1
# 重新定义时间单位
a2.sinks.k2.hdfs.roundUnit = hour

# 是否使用本地时间戳
a2.sinks.k2.hdfs.useLocalTimeStamp = true

# 积攒多少个Event才flush到HDFS一次
a2.sinks.k2.hdfs.batchSize = 1000
# 设置文件类型,可支持压缩
a2.sinks.k2.hdfs.fileType = DataStream
# 多久生成一个新的文件
a2.sinks.k2.hdfs.rollInterval = 30
a2.sinks.k2.hdfs.rollSize = 134217700
# 文件的滚动与Event数量无关
a2.sinks.k2.hdfs.rollCount = 0

# Use a channel which buffers events in memory
a2.channels.c2.type = memory
a2.channels.c2.capacity = 1000
a2.channels.c2.transactionCapacity = 100

# Bind the source and sink to the channel
a2.sources.r2.channels = c2
a2.sinks.k2.channel = c2
- 创建数据库
hive> create database school;
- 使用创建好的库
hive> use school;
- 创建表
hive> create table teacher(id string,name string,age int)row format delimited fields terminated by ',';
- 创建数据文件
1,zhangsan,22
2,lisi,23
3,wangwu,24
- 导入数据
hive> load data local inpath'/usr/apps/tmp/userdata/data.txt' into table teacher;
- 输入查询命令
hive> select * from teacher;
- 等到30秒之后hdfs中的.tmp缓存文件变成有效文件后,下载打开。

flume监控整个文件夹文件
- 在flume的job文件夹下创建conf文件,命名为
dir-flume-hdfs.conf
vim dir-flume-hdfs.conf
- 内容:
# Name the components on this agent
a2.sources = r2
a2.sinks = k2
a2.channels = c2

# Describe/configure the source
a2.sources.r2.type = spooldir
a2.sources.r2.spoolDir = /usr/apps/flume-1.7.0/upload
# a2.sources.r2.fileHeader = true

# Describe the sink
a2.sinks.k2.type = hdfs
a2.sinks.k2.hdfs.path = hdfs://master:9000/flume/%Y%m%d/%H

# 上传文件的前缀
a2.sinks.k2.hdfs.filePrefix = logs-

# 是否按照时间滚动文件夹
a2.sinks.k2.hdfs.round = true
# 多少时间单位创建一个新的文件夹
a2.sinks.k2.hdfs.roundValue = 1
# 重新定义时间单位
a2.sinks.k2.hdfs.roundUnit = hour

# 是否使用本地时间戳
a2.sinks.k2.hdfs.useLocalTimeStamp = true

# 积攒多少个Event才flush到HDFS一次
a2.sinks.k2.hdfs.batchSize = 1000
# 设置文件类型,可支持压缩
a2.sinks.k2.hdfs.fileType = DataStream
# 多久生成一个新的文件
a2.sinks.k2.hdfs.rollInterval = 30
a2.sinks.k2.hdfs.rollSize = 134217700
# 文件的滚动与Event数量无关
a2.sinks.k2.hdfs.rollCount = 0

# Use a channel which buffers events in memory
a2.channels.c2.type = memory
a2.channels.c2.capacity = 1000
a2.channels.c2.transactionCapacity = 100

# Bind the source and sink to the channel
a2.sources.r2.channels = c2
a2.sinks.k2.channel = c2
- 创建文件1.txt,再依据1.txt复制2.txt、3.txt,内容为
hello world,过于简单,本文不再演示。
cp 1.txt
cp 1.txt 2.txt
cp 1.txt 3.txt
- 开启任务
[root@master flume-1.7.0]# bin/flume-ng agent -c conf/ -f job/dir-flume-hdfs.conf -n a2
- 将文件cp到upload文件夹中
cp 1.txt upload/
cp 2.txt upload/
- 查看hdfs中文件变化,依据时间戳查看
- 如图

- 下载后查看内容
hello world
hello world
注意事项
- 不要上传相同文件名文件, 若要上传相同文件名文件请先删除目录中的相同文件后再上传到目录,否则报错
- 不要上传
.COMPLETED文件名结尾的文件,否则flume不读取
使用正则表达式过滤文件
- 添加配置到
dir-flume-hdfs.conf配置文件中,具体添加配置如下:
a2.sources.r2.ignorePattern = ([^ ]*\.tmp)
例如(片段):
# Describe/configure the source
a2.sources.r2.type = spooldir
a2.sources.r2.spoolDir = /usr/apps/flume-1.7.0/upload
# a2.sources.r2.fileHeader = true
a2.sources.r2.ignorePattern = ([^ ]*\.tmp)


 3062
3062


 被折叠的 条评论
为什么被折叠?
被折叠的 条评论
为什么被折叠?
 到【灌水乐园】发言


