


一、准备工作
关闭selinux
sed -i 's/SELINUX=enforcing/SELINUX=disabled/g' /etc/selinux/config
关闭防火墙
systemctl stop firewalld
设置hosts
vim /etc/hosts
ip +域名
例子
192.168.1.133 es.xx.com
1、安装jdk1.8https://blog.csdn.net/qq_42250832/article/details/138931378?spm=1001.2014.3001.5501
官方下载连接地址,选择版本,点击下载
https://www.elastic.co/cn/downloads/past-releases/#elasticsearch
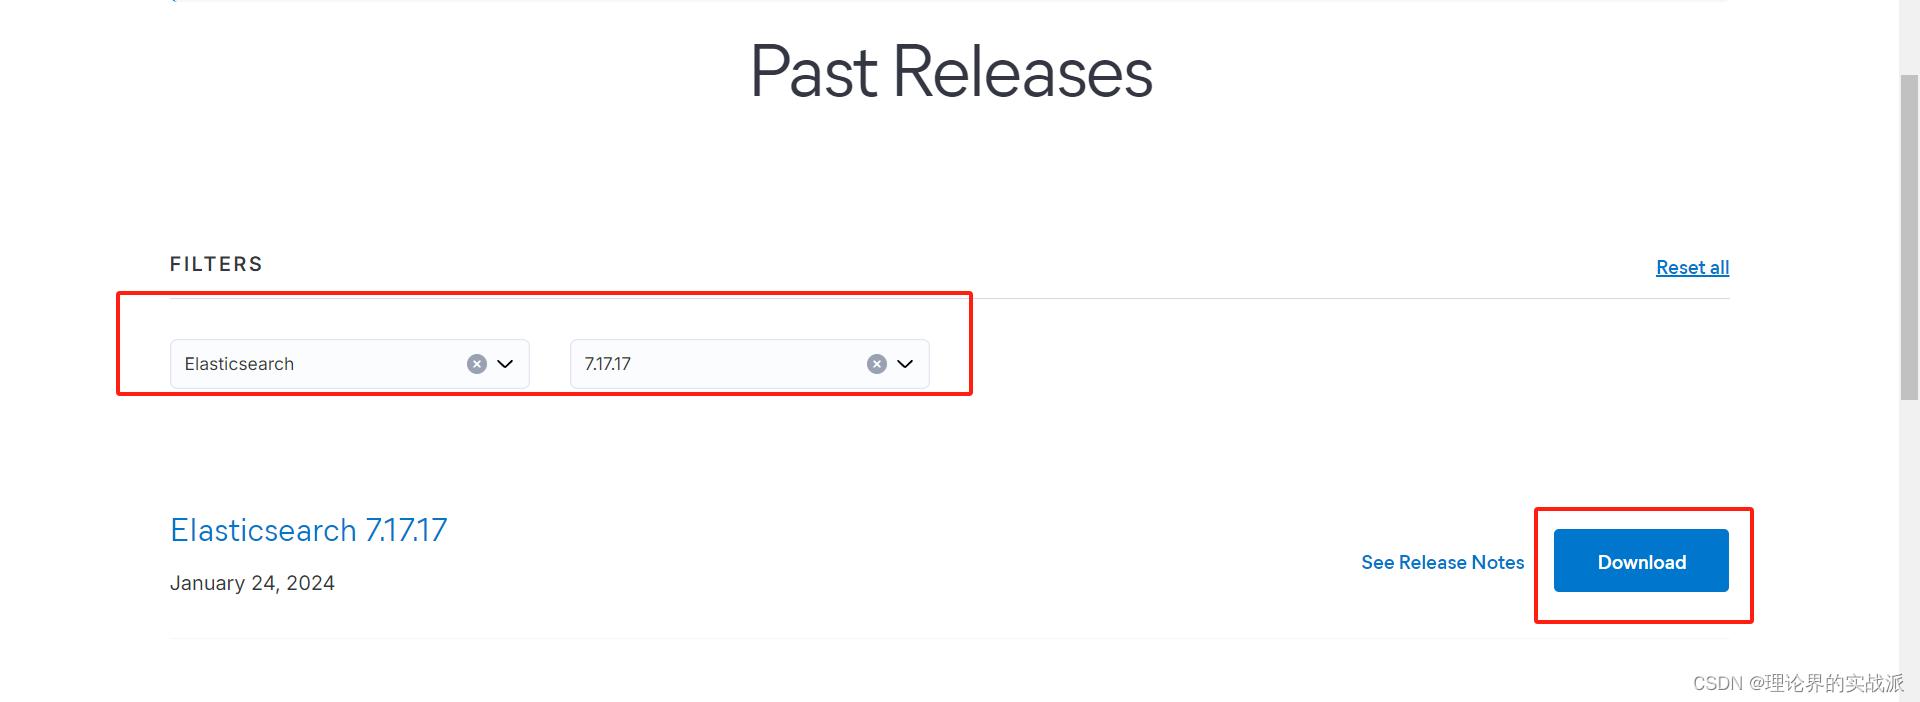
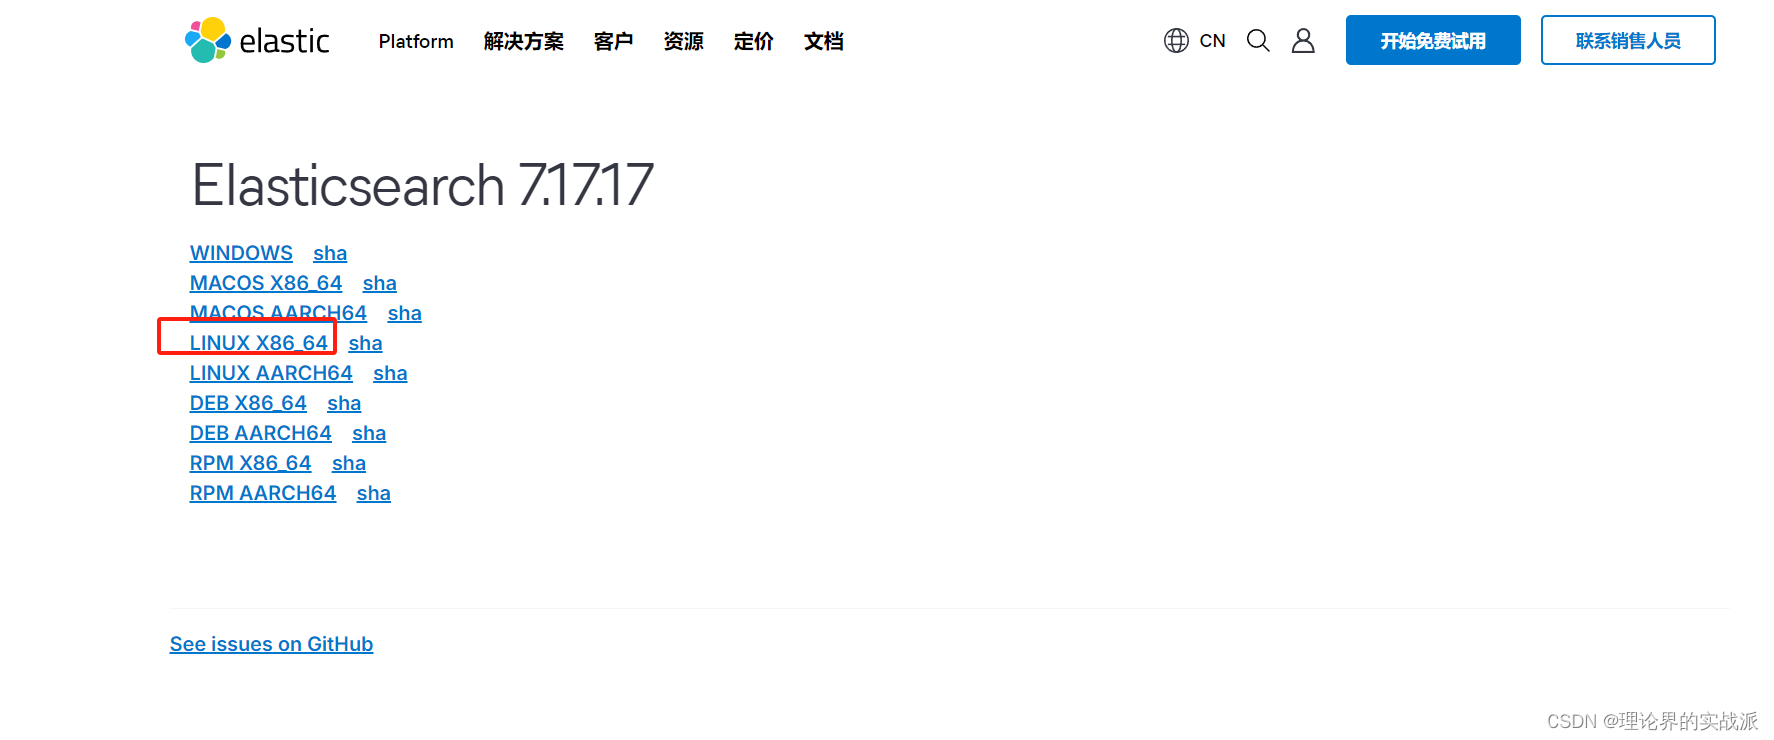
2、点击x86版本下载
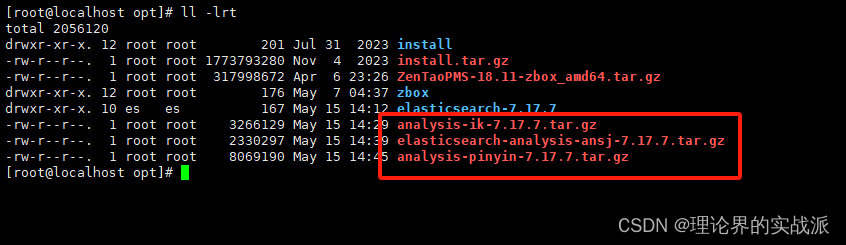
3、分词器插件下载
ik分词器下载
https://github.com/infinilabs/analysis-ik/releases选择tags,找到对应7.17.7版本点tar.gz
Ansj分词器
https://github.com/NLPchina/elasticsearch-analysis-ansj/releases 选择tags,找到对应7.17.7版本点tar.gz
中文拼音分词器
https://github.com/medcl/elasticsearch-analysis-pinyin/releases 选择tags,找到对应7.17.7版本点tar.gz
安装例子

4、上传到/opt目录
5、创建脚本tar包目录
mkdir -p /opt/install/package/es
6、上传安装包到指定目录
cd /opt/install/package/es

7、创建安装脚本
mkdir /opt/install/es -p
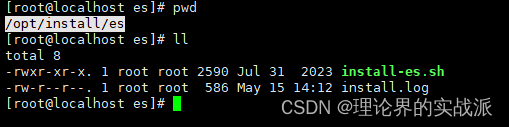
vim /opt/install/es/install-es.sh
#!/bin/bash
#
package_name="elasticsearch-7.17.7-linux-x86_64.tar.gz"
script_dir=$(cd $(dirname $0);pwd)
source ./$scipt_dir/../Loginfo.sh

#test -d /opt/elasticsearch-7.17.7 && rm -rf /opt/elasticsearch-7.17.7
if [ -d /opt/elasticsearch-7.17.7 ];then
    log_info "elasticsearch dir already exists!"
    exit 1
else
log_info "install es ,tar package"
tar -zxvf ../package/es/$package_name -C /opt &>/dev/null
log_error "tar package failed."

username=es
if id -u $username >/dev/null 2>&1; then
        log_info "user exists"
else
        #echo "user does not exist"
	useradd es
	echo "es@1234!!H" |passwd  --stdin es
fi

log_info "add es sudoers config"
sed -i '/es     ALL=(ALL)       ALL/d' /etc/sudoers
sed -i '/^root/ies     ALL=(ALL)       ALL' /etc/sudoers

log_info "add nproc/nofile  limit.conf "
if ! grep "*        soft    nproc 65535" /etc/security/limits.conf &>/dev/null; then
cat >> /etc/security/limits.conf << EOF

*        soft    nproc 65535
*        hard    nproc 65535
*        soft    nofile 65535
*        hard    nofile 65535
EOF
fi

log_info "add vm.max_map_count sysctl.conf"
if ! grep "vm.max_map_count=655360"  /etc/sysctl.conf &>/dev/null; then
cat >>  /etc/sysctl.conf << EOF
vm.max_map_count=655360
EOF
fi

sysctl -p &>/dev/null

log_info "Modify elasticsearch.yml file"
if ! grep "^node.name: node-1" /opt/elasticsearch-7.17.7/config/elasticsearch.yml &>/dev/null;then

cat >>/opt/elasticsearch-7.17.7/config/elasticsearch.yml <<EOF
node.name: node-1
http.port: 9200
cluster.initial_master_nodes: ["node-1"]
network.host: 0.0.0.0
http.cors.enabled: true
http.cors.allow-origin: "*"

EOF
fi

#log_info  "add ES_analysis to plugins"
#rm -rf ES分词插件
#tar -zxvf ../package/es/ES_analysis.tar -C $script_dir &>/dev/null

#\mv ES分词插件/analysis-ik-7.17.7/ ES分词插件/analysis-pinyin-7.17.7/  ES分词插件/elasticsearch-analysis-ansj-7.17.7.0-release/ /opt/elasticsearch-7.17.7/plugins/
#\mv ES/analysis-ik-7.17.7/ ES/analysis-pinyin-7.17.7/  ES/elasticsearch-analysis-ansj-7.17.7.0-release/ /opt/elasticsearch-7.17.7/plugins/
#cp -v  ES/synonym.dic /opt/elasticsearch-7.17.7/config

#ps -ef | grep elastic|grep -v grep|awk '{print $2}'|xargs kill -9 &>/dev/null
ps -ef | grep elastic|grep -v grep|awk '{print $2}'|xargs kill -9 &>/dev/null

log_info "start es..."
chown es:es /opt/elasticsearch-7.17.7/ -R

su - es -c  "cd /opt/elasticsearch-7.17.7/bin;./elasticsearch -d"

log_info "print es processlist.."
ps axu|grep elasticsearch|grep -v grep
log_info  "install done.. "
log_info  "install dir /opt/elasticsearch-7.17.7/"
rm -rf ES/
fi
8、执行安装命令
sh /opt/install/es/install-es.sh
9、安装插件
cd /opt
tar -xvf analysis-ik-7.17.7.tar.gz -C /opt/elasticsearch-7.17.7/plugins/
tar -xvf analysis-pinyin-7.17.7.tar.gz  -C  /opt/elasticsearch-7.17.7/plugins/
tar -xvf elasticsearch-analysis-ansj-7.17.7.tar.gz -C  /opt/elasticsearch-7.17.7/plugins/
10、修改插件名字
cd /opt/elasticsearch-7.17.7/plugins/
mv analysis-ik-7.17.7 analysis-ik
mv analysis-pinyin-7.17.7 analysis-pinyin
mv elasticsearch-analysis-ansj-7.17.7 analysis-ansj
11、授权重启es
chown es:es /opt/elasticsearch-7.17.7 -R
ps aux | grep -v grep |grep el | xargs kill -9 {print $2}
su - es
/opt/elasticsearch-7.17.7/bin/elasticsearch -d
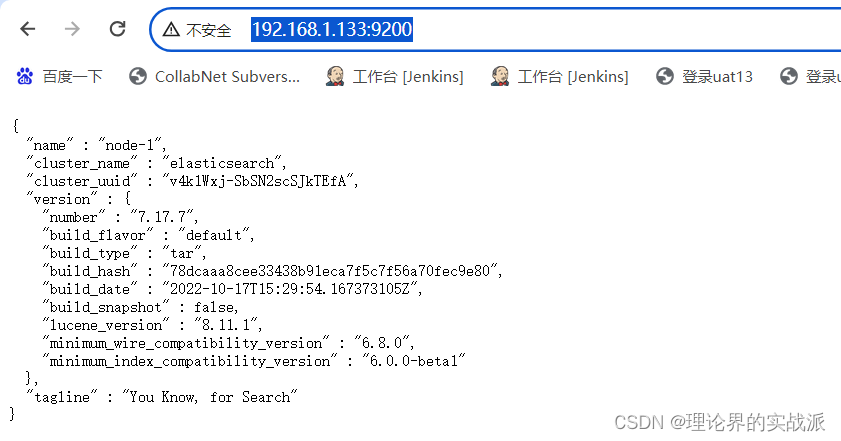
12、访问验证ip+端口 #默认端口9200
二、集群部署三台
1、将/opt/elasticsearch-7.17.7拷贝到另外两台的 /opt/
例子#注意当前为192.168.1.133
cd /opt
scp -r elasticsearch-7.17.7 root@192.168.1.134:/opt
scp -r elasticsearch-7.17.7 root@192.168.1.135:/opt
2、并且在另外两台机器创建es账号并且目录授权
useradd es
passwd es
密码为es@1234!!H注意密码最好三台一样
3、其余两台root授权es目录启动
chown -R es:es /opt/elasticsearch-7.17.7
su - es
/opt/elasticsearch-7.17.7/bin/elasticsearch -d
4、Es增加密码操作--------请用es账号操作增加密码相关内容------三台服务器都需要操作
①开启安全认证
在config/elasticsearch.yml最后中新增设置
xpack.security.enabled: true
xpack.security.transport.ssl.enabled: true
②重启es服务
1).查找ES进程
ps -ef | grep elastic
2).杀掉ES进程
kill -9 2382(进程号)
3).重启ES
后台启动
/opt/elasticsearch-7.17.7/bin/elasticsearch -d
进入目录
cd /opt/elasticsearch-7.17.7
③、生成证书
./bin/elasticsearch-certutil ca
下面两项直接回车
Please enter the desired output file [elastic-stack-ca.p12]: #这里直接回车即可
Enter password for elastic-stack-ca.p12 : #这里直接回车即可,不要设置密码,假如在生成证书的时候设置了密码,会导致无法启动ES报错
设置完毕后,会在es安装目录下看到新生成的文件:
elastic-stack-ca.p12
④生成密钥
./bin/elasticsearch-certutil cert --ca elastic-stack-ca.p12
下面三项直接回车
Enter password for CA (elastic-stack-ca.p12) :
Please enter the desired output file [elastic-certificates.p12]:
Enter password for elastic-certificates.p12 : #这里直接回车即可,不要设置密码,否则后面ES会启动不了
设置完毕后,会在es安装目录下看到新生成的文件:
elastic-certificates.p12
⑤在设置中设置认证文件
在config目录创建certs目录,拷贝p12文件文件至certs目录下,并在设置中设置p12文件路径
cd config/
mkdir certs
cp ../elastic-certificates.p12 certs/
在设置中设置p12文件路径
vim /opt/elasticsearch-7.17.7/elasticsearch.yml
新增配置
xpack.security.transport.ssl.verification_mode: certificate
xpack.security.transport.ssl.keystore.path: certs/elastic-certificates.p12
xpack.security.transport.ssl.truststore.path: certs/elastic-certificates.p12
重启所有es主机
kill -9 2382(进程号)
/opt/elasticsearch-7.17.7/bin/elasticsearch -d
1、如配置集群,请稍等在配置密码,如配置单机,请直接设置密码
设置密码
单机
../bin/elasticsearch-setup-passwords interactive
登录浏览器访问单机192.168.1.133:9200 账号elastic 密码es@1234!!H密码为刚配置的es密码,并非主机密码
会有一堆账号密码设置都一样就行,敲一个密码敲一下回车,敲一个密码敲一下回车

集群请等待集群配置完成在设置密码
三台机器配置es文件
使用root权限配置将配置文件和脚本存储在目录,授权777
cd /opt/install/es
chmod 777 ./*
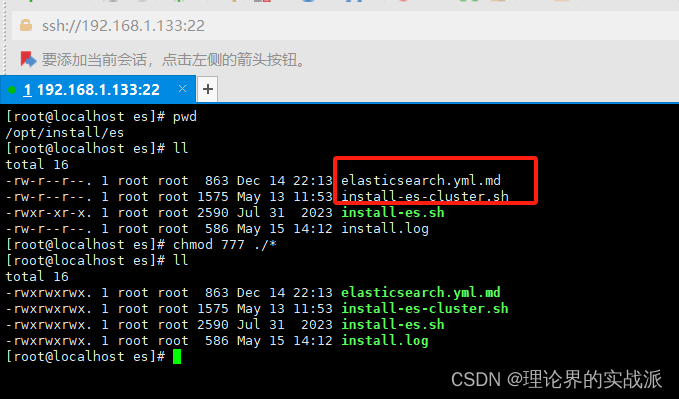
vim elasticsearch.yml.md
cluster.name: cluster-es
node.name: HOSTNAME_LOCAL
node.master: true
node.data: true
network.host: NODEIP_LOCAL
network.publish_host: NODEIP_LOCAL
discovery.seed_hosts: ["NODEIPA:9300","NODEIPB:9300","NODEIPC:9300"]
cluster.initial_master_nodes: ["HOSTNAMEA","HOSTNAMEB","HOSTNAMEC"]
cluster.routing.allocation.cluster_concurrent_rebalance: 16
cluster.routing.allocation.node_concurrent_recoveries: 16
cluster.routing.allocation.node_initial_primaries_recoveries: 16
http.cors.enabled: true
http.cors.allow-origin: "*"
xpack.security.enabled: true
xpack.security.transport.ssl.enabled: true
xpack.security.transport.ssl.verification_mode: certificate
xpack.security.transport.ssl.keystore.path: certs/elastic-certificates.p12
xpack.security.transport.ssl.truststore.path: certs/elastic-certificates.p12
vim install-es-cluster.sh
#!/bin/bash
#

if [ -z $3 ];then
    echo "Usage: sh $(basename $0) local_ip node-ip01 node-ip02 node-ip03 "
    echo "Ex: sh $(basename $0) 192.168.1.133 192.168.1.133 192.168.1.134 192.168.1.135"
    exit -1
fi
script_dir=$(cd $(dirname $0);pwd)
install_dir=/opt
source $script_dir/../Loginfo.sh
LOCAL_IP="$1"
NODEIPA="$2"
NODEIPB="$3"
NODEIPC="$4"

hostnamea=node-$(echo $NODEIPA|awk -F'.' '{print $NF}')
hostnameb=node-$(echo $NODEIPB|awk -F'.' '{print $NF}')
hostnamec=node-$(echo $NODEIPC|awk -F'.' '{print $NF}')
hostname_local=node-$(echo $LOCAL_IP|awk -F'.' '{print $NF}')


#test -d $install_dir/elasticsearch-7.17.7 && rm -rf $install_dir/elasticsearch-7.17.7
if [ ! -d $install_dir/elasticsearch-7.17.7 ];then
    log_info "elasticsearch $install_dir install dir does not exist..."
    exit 1
else
    cp  -v  elasticsearch.yml.md $install_dir/elasticsearch-7.17.7/config/elasticsearch.yml
    sed -i -e 's/HOSTNAME_LOCAL/'$hostname_local'/g' -e   's/NODEIP_LOCAL/'$LOCAL_IP'/g' -e  's/NODEIPA/'$NODEIPA'/g'  \
             -e  's/NODEIPB/'$NODEIPB'/g' -e  's/NODEIPC/'$NODEIPC'/g'  -e  's/HOSTNAMEA/'$hostnamea'/g' \
             -e  's/HOSTNAMEB/'$hostnameb'/g'  -e  's/HOSTNAMEC/'$hostnamec'/g' \
             $install_dir/elasticsearch-7.17.7/config/elasticsearch.yml
    ps axu|grep elasticsearch|grep -v grep|awk '{print $2}'|xargs kill -9
    username=es
    log_info "start es..."
    chown $username:$username $install_dir/elasticsearch-7.17.7/ -R
    su - $username -c  "cd $install_dir/elasticsearch-7.17.7/bin;./elasticsearch -d"
    ps axu|grep elasticsearch|grep -v grep
fi
对于集群,请再集中每个节点操作这一步 ,将主节点p12认证文件拷贝到其他节点上,其余节点原始文件备份
,并修改所有ES节点的配置文件添加配置
注意一定要将主节点es下config上两个认证文件和想设置的主节点一样及certs也要和主节点一样,主节点都拷贝过去就行,做集群之前一定要删除nodes文件
密码在安装完成集群版本在设置
每台服务器都要删除
rm -rf /opt/elasticsearch-7.17.7/data/nodes
sh install-es-cluster.sh 192.168.1.133 192.168.1.133 192.168.1.134 192.168.1.135
此命令三台主机都需要执行第一个是本机ip,第二个是master节点,第三/四是node节点
安装完成需要在主节点执行…/bin/elasticsearch-setup-passwords interactive 设置/重置密码
浏览器访问集群账号elastic 密码es@1234!!H密码为刚配置的es密码,并非主机密码
http://192.168.1.133:9200/_cat/health?v如果返回的node.total是3,代表集群搭建成功
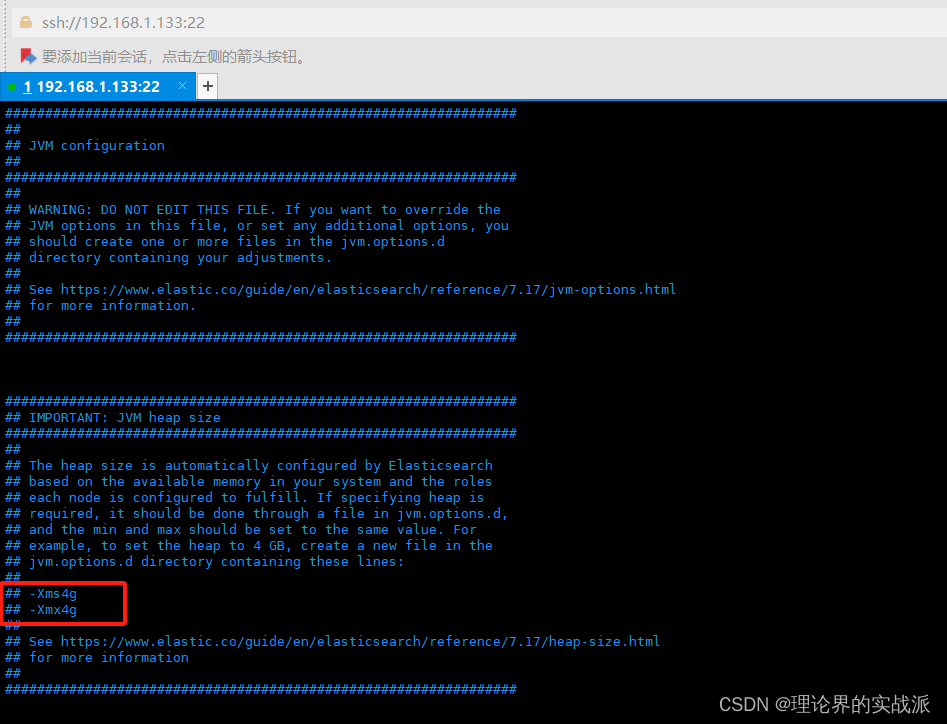
设置es内存
cd /opt/elasticsearch-7.17.7/config
vim jvm.options
取消注释-Xms -Xmx 设置为服务器1/3内存大小,但是最好不要低于4g,否则可能会内存溢出
重新启动es—注意es服务是否为es权限如果不是
chown es:es /opt/elasticsearch-7.17.7 -R
su - es
ps axu|grep elasticsearch|grep -v grep|awk '{print $2}'|xargs kill -9
/opt/elasticsearch-7.17.7/bin/elasticsearch -d
*注意如果应用连接es服务高可用版本需要修改hosts 比如三台主机
vim /etc/hosts
192.168.1.133 es1.xx.com
192.168.1.134 es2.xx.com
192.168.1.135 es3.xx.com
而且需要编辑应用的yml文件修改为http访问连接及user、password


 1329
1329

 被折叠的 条评论
为什么被折叠?
被折叠的 条评论
为什么被折叠?
 到【灌水乐园】发言


