


SpringMVC项目框架
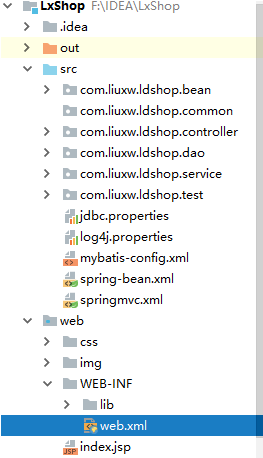
1.SpringMVC的环境图解如下图
2.导入jar包
3.jdbc.properties
jdbc.driver=com.mysql.jdbc.Driver
jdbc.url=jdbc:mysql://localhost:3306/ldshop?characterEncoding=utf8
jdbc.username=root
jdbc.password=123456
4.logger.properties
# Global logging configuration
# developer-->DEBUG productor-->INFO or ERROR
log4j.rootLogger=DEBUG, stdout
# MyBatis logging configuration...
log4j.logger.org.mybatis.example.BlogMapper=TRACE
# Console output...
log4j.appender.stdout=org.apache.log4j.ConsoleAppender
log4j.appender.stdout.layout=org.apache.log4j.PatternLayout
log4j.appender.stdout.layout.ConversionPattern=%5p [%t] - %m%n
5.mybatis-config.xml
<?xml version="1.0" encoding="UTF-8" ?>
<!DOCTYPE configuration
        PUBLIC "-//mybatis.org//DTD Config 3.0//EN"
        "http://mybatis.org/dtd/mybatis-3-config.dtd">
<configuration>
    <!--配置别名:主要是简化bean文件夹中实体类的访问-->
    <typeAliases>
        <package name="com.liuxw.ldshop.bean"/>
    </typeAliases>
    <!--配置mapper映射,操作数据库的代码dao包下,mybatis访问的就是dao包-->
    <mappers>
        <package name="com.liuxw.ldshop.dao"/>
    </mappers>
</configuration>
6.springmvc.xml
<?xml version="1.0" encoding="UTF-8"?>
<beans xmlns="http://www.springframework.org/schema/beans"
       xmlns:xsi="http://www.w3.org/2001/XMLSchema-instance"
       xmlns:mvc="http://www.springframework.org/schema/mvc"
       xmlns:context="http://www.springframework.org/schema/context"
       xmlns:aop="http://www.springframework.org/schema/aop"
       xmlns:tx="http://www.springframework.org/schema/tx"
       xmlns:mybatis-spring="http://mybatis.org/schema/mybatis-spring"
       xsi:schemaLocation="http://www.springframework.org/schema/aop http://www.springframework.org/schema/aop/spring-aop-4.3.xsd
        http://www.springframework.org/schema/mvc http://www.springframework.org/schema/mvc/spring-mvc-4.3.xsd
        http://www.springframework.org/schema/beans http://www.springframework.org/schema/beans/spring-beans-4.3.xsd
        http://mybatis.org/schema/mybatis-spring http://mybatis.org/schema/mybatis-spring-1.3.3.xsd
        http://www.springframework.org/schema/tx http://www.springframework.org/schema/tx/spring-tx-4.3.xsd
        http://www.springframework.org/schema/context http://www.springframework.org/schema/context/spring-context.xsd">
    <!-- 使用 mvc:annotation-driven代替注解映射器和注解适配器配置
    mvc:annotation-driven默认加载很多的参数绑定方法,
    比如json转换解析器就默认加载了,如果使用mvc:annotation-driven不用配置上边的RequestMappingHandlerMapping和RequestMappingHandlerAdapter
    实际开发时使用mvc:annotation-driven
     -->
    <mvc:annotation-driven></mvc:annotation-driven>
    <!-- 扫描所有的Controller-->
    <context:component-scan base-package="com.liuxw.ldshop.controller"></context:component-scan>
    <!-- 配置视图解析器 进行jsp解析,默认使用jstl标签,classpath下得有jstl的包 -->
    <bean class="org.springframework.web.servlet.view.InternalResourceViewResolver" />
    <!--释放静态资源-->
    <mvc:default-servlet-handler />
    <!-- 视图解析器
    解析jsp解析,默认使用jstl标签,classpath下的得有jstl的包
     -->
    <!-- <bean
        class="org.springframework.web.servlet.view.InternalResourceViewResolver">
        配置jsp路径的前缀
        <property name="prefix" value="/WEB-INF/jsp/"/>
        配置jsp路径的后缀
        <property name="suffix" value=".jsp"/>
    </bean> -->
</beans>
7.spring-bean.xml
<?xml version="1.0" encoding="UTF-8"?>
<beans xmlns="http://www.springframework.org/schema/beans"
       xmlns:xsi="http://www.w3.org/2001/XMLSchema-instance" xmlns:mvc="http://www.springframework.org/schema/mvc"
       xmlns:context="http://www.springframework.org/schema/context"
       xmlns:aop="http://www.springframework.org/schema/aop" xmlns:tx="http://www.springframework.org/schema/tx"
       xsi:schemaLocation="http://www.springframework.org/schema/beans
http://www.springframework.org/schema/beans/spring-beans-4.3.xsd
http://www.springframework.org/schema/mvc
http://www.springframework.org/schema/mvc/spring-mvc-4.3.xsd
http://www.springframework.org/schema/context
http://www.springframework.org/schema/context/spring-context.xsd
http://www.springframework.org/schema/aop
http://www.springframework.org/schema/aop/spring-aop-4.3.xsd
http://www.springframework.org/schema/tx
http://www.springframework.org/schema/tx/spring-tx-4.3.xsd">


    <context:annotation-config></context:annotation-config>
    <!-- 配置service中的bean,将service中的类交给spring容器 -->
    <context:component-scan base-package="com.liuxw.ldshop.service"></context:component-scan>
    <!-- spring配置文件,跟mybaits整合后,DataSource需要在这里配置 -->
    <!-- 加载外部jdbc.properties -->
    <context:property-placeholder location="classpath:jdbc.properties" />
    <!-- 数据库连接池,两种方式,可以使用c3p0,这里我们使用的是dbcp,在java中连接数据库 -->
    <bean id="dataSource" class="org.apache.commons.dbcp.BasicDataSource">
        <property name="driverClassName" value="${jdbc.driver}" />
        <property name="url" value="${jdbc.url}" />
        <property name="username" value="${jdbc.username}" />
        <property name="password" value="${jdbc.password}" />
        <property name="maxActive" value="10" />
        <property name="maxIdle" value="5" />
    </bean>
    <!-- mapper配置 -->
    <!-- 将mybatis中的写在代码中的sqlsessionfactory配置在 Spring配置文件中,交由spring管理,从而简化操作 -->
    <bean id="sqlSessionFactory" class="org.mybatis.spring.SqlSessionFactoryBean">
        <!-- 数据库连接池 -->
        <property name="dataSource" ref="dataSource" />
        <!-- 加载mybatis的全局配置文件,关联mybatis的配置文件-->
        <property name="configLocation" value="classpath:mybatis-config.xml" />
    </bean>
    <!-- 这里主要配置mapper扫描器,我们只需要在使用的时候通过
         @AutoWired直接访问dao层的接口就行, -->
    <bean class="org.mybatis.spring.mapper.MapperScannerConfigurer">
        <!--配置dao包-->
        <property name="basePackage" value="com.liuxw.ldshop.dao"></property>
        <property name="sqlSessionFactoryBeanName" value="sqlSessionFactory" />
    </bean>
</beans>
8.dao层xml文件(ProductDao.xml)
<?xml version="1.0" encoding="UTF-8" ?>
<!-- 映射文件:这里就是对user表进行crud -->
<!DOCTYPE mapper
        PUBLIC "-//mybatis.org//DTD Mapper 3.0//EN"
        "http://mybatis.org/dtd/mybatis-3-mapper.dtd">
<mapper namespace="com.yueqian.shop.dao.ProductDao">
    <!-- 定义接受数据的结果集-->
    <resultMap id="findProductResultMap" type="Product">
        <!--column:表字段,property:类属性-->
        <id column="pid" property="pid"></id>
        <result column="pname" property="pname"></result>
        <result column="market_price" property="marketPrice"></result>
        <result column="shop_price" property="shopPrice"></result>
        <result column="image" property="image"></result>
        <result column="pdesc" property="pdesc"></result>
        <result column="is_hot" property="isHot"></result>
        <result column="pdate" property="pdate"></result>
        <result column="csid" property="csid"></result>
        <result column="state" property="state"></result>


    </resultMap>
    <!--添加产品
    id:对应dao接口方法的方法名
    parameterType:对应dao接口方法的参数类型-->
    <insert id="addProduct" parameterType="Product">
        insert into product(pname,market_price,shop_price,image,pdesc,is_hot,pdate,csid,state) values(
        #{pname},#{marketPrice},#{shopPrice},#{image},#{pdesc},#{isHot},#{pdate},#{csid},#{state})
    </insert>
    <!-- 查询产品信息
         使用resutType的前提是:表字段名跟类属性名要完全一致
    -->
    <select id="findProducts" parameterType="string" resultMap="findProductResultMap">
       select * from product where pname like concat("%",concat("${value}","%"))
    </select>
    <!--根据产品编号查询产品信息-->
    <select id="findProductById" parameterType="int" resultMap="findProductResultMap">
        select * from product where pid =#{pid}
    </select>
    <!--根据产品编号修改产品信息-->
    <update id="updateProduct" parameterType="Product">
        update product
        <set>
            pname=#{pname},csid=#{csid},
            <if test="image!=null">
                image=#{image},
            </if>
            market_price=#{marketPrice},shop_price=#{shopPrice},is_hot=#{isHot},pdesc=#{pdesc}
        </set>
        where pid=#{pid}
    </update>
    <!--根据产品编号删除产品信息-->
    <delete id="deleteProduct" parameterType="int">
        delete from product where pid =#{pid}
    </delete>
</mapper>
9.web.xml
<?xml version="1.0" encoding="UTF-8"?>
<web-app xmlns="http://xmlns.jcp.org/xml/ns/javaee"
         xmlns:xsi="http://www.w3.org/2001/XMLSchema-instance"
         xsi:schemaLocation="http://xmlns.jcp.org/xml/ns/javaee http://xmlns.jcp.org/xml/ns/javaee/web-app_4_0.xsd"
         version="4.0">
    <!--配置欢迎界面,也就是程序运行之后显示的默认的界面-->
    <welcome-file-list>
        <welcome-file>login.jsp</welcome-file>
    </welcome-file-list>
    <!--   配置spring-bean.xml-->
    <context-param>
        <param-name>contextConfigLocation</param-name>
        <param-value>classpath:spring-bean.xml</param-value>
    </context-param>
    <listener>
        <listener-class>org.springframework.web.context.ContextLoaderListener</listener-class>
    </listener>
    <!--配置springmvc.xml-->
    <servlet>
        <servlet-name>lshop</servlet-name>
        <servlet-class>org.springframework.web.servlet.DispatcherServlet</servlet-class>
        <init-param>
            <param-name>contextConfigLocation</param-name>
            <param-value>classpath:springmvc.xml</param-value>
        </init-param>
    </servlet>
    <!-- 配置拦截器 -->
    <servlet-mapping>
        <servlet-name>lshop</servlet-name>
        <url-pattern>/</url-pattern>
    </servlet-mapping>
    <!-- 解决数据库响应中文乱码的问题 -->
    <filter>
        <filter-name>characterEncodingFilter</filter-name>
        <filter-class>org.springframework.web.filter.CharacterEncodingFilter</filter-class>
        <init-param>
            <param-name>encoding</param-name>
            <param-value>UTF-8</param-value>
        </init-param>
        <init-param>
            <param-name>forceEncoding</param-name>
            <param-value>true</param-value>
        </init-param>
    </filter>
    <filter-mapping>
        <filter-name>characterEncodingFilter</filter-name>
        <url-pattern>/*</url-pattern>
    </filter-mapping>
</web-app>


 6016
6016


 被折叠的 条评论
为什么被折叠?
被折叠的 条评论
为什么被折叠?
 到【灌水乐园】发言


