


qt系列文章之激光雷达通信
提示:这里可以添加系列文章的所有文章的目录,目录需要自己手动添加
例如:第一章 qt通信学习入门之激光雷达通信
前言
提示:这里可以添加本文要记录的大概内容:
例如:随着人工智能的不断发展,雷达通信这门技术也越来越重要,很多人都开启了学习串口雷达,本文就介绍了串口雷达通信的基础内容。
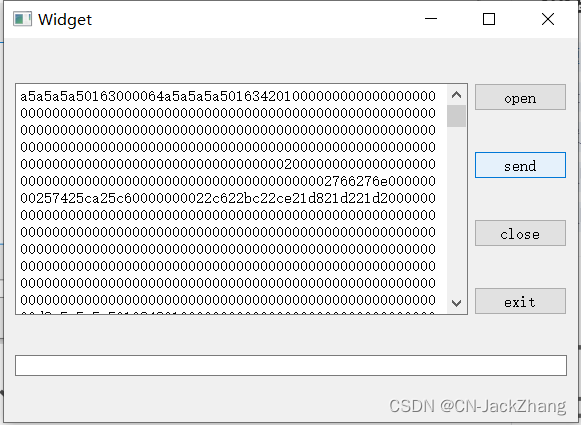
0.效果

一、通信思路
1.首先在.pro文件添加serialport
2.在.h文件添加头文件<QTSerialPort/QSerialPort>
3.在头文件声明变量和函数,在对应cpp文件里实现
4.要实现这样几个函数,对串口的初始化函数,打开串口的槽函数,发送指令的槽函数,关闭串口的槽函数,退出界面的槽函数。
为什么要实现这样几个函数,因为串口通信的流程是:
首先要实例化一个串口对象,
然后对串口对象进行初始化,
然后建立串口对象的信号和对应的槽函数,
然后打开串口,
然后发送指令,
然后在串口对象的对应槽函数中显示从下位机中读到的信息。
二、使用步骤
1.在.pro文件中加入串口通信库
具体代码为:
QT += core gui serialport
2.做好ui
具体为:
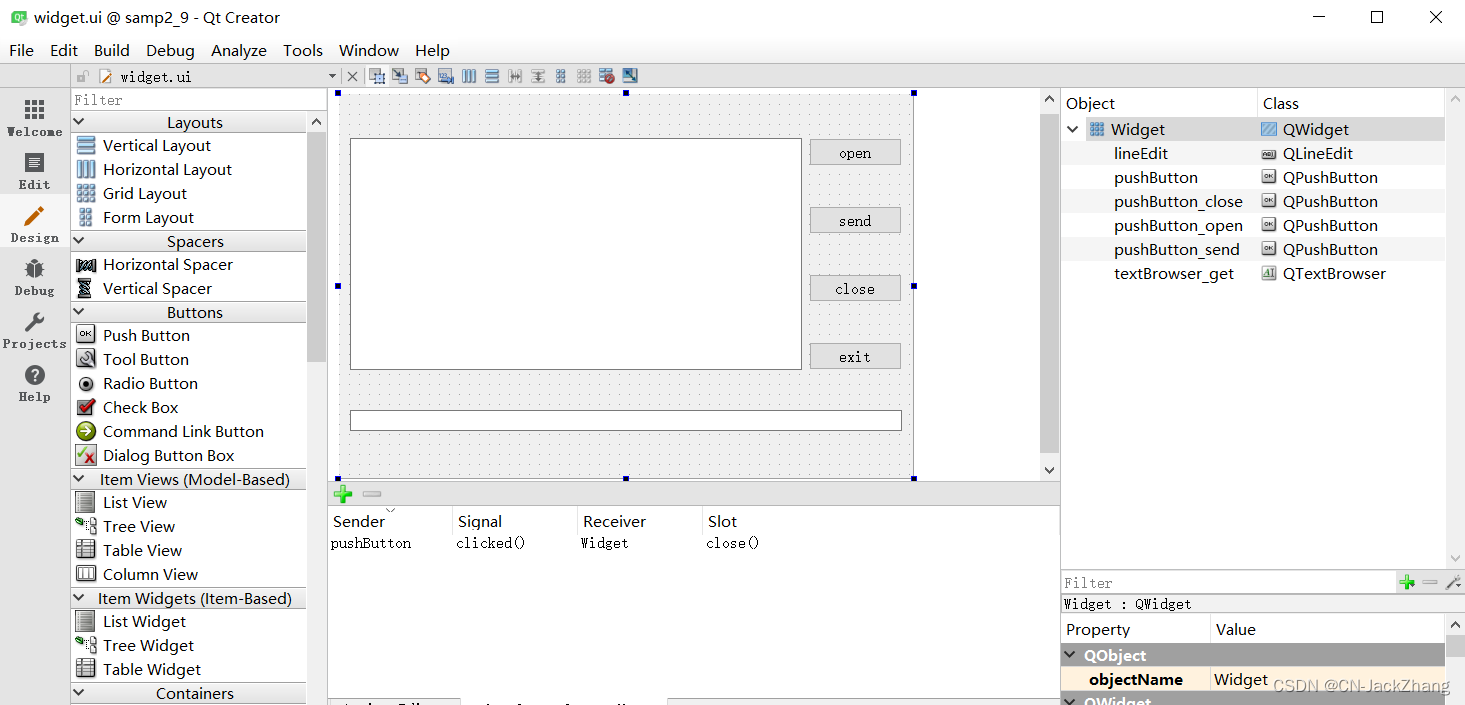
pushButton4个,分别为:
close pushButton_close 作用:关闭串口 点击go to slot
open pushButton_open 作用:打开串口 点击go to slot
send pushButton_send 作用:发送指令 点击go to slot
exit pushButton 作用:退出界面
textBrower 1个,作用:读到的数据显示
3.头文件中声明变量和函数,导入头文件
在头文件中,导入通信需要的头文件
#include<QtSerialPort/QSerialPort>
#include<QtSerialPort/QSerialPortInfo>
#include<QDebug>  //显示debug信息
在头文件中,声明一个全局QSerialPort指针,代表串口,用此串口来进行通信,
具体为:
QSerialPort *m_port; //我的串口指针
声明一个初始化函数Init()
具体为:
void Init(); //声明一个初始化函数
在头文件的private slots里面自动生成了这样几个槽函数,
void on_pushButton_close_clicked()
void on_pushButton_open_clicked()
void on_pushButton_send_clicked()
还需要添加一个ReadData()槽函数,用来和串口联系,为:
void ReadData()
所有槽函数为:
private slots;
	void ReadData(); //读取串口返回数据
	void on_pushButton_open_clicked(); //打开串口
	void on_pushButton_send_clicked(); //给串口发送指令
	void on_pushButton_close_clicked(); //关闭串口通信
还需要添加一个signals,用来作串口的signal和slot
signals:
	readyRead();  //串口已经初始化完毕的signal,表示准备好通信
在.cpp文件实现为;
connect(m_port,SIGNAL(readyRead()),this,SLOT(ReadData())); //建立我的串口的准备好读取(readyRead())的signal和读取串口信息(ReadData())槽函数之间的链接
所有的声明都在Widget类中声明。
即;
class Widget: public QWidget
{
	//类体
	//所有声明都在这个Widget类中声明
};
完整头文件为:
#ifndef WIDGET_H
#define WIDGET_H

#include <QWidget>
#include <QtSerialPort/QSerialPort>
#include <QtSerialPort/QSerialPortInfo>
#include <QDebug>

namespace Ui {
class Widget;
}

class Widget : public QWidget
{
    Q_OBJECT
public:
    explicit Widget(QWidget *parent = 0);
    ~Widget();
    void Init();    //初始化(Init)
private slots:
    //slot:打开串口(open),读取串口数据(ReadData),发送串口数据(send)
    void on_pushButton_open_clicked();

    void on_pushButton_send_clicked();

    void ReadData();

    void on_pushButton_close_clicked();

private:
    Ui::Widget *ui;
    //声明一个串口指针
    QSerialPort *m_port;

signals:
    //signal:准备读取
    void readyRead();


};

#endif // WIDGET_H
4.类中函数的实现
对应类中的声明,
完整代码为:
#include "widget.h"
#include "ui_widget.h"

Widget::Widget(QWidget *parent) :
    QWidget(parent),
    ui(new Ui::Widget)
{
    ui->setupUi(this);
    //先对m_port初始化
    Init();
    //再链接信号readyRead和槽ReadData
    connect(m_port,SIGNAL(readyRead()),this,SLOT(ReadData()));
}

Widget::~Widget()
{
    delete ui;
}

void Widget::Init()
{
    //实例化一个指针对象,
    m_port = new QSerialPort();
    //对指针对象初始化,串口名,波特率,数据位,停止位,校验位,控制流,
    m_port->setPortName("COM3");
    m_port->setBaudRate(921600);
    m_port->setDataBits(QSerialPort::Data8);
    m_port->setStopBits(QSerialPort::OneStop);
    m_port->setParity(QSerialPort::NoParity);
    m_port->setFlowControl(QSerialPort::NoFlowControl);
}

void Widget::on_pushButton_open_clicked()
{
    //打开串口,使用父类
    m_port->open(QIODevice::ReadWrite);
    //检验串口是否打开
    if(m_port->isOpen())
    {
        qDebug()<<"port open successful";
    }
    else
    {
        qDebug()<<"port open not successful";
    }
}

void Widget::on_pushButton_send_clicked()
{
    //发送指令,使用write()
    //声明一个字符数组对象存储要发送的指令()
    unsigned char buf[9]={0xA5,0xA5,0xA5,0xA5,0x00,0x63,0x00,0x00,0x63};

    //将数组强制转换为const char*类型
    m_port->write(reinterpret_cast<const char*>(buf),9 );
    qDebug()<<"scanning command send successfully,start scanning";
}


void Widget::ReadData()
{
    //读取数据,使用read()
    //声明一个字节数组对象,存储读到的数据
    QByteArray arr;
    //用指针读取数据,数据是16进制,转换成16进制,保存到字节数组
    arr = m_port->readAll().toHex();
//    arr = m_port->readLine();
//    arr = m_port->readAll();
    //

    //通过ui组件显示读到的字节数组
    ui->textBrowser_get->insertPlainText(QString(arr));
}

void Widget::on_pushButton_close_clicked()
{
    //发送指令,使用write()
    //声明一个字符数组对象存储要发送的指令(关闭串口)
    unsigned char buf[9]={0xA5,0xA5,0xA5,0xA5,0x00,0x64,0x00,0x00,0x64};

    //将数组强制转换为const char*类型
    m_port->write(reinterpret_cast<const char*>(buf),9 );
    qDebug()<<"port closed successfully";
}
总结
例如:以上就是今天要讲的内容,本文仅仅简单介绍了激光雷达通信,而qt提供了大量能使我们快速便捷地处理串口通信数据的函数和方法。


 4156
4156


 被折叠的 条评论
为什么被折叠?
被折叠的 条评论
为什么被折叠?
 到【灌水乐园】发言


