


前言
本人小白,学校的校园网访问不了github等网站,所以打算使用nginx在云服务器上做正向代理这些网站。
服务器环境:Ubuntu 22.04.4 LTS
下载nginx
nginx默认只支持转发http,要增加模块ngx_http_proxy_connect_module去支持https,所以建议使用源码进行编译安装(增加模块要重新编译)
这是一个开源模块,地址:https://github.com/chobits/ngx_http_proxy_connect_module
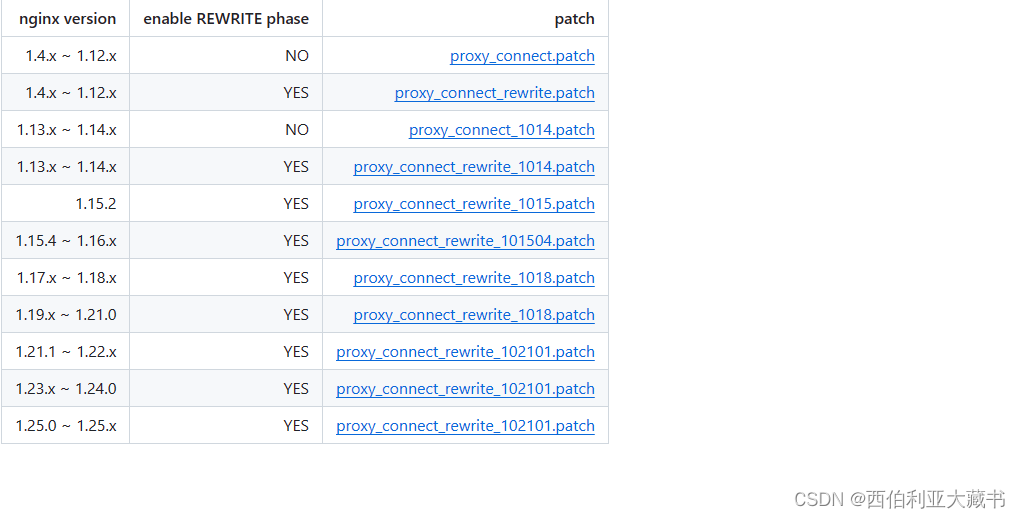
模块目前支持的nginx版本:
nginx的下载地址:http://nginx.org/download/
以1.19.9为例
mkdir /usr/nginx
cd /usr/nginx
wget http://nginx.org/download/nginx-1.19.9.tar.gz
tar -xzvf nginx-1.19.9.tar.gz
这里是可以不进行编译安装的,因为增加模块还要编译安装一次
下载模块
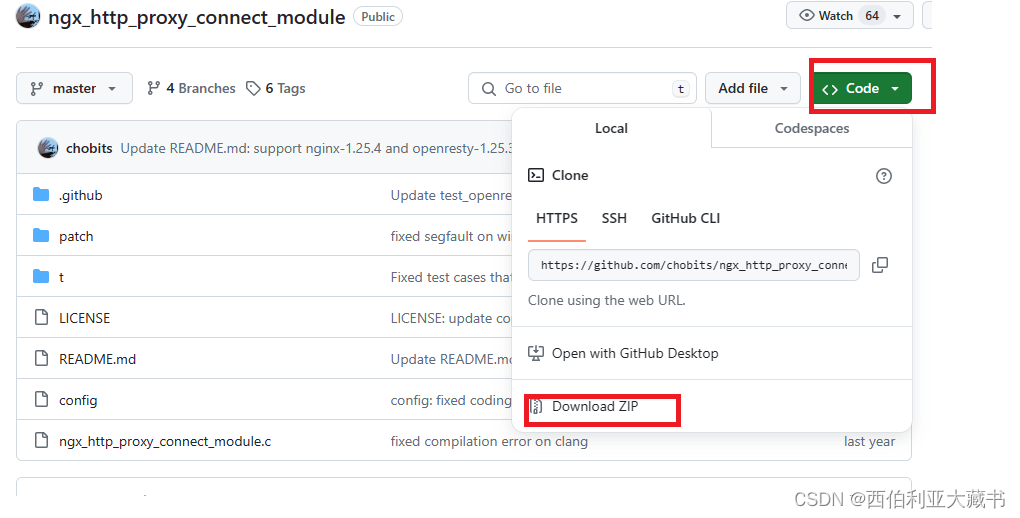
去https://github.com/chobits/ngx_http_proxy_connect_module下载源码的zip压缩包
解压并重命名模块
将下载好的ngx_http_proxy_connect_module-master.zip传到服务器的/usr/nginx下,我使用的是xftp
cd /usr/nginx
unzip ngx_http_proxy_connect_module-master.zip
mv ngx_http_proxy_connect_module-master ngx_http_proxy_connect_module
安装模块
进入/usr/nginx/nginx-1.19.9准备给nginx添加模块
cd /usr/nginx/nginx-1.19.9
patch -p1 < /usr/nginx/ngx_http_proxy_connect_module/patch/proxy_connect_rewrite_1018.patch
注意这里的补丁和nginx的版本有对应关系,参考:

1.19.9对应的补丁是proxy_connect_rewrite_1018.patch
./configure --add-module=/usr/nginx/ngx_http_proxy_connect_module --prefix=/etc/nginx
make && make install
修改nginx的配置文件
文件位置/etc/nginx/conf/nginx.conf,建议备份一份:
cd /etc/nginx
cp conf/nginx.conf conf/nginx.conf.bak
vim /etc/nginx/conf/nginx.conf
给出我的配置文件:
#user  nobody;
worker_processes  1;

#error_log  logs/error.log;
#error_log  logs/error.log  notice;
#error_log  logs/error.log  info;

pid        logs/nginx.pid;


events {
   worker_connections  1024;
}


http {
   include       mime.types;
   default_type  application/octet-stream;

   #log_format  main  '$remote_addr - $remote_user [$time_local] "$request" '
   #                  '$status $body_bytes_sent "$http_referer" '
   #                  '"$http_user_agent" "$http_x_forwarded_for"';

   #access_log  logs/access.log  main;

   sendfile        on;
   #tcp_nopush     on;

   #keepalive_timeout  0;
   keepalive_timeout  65;

   #gzip  on;

   #正向代理转发http请求
   server {
       #指定DNS服务器IP地址
       resolver 223.5.5.5;
       #监听80端口,http默认端口80
       listen 80;
       #服务器IP或域名
       server_name  localhost;

       #正向代理转发http请求
       location / {
           proxy_pass                 http://$host$request_uri;
           proxy_set_header           HOST $host;
           proxy_buffers              256 4k;
           proxy_max_temp_file_size   0k;
           proxy_connect_timeout      30;
           proxy_send_timeout         60;
           proxy_read_timeout         60;
           proxy_next_upstream error  timeout invalid_header http_502;
       }
   }

   #正向代理转发https请求
   server {
       #指定DNS服务器IP地址
       resolver 223.5.5.5;
       #监听443端口,https默认端口443
       listen 443;

       #正向代理转发https请求
       proxy_connect;
       proxy_connect_allow            443 563;
       proxy_connect_connect_timeout  30s;
       proxy_connect_read_timeout     60s;
       proxy_connect_send_timeout     60s;
       location / {
           proxy_pass http://$host;
           proxy_set_header Host $host;
       }
   }
   # another virtual host using mix of IP-, name-, and port-based configuration
   #
   #server {
   #    listen       8000;
   #    listen       somename:8080;
   #    server_name  somename  alias  another.alias;

   #    location / {
   #        root   html;
   #        index  index.html index.htm;
   #    }
   #}


   # HTTPS server
   #
   #server {
   #    listen       443 ssl;
   #    server_name  localhost;

   #    ssl_certificate      cert.pem;
   #    ssl_certificate_key  cert.key;

   #    ssl_session_cache    shared:SSL:1m;
   #    ssl_session_timeout  5m;

   #    ssl_ciphers  HIGH:!aNULL:!MD5;
   #    ssl_prefer_server_ciphers  on;

   #    location / {
   #        root   html;
   #        index  index.html index.htm;
   #    }
   #}

}
设置或者关闭防火墙,我直接关闭了
sudo ufw disable
启动nginx
#指定配置文件启动
nginx -c /etc/nginx/conf/nginx.conf
#检查nginx配置文件
nginx -t
#修改配置后重新加载生效
nginx -s reload
#关闭nginx
nginx -s stop
log位置:/etc/nginx/logs
记得在服务器安全组中将对应的端口打开
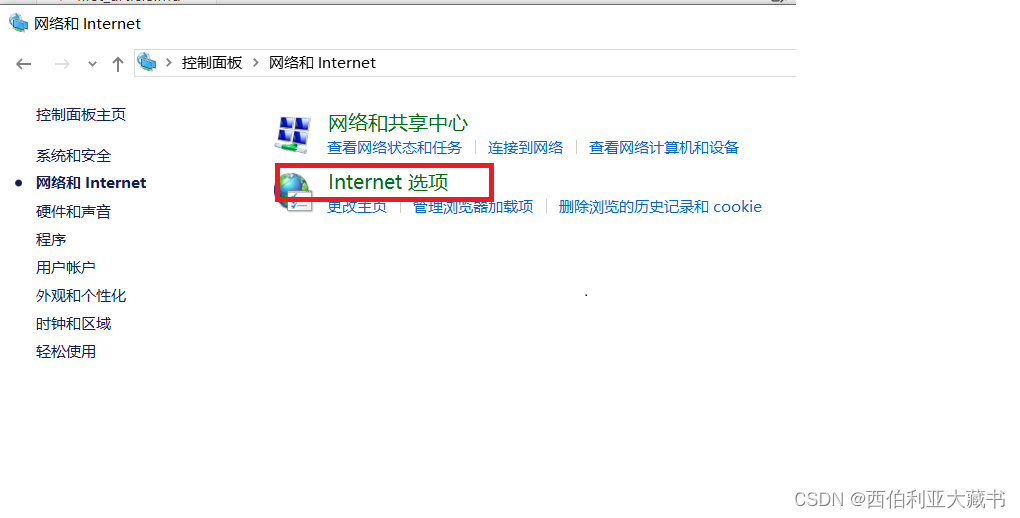
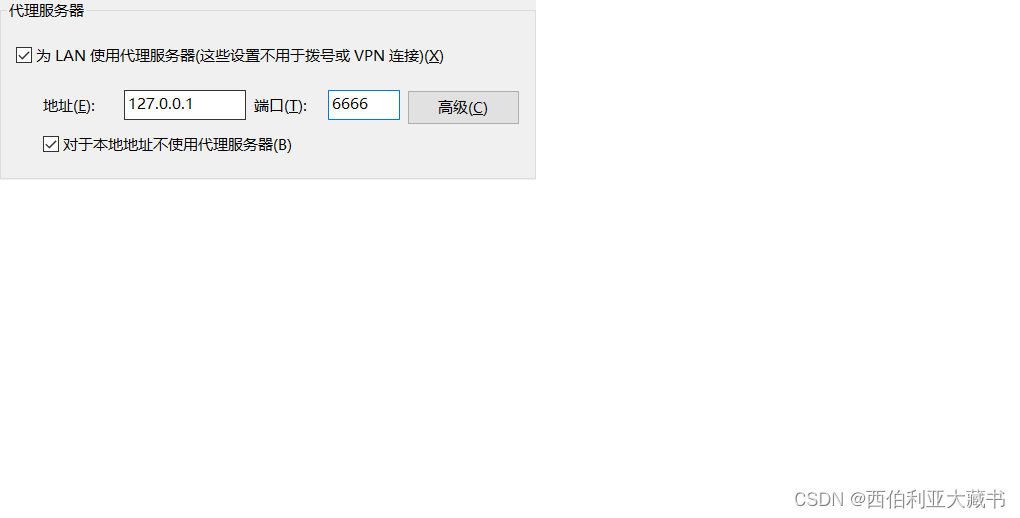
本地windows使用代理
打开控制面板,找到网络和internet,找到internet选项
点击连接,局域网设置
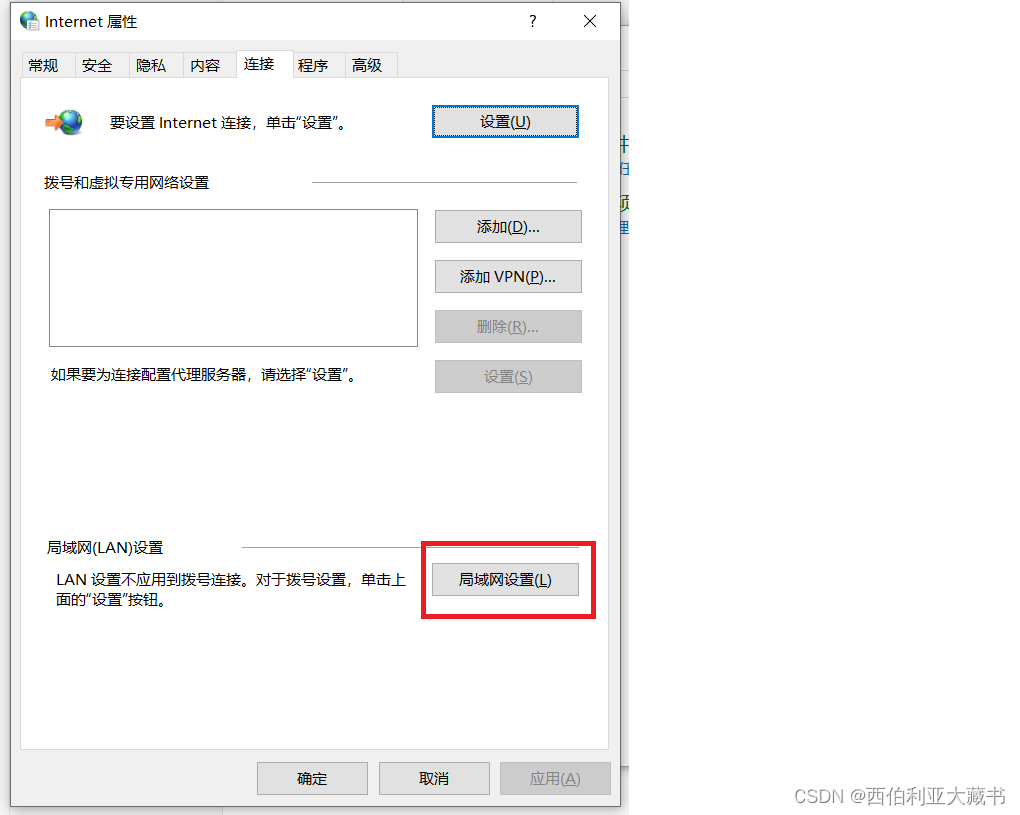
填写对应的ip和端口
这样就所有的访问都会通过代理服务器进行转发了
但是配置完之后打开github很慢而且图片和JS,CSS等都加载不出来。我也不清楚什么原因所以我放弃了这个想法。
参考:
nginx–图解及代码实现正向代理、反向代理及负载均衡(非常实用,建议收藏)


 9116
9116

 被折叠的 条评论
为什么被折叠?
被折叠的 条评论
为什么被折叠?
 到【灌水乐园】发言


