


五、Docker
1、简介
Docker是一个开源的应用容器引擎;是一个轻量级容器技术
Docker支持将软件编译成一个镜像;然后在镜像中各种软件做好配置,将镜像发布出去,其他使用者可以直接使用这个镜像;
运行中的这个镜像称为容器,容器启动是非常快速的;

2、核心概念
docker主机(Host):安装了Docker程序的机器(Docker直接安装在操作系统之上);
docker客户端(Client):连接docker主机进行操作;
docker仓库(Registry): 用来保存各种打包好的软件镜像。
docker镜像(Images):软件打包好的镜像;放在docker仓库中;
docker容器(Container):镜像启动后的实例称为一个容器;容器是独立运行的一个或一组应用

使用Docker的步骤:
1).安装Docker
2).去Docker仓库找到这个软件对象的镜像;
3).使用Docker运行这个镜像,这个镜像就会生成一个Docker容器;
4).对容器的启动停止就是对软件的启动停止;
3、安装Docker
1)、安装linux虚拟机
1)、VMWare、VirtualBox(安装);
2)、导入虚拟机文件centos7-atguigu.ova;
3)、双击启动linux虚拟机;使用 root/ 123456登陆
4)、使用客户端连接linux服务器进行命令操作;
5)、设置虚拟机网络;
桥接网络=选好网卡==接入网线;
6)、设置好网络以后使用命令重启虚拟机的网络
service network restart
7)、查看linux的ip地址
ip addr
8)、使用客户端连接linux;
2)、在linux虚拟机上安装docker
步骤:
1、检查内核版本,必须是3.10及以上
uname -r
2、安装docker
yum install docker
3、输入y确认安装
4、启动docker
[root@localhost ~]# systemctl start docker
[root@localhost ~]# docker -v
Docker version 1.12.6, build 3e8e77d/1.12.6
5、开机启动docker
[root@localhost ~]# systemctl enable docker
Created symlink from /etc/systemd/system/multi-user.target.wants/docker.service to /usr/lib/systemd/system/docker.service.
6、停止docker
systemctl stop docker
4、Docker常用命令&操作
1)、镜像操作
| 操作 | 命令 | 说明 |
|---|---|---|
| 检索 | docker search 关键字 eg:docker search redis | 我们经常去docker hub上检索镜像的详细信息,如镜像的TAG。 |
| 拉取 | docker pull 镜像名:tag | :tag是可选的,tag表示标签,多为软件的版本,默认是latest |
| 列表 | docker images | 查看所有本地镜像 |
| 删除 | docker rmi image-id | 删除指定的本地镜像 |
2)、容器操作
软件镜像(QQ安装程序)----运行镜像----产生一个容器(正在运行的软件,运行的QQ);
步骤:
1、搜索镜像
[root@localhost ~]# docker search tomcat
2、拉取镜像
[root@localhost ~]# docker pull tomcat
3、根据镜像启动容器
docker run --name mytomcat -d tomcat:latest
4、docker ps
查看运行中的容器
5、 停止运行中的容器
docker stop  容器的id
6、查看所有的容器
docker ps -a
7、启动容器
docker start 容器id
8、删除一个容器
 docker rm 容器id
9、启动一个做了端口映射的tomcat
[root@localhost ~]# docker run -d -p 8888:8080 tomcat
-d:后台运行
-p: 将主机的端口映射到容器的一个端口    主机端口:容器内部的端口

10、为了演示简单关闭了linux的防火墙
service firewalld status ;查看防火墙状态
service firewalld stop:关闭防火墙
11、查看容器的日志
docker logs container-name/container-id

更多命令参看
https://docs.docker.com/engine/reference/commandline/docker/
可以参考每一个镜像的文档
3)、安装MySQL示例
docker pull mysql
错误的启动
[root@localhost ~]# docker run --name mysql01 -d mysql
42f09819908bb72dd99ae19e792e0a5d03c48638421fa64cce5f8ba0f40f5846

mysql退出了
[root@localhost ~]# docker ps -a
CONTAINER ID        IMAGE               COMMAND                  CREATED             STATUS                           PORTS               NAMES
42f09819908b        mysql               "docker-entrypoint.sh"   34 seconds ago      Exited (1) 33 seconds ago                            mysql01
538bde63e500        tomcat              "catalina.sh run"        About an hour ago   Exited (143) About an hour ago                       compassionate_
goldstine
c4f1ac60b3fc        tomcat              "catalina.sh run"        About an hour ago   Exited (143) About an hour ago                       lonely_fermi
81ec743a5271        tomcat              "catalina.sh run"        About an hour ago   Exited (143) About an hour ago                       sick_ramanujan


//错误日志
[root@localhost ~]# docker logs 42f09819908b
error: database is uninitialized and password option is not specified
  You need to specify one of MYSQL_ROOT_PASSWORD, MYSQL_ALLOW_EMPTY_PASSWORD and
  MYSQL_RANDOM_ROOT_PASSWORD;
  这个三个参数必须指定一个
正确的启动
[root@localhost ~]# docker run --name mysql01 -e MYSQL_ROOT_PASSWORD=123456 -d mysql
b874c56bec49fb43024b3805ab51e9097da779f2f572c22c695305dedd684c5f
[root@localhost ~]# docker ps
CONTAINER ID        IMAGE               COMMAND                  CREATED             STATUS              PORTS               NAMES
b874c56bec49        mysql               "docker-entrypoint.sh"   4 seconds ago       Up 3 seconds        3306/tcp            mysql01
做了端口映射
[root@localhost ~]# docker run -p 3306:3306 --name mysql02 -e MYSQL_ROOT_PASSWORD=123456 -d mysql
ad10e4bc5c6a0f61cbad43898de71d366117d120e39db651844c0e73863b9434
[root@localhost ~]# docker ps
CONTAINER ID        IMAGE               COMMAND                  CREATED             STATUS              PORTS                    NAMES
ad10e4bc5c6a        mysql               "docker-entrypoint.sh"   4 seconds ago       Up 2 seconds        0.0.0.0:3306->3306/tcp   mysql02
几个其他的高级操作
docker run --name mysql03 -v /conf/mysql:/etc/mysql/conf.d -e MYSQL_ROOT_PASSWORD=my-secret-pw
-d mysql:tag
把主机的/conf/mysql文件夹挂载到 mysqldocker容器的/etc/mysql/conf.d文件夹里面
改mysql的配置文件就只需要把mysql配置文件放在自定义的文件夹下(/conf/mysql)

docker run --name some-mysql -e MYSQL_ROOT_PASSWORD=my-secret-pw -d mysql:tag --character-set-
server=utf8mb4 --collation-server=utf8mb4_unicode_ci
指定mysql的一些配置参数
六 SpringBoot与数据访问
1.JDBC
<dependency>
			<groupId>org.springframework.boot</groupId>
			<artifactId>spring-boot-starter-jdbc</artifactId>
		</dependency>
		<dependency>
			<groupId>mysql</groupId>
			<artifactId>mysql-connector-java</artifactId>
			<scope>runtime</scope>
		</dependency>
spring:
  datasource:
    username: root
    password: 123456
    url: jdbc:mysql://192.168.15.22:3306/jdbc
    driver-class-name: com.mysql.jdbc.Driver
效果:
默认是用org.apache.tomcat.jdbc.pool.DataSource 作为数据源;
数据源的相关配置都在DataSourceProperties里面
自动配置原理:org.springframework.boot.autoconfigure.jdbc:
- 参考DataSourceConfiguration,根据配置创建数据源,默认使用Tomcat连接池;可以使用spring.datasource.type指定自定义的数据源类型;
- SpringBoot默认可以支持;
org.apache.tomcat.jdbc.pool.DataSource、HikariDataSource、BasicDataSource、 - 自定义数据源类型类型
/** * Generic DataSource configuration. */ @ConditionalOnMissingBean(DataSource.class) @ConditionalOnProperty(name = "spring.datasource.type") static class Generic { @Bean public DataSource dataSource(DataSourceProperties properties) { //使用DataSourceBuilder创建数据源,利用反射创建响应type的数据源,并且绑定相关属性 return properties.initializeDataSourceBuilder().build(); } } - DataSourceInitializer:ApplicationListener;
作用:
1)、runSchemaScripts();运行建表语句;
2)、runDataScripts();运行插入数据的sql语句;
默认只需要将文件命名为:
schema-*.sql、data-*.sql
默认规则:schema.sql,schema-all.sql;
可以使用
	schema:
      - classpath:department.sql
      指定位置
2、整合Druid数据源
导入druid数据源
@Configuration
public class DruidConfig {

    @ConfigurationProperties(prefix = "spring.datasource")
    @Bean
    public DataSource druid(){
       return  new DruidDataSource();
    }

    //配置Druid的监控
    //1、配置一个管理后台的Servlet
    @Bean
    public ServletRegistrationBean statViewServlet(){
        ServletRegistrationBean bean = new ServletRegistrationBean(new StatViewServlet(), "/druid/*");
        Map<String,String> initParams = new HashMap<>();

        initParams.put("loginUsername","admin");
        initParams.put("loginPassword","123456");
        initParams.put("allow","");//默认就是允许所有访问
        initParams.put("deny","192.168.15.21");

        bean.setInitParameters(initParams);
        return bean;
    }


    //2、配置一个web监控的filter
    @Bean
    public FilterRegistrationBean webStatFilter(){
        FilterRegistrationBean bean = new FilterRegistrationBean();
        bean.setFilter(new WebStatFilter());

        Map<String,String> initParams = new HashMap<>();
        initParams.put("exclusions","*.js,*.css,/druid/*");

        bean.setInitParameters(initParams);

        bean.setUrlPatterns(Arrays.asList("/*"));

        return  bean;
    }
}
3、整合MyBatis
		<dependency>
			<groupId>org.mybatis.spring.boot</groupId>
			<artifactId>mybatis-spring-boot-starter</artifactId>
			<version>1.3.1</version>
		</dependency>

步骤:
1). 配置数据源相关属性
2). 给数据库建表
3). 创建javaBean
4). 注解版
//指定这是一个操作数据库的mapper
@Mapper
public interface DepartmentMapper {

    @Select("select * from department where id=#{id}")
    public Department getDeptById(Integer id);

    @Delete("delete from department where id=#{id}")
    public int deleteDeptById(Integer id);

    @Options(useGeneratedKeys = true,keyProperty = "id")
    @Insert("insert into department(departmentName) values(#{departmentName})")
    public int insertDept(Department department);

    @Update("update department set departmentName=#{departmentName} where id=#{id}")
    public int updateDept(Department department);
}
问题:
自定义MyBatis的配置规则;给容器中添加一个ConfigurationCustomizer;
@org.springframework.context.annotation.Configuration
public class MyBatisConfig {

    @Bean
    public ConfigurationCustomizer configurationCustomizer(){
        return new ConfigurationCustomizer(){

            @Override
            public void customize(Configuration configuration) {
                configuration.setMapUnderscoreToCamelCase(true);
            }
        };
    }
}
使用MapperScan批量扫描所有的Mapper接口;
@MapperScan(value = "com.atguigu.springboot.mapper")
@SpringBootApplication
public class SpringBoot06DataMybatisApplication {

	public static void main(String[] args) {
		SpringApplication.run(SpringBoot06DataMybatisApplication.class, args);
	}
}
5)、配置文件版
mybatis:
  config-location: classpath:mybatis/mybatis-config.xml 指定全局配置文件的位置
  mapper-locations: classpath:mybatis/mapper/*.xml  指定sql映射文件的位置
更多使用参照
http://www.mybatis.org/spring-boot-starter/mybatis-spring-boot-autoconfigure/
4、整合SpringData JPA
1)、SpringData简介

2)、整合SpringData JPA
JPA:ORM(Object Relational Mapping);
1)、编写一个实体类(bean)和数据表进行映射,并且配置好映射关系;
//使用JPA注解配置映射关系
@Entity //告诉JPA这是一个实体类(和数据表映射的类)
@Table(name = "tbl_user") //@Table来指定和哪个数据表对应;如果省略默认表名就是user;
public class User {

    @Id //这是一个主键
    @GeneratedValue(strategy = GenerationType.IDENTITY)//自增主键
    private Integer id;

    @Column(name = "last_name",length = 50) //这是和数据表对应的一个列
    private String lastName;
    @Column //省略默认列名就是属性名
    private String email;
2)、编写一个Dao接口来操作实体类对应的数据表(Repository)
//继承JpaRepository来完成对数据库的操作
public interface UserRepository extends JpaRepository<User,Integer> {
}
3)、基本的配置JpaProperties
spring:
 jpa:
    hibernate:
#     更新或者创建数据表结构
      ddl-auto: update
#    控制台显示SQL
    show-sql: true
七、启动配置原理
几个重要的事件回调机制
配置在META-INF/spring.factories
ApplicationContextInitializer
SpringApplicationRunListener
只需要放在ioc容器中
ApplicationRunner
CommandLineRunner
启动流程:
1、创建SpringApplication对象
initialize(sources);
private void initialize(Object[] sources) {
//保存主配置类
if (sources != null && sources.length > 0) {
this.sources.addAll(Arrays.asList(sources));
}
//判断当前是否一个web应用
this.webEnvironment = deduceWebEnvironment();
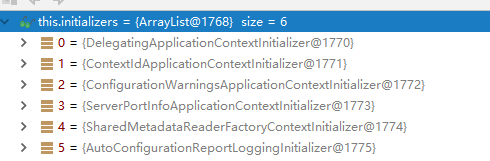
//从类路径下找到META-INF/spring.factories配置的所有ApplicationContextInitializer;然后保存起来
setInitializers((Collection) getSpringFactoriesInstances(
ApplicationContextInitializer.class));
//从类路径下找到ETA-INF/spring.factories配置的所有ApplicationListener
setListeners((Collection) getSpringFactoriesInstances(ApplicationListener.class));
//从多个配置类中找到有main方法的主配置类
this.mainApplicationClass = deduceMainApplicationClass();
}

2、运行run方法
public ConfigurableApplicationContext run(String... args) {
   StopWatch stopWatch = new StopWatch();
   stopWatch.start();
   ConfigurableApplicationContext context = null;
   FailureAnalyzers analyzers = null;
   configureHeadlessProperty();

   //获取SpringApplicationRunListeners;从类路径下META-INF/spring.factories
   SpringApplicationRunListeners listeners = getRunListeners(args);
    //回调所有的获取SpringApplicationRunListener.starting()方法
   listeners.starting();
   try {
       //封装命令行参数
      ApplicationArguments applicationArguments = new DefaultApplicationArguments(
            args);
      //准备环境
      ConfigurableEnvironment environment = prepareEnvironment(listeners,
            applicationArguments);
       		//创建环境完成后回调SpringApplicationRunListener.environmentPrepared();表示环境准备完成

      Banner printedBanner = printBanner(environment);

       //创建ApplicationContext;决定创建web的ioc还是普通的ioc
      context = createApplicationContext();

      analyzers = new FailureAnalyzers(context);
       //准备上下文环境;将environment保存到ioc中;而且applyInitializers();
       //applyInitializers():回调之前保存的所有的ApplicationContextInitializer的initialize方法
       //回调所有的SpringApplicationRunListener的contextPrepared();
       //
      prepareContext(context, environment, listeners, applicationArguments,
            printedBanner);
       //prepareContext运行完成以后回调所有的SpringApplicationRunListener的contextLoaded();

       //s刷新容器;ioc容器初始化(如果是web应用还会创建嵌入式的Tomcat);Spring注解版
       //扫描,创建,加载所有组件的地方;(配置类,组件,自动配置)
      refreshContext(context);
       //从ioc容器中获取所有的ApplicationRunner和CommandLineRunner进行回调
       //ApplicationRunner先回调,CommandLineRunner再回调
      afterRefresh(context, applicationArguments);
       //所有的SpringApplicationRunListener回调finished方法
      listeners.finished(context, null);
      stopWatch.stop();
      if (this.logStartupInfo) {
         new StartupInfoLogger(this.mainApplicationClass)
               .logStarted(getApplicationLog(), stopWatch);
      }
       //整个SpringBoot应用启动完成以后返回启动的ioc容器;
      return context;
   }
   catch (Throwable ex) {
      handleRunFailure(context, listeners, analyzers, ex);
      throw new IllegalStateException(ex);
   }
}
3、事件监听机制
配置在META-INF/spring.factories
ApplicationContextInitializer
public class HelloApplicationContextInitializer implements ApplicationContextInitializer<ConfigurableApplicationContext> {
    @Override
    public void initialize(ConfigurableApplicationContext applicationContext) {
        System.out.println("ApplicationContextInitializer...initialize..."+applicationContext);
    }
}
SpringApplicationRunListener
public class HelloSpringApplicationRunListener implements SpringApplicationRunListener {

    //必须有的构造器
    public HelloSpringApplicationRunListener(SpringApplication application, String[] args){

    }

    @Override
    public void starting() {
        System.out.println("SpringApplicationRunListener...starting...");
    }

    @Override
    public void environmentPrepared(ConfigurableEnvironment environment) {
        Object o = environment.getSystemProperties().get("os.name");
        System.out.println("SpringApplicationRunListener...environmentPrepared.."+o);
    }

    @Override
    public void contextPrepared(ConfigurableApplicationContext context) {
        System.out.println("SpringApplicationRunListener...contextPrepared...");
    }

    @Override
    public void contextLoaded(ConfigurableApplicationContext context) {
        System.out.println("SpringApplicationRunListener...contextLoaded...");
    }

    @Override
    public void finished(ConfigurableApplicationContext context, Throwable exception) {
        System.out.println("SpringApplicationRunListener...finished...");
    }
}
配置(META-INF/spring.factories)
org.springframework.context.ApplicationContextInitializer=\
com.atguigu.springboot.listener.HelloApplicationContextInitializer

org.springframework.boot.SpringApplicationRunListener=\
com.atguigu.springboot.listener.HelloSpringApplicationRunListener
只需要放在ioc容器中
ApplicationRunner
@Component
public class HelloApplicationRunner implements ApplicationRunner {
    @Override
    public void run(ApplicationArguments args) throws Exception {
        System.out.println("ApplicationRunner...run....");
    }
}
CommandLineRunner
@Component
public class HelloCommandLineRunner implements CommandLineRunner {
    @Override
    public void run(String... args) throws Exception {
        System.out.println("CommandLineRunner...run..."+ Arrays.asList(args));
    }
}
八、自定义starter
starter:
1、这个场景需要使用到的依赖是什么?
2、如何编写自动配置
@Configuration  //指定这个类是一个配置类
@ConditionalOnXXX  //在指定条件成立的情况下自动配置类生效
@AutoConfigureAfter  //指定自动配置类的顺序
@Bean  //给容器中添加组件

@ConfigurationPropertie结合相关xxxProperties类来绑定相关的配置
@EnableConfigurationProperties //让xxxProperties生效加入到容器中

自动配置类要能加载
将需要启动就加载的自动配置类,配置在META-INF/spring.factories
org.springframework.boot.autoconfigure.EnableAutoConfiguration=\
org.springframework.boot.autoconfigure.admin.SpringApplicationAdminJmxAutoConfiguration,\
org.springframework.boot.autoconfigure.aop.AopAutoConfiguration,\
3、模式:
启动器只用来做依赖导入;
专门来写一个自动配置模块;
启动器依赖自动配置;别人只需要引入启动器(starter)
mybatis-spring-boot-starter;自定义启动器名-spring-boot-starter
步骤:
1)、启动器模块
<?xml version="1.0" encoding="UTF-8"?>
<project xmlns="http://maven.apache.org/POM/4.0.0"
         xmlns:xsi="http://www.w3.org/2001/XMLSchema-instance"
         xsi:schemaLocation="http://maven.apache.org/POM/4.0.0 http://maven.apache.org/xsd/maven-4.0.0.xsd">
    <modelVersion>4.0.0</modelVersion>

    <groupId>com.atguigu.starter</groupId>
    <artifactId>atguigu-spring-boot-starter</artifactId>
    <version>1.0-SNAPSHOT</version>

    <!--启动器-->
    <dependencies>

        <!--引入自动配置模块-->
        <dependency>
            <groupId>com.atguigu.starter</groupId>
            <artifactId>atguigu-spring-boot-starter-autoconfigurer</artifactId>
            <version>0.0.1-SNAPSHOT</version>
        </dependency>
    </dependencies>

</project>
2)、自动配置模块
<?xml version="1.0" encoding="UTF-8"?>
<project xmlns="http://maven.apache.org/POM/4.0.0" xmlns:xsi="http://www.w3.org/2001/XMLSchema-instance"
   xsi:schemaLocation="http://maven.apache.org/POM/4.0.0 http://maven.apache.org/xsd/maven-4.0.0.xsd">
   <modelVersion>4.0.0</modelVersion>

   <groupId>com.atguigu.starter</groupId>
   <artifactId>atguigu-spring-boot-starter-autoconfigurer</artifactId>
   <version>0.0.1-SNAPSHOT</version>
   <packaging>jar</packaging>

   <name>atguigu-spring-boot-starter-autoconfigurer</name>
   <description>Demo project for Spring Boot</description>

   <parent>
      <groupId>org.springframework.boot</groupId>
      <artifactId>spring-boot-starter-parent</artifactId>
      <version>1.5.10.RELEASE</version>
      <relativePath/> <!-- lookup parent from repository -->
   </parent>

   <properties>
      <project.build.sourceEncoding>UTF-8</project.build.sourceEncoding>
      <project.reporting.outputEncoding>UTF-8</project.reporting.outputEncoding>
      <java.version>1.8</java.version>
   </properties>

   <dependencies>

      <!--引入spring-boot-starter;所有starter的基本配置-->
      <dependency>
         <groupId>org.springframework.boot</groupId>
         <artifactId>spring-boot-starter</artifactId>
      </dependency>

   </dependencies>


</project>
package com.atguigu.starter;

import org.springframework.boot.context.properties.ConfigurationProperties;

@ConfigurationProperties(prefix = "atguigu.hello")
public class HelloProperties {

    private String prefix;
    private String suffix;

    public String getPrefix() {
        return prefix;
    }

    public void setPrefix(String prefix) {
        this.prefix = prefix;
    }

    public String getSuffix() {
        return suffix;
    }

    public void setSuffix(String suffix) {
        this.suffix = suffix;
    }
}
package com.atguigu.starter;

public class HelloService {

    HelloProperties helloProperties;

    public HelloProperties getHelloProperties() {
        return helloProperties;
    }

    public void setHelloProperties(HelloProperties helloProperties) {
        this.helloProperties = helloProperties;
    }

    public String sayHellAtguigu(String name){
        return helloProperties.getPrefix()+"-" +name + helloProperties.getSuffix();
    }
}
package com.atguigu.starter;

import org.springframework.beans.factory.annotation.Autowired;
import org.springframework.boot.autoconfigure.condition.ConditionalOnWebApplication;
import org.springframework.boot.context.properties.EnableConfigurationProperties;
import org.springframework.context.annotation.Bean;
import org.springframework.context.annotation.Configuration;

@Configuration
@ConditionalOnWebApplication //web应用才生效
@EnableConfigurationProperties(HelloProperties.class)
public class HelloServiceAutoConfiguration {

    @Autowired
    HelloProperties helloProperties;
    @Bean
    public HelloService helloService(){
        HelloService service = new HelloService();
        service.setHelloProperties(helloProperties);
        return service;
    }
}
更多SpringBoot整合示例
https://github.com/spring-projects/spring-boot/tree/master/spring-boot-samples


 465
465


 被折叠的 条评论
为什么被折叠?
被折叠的 条评论
为什么被折叠?
 到【灌水乐园】发言


