


在Eclipse EE上搭建基于Scala文件的Maven项目
这篇博客是笔者在进行创新实训课程项目时所做工作的回顾。对于该课程项目所有的工作记录,读者可以参阅下面的链接。
注意!这篇博文不会涉及在机器上安装Hadoop,Spark等环境,仅仅是能够在Eclipse EE上搭建基于Scala文件的Maven项目,请读者留意!
目录
参考资料
在撰写这篇博客时,下面的一些链接给予了我莫大的帮助,在此表示万分感谢!
- Eclipse 创建Maven scala 项目安装并解决加载项目类型慢的问题: https://blog.51cto.com/472053211/2064787
- 解决多个版本的Scala库冲突的问题:https://stackoverflow.com/questions/49601960/more-than-one-scala-library-found-in-the-build-path-when-fresh-creating-maven-pr
还有其他很多网页也提供了很多帮助,我们就不一一列举了。
问题背景描述
在学习这个项目的时候,我想要在自己的机器上撰写scala代码,以便配合队友的工作。于是,我便想到要在Eclipse EE上搭建基于Scala文件的Maven项目。
本文基于的Eclipse EE版本是2019.03版本的,如下图所示:

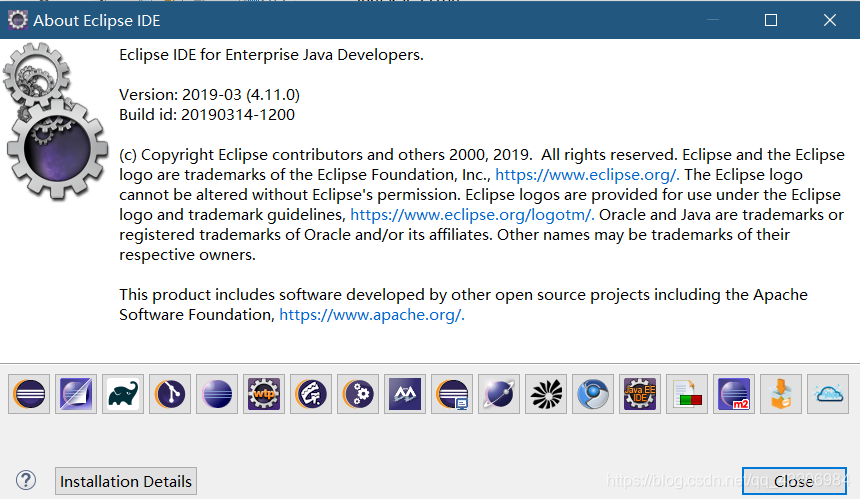
注意!这篇博文不会涉及在机器上安装Hadoop,Spark等环境,仅仅是能够在Eclipse EE上搭建基于Scala文件的Maven项目。所以,后续代码的运行我是交给队友进行的,进展还算顺利吧。
在Eclipse EE上搭建scala编写环境
要想在Eclipse EE上搭建基于scala文件的Maven项目,首先你需要能够在Eclipse EE上创建一个Scala工程。要想做到这一点,我们首先要在Eclipse EE上安装一个叫 Scala IDE 的插件。请读者在菜单栏依次选择 Help > Eclipse MarketPlace … ,在打开的窗口中搜索 scala ide,如下图:
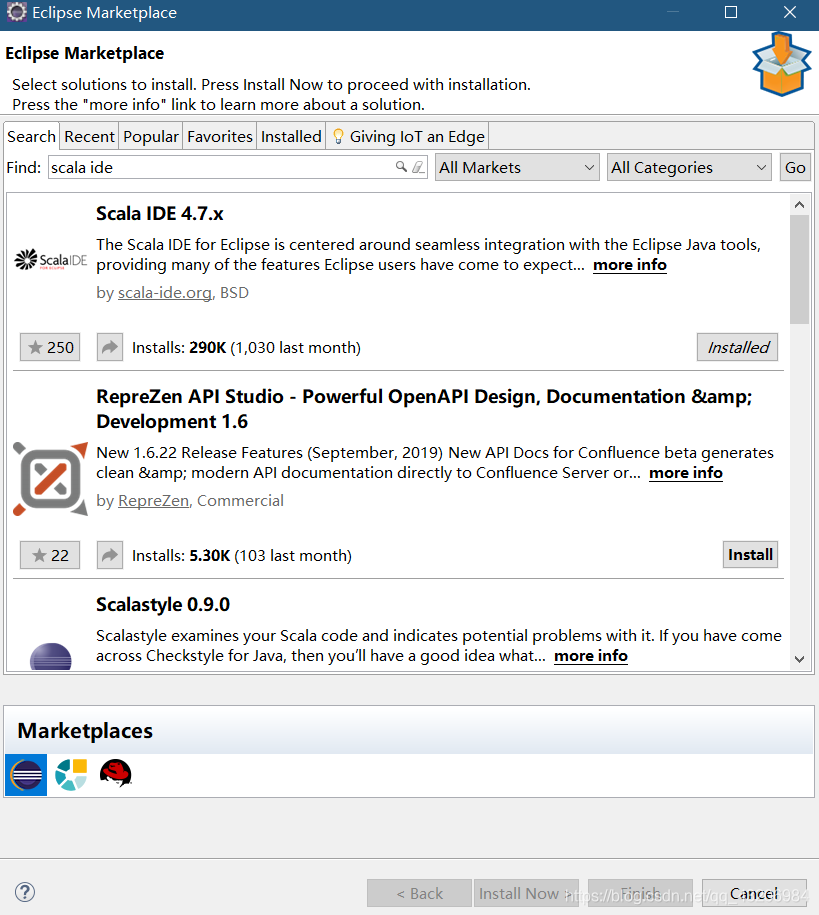
选择Scala IDE 4.7.x这一项,点击Install就安装上了。
这时,我们在Package Explorer区域内右击,就可以创建一个新的Scala Project啦,如图:
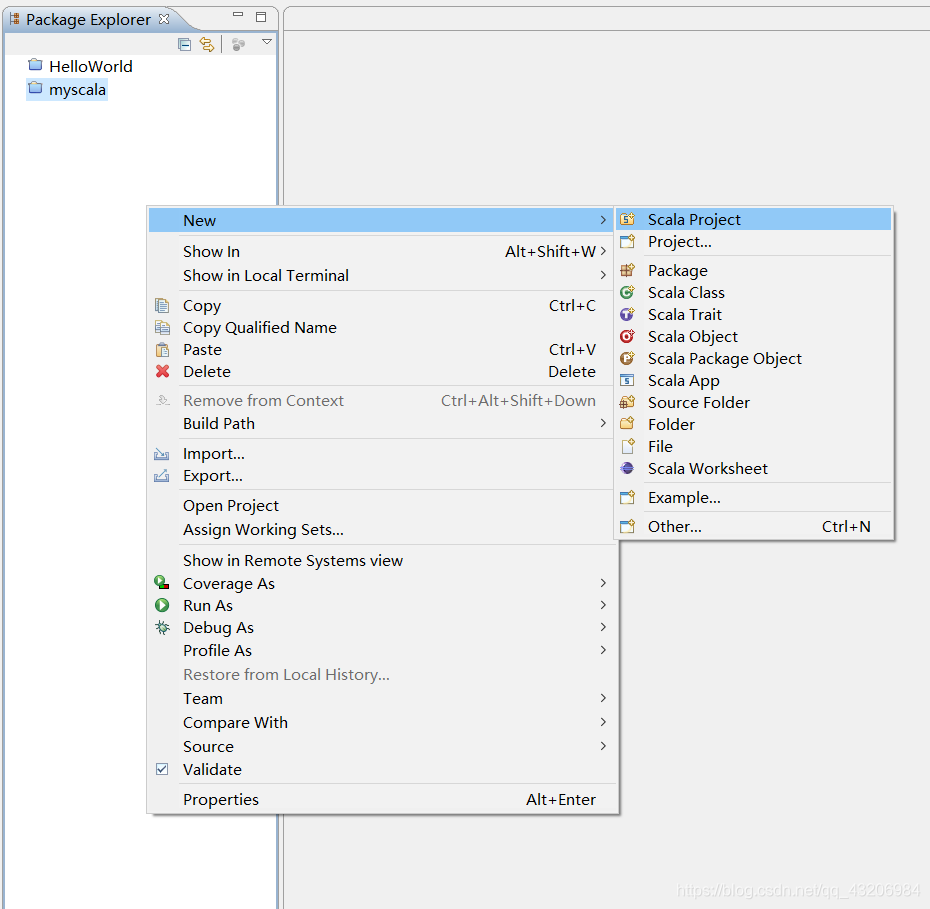
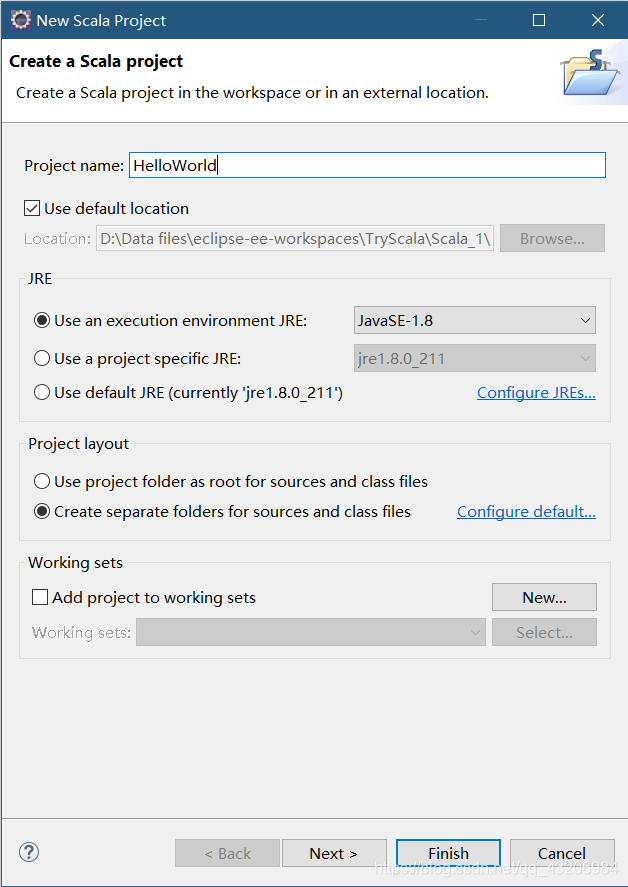
接下来,我们根据这个链接的叙述,来新建一个Scala Project项目,写一下Hello world。首先,在Package Explorer区域内右击,点击 New > Scala Project,在弹出的窗口内输入项目名 HelloWorld,点击Finish,如下:
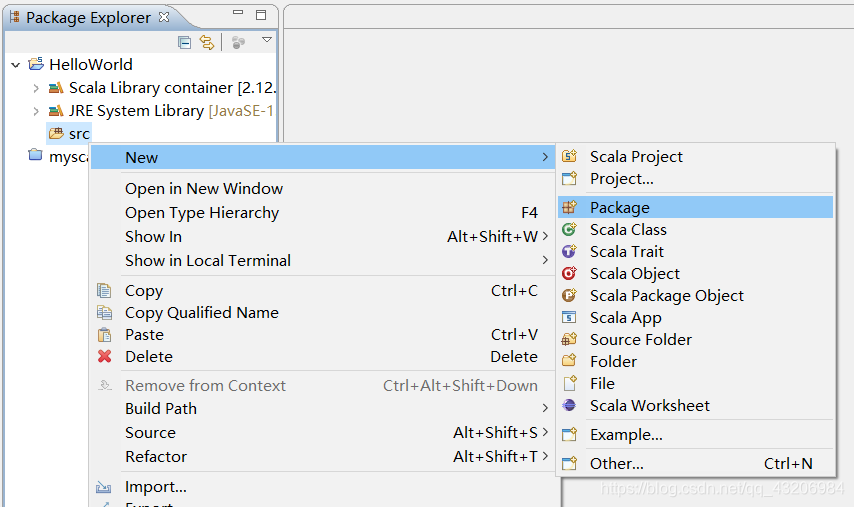
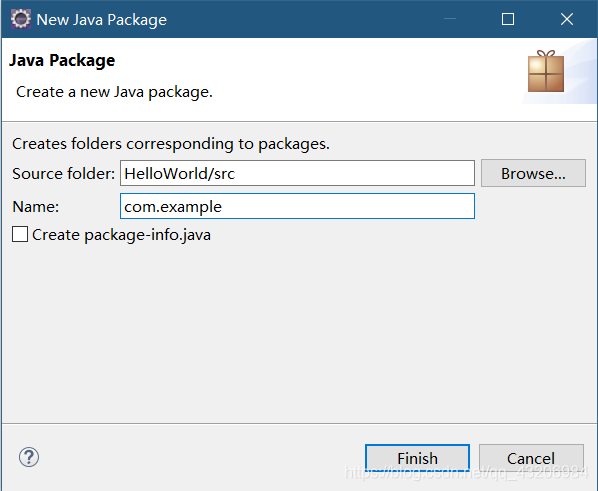
接下来,我们在src文件中新建一个package,名字叫com.example:
然后新建两个文件,一个包含HelloWorld对象,一个包含Student类,如下图:
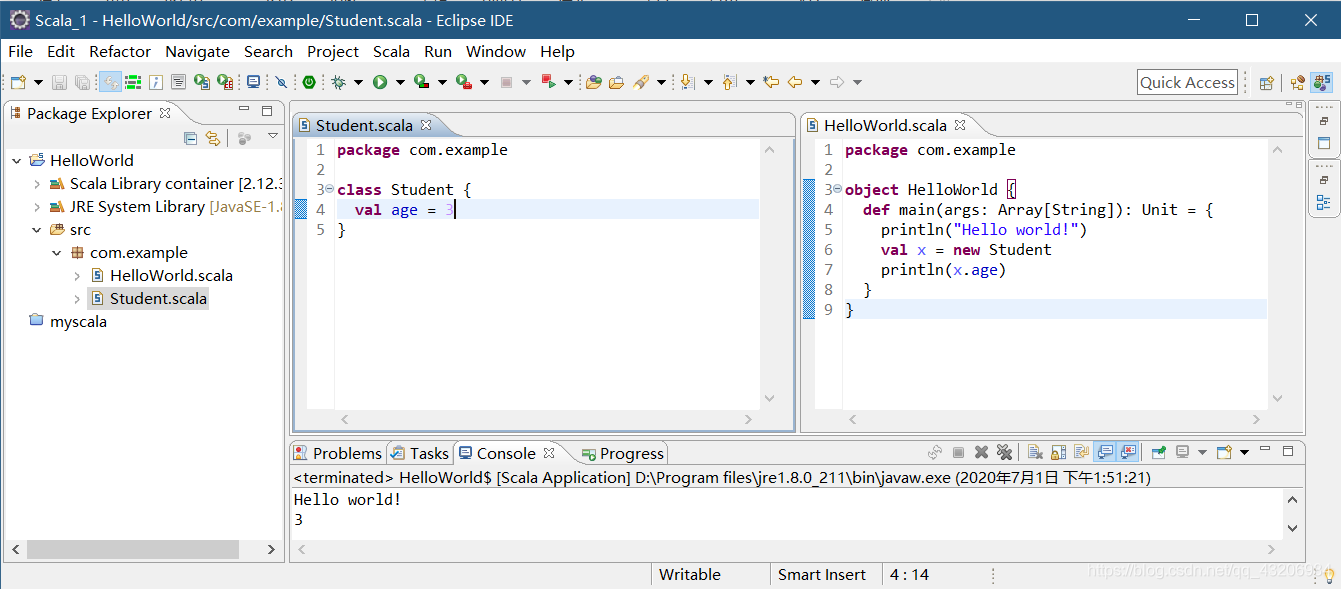
这两个类的代码如下:
HelloWorld.scala:
package com.example

object HelloWorld {
  def main(args: Array[String]): Unit = {
    println("Hello world!")
    val x = new Student
    println(x.age)
  }
}
Student.scala:
package com.example

class Student {
  val age = 3
}
点击运行按钮,你会发现命令行输出了“Hello world!”和“3”两行。这表明,我们可以在Eclipse EE上运行Scala项目了!
怎样才能在Eclipse EE上的Maven项目中写scala文件?
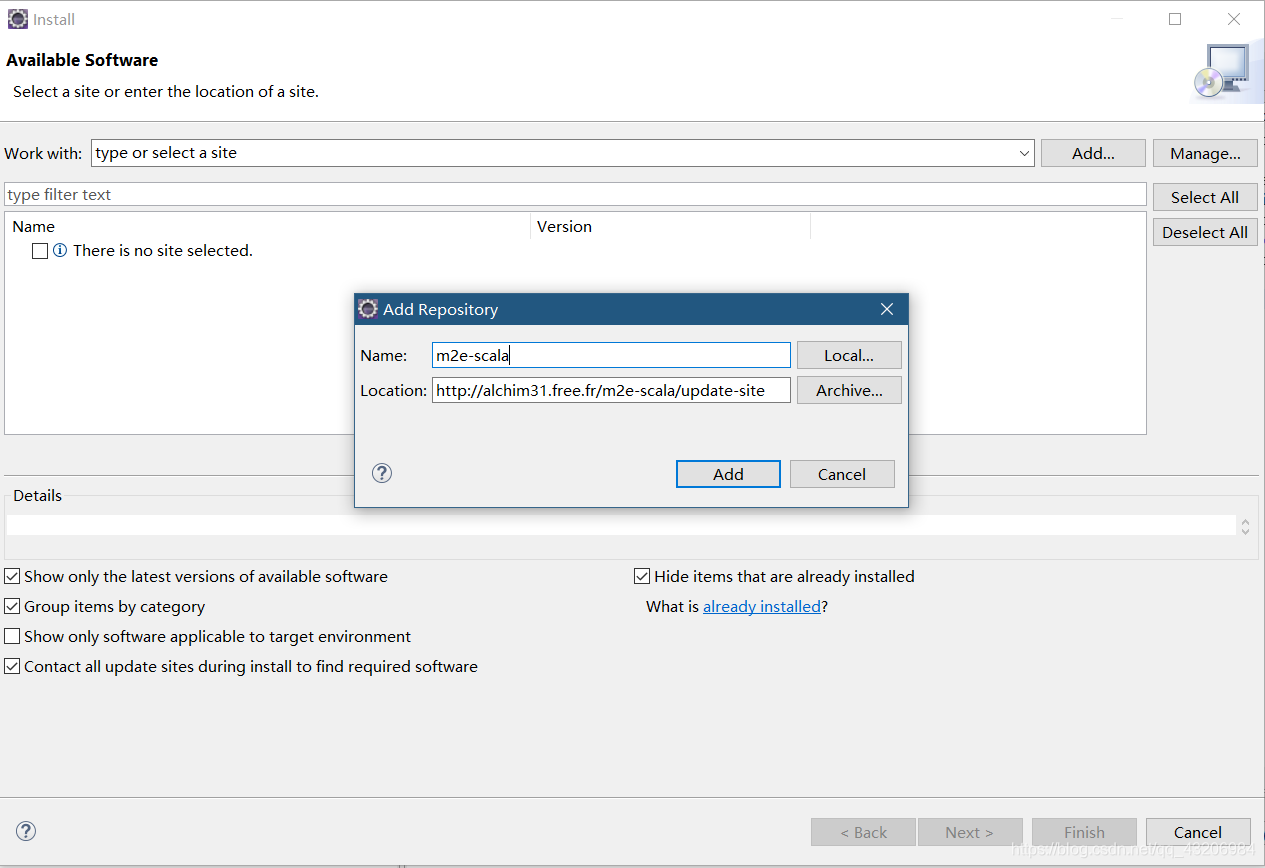
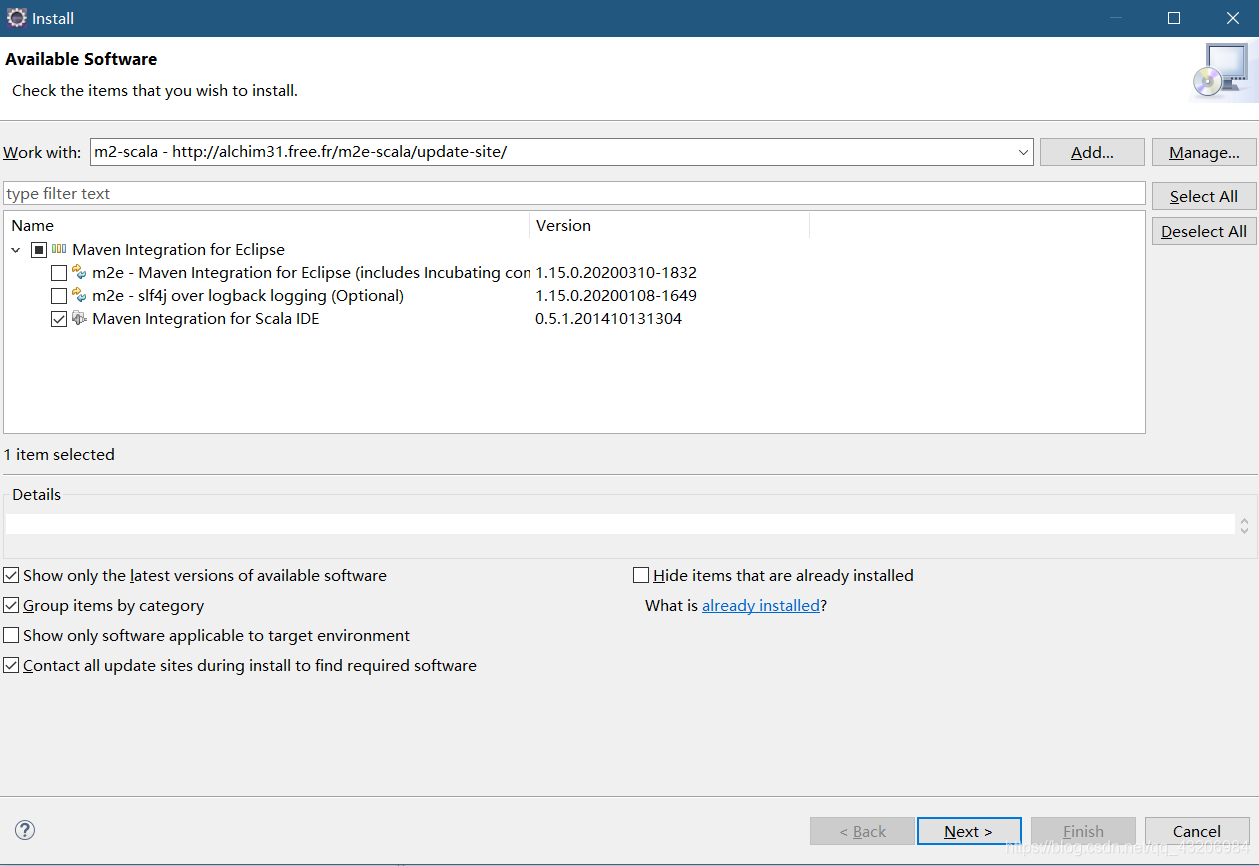
但是,仅仅是这样,我们还是不能在Maven项目中加入scala文件。我们还要根据这个链接的指示,来安装Maven Integration for Scala IDE这个插件。在菜单栏中,依次选择 Help > Install New Software… ,在弹出的页面中,点击Add按钮,添加插件源 http://alchim31.free.fr/m2e-scala/update-site ,给这个源随便起个名字,如下图:
然后,当插件源加载完毕,你应该看到下面的页面。选中Maven Integration for Scala IDE这个插件,然后一路next安装就好了。
搭建基于scala的Maven项目
接下来,我们就试着在工作空间内新建一个基于scala的Maven项目。在这个项目中,我们会引入少量与spark有关的包,但是,我们在这篇博客中不会讲述spark环境的配置。
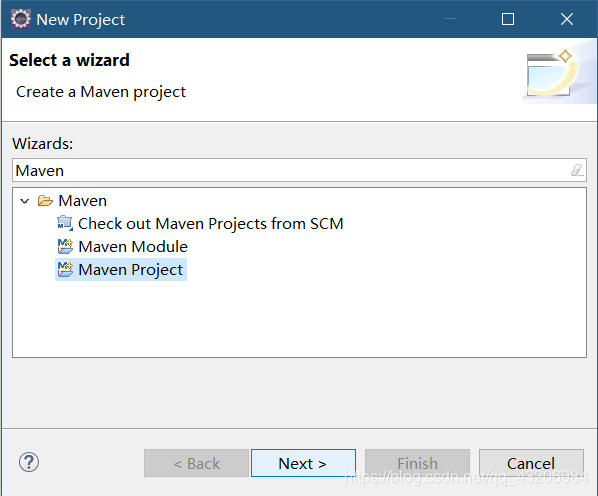
首先,我们先新建一个Maven工程。在Package Explorer中,右键新建一个Project,如下图所示:

接下来,我们搜索Maven,选择新建一个Maven项目,点击Next:
然后在下图中直接点击Next:

在下图中,我们点击右下角的Add Archetype…这个按钮,在弹出的窗口中填入如下信息:
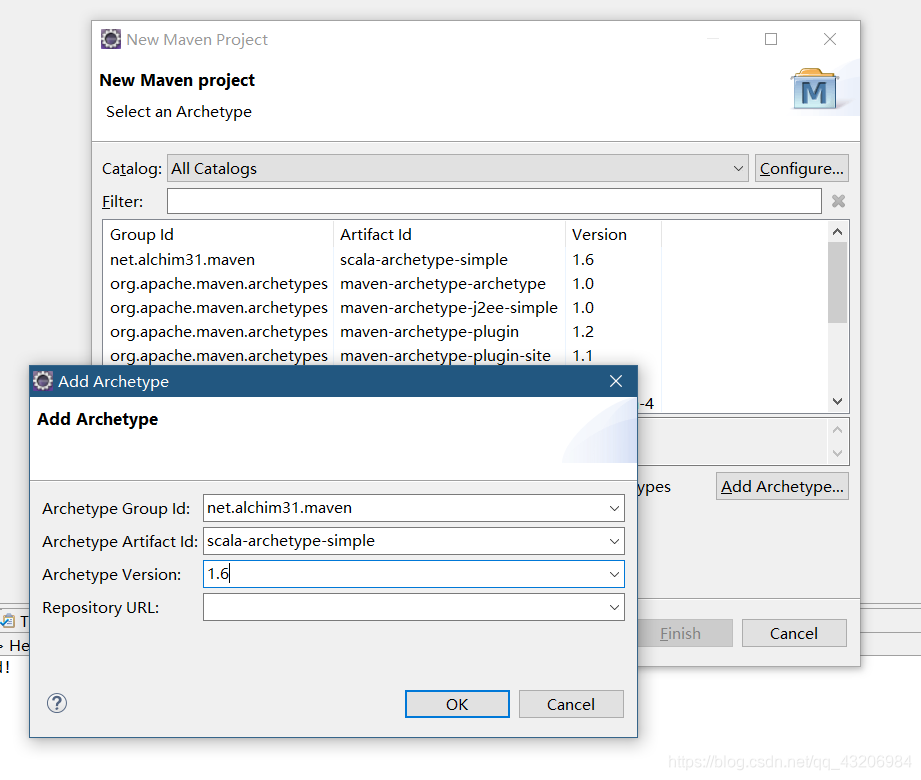
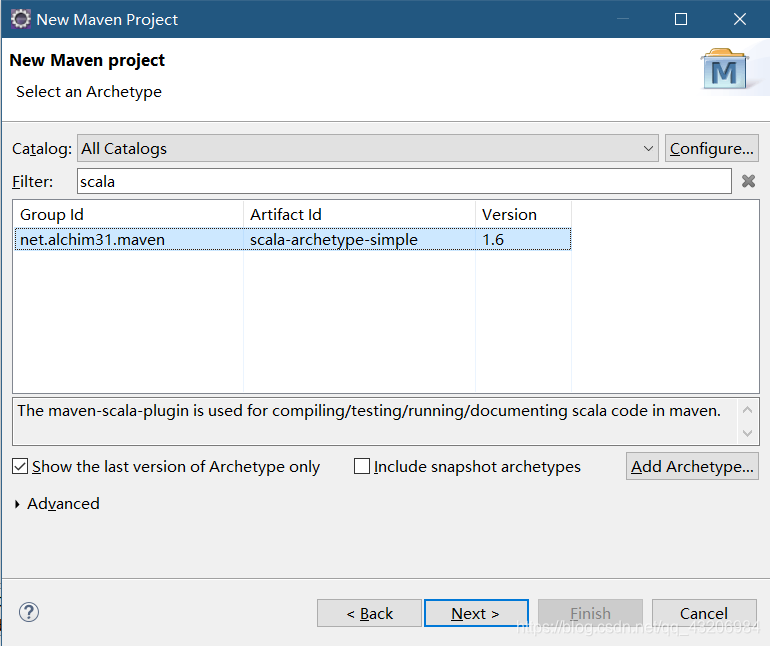
第四个字段空着不用写,点击OK。然后在Filter框里填入“scala”,选中搜出来的这一项,点击Next,如下图:
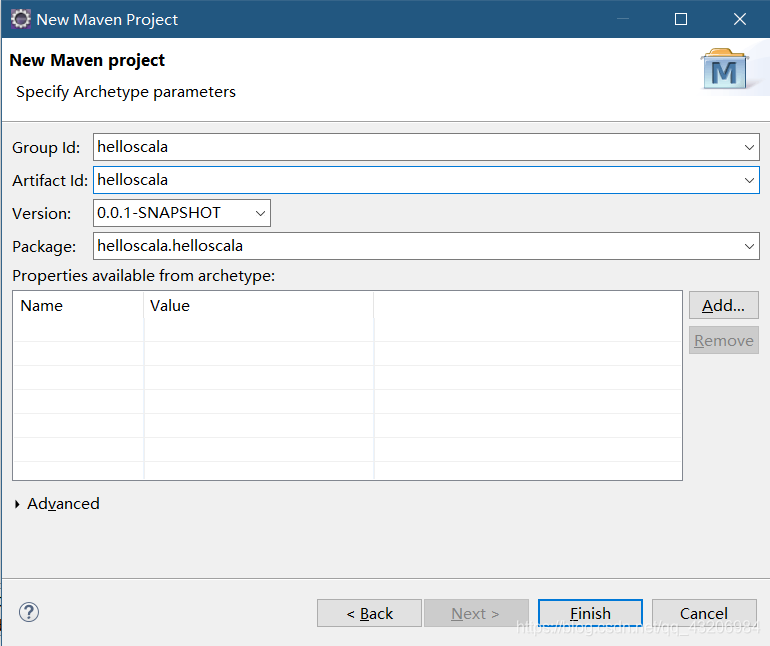
最后,在Group Id与Artifact Id框里填入你喜爱的名字,点击Finish,项目就建好啦:
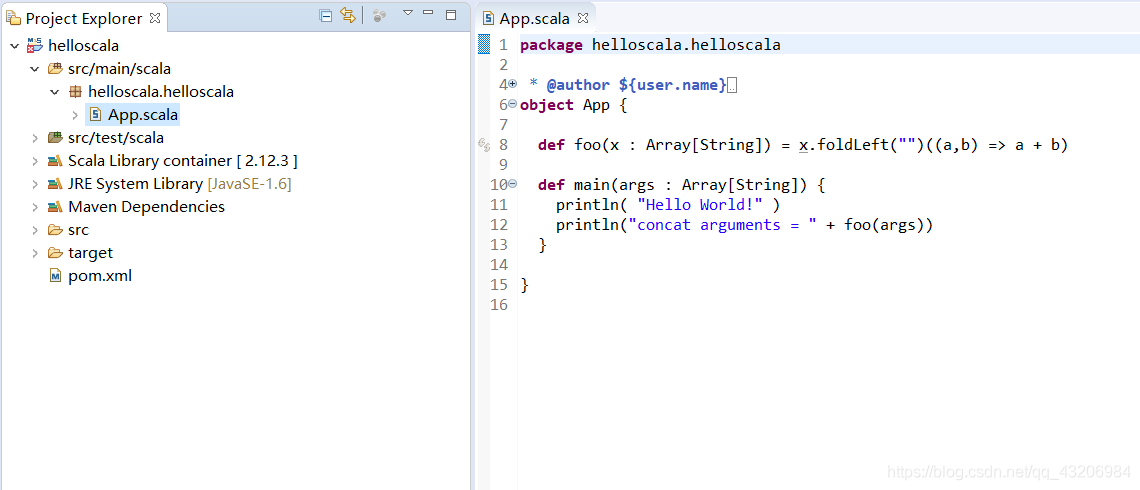
然后,如果正常的话,你应该能够看到下面的景象:
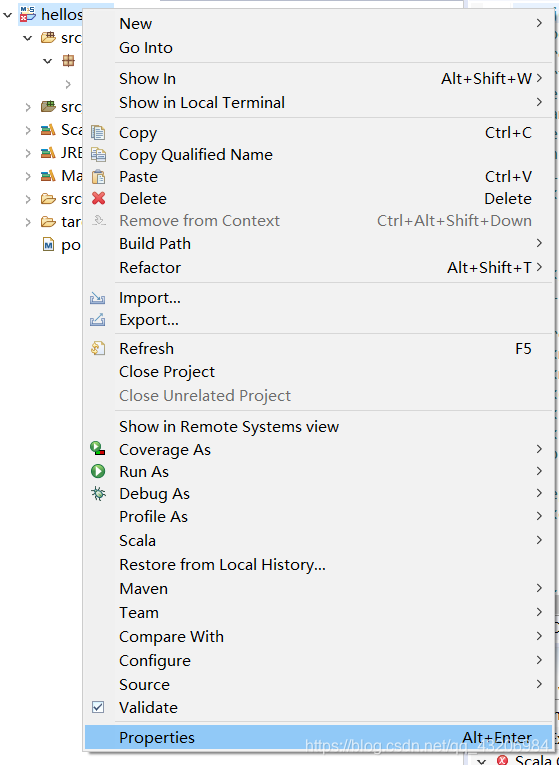
接下来我们配置一下这个Maven工程所用的scala版本。我们这次准备用2.11版本的scala,所以,我们按照这个链接中 Praveen L 的回答,在项目上点击右键,然后选择 Properties > Scala Compiler,选中“Use Project Settings”框,然后选择Latest 2.11 bundle (dynamic) 一项,点击Apply and Close:

再然后,我们完善一下pom.xml的内容。将下面的代码复制到你的pom.xml中,其中包含spark的一些相关库:
<project xmlns="http://maven.apache.org/POM/4.0.0" xmlns:xsi="http://www.w3.org/2001/XMLSchema-instance" xsi:schemaLocation="http://maven.apache.org/POM/4.0.0 http://maven.apache.org/maven-v4_0_0.xsd">
  <modelVersion>4.0.0</modelVersion>
  <groupId>myscala</groupId>
  <artifactId>myscala</artifactId>
  <version>0.0.1-SNAPSHOT</version>
  <name>${project.artifactId}</name>
  <description>My wonderfull scala app</description>
  <inceptionYear>2015</inceptionYear>
  <licenses>
    <license>
      <name>My License</name>
      <url>http://....</url>
      <distribution>repo</distribution>
    </license>
  </licenses>

  <properties>
    <maven.compiler.source>1.6</maven.compiler.source>
    <maven.compiler.target>1.6</maven.compiler.target>
    <encoding>UTF-8</encoding>
    <scala.version>2.11</scala.version>
    <scala.compat.version>2.11</scala.compat.version>
    <spark.version>2.4.0</spark.version>
    <hadoop.version>2.6.0</hadoop.version>
  </properties>

  <dependencies>
    <dependency>
      <groupId>org.scala-lang</groupId>
      <artifactId>scala-library</artifactId>
      <version>2.11.5</version>
    </dependency>

    <dependency>
            <groupId>junit</groupId>
            <artifactId>junit</artifactId>
            <version>4.12</version>
        </dependency>

    <dependency>
        <groupId>org.specs2</groupId>
        <artifactId>specs2-junit_${scala.compat.version}</artifactId>
        <version>2.4.16</version>
        <scope>test</scope>
    </dependency>

    <dependency>
          <groupId>org.apache.spark</groupId>
          <artifactId>spark-core_${scala.version}</artifactId>
          <version>${spark.version}</version>
      </dependency>

      <dependency>
          <groupId>org.apache.spark</groupId>
          <artifactId>spark-sql_${scala.version}</artifactId>
          <version>${spark.version}</version>
      </dependency>

      <dependency>
          <groupId>org.apache.spark</groupId>
          <artifactId>spark-hive_${scala.version}</artifactId>
          <version>${spark.version}</version>
      </dependency>

      <dependency>
          <groupId>org.apache.spark</groupId>
          <artifactId>spark-streaming_${scala.version}</artifactId>
          <version>${spark.version}</version>
      </dependency>

      <dependency>
          <groupId>org.apache.spark</groupId>
          <artifactId>spark-mllib_${scala.version}</artifactId>
          <version>${spark.version}</version>
      </dependency>

      <dependency>
          <groupId>org.apache.hadoop</groupId>
          <artifactId>hadoop-client</artifactId>
          <version>2.7.0</version>
      </dependency>

      <dependency>
            <groupId>junit</groupId>
            <artifactId>junit</artifactId>
            <version>4.12</version>
        </dependency>
        <dependency>
            <groupId>org.slf4j</groupId>
            <artifactId>slf4j-api</artifactId>
            <version>1.6.6</version>
        </dependency>
        <dependency>
            <groupId>org.slf4j</groupId>
            <artifactId>slf4j-log4j12</artifactId>
            <version>1.6.6</version>
        </dependency>

        <dependency>
            <groupId>log4j</groupId>
            <artifactId>log4j</artifactId>
            <version>1.2.16</version>
        </dependency>

        <dependency>
            <groupId>dom4j</groupId>
            <artifactId>dom4j</artifactId>
            <version>1.6.1</version>
        </dependency>
        <dependency>
            <groupId>jaxen</groupId>
            <artifactId>jaxen</artifactId>
            <version>1.1.6</version>
        </dependency>
        <dependency>
            <groupId>args4j</groupId>
            <artifactId>args4j</artifactId>
            <version>2.33</version>
        </dependency>
        <dependency>
            <groupId>jline</groupId>
            <artifactId>jline</artifactId>
            <version>2.14.5</version>
        </dependency>


    <!-- Test -->
    <dependency>
      <groupId>junit</groupId>
      <artifactId>junit</artifactId>
      <version>4.11</version>
      <scope>test</scope>
    </dependency>
    <dependency>
      <groupId>org.specs2</groupId>
      <artifactId>specs2-core_${scala.compat.version}</artifactId>
      <version>2.4.16</version>
      <scope>test</scope>
    </dependency>
    <dependency>
      <groupId>org.scalatest</groupId>
      <artifactId>scalatest_${scala.compat.version}</artifactId>
      <version>2.2.4</version>
      <scope>test</scope>
    </dependency>
  </dependencies>

  <build>
    <sourceDirectory>src/main/scala</sourceDirectory>
    <testSourceDirectory>src/test/scala</testSourceDirectory>
    <plugins>
      <plugin>
        <!-- see http://davidb.github.com/scala-maven-plugin -->
        <groupId>net.alchim31.maven</groupId>
        <artifactId>scala-maven-plugin</artifactId>
        <version>3.2.0</version>
        <executions>
          <execution>
            <goals>
              <goal>compile</goal>
              <goal>testCompile</goal>
            </goals>
            <configuration>
              <args>
                <arg>-make:transitive</arg>
                <arg>-dependencyfile</arg>
                <arg>${project.build.directory}/.scala_dependencies</arg>
              </args>
            </configuration>
          </execution>
        </executions>
      </plugin>
      <plugin>
        <groupId>org.apache.maven.plugins</groupId>
        <artifactId>maven-surefire-plugin</artifactId>
        <version>2.18.1</version>
        <configuration>
          <useFile>false</useFile>
          <disableXmlReport>true</disableXmlReport>
          <!-- If you have classpath issue like NoDefClassError,... -->
          <!-- useManifestOnlyJar>false</useManifestOnlyJar -->
          <includes>
            <include>**/*Test.*</include>
            <include>**/*Suite.*</include>
          </includes>
        </configuration>
      </plugin>
    </plugins>
  </build>
</project>
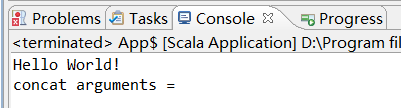
等待Eclipse后台安装完毕,就可以快乐地写代码了!这时,如果你运行App.scala(工程初始时自带),控制台是可以输出“Hello, world!”的:
小结
在这篇博客中,我们简要地介绍了如何在Eclipse EE中搭建一个scala开发环境,并将Maven与Scala结合在了一起。下一篇博客,就是在上一篇博客搭建的环境上探索的。


 2389
2389


 被折叠的 条评论
为什么被折叠?
被折叠的 条评论
为什么被折叠?
 到【灌水乐园】发言


