


一、基于端口访问
在网卡只有一个,或者服务器资源有限的情况下有多个网站,就可以基于端口,或者基于域名来实现资源的访问。基于端口访问就是配置多个不同的端口,将域名指向同一个ip不同的端口来实现。
nginx.conf配置文件如下
#user nobody;
worker_processes 8;
events {
worker_connections 1024;
}
http {
include mime.types;
default_type application/octet-stream;
sendfile on;
keepalive_timeout 65;
##指定不同端口访问配置server段第一个端口800
server {
listen 800; #第一端口800
server_name localhost;
location / {
root /www/ctm/xcy-project/yun-app-lives; ##网站目录
try_files $uri $uri/ /;
index index.html index.htm;
}
error_page 500 502 503 504 /50x.html;
location = /50x.html {
root html;
}
}
##指定不同端口访问配置server段第二个端口801
server {
listen 801; #第二个端口801
server_name localhost;
location / {
root /www/ctm/xcy-project/yun-app; #项目路径
try_files $uri $uri/ /;
index index.html index.htm;
}
error_page 500 502 503 504 /50x.html;
location = /50x.html {
}
}
}
保存重启
测试访问800端口
ip:800

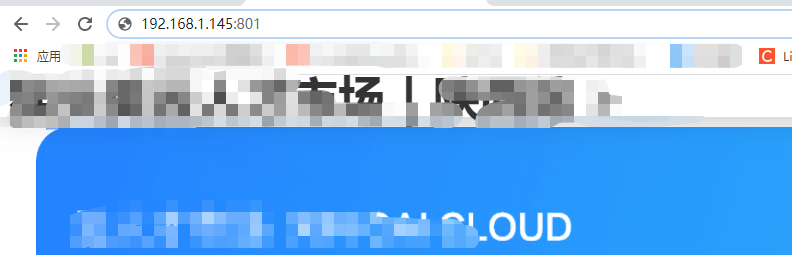
测试访问801端口
ip:801
以上就是基于同ip不同端口访问,域名指定相应ip及端口就好。
二、基于不同域名访问
一般都是在nginx.conf的尾部加入include,使用vhost这样每个网页用单独的配置。
nginx.cnof最尾部的括号内添加如下
include vhost/*.conf;

配置文件的同级目录创建一个vhost文件夹

进入vhost目录下创建两个文件,实现不同域名访问。文件名的最后要以.conf结尾。

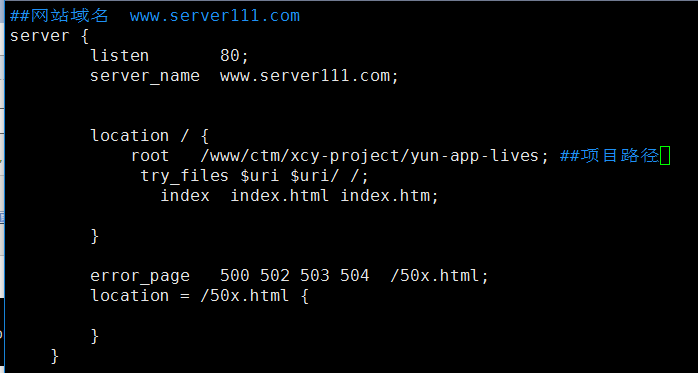
www.server111.com的配置文件如下
##网站域名 www.server111.com
server {
listen 80;
server_name www.server111.com; ##指定域名
location / {
root /www/ctm/xcy-project/yun-app-lives; ##项目路径
try_files $uri $uri/ /;
index index.html index.htm;
}
error_page 500 502 503 504 /50x.html;
location = /50x.html {
}
}
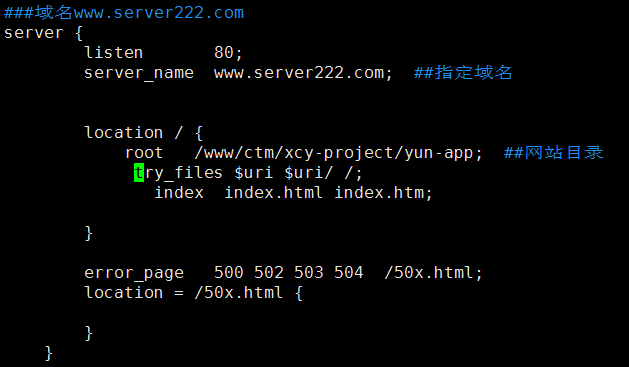
www.server222.com的配置文件如下
其实只需要修改一下项目路径及域名即可。
配置完成保存,然后重启nginx
因为我们域名是自己编写的,所以需要添加到本地的hosts文件,不然是无法访问的。
C:\Windows\System32\drivers\etc

添加你自己设置的域名+ip ,尾部添加。
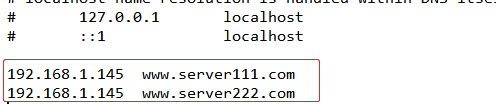
保存然后就可以测试访问
www.server111.com

测试访问
www.server222.com


 3万+
3万+


 被折叠的 条评论
为什么被折叠?
被折叠的 条评论
为什么被折叠?
 到【灌水乐园】发言


