小程序 卡片式动效实现

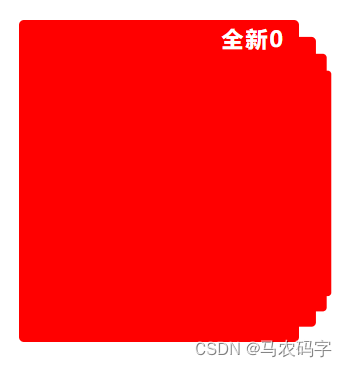
效果如下:
在这里插入图片描述
demo:

<!-- 折叠轮播图 组件-->
<template>
  <view class="swpbig">
    <view
      ref="swiperPanel"
      class="swiperPanel"
      @touchstart="startMove"
      @touchend="endMove"
    >
      <view
        v-for="(item, index) in swiperList"
        :key="index"
        class="swiperItem"
        :style="{transform: itemStyle[index].transform, zIndex: itemStyle[index].zIndex, opacity: itemStyle[index].opacity}"
      >
        <view class="children">
          <view class="pic">
            <!-- <span>{{ index }}</span> -->
            <image
              class="pici"
              :src="item.url"
            />
            <!--  <image
              class="banner_signal"
              src="../../static/banner_signal.png"
              mode=""
            /> -->
            <view class="swpnew">全新{{ index }}</view>
          </view>
        </view>
      </view>
    </view>
  </view>
</template>
 
<script>
var timer
export default {
  props: {
    swiperList: {
      type: Array,
      default: () => [
        {
          type: 'Array'
          // url: '../../static/banone.png'
        }, {
          type: 'Array'
          // url: '../../static/bantwo.png'
        }, {
          type: 'Array'
          // url: '../../static/banthree.png'
        }, {
          type: 'Array'
          // url: '../../static/banthree.png'
        }, {
          type: 'Array'
          // url: '../../static/banthree.png'
        }
      ]
    }
  },
  data() {
    return {
      slideNote: {
        x: 0,
        y: 0
      },
      screenWidth: 0,
      itemStyle: [],
      active: 0
    }
  },
  created() {
    var macInfo = uni.getSystemInfoSync()
    this.screenWidth = macInfo.screenWidth
    // 计算swiper样式
    this.swiperList.forEach((item, index) => {
      this.itemStyle.push(this.getStyle(index))
    })
    // timer = setInterval(() => {
    // this.rightSlider()
    // }, 3000)
  },
  methods: {
    rightSlider() {
      var newList = JSON.parse(JSON.stringify(this.itemStyle))
      var last = [newList.pop()]
      newList = last.concat(newList)
      this.itemStyle = newList
    },
    getStyle(e, style) {
      // if (e > this.swiperList.length / 2) {
      //   console.log(e)
      //   var right = this.swiperList.length - e
      //   return {
      //     transform: 'scale(' + (1 - right / 10) + ') translate(-' + (right * 9) + '%,0px)',
      //     zIndex: 9999 - right
      //     // opacity: 0.5 / right
      //   }
      // } else {
      return {
        transform: 'scale(' + (1 - e / 10) + ') translate(' + (e * 9) + '%,0px)',
        zIndex: 9999 - e
        // opacity: 0.5 / e
      }
      // }
    },
    startMove(e) {
      clearInterval(timer)
      this.slideNote.x = e.changedTouches[0] ? e.changedTouches[0].pageX : 0
      this.slideNote.y = e.changedTouches[0] ? e.changedTouches[0].pageY : 0
    },
    endMove(e) {
      // timer = setInterval(() => {
      //   this.rightSlider()
      // }, 3000)
      let staticTransform = ''
      let staticActive = ''
      var newList = JSON.parse(JSON.stringify(this.itemStyle))
      if ((e.changedTouches[0].pageX - this.slideNote.x) < 0) {
        staticActive = this.active
        // 向左滑动
        var last = [newList.pop()]
        // console.log('左滑', last)
        newList = last.concat(newList)
        const item = newList[staticActive]
        staticTransform = item.transform
        item.transform = 'translateX(-110%) rotate(-10deg)'
        if (this.active <= this.itemStyle.length - 2) {
          this.active++
        } else {
          this.active = 0
        }
      } else if ((e.changedTouches[0].pageX - this.slideNote.x) > 0) {
        if (this.active === 0) {
          this.active = this.itemStyle.length - 1
        } else {
          this.active--
        }
        staticActive = this.active
        // 向右滑动
        newList.push(newList[0])
        newList.splice(0, 1)
        const item = newList[staticActive]
        staticTransform = item.transform
        // item.transform = 'translateX(-110%) rotate(-5deg)'
      } else {
        // 点击
      }
      this.itemStyle = newList
      setTimeout(() => {
        const item = this.itemStyle[staticActive]
        item.transform = staticTransform
      }, 500)
    }
  }
}
</script>
 
<style lang="scss">
	.swpbig{
		overflow: hidden;
		margin-top: 100px;
	}
	.swiperPanel {
		margin-top: 50upx;
		height: 680upx;
		width: 686upx;
		overflow: hidden;
		position: relative;
		margin-left:80upx;
 
		.swiperItem {
			height: 100%;
			width: 100%;
			position: absolute;
			top: 0;
			left: 0upx;
			transition: all .5s;
 
			.children {
				// height: 100%;
				width: 570upx;
				margin: 2upx 160upx 2upx 0;
				position: relative;
				
				.pic {
					position: relative;
					height: 645rpx;
					width: 560rpx;
					border-radius: 10upx;
				}
				.pici{
					position: absolute;
					height: 645rpx;
					width: 560rpx;
					border-radius: 10upx;	
					background: red;
				}
				.banner_signal{
					position: absolute;
					height: 645rpx;
					width: 560rpx;
					top: 0;
				}
				.swpnew{
					position: absolute;
					height: 63rpx;
					font-size: 45rpx;
					font-weight: bold;
					color: #FFF;
					line-height: 53rpx;
					right: 28rpx;
					margin-top: 12rpx;
					letter-spacing: 5rpx;
				}
			}
		}
	}
</style>
  • 1
    点赞
  • 0
    收藏
    觉得还不错? 一键收藏
  • 1
    评论
以下是一个简单的 Android 卡片展开动效实例: 1. 首先,创建一个布局文件 card_layout.xml,用于显示卡片内容: ``` <LinearLayout android:id="@+id/cardLayout" android:layout_width="match_parent" android:layout_height="wrap_content" android:background="@drawable/card_bg" android:orientation="vertical" android:padding="16dp"> <TextView android:id="@+id/titleTextView" android:layout_width="match_parent" android:layout_height="wrap_content" android:text="Card Title" android:textSize="18sp" /> <TextView android:id="@+id/contentTextView" android:layout_width="match_parent" android:layout_height="wrap_content" android:text="Card Content" android:textSize="14sp" /> </LinearLayout> ``` 2. 创建一个展开动画的布局文件 expand_layout.xml,用于显示展开后的卡片内容: ``` <LinearLayout android:id="@+id/expandLayout" android:layout_width="match_parent" android:layout_height="wrap_content" android:background="@drawable/card_bg" android:orientation="vertical" android:padding="16dp"> <TextView android:id="@+id/titleTextView" android:layout_width="match_parent" android:layout_height="wrap_content" android:text="Card Title" android:textSize="18sp" /> <TextView android:id="@+id/contentTextView" android:layout_width="match_parent" android:layout_height="wrap_content" android:text="Card Content" android:textSize="14sp" /> <TextView android:id="@+id/extraTextView" android:layout_width="match_parent" android:layout_height="wrap_content" android:text="Extra Content" android:textSize="14sp" /> </LinearLayout> ``` 3. 创建一个动画类 CardExpandAnimation.java,用于实现卡片的展开和收起: ``` public class CardExpandAnimation extends Animation { private View view; private int startHeight; private int endHeight; public CardExpandAnimation(View view) { this.view = view; this.startHeight = view.getHeight(); this.endHeight = view.getResources().getDimensionPixelSize(R.dimen.card_expand_height); } @Override protected void applyTransformation(float interpolatedTime, Transformation t) { int newHeight = (int) (startHeight + (endHeight - startHeight) * interpolatedTime); view.getLayoutParams().height = newHeight; view.requestLayout(); } @Override public boolean willChangeBounds() { return true; } } ``` 4. 在 Activity 中,实现卡片的展开和收起: ``` public class MainActivity extends AppCompatActivity { private LinearLayout cardLayout; private LinearLayout expandLayout; private boolean isExpanded = false; @Override protected void onCreate(Bundle savedInstanceState) { super.onCreate(savedInstanceState); setContentView(R.layout.activity_main); cardLayout = findViewById(R.id.cardLayout); expandLayout = findViewById(R.id.expandLayout); cardLayout.setOnClickListener(new View.OnClickListener() { @Override public void onClick(View v) { if (isExpanded) { collapseCard(); } else { expandCard(); } } }); } private void expandCard() { CardExpandAnimation animation = new CardExpandAnimation(cardLayout); animation.setDuration(300); cardLayout.startAnimation(animation); expandLayout.setVisibility(View.VISIBLE); isExpanded = true; } private void collapseCard() { CardExpandAnimation animation = new CardExpandAnimation(cardLayout); animation.setDuration(300); cardLayout.startAnimation(animation); expandLayout.setVisibility(View.GONE); isExpanded = false; } } ``` 在这个例子中,我们通过 CardExpandAnimation 类实现了卡片的展开和收起,并在 Activity 中实现了点击事件来触发展开和收起动画。展开后的卡片内容使用了一个单独的布局文件 expand_layout.xml 来实现

“相关推荐”对你有帮助么?

  • 非常没帮助
  • 没帮助
  • 一般
  • 有帮助
  • 非常有帮助
提交
评论 1
添加红包

请填写红包祝福语或标题

红包个数最小为10个

红包金额最低5元

当前余额3.43前往充值 >
需支付:10.00
成就一亿技术人!
领取后你会自动成为博主和红包主的粉丝 规则
hope_wisdom
发出的红包
实付
使用余额支付
点击重新获取
扫码支付
钱包余额 0

抵扣说明:

1.余额是钱包充值的虚拟货币,按照1:1的比例进行支付金额的抵扣。
2.余额无法直接购买下载,可以购买VIP、付费专栏及课程。

余额充值