


文章目录
c++ 新特性
auto关键字
auto 能做什么
//编译器能通过上下文,推断出auto变量的类型

auto fun(int a,int b)
{
	return a + b;
}

int main()
{
	auto a = 10;
	auto c = 'c';
	auto str = "qwe";
	return 0;
}
在c++ 14中auto 可以作为函数的返回值;
auto可以用于定义函数,不能用于声明函数,例如:
class Test
{
public:
	//会发生变异时的错误
    auto TestWork(int a ,int b);
};
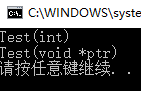
nullptr用法
class Test
{
public:
	Test(int index)
	{
		cout << "Test(int)" << endl;
	}

	Test(void *ptr)
	{
		cout << "Test(void *ptr)" << endl;
	}
};

int main()
{
	Test(NULL);		//NULL 是宏定义,代表整形值0
	Test(nullptr);
}
for循环
int main()
{
	vector<int> vec;
	for(int i = 0; i < 10; i++)
	{
		vec.push_back(rand());
	}

	//内部迭代器实现
	for(auto val:vec)
	{
		cout << val << " ";
	}
	cout << endl;
	return 0;
}
STL
数组array
int main()
{
	//用法与普通的数组基本一样,
	//在底层封装了迭代器
	array<int,4> arr = {1,2,3,4};

	for(auto val:arr)
	{
		cout << val << " ";
	}
	cout << endl;
	int size = sizeof(arr);
	cout << "数组的字节数" << size << endl;
}
forward_list
与list 一样都是链式结构,list 采用的是双向链表,forward_list 采用的是单向链表
int main()
{
	//用法与list 的用法一样
	forward_list<int> ls;
	for(int i = 0; i < 10; i++)
	{
		ls.push_front(rand());
	}
	for(auto val:ls)
	{
		cout << val << " ";
	}
	cout <<endl;
	return 0;
}
unordered_map 与 unordered_set
使用方法与map 类似,只是底层实现的数据结构不一样,map set 基于红黑树
unordered_map 与unordered_set底层实现的数据结构是哈希表,所以在选择容器的时候,如果对数据的有序性有要求,则选择map 或则 set ;如果对有序性没有要求,则选择unordered_map 或者 ubordered_set,因为哈希表的增删查的时间复杂度都接近于O(1
int main()
{
	srand(time(0));
	unordered_map<int ,int> ma;
	for(int i = 0; i < 100; i++)
	{
		ma[rand() % 10 + 1]++;
	}

	for(auto val:ma)
	{
		cout << val.first << "==>" << val.second << endl;
	}
	return 0;
}
多线程
thread
void threadfun1()
{
	cout << "threadfun1()" << endl;
	this_thread::sleep_for(chrono::seconds(1));
	cout << "threadfun1() over" << endl;
}

void threadfun2(int a,string str)
{
	cout << a << " == >" << str << endl;
	cout << "threadfun2()" << endl;
	this_thread::sleep_for(chrono::seconds(5));
	cout << "threadfun2() over" << endl;
}
int main()
{
	//线程执行threadfun1函数
	thread t1(threadfun1);
	//线程执行threadfun2函数
	thread t2(threadfun2,10,"abc");

	//主线程等待线程的结束
	t1.join();
	cout << "t1.join()" << endl;
	//不等待现成的结束。
	t2.detach();
	cout << "t2.detach()" << endl;
	return 0;
}
atomic
atomic 为c++11 封装了原子数据类型。
从功能上看,简单地说,原子数据类型不会发生数据竞争,能直接用在多线程中而不必我们用户对其进行添加互斥资源锁的类型。从实现上,大家可以理解为这些原子类型内部自己加了锁。
atomic_int iCount;

void threadfun()
{
	for(int i = 0; i < 10000; i++)
	{
		iCount++;
	}
}

int main()
{
	vector<thread> vec;
	for(int i = 0; i < 10; i++)
	{
		vec.push_back(thread(threadfun));
	}

	for(auto &val:vec)
	{
		val.join();
	}
}

condition_variable
C++11中的std::condition_variable就像Linux下使用pthread_cond_wait和pthread_cond_signal一样,可以让线程休眠,直到被唤醒,再从新执行。线程等待在多线程编程中使用非常频繁,经常需要等待一些异步执行的条件的返回结果。
mutex mu;
condition_variable cv;
bool ready = false;


void threadfun(int id)
{
	cout << id << "已经到达" << endl;
	while(!ready)
	{
		unique_lock<mutex> lck(mu);
		//阻塞线程直到ready为true为止
		cv.wait(lck);
	}
}

void go()
{
	unique_lock<mutex> lck(mu);
	ready = true;
	//唤醒所以线程
	cv.notify_all();
}

int main()
{
	vector<thread> vec;
	for(int i = 0; i < 10; ++i)
	{
		vec.push_back(thread(threadfun,i));
	}

	cout << "all threads ready" << endl;
	go();
	for(auto &val:vec)
	{
		val.join();
	}
	return 0;
}
智能指针
shared_ptr
带引用计数的的智能指针,也叫强引用指针
class Test
{
public:
	Test()
	{
		cout << "Test()" << endl;
	}

	~Test()
	{
		cout << "~Test()" << endl;
	}
private:
	int *ptr;
};

int main()
{
	shared_ptr<Test> t1(new Test);
	//智能指针的拷贝构造时,不重新申请内存,不调用构造函数
	//只是将第一次开辟的内存的引用计数加一
	shared_ptr<Test> t2(t1);

	//输出2
	cout << t1.use_count() << endl;
	//输出2
	cout << t2.use_count() << endl;
	return 0;
}
weak_ptr
带引用计数的智能指针,弱引用计数
class Test
{
public:
	Test()
	{
		cout << "Test()" << endl;
	}

	~Test()
	{
		cout << "~Test()" << endl;
	}
private:
	int *ptr;
};

int main()
{
	shared_ptr<Test> t1(new Test);
	//智能指针的拷贝构造时,不重新申请内存,不调用构造函数
	//内存的引用计数不变,强引用指针的观察者数量加一
	weak_ptr<Test> t2(t1);

	//输出1
	cout << t1.use_count() << endl;
	//输出1
	cout << t2.use_count() << endl;
	return 0;
}
循环引用问题
class B;
class A
{
public:
	A()
	{
		cout << "A()" << endl;
	}
	~A()
	{
		cout << "~A()" << endl;
	}
	shared_ptr<B> ptr_b;
};

class B
{
public:
	B()
	{
		cout << "B()" << endl;
	}
	~B()
	{
		cout << "~B()" << endl;
	}
	shared_ptr<A> ptr_a;
};

int main()
{
	shared_ptr<A> ptra(new A);
	shared_ptr<B> ptrb(new B);
	ptra->ptr_b = ptrb;
	ptrb->ptr_a = ptra;

	cout << ptra.use_count() << endl;
	cout << ptrb.use_count() << endl;
}

可以看到结果中调用了A B 的构造函数,但是并没有调用析构函数,说明存在内存的泄漏。产生的 原因是:
	shared_ptr<A> ptra(new A);
	shared_ptr<B> ptrb(new B);
两句分别使ptra 和 ptrb 指向了新开辟的两块内存,此时两块内存的引用计数都为1,
当执行
	ptra->ptr_b = ptrb;
	ptrb->ptr_a = ptra;
的时候,两块内存的引用计数都分别加一,两块内存的引用计数都变为2,
当程序结束的时候,ptra 指针析构,内存A的引用计数变为1,不释放内存,ptrb 指针析构,内存B 的引用计数变为1,不释放内存。所以,再程序结束的时候,两块内存的引用计数并没有变为0.
解决方法:
class B;
class A
{
public:
	A()
	{
		cout << "A()" << endl;
	}
	~A()
	{
		cout << "~A()" << endl;
	}
	shared_ptr<B> ptr_b;
};

class B
{
public:
	B()
	{
		cout << "B()" << endl;
	}
	~B()
	{
		cout << "~B()" << endl;
	}
	weak_ptr<A> ptr_a;
};

int main()
{
	shared_ptr<A> ptra(new A);
	shared_ptr<B> ptrb(new B);
	ptra->ptr_b = ptrb;
	ptrb->ptr_a = ptra;

	cout << ptra.use_count() << endl;
	cout << ptrb.use_count() << endl;

}

bind
#include <iostream>
#include <functional>

using namespace std;
/*
	bind 函数的使用
*/

class comp
{
public:
	bool operator()(int a,int b)
	{
		return a > b;
	}
private:
};

bool func(int a,int b)
{
	return a > b;
}

int main()
{
	//将f指向绑定后的函数函数
	//<bool(int)>表示形参列表,返回值类型
	//绑定后的结果可以通过std::function进行保存
	//bind参数 函数指针,函数的参数列表
	function<bool(int)> f = bind(comp(), 1, std::placeholders::_1);

	//std::placeholders::_2 表示占位符,表示实参的第二个放到该位置,
	cout << bind(func, std::placeholders::_2, 1)(2,-1) << endl;

	//调用绑定后的函数
	cout << f(-1) << endl;
	return 0;
}
function
//如果一个函数的要求既能接受函数指针,也能接受函数对象
class Test
{
public:
	//function 可以结合bind 使用,对bind 的函数进行保存
	//也可以作为形参,不仅可以接受函数指针,还可以接受函数对象
	int Add(function<int(int,int)> f,int a,int b)
	{
		return f(a,b);
	}
};

int main()
{
	//类似于函数指针的用法
	void func(int);
	funtion<void(int)> f = func;

	return 0;
}
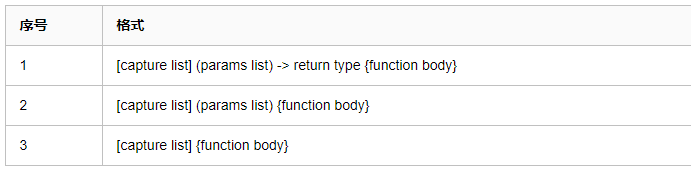
lambda 表达式
lambda的声明方式
[capture list] (params list) mutable exception-> return type { function body }
各项具体含义如下

1、capture list:捕获外部变量列表
2、params list:形参列表
3、mutable指示符:用来说用是否可以修改捕获的变量
4、exception:异常设定
5、return type:返回类型
6、function body:函数体
此外还有几种简写的方式
capture list:捕获外部变量列表


 2054
2054


 被折叠的 条评论
为什么被折叠?
被折叠的 条评论
为什么被折叠?
 到【灌水乐园】发言


