1.创建项目
npm init vite@latest vue3-vite-users
2.模拟数据
npm install -g json-server
在根目录下创建data文件夹,db.json,写json数据
json-server --watch data/db.json --port=3303
在package.json 中的scripts中加:
"generate":"json-server ./data/db.json"
npm run generate
解决方案:
以管理员身份运行powershell(快捷键:windows+X)
set-executionpolicy remotesigned
y
3.配置路由
npm install vue-router
import { createRouter, createWebHistory } from "vue-router";
import Home from "../views/HomeView.vue";
const routes = [
{ path: "/", name: "Home", component: Home },
{
path: "/add",
name: "add",
component: () => import("../views/AddView.vue"),
},
{
path: "/about",
name: "about",
component: () => import("../views/AboutView.vue"),
},
];
const router = createRouter({
history: createWebHistory(),
routes,
});
export default router;
import router from "./router"
.use(router)
<script setup>
</script>
<template>
<router-view></router-view>
</template>
4.制作导航
https://www.bootcss.com/ --> Bootstrap4中文文档 --> 快速入门
<link
rel="stylesheet"
href="https://cdn.jsdelivr.net/npm/bootstrap@4.6.1/dist/css/bootstrap.min.css"
crossorigin="anonymous"
/>
<nav class="navbar navbar-expand-md navbar-dark bg-dark mb-4">
<a class="navbar-brand" href="#">Top navbar</a>
<button
class="navbar-toggler"
type="button"
data-toggle="collapse"
data-target="#navbarCollapse"
aria-controls="navbarCollapse"
aria-expanded="false"
aria-label="Toggle navigation"
>
<span class="navbar-toggler-icon"></span>
</button>
<div class="collapse navbar-collapse" id="navbarCollapse">
<ul class="navbar-nav mr-auto">
<li class="nav-item active">
<a class="nav-link" href="#"
>Home <span class="sr-only">(current)</span></a
>
</li>
<li class="nav-item">
<a class="nav-link" href="#">Link</a>
</li>
<li class="nav-item">
<a class="nav-link disabled">Disabled</a>
</li>
</ul>
<form class="form-inline mt-2 mt-md-0">
<input
class="form-control mr-sm-2"
type="text"
placeholder="Search"
aria-label="Search"
/>
<button class="btn btn-outline-success my-2 my-sm-0" type="submit">
Search
</button>
</form>
</div>
</nav>
<nav class="navbar navbar-expand-md navbar-dark bg-dark mb-4">
<div class="navbar-brand" to="/">用户管理系统</div>
<div class="collapse navbar-collapse" id="navbarCollapse">
<ul class="navbar-nav mr-auto">
<li class="nav-item active">
<router-link class="nav-link" to="/">主页</router-link>
</li>
<li class="nav-item">
<router-link class="nav-link" to="/about">关于</router-link>
</li>
</ul>
<ul class="navbar-nav">
<li class="nav-item active">
<router-link class="nav-link" to="/add">添加用户</router-link>
</li>
</ul>
</div>
</nav>
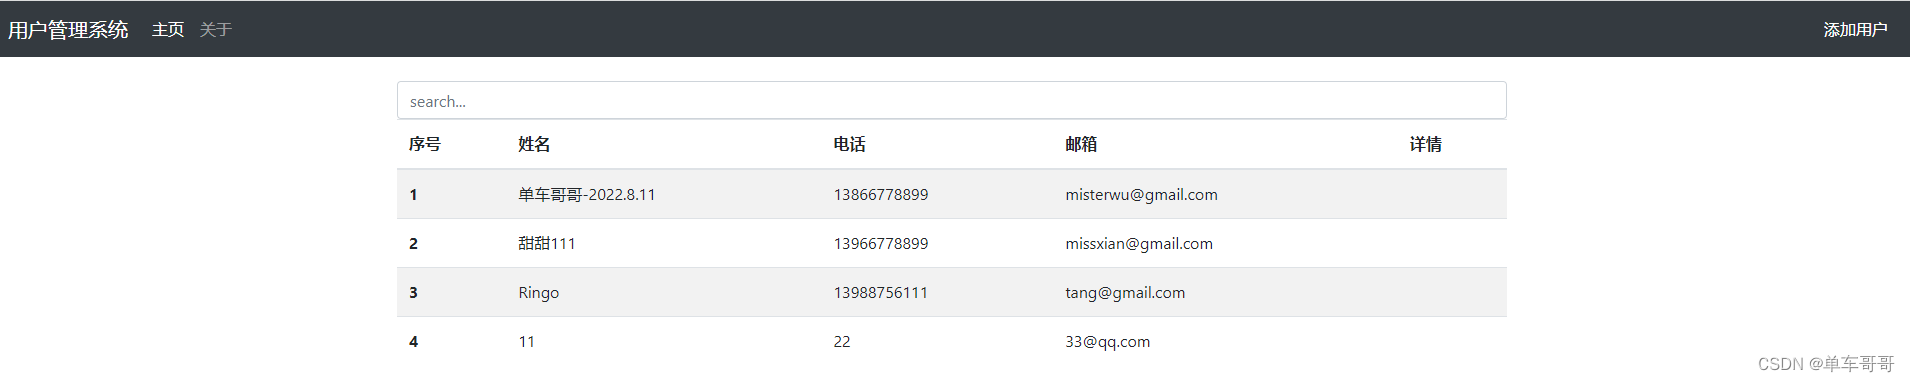
5.请求数据并渲染
<table class="table table-striped">
<thead>
<tr>
<th scope="col">姓名</th>
<th scope="col">电话</th>
<th scope="col">邮箱</th>
<th scope="col">详情</th>
</tr>
</thead>
<tbody>
<tr>
<td>1</td>
<td>2</td>
<td>3</td>
<td>4</td>
</tr>
</tbody>
</table>
<template>
<!-- container保证表格即内容左右两边有留白 -->
<div class="home container">
<input type="text" class="form-control" placeholder="search..." />
<!-- 表格 -->
<table class="table table-striped">
<thead>
<tr>
<th scope="col">序号</th>
<th scope="col">姓名</th>
<th scope="col">电话</th>
<th scope="col">邮箱</th>
<th scope="col">详情</th>
</tr>
</thead>
<tbody>
<tr v-for="customer in customers" :key="customer.id">
<th scope="row">{{ customer.id }}</th>
<td>{{ customer.name }}</td>
<td>{{ customer.phone }}</td>
<td>{{ customer.email }}</td>
<td>{{ }}</td>
</tr>
</tbody>
</table>
</div>
</template>
<script lang="ts" setup>
import { ref, onMounted } from "vue";
import axios from "axios";
const customers = ref<any>([]);
onMounted(async () => {
const res = await axios.get("http://localhost:3000/users");
customers.value = res.data;
console.log(res.data);
});
</script>
6.制作添加用户表单
6.1.获取表单数据操作
<template>
<div class="add container">
<form @submit.prevent="addCustomer">
<div class="form-group">
<label>姓名</label>
<input
type="text"
class="form-control"
placeholder="name..."
v-model="customer.name"
/>
</div>
<div class="form-group">
<label>电话</label>
<input
type="text"
class="form-control"
placeholder="phone..."
v-model="customer.phone"
/>
</div>
<div class="form-group">
<label>邮箱</label>
<input
type="email"
class="form-control"
placeholder="email..."
v-model="customer.email"
/>
</div>
<div class="form-group">
<label>学历</label>
<input
type="text"
class="form-control"
placeholder="education..."
v-model="customer.education"
/>
</div>
<div class="form-group">
<label>毕业学校</label>
<input
type="text"
class="form-control"
placeholder="graduations school..."
v-model="customer.graduationschool"
/>
</div>
<div class="form-group">
<label>专业</label>
<input
type="text"
class="form-control"
placeholder="profession..."
v-model="customer.profession"
/>
</div>
<div class="form-group">
<label>个人简介</label>
<textarea
class="form-control"
rows="7"
v-model="customer.profile"
></textarea>
</div>
<button type="submit" class="btn btn-primary btn-block">添加</button>
</form>
</div>
</template>
<script lang="ts" setup>
import { ref } from "vue";
import axios from "axios";
const customer = ref<any>({
id: "",
name: "",
phone: "",
email: "",
education: "",
graduationschool: "",
profession: "",
profile: "",
});
const addCustomer = async () => {
console.log(customer.value);
};
</script>
6.2.数据添加提交,路由跳转
<script lang="ts" setup>
import { ref } from "vue";
import axios from "axios";
import { useRouter } from "vue-router";
const router = useRouter();
const customer = ref<any>({
id: "",
name: "",
phone: "",
email: "",
education: "",
graduationschool: "",
profession: "",
profile: "",
});
const addCustomer = async () => {
const res = await axios.post("http://localhost:3000/users", customer.value);
console.log(res.data);
router.push("/");
};
</script>
7.跳转到详情
7.1.页面跳转并传递参数的两种写法
<td>
<router-link class="btn btn-warning" :to="'/details/' + customer.id">
详情
</router-link>
</td>
<td>
<router-link
class="btn btn-warning"
:to="{ name: 'details', params: { id: customer.id } }">
详情
</router-link>
</td>
7.2.在details组件中接收参数的两种写法
<script lang="ts" setup>
import { ref, onMounted } from "vue";
import axios from "axios";
const customer = ref<any>({});
const props = defineProps({
id: String,
});
onMounted(async () => {
const res = await axios.get("http://localhost:3000/users/" + props.id);
console.log(res.data);
customer.value = res.data;
});
</script>
{
path: "/details/:id",
name: "details",
component: () => import("../views/DetailView.vue"),
props:true
},
<script lang="ts" setup>
import { ref, onMounted } from "vue";
import { useRoute } from "vue-router";
import axios from "axios";
const customer = ref<any>({});
const route = useRoute();
onMounted(async () => {
const res = await axios.get("http://localhost:3000/users/" + route.params.id);
console.log(res.data);
});
</script>
{
path: "/details/:id",
name: "details",
component: () => import("../views/DetailView.vue"),
},
7.3.引入图标
<ul class="list-group">
<li class="list-group-item">An item</li>
<li class="list-group-item">A second item</li>
<li class="list-group-item">A third item</li>
<li class="list-group-item">A fourth item</li>
<li class="list-group-item">And a fifth one</li>
</ul>
<link rel="stylesheet" href="https://cdn.staticfile.org/font-awesome/4.7.0/css/font-awesome.css">
<template>
<div class="details container">
<h1 class="page-header">
<router-link to="/" class="btn btn-success">返回</router-link>
<span style="float: right">
<router-link class="btn btn-primary" :to="'/edit/' + customer.id">
编辑
</router-link>
<button class="btn btn-danger">删除</button>
</span>
</h1>
<ul class="list-group">
<li class="list-group-item">
<i class="fa fa-user" aria-hidden="true"></i> {{
customer.name
}}
</li>
<li class="list-group-item">
<i class="fa fa-phone" aria-hidden="true"></i> {{
customer.phone
}}
</li>
<li class="list-group-item">
<i class="fa fa-envelope-open" aria-hidden="true"></i> {{
customer.email
}}
</li>
<li class="list-group-item">
<i class="fa fa-meetup" aria-hidden="true"></i> {{
customer.education
}}
</li>
<li class="list-group-item">
<i class="fa fa-superpowers" aria-hidden="true"></i> {{
customer.graduationschool
}}
</li>
<li class="list-group-item">
<i class="fa fa-window-restore" aria-hidden="true"></i> {{
customer.profession
}}
</li>
<li class="list-group-item">
<i class="fa fa-wpexplorer" aria-hidden="true"></i> {{
customer.profile
}}
</li>
</ul>
</div>
</template>
<script lang="ts" setup>
import { ref, onMounted } from "vue";
import { useRoute } from "vue-router";
import axios from "axios";
const customer = ref<any>({});
const route = useRoute();
onMounted(async () => {
const res = await axios.get("http://localhost:3000/users/" + route.params.id);
console.log(res.data);
customer.value = res.data;
});
</script>
7.4.实现删除
<script lang="ts" setup>
import { ref, onMounted } from "vue";
import { useRoute ,useRouter} from "vue-router";
import axios from "axios";
const router=useRouter();
onMounted(async () => {
const res = await axios.get("http://localhost:3000/users/" + route.params.id);
console.log(res.data);
customer.value = res.data;
});
const deleteCustomer = async () => {
await axios.delete("http://localhost:3000/users/" + route.params.id);
router.push("/");
};
</script>
7.5.实现编辑
<span style="float: right">
<!-- <router-link
class="btn btn-primary"
:to="{ name: 'edit', params: { id: customer.id } }"
>编辑</router-link
> -->
<router-link class="btn btn-primary" :to="'/edit/' + customer.id">
编辑 </router-link>
<button class="btn btn-danger" @click="deleteCustomer">删除</button>
</span>
<template>
<div class="edit container">
<form @submit.prevent="updateCustomer">
<div class="form-group">
<label>姓名</label>
<input type="text" class="form-control" placeholder="name..." v-model="customer.name" />
</div>
<div class="form-group">
<label>电话</label>
<input type="text" class="form-control" placeholder="phone..." v-model="customer.phone" />
</div>
<div class="form-group">
<label>邮箱</label>
<input type="email" class="form-control" placeholder="email..." v-model="customer.email" />
</div>
<div class="form-group">
<label>学历</label>
<input type="text" class="form-control" placeholder="education..." v-model="customer.education" />
</div>
<div class="form-group">
<label>毕业学校</label>
<input type="text" class="form-control" placeholder="graduations school..."
v-model="customer.graduationschool" />
</div>
<div class="form-group">
<label>专业</label>
<input type="text" class="form-control" placeholder="profession..." v-model="customer.profession" />
</div>
<div class="form-group">
<label>个人简介</label>
<textarea class="form-control" rows="7" v-model="customer.profile"></textarea>
</div>
<button type="submit" class="btn btn-primary btn-block">确定</button>
</form>
</div>
</template> -->
<script lang="ts" setup>
import { ref, onMounted } from "vue";
import axios from "axios";
import { useRouter, useRoute } from "vue-router";
const router = useRouter();
const route = useRoute();
const customer = ref<any>({});
onMounted(async () => {
const res = await axios.get("http://localhost:3000/users/" + route.params.id);
console.log(res.data);
customer.value = res.data;
});
const updateCustomer = async () => {
const res = await axios.put("http://localhost:3000/users/" + route.params.id, customer.value);
console.log(res.data);
router.push("/");
};
</script>
8.提示框提醒
npm install element-plus --save
import ElementPlus from 'element-plus'
import 'element-plus/dist/index.css'
use(ElementPlus)
import { ElMessage } from "element-plus";
ElMessage({
message: "用户添加成功!",
type: "success",
});
router.push("/");
import { ElMessage,ElMessageBox } from "element-plus";
const deleteCustomer = async () => {
ElMessageBox.confirm("确定要删除此条记录?", "提示", {
confirmButtonText: "是",
cancelButtonText: "否",
type: "warning",
})
.then(() => {
axios.delete("http://localhost:3000/users/" + route.params.id);
ElMessage({
type: "success",
message: "用户删除成功!",
});
router.push("/");
})
};
9.实现搜索功能
const matchCustomers=computed(() => {
    return customers.value.filter((item:any)=>item.name.includes(filterInput.value))
})
<tbody>
        <tr v-for="customer in matchCustomers" :key="customer.id">
          <th scope="row">{{ customer.id }}</th>
          <td>{{ customer.name }}</td>
          <td>{{ customer.phone }}</td>
          <td>{{ customer.email }}</td>
          <!-- 因为id是动态的,所以要用:进行绑定 -->
          <!-- <td>
            <router-link class="btn btn-warning" :to="'/details/' + customer.id"
              >详情</router-link
            >
          </td> -->
          <td>
            <router-link class="btn btn-warning" :to="{ name: 'details', params: { id: customer.id } }">详情</router-link>
          </td>
        </tr>
      </tbody>


 27万+
27万+

 被折叠的 条评论
为什么被折叠?
被折叠的 条评论
为什么被折叠?
 到【灌水乐园】发言


