


融会贯通:做一个漂(jian)亮(lou)的聊天界面
一、把聊天气泡做出来
先找一张聊天气泡的图片(图片后缀 png):

鉴于我们要做到随文本内容的多少而变化,所以需要使用 Android SDK 目录下 tools 文件夹中的 draw9patch.bat 文件,使用前记得将 JDK 的 bin 目录配置到环境变量中,Android Studio 2.3 及其以上版本可以直接右击图片,找到 Create 9-Patch file 进行操作。
如图(按住Shift键拖动可以进行擦除):
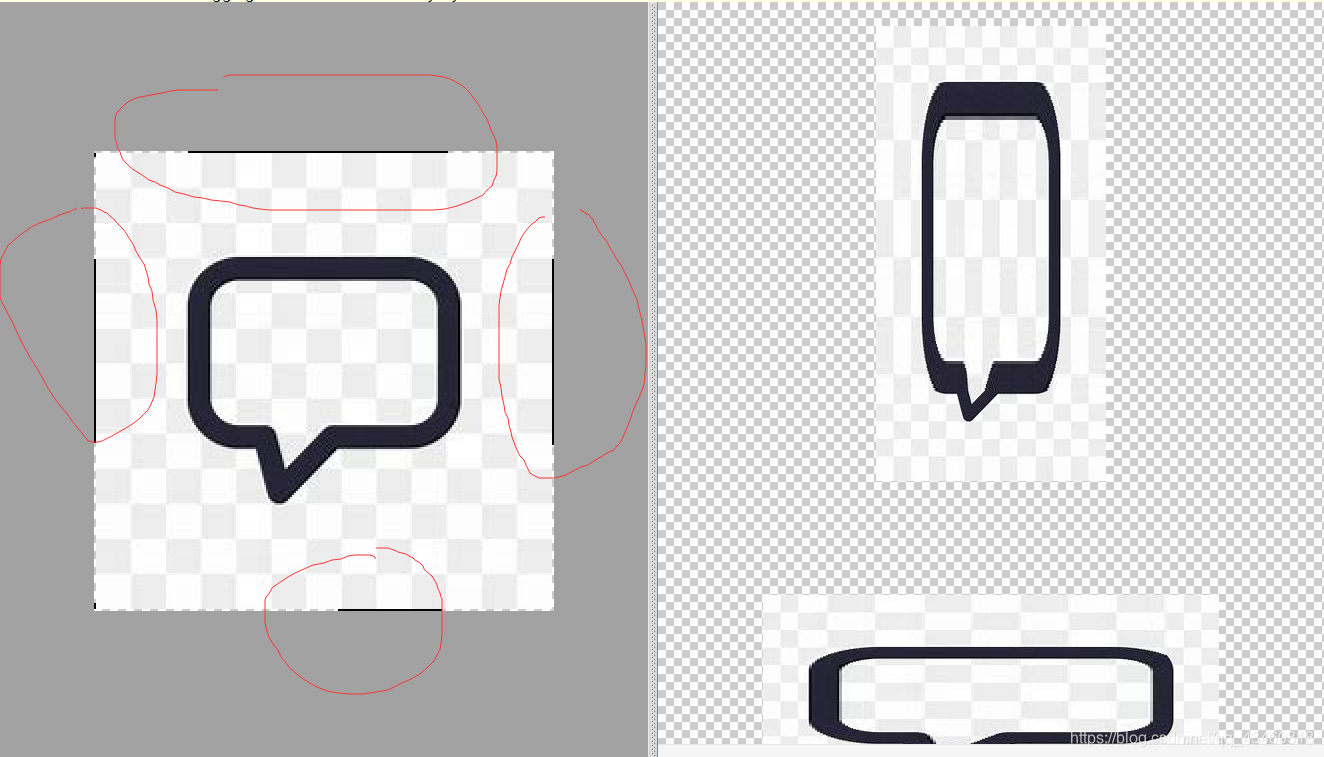
制作收到消息和发出消息共两张背景图。
二、编写界面
1.添加依赖
dependencies {
    compile fileTree(dir: 'libs', include: ['*.jar'])
    androidTestCompile('com.android.support.test.espresso:espresso-core:2.2.2', {
        exclude group: 'com.android.support', module: 'support-annotations'
    })
    compile 'com.android.support:appcompat-v7:24.2.1'

    compile'com.android.support:recyclerview-v7:24.2.1'		//添加的依赖

    testCompile 'junit:junit:4.12'
}
2.修改 activity_main.xml 的代码
<LinearLayout xmlns:android="http://schemas.android.com/apk/res/android"
    android:orientation="vertical"
    android:layout_width="match_parent"
    android:layout_height="match_parent"
    android:background="#81b4e6"
   >

    <android.support.v7.widget.RecyclerView
        android:id="@+id/msg_recycler_view"
        android:layout_width="match_parent"
        android:layout_height="0dp"
        android:layout_weight="1"
        />
    <LinearLayout
        android:layout_width="match_parent"
        android:layout_height="wrap_content">

        <EditText
            android:id="@+id/input_text"
            android:layout_width="0dp"
            android:layout_height="wrap_content"
            android:layout_weight="1"
            android:hint="Type something here"
            android:maxLines="2"
            />
        <Button
            android:id="@+id/send"
            android:layout_width="wrap_content"
            android:layout_height="wrap_content"
            android:text="send"/>

    </LinearLayout>

</LinearLayout>
3.定义消息的实体类,新建 Msg
public class Msg {
    public static final int TYPE_RECEIVED = 0;

    public static final int TYPE_SENT = 1;

    private String content;

    private int type;

    public Msg(String content,int type){
        this.content = content;
        this.type = type;
    }
    public String getContent(){
        return content;
    }
    public int getType(){
        return type;
    }

}
content : 消息的内容
type : 消息的类型
TYPE_RECEIVED : 收到消息
TYPE_SENT : 发出消息
4.编写 RecyclerView 的子项布局,新建 msg_item.xml
<LinearLayout xmlns:android="http://schemas.android.com/apk/res/android"
    android:orientation="vertical"
    android:layout_width="match_parent"
    android:layout_height="wrap_content"
    android:padding="10dp"
    >

    <LinearLayout
        android:id="@+id/left_layout"
        android:layout_width="wrap_content"
        android:layout_height="wrap_content"
        android:layout_gravity="left"
        android:background="@drawable/th"
        >
        <TextView
            android:id="@+id/left_msg"
            android:layout_width="wrap_content"
            android:layout_height="wrap_content"
            android:layout_gravity="center"
            android:layout_margin="10dp"
            android:textColor="#302525"
            />

    </LinearLayout>

    <LinearLayout
        android:id="@+id/right_layout"
        android:layout_width="wrap_content"
        android:layout_height="wrap_content"
        android:layout_gravity="right"
        android:background="@drawable/th1"
        >

        <TextView
            android:id="@+id/right_msg"
            android:layout_width="wrap_content"
            android:layout_height="wrap_content"
            android:layout_gravity="center"
            android:layout_margin="10dp"
            />

    </LinearLayout>
</LinearLayout>
5.创建 RecyclerView 的适配器类,新建类 MsgAdapter
public class MsgAdapter extends RecyclerView.Adapter<MsgAdapter.ViewHolder> {

    private List<Msg> mMsgList;

    static class ViewHolder extends RecyclerView.ViewHolder{
        LinearLayout leftLayout;

        LinearLayout rightLayout;

        TextView leftMsg;

        TextView rightMsg;

        public ViewHolder(View view){
            super(view);
            leftLayout = (LinearLayout)view.findViewById(R.id.left_layout);
            rightLayout = (LinearLayout)view.findViewById(R.id.right_layout);
            leftMsg = (TextView)view.findViewById(R.id.left_msg);
            rightMsg = (TextView)view.findViewById(R.id.right_msg);
        }
    }
    public MsgAdapter(List<Msg> msgList){
        mMsgList = msgList;
    }
    public ViewHolder  onCreateViewHolder(ViewGroup parent ,int viewType){
        View view = LayoutInflater.from(parent.getContext()).inflate(R.layout.msg_item,parent,false);
        return new ViewHolder(view);
    }
    public void onBindViewHolder(ViewHolder holder,int position){
        Msg msg = mMsgList.get(position);
        if(msg.getType() == Msg.TYPE_RECEIVED){
            //收到消息,显示左方布局,隐藏右方布局
            holder.leftLayout.setVisibility(View.VISIBLE);
            holder.rightLayout.setVisibility(View.GONE);
            holder.leftMsg.setText(msg.getContent());
        }
        else if(msg.getType() == Msg.TYPE_SENT){
            //发送消息,显示右方布局,隐藏左方布局
            holder.leftLayout.setVisibility(View.GONE);
            holder.rightLayout.setVisibility(View.VISIBLE);
            holder.rightMsg.setText(msg.getContent());
        }
    }
    public int getItemCount(){
        return mMsgList.size();
    }

}
利用可见属性来控制收到消息和发出消息的显示。
6.修改 MainActivity 的代码
public class MainActivity extends AppCompatActivity {

    private List<Msg> msgList = new ArrayList<>();

    private EditText inputText;

    private Button send;

    private RecyclerView msgRecyclerView;

    private MsgAdapter adapter;

    @Override
    protected void onCreate(Bundle savedInstanceState) {
        super.onCreate(savedInstanceState);
        setContentView(R.layout.activity_main);
        initMsgs();
        inputText = (EditText)findViewById(R.id.input_text);
        send = (Button)findViewById(R.id.send);
        msgRecyclerView = (RecyclerView)findViewById(R.id.msg_recycler_view);
        LinearLayoutManager linearManager = new LinearLayoutManager(this);
        msgRecyclerView.setLayoutManager(linearManager);
        adapter = new MsgAdapter(msgList);
        msgRecyclerView.setAdapter(adapter);
        send.setOnClickListener(new View.OnClickListener() {
            @Override
            public void onClick(View v) {
                String content = inputText.getText().toString();
                if(!"".equals(content)){
                    Msg msg = new Msg(content,Msg.TYPE_SENT);
                    msgList.add(msg);
                    adapter.notifyItemInserted(msgList.size() - 1);//有新消息时刷新RecyclerView中的显示
                    msgRecyclerView.scrollToPosition(msgList.size() - 1);//将RecyclerView定位到最后一行
                    inputText.setText("");//清空输入框内容

                }
            }
        });
    }
    private void initMsgs(){
        Msg msg1 = new Msg("你好,我是一名雇佣兵",Msg.TYPE_RECEIVED);
        msgList.add(msg1);
        Msg msg2 = new Msg("你好,你叫什么名字?",Msg.TYPE_SENT);
        msgList.add(msg2);
        Msg msg3 = new Msg("我叫白朴",Msg.TYPE_RECEIVED);
        msgList.add(msg3);
    }
}
效果:
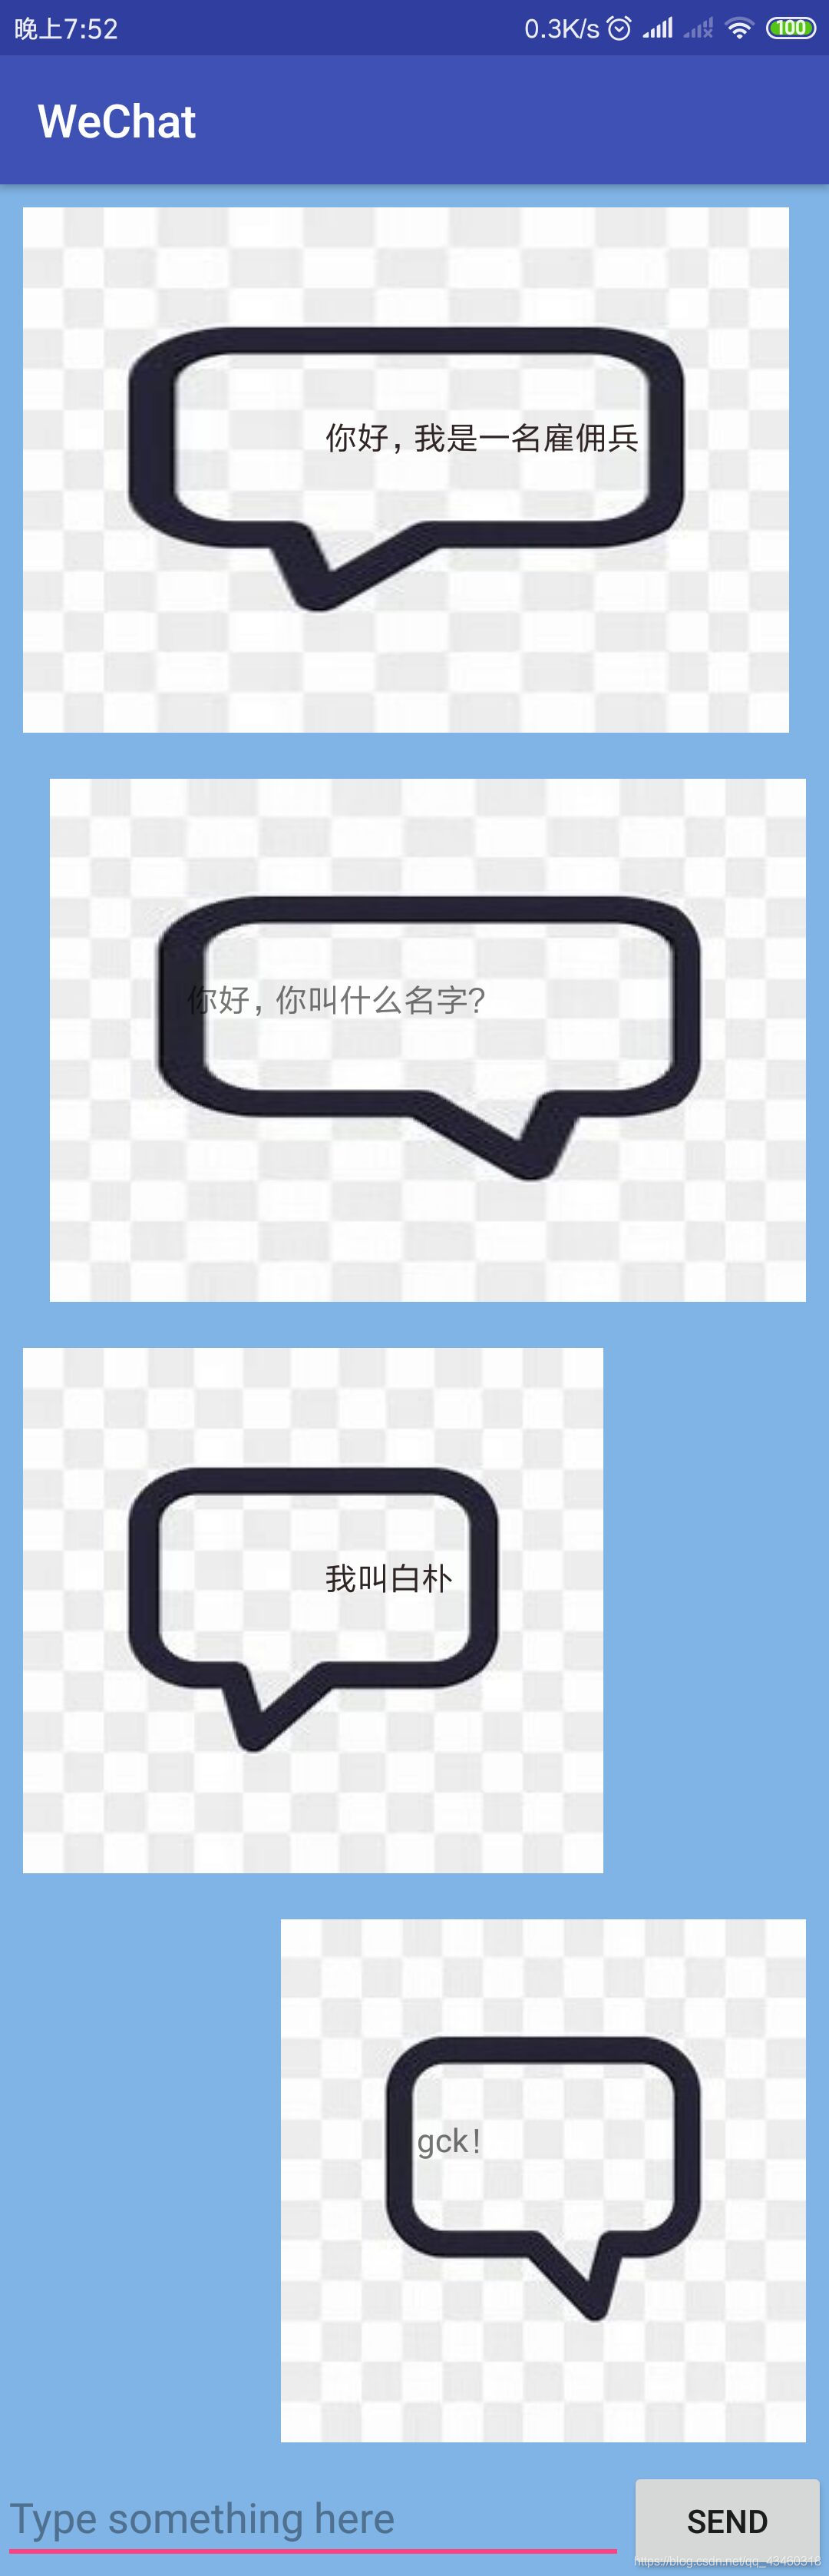
还是很有成就感,虽然说只是跟着书上敲了一遍。
小结:把之前所学的布局,控件,等 UI 知识融汇在一起,写出了一个简陋的聊天界面,心情还是很不错,继续加油。


 2961
2961


 被折叠的 条评论
为什么被折叠?
被折叠的 条评论
为什么被折叠?
 到【灌水乐园】发言


