


1.master的配置 ##172.25.80.1
1.获取安装包并安装
[root@server1 3.0.103]# yum install moosefs-master-3.0.103-1.rhsystemd.x86_64.rpm moosefs-cli-3.0.103-1.rhsystemd.x86_64.rpm moosefs-cgiserv-3.0.103-1.rhsystemd.x86_64.rpm moosefs-cgi-3.0.103-1.rhsystemd.x86_64.rpm -y

2.启动moosefs-master服务
[root@server1 3.0.103]# systemctl start moosefs-master
查询端口,可以看到mfsmaster开启的三个端口9419到9421
[root@server1 3.0.103]# netstat -tnlop
Active Internet connections (only servers)
Proto Recv-Q Send-Q Local Address           Foreign Address         State       PID/Program name     Timer
tcp        0      0 0.0.0.0:9419            0.0.0.0:*               LISTEN      1153/mfsmaster       off (0.00/0/0)
tcp        0      0 0.0.0.0:9420            0.0.0.0:*               LISTEN      1153/mfsmaster       off (0.00/0/0)
tcp        0      0 0.0.0.0:9421            0.0.0.0:*               LISTEN      1153/mfsmaster       off (0.00/0/0)

3.开启moosefs-cgiserv服务
[root@server1 3.0.103]# systemctl start moosefs-cgiserv
查询端口,可以看到开启了9425的端口
[root@server1 3.0.103]# netstat -tnlp
tcp        0      0 0.0.0.0:9425            0.0.0.0:*               LISTEN      1182/python
4.本地解析
[root@server1 mfs]# vim /etc/hosts	##做本地解析
172.25.1.1	server1 mfsmaster

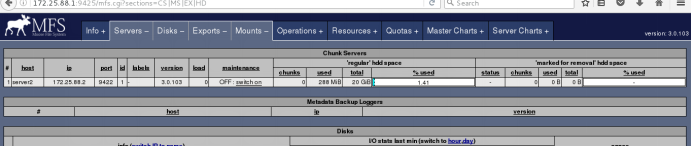
在浏览器测试:

chunk1的配置 ##172.25.80.2
[root@server2 ~]# ls
moosefs-chunkserver-3.0.103-1.rhsystemd.x86_64.rpm
[root@server2 ~]# yum install moosefs-chunkserver-3.0.103-1.rhsystemd.x86_64.rpm -y

添加一块磁盘

[root@server2 mfs]# fdisk -l
Disk /dev/vda: 21.5 GB, 21474836480 bytes, 41943040 sectors
Units = sectors of 1 * 512 = 512 bytes
Sector size (logical/physical): 512 bytes / 512 bytes
I/O size (minimum/optimal): 512 bytes / 512 bytes

[root@server2 mfs]# fdiak /dev/vda		#划分一个分区
[root@server2 mfs]# fdisk -l
   Device Boot      Start         End      Blocks   Id  System
/dev/vda1            2048    41943039    20970496   83  Linux
[root@server2 mfs]# mkfs.xfs /dev/vda1
meta-data=/dev/vda1              isize=512    agcount=4, agsize=1310656 blks
         =                       sectsz=512   attr=2, projid32bit=1
         =                       crc=1        finobt=0, sparse=0
data     =                       bsize=4096   blocks=5242624, imaxpct=25
         =                       sunit=0      swidth=0 blks
naming   =version 2              bsize=4096   ascii-ci=0 ftype=1
log      =internal log           bsize=4096   blocks=2560, version=2
         =                       sectsz=512   sunit=0 blks, lazy-count=1
realtime =none                   extsz=4096   blocks=0, rtextents=0
[root@server2 mfs]# mount /dev/vda1 /mnt/chunk1/

[root@server2 mnt]# mkdir /mnt/chunk1/
[root@server2 mnt]# chown mfs.mfs chunk1/
[root@server2 mnt]# ll -d /mnt/chunk1/
drwxr-xr-x 2 mfs mfs 6 May 18 16:55 /mnt/chunk1/

[root@server2 ~]# vim /etc/mfs/mfshdd.cfg
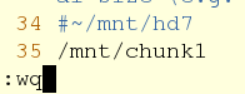
[root@server2 mnt]# systemctl start moosefs-chunkserver

[root@server3 ~]# ls
moosefs-chunkserver-3.0.103-1.rhsystemd.x86_64.rpm
[root@server3 ~]# yum install moosefs-chunkserver-3.0.103-1.rhsystemd.x86_64.rpm -y
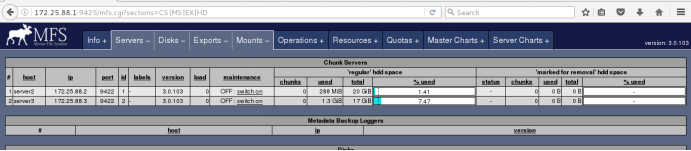
在浏览器刷新会看到
Chunk2与chunk1相同,但没有再加磁盘
[root@server3 ~]# mkdir /mnt/chunk2
[root@server3 ~]# chown mfs.mfs /mnt/chunk2/
[root@server3 ~]# vim /etc/hosts
[root@server3 ~]# vim /etc/mfs/mfshdd.cfg
[root@server3 ~]# systemctl start moosefs-chunkserver
客户端:
[root@foundation88 3.0.103]# yum install moosefs-client-3.0.103-1.rhsystemd.x86_64.rpm -y
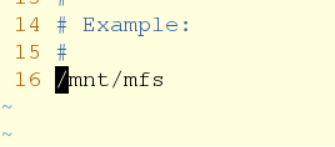
[root@foundation80 3.0.103]# vim /etc/mfs/mfsmount.cfg
15 #
16 /mnt/mfs
[root@foundation88 3.0.103]# mkdir /mnt/mfs
[root@foundation88 3.0.103]# cd /mnt/mfs/
[root@foundation88 mfs]# ls		##目录必须为空的
[root@foundation88 mfs]# ll -d /mnt/mfs/
drwxr-xr-x 2 root root 0 May 18 16:26 /mnt/mfs/

[root@foundation88 mfs]# vim /etc/hosts

[root@foundation88 mfs]# mfsmount
[root@foundation88 mfs]# df
mfsmaster:9421                      38771712  1626496  37145216   5% /mnt/mfs
[root@foundation88 mfs]# mkdir  dir1
[root@foundation88 mfs]# mkdir  dir2
[root@foundation88 mfs]# ls
dir1  dir2
[root@foundation88 mfs]# mfsgetgoal dir1/
dir1/: 2
[root@foundation88 mfs]# mfsgetgoal dir2/
dir2/: 2
[root@foundation88 mfs]# mfssetgoal -r 1 dir1/
dir1/:
 inodes with goal changed:                       1
 inodes with goal not changed:                   0
 inodes with permission denied:                  0

[root@foundation88 mfs]# mfsgetgoal dir1/
dir1/: 1
[root@foundation88 mfs]# mfsgetgoal dir2/
dir2/: 2

[root@foundation88 mfs]# cd dir1/
[root@foundation88 dir1]# ls
[root@foundation88 dir1]# cp /etc/passwd .
[root@foundation88 dir1]# mfsfileinfo passwd
passwd:
	chunk 0: 0000000000000001_00000001 / (id:1 ver:1)
		copy 1: 172.25.88.3:9422 (status:VALID)

[root@foundation88 dir1]# dd if=/dev/zero of=bigfile bs=1M count=200
200+0 records in
200+0 records out
209715200 bytes (210 MB) copied, 1.33058 s, 158 MB/s

[root@foundation88 dir1]# mfsfileinfo bigfile
bigfile:
	chunk 0: 0000000000000002_00000001 / (id:2 ver:1)
		copy 1: 172.25.88.2:9422 (status:VALID)
	chunk 1: 0000000000000003_00000001 / (id:3 ver:1)
		copy 1: 172.25.88.3:9422 (status:VALID)
	chunk 2: 0000000000000004_00000001 / (id:4 ver:1)
		copy 1: 172.25.88.2:9422 (status:VALID)
	chunk 3: 0000000000000005_00000001 / (id:5 ver:1)
		copy 1: 172.25.88.3:9422 (status:VALID)

[root@foundation88 dir2]# dd if=/dev/zero of=bigfile2 bs=1M count=200
200+0 records in
200+0 records out
209715200 bytes (210 MB) copied, 12.5353 s, 16.7 MB/s
[root@foundation88 dir2]# mfsfileinfo bigfile2
bigfile2:
	chunk 0: 0000000000000006_00000001 / (id:6 ver:1)
		copy 1: 172.25.88.2:9422 (status:VALID)
		copy 2: 172.25.88.3:9422 (status:VALID)
	chunk 1: 0000000000000007_00000001 / (id:7 ver:1)
		copy 1: 172.25.88.2:9422 (status:VALID)
		copy 2: 172.25.88.3:9422 (status:VALID)
	chunk 2: 0000000000000008_00000001 / (id:8 ver:1)
		copy 1: 172.25.88.2:9422 (status:VALID)
		copy 2: 172.25.88.3:9422 (status:VALID)
	chunk 3: 0000000000000009_00000001 / (id:9 ver:1)
		copy 1: 172.25.88.2:9422 (status:VALID)
		copy 2: 172.25.88.3:9422 (status:VALID)

[root@server2 mnt]# systemctl stop moosefs-chunkserver

[root@foundation88 dir2]# mfsfileinfo bigfile2
bigfile2:
	chunk 0: 0000000000000006_00000001 / (id:6 ver:1)
		copy 1: 172.25.88.3:9422 (status:VALID)
	chunk 1: 0000000000000007_00000001 / (id:7 ver:1)
		copy 1: 172.25.88.3:9422 (status:VALID)
	chunk 2: 0000000000000008_00000001 / (id:8 ver:1)
		copy 1: 172.25.88.3:9422 (status:VALID)
	chunk 3: 0000000000000009_00000001 / (id:9 ver:1)
		copy 1: 172.25.88.3:9422 (status:VALID)
[root@foundation88 dir2]# cd ../dir1
[root@foundation88 dir1]# mfsfileinfo bigfile
bigfile:
	chunk 0: 0000000000000002_00000001 / (id:2 ver:1)
		no valid copies !!!
	chunk 1: 0000000000000003_00000001 / (id:3 ver:1)
		no valid copies !!!
	chunk 2: 0000000000000004_00000001 / (id:4 ver:1)
		no valid copies !!!
	chunk 3: 0000000000000005_00000001 / (id:5 ver:1)
		copy 1: 172.25.88.3:9422 (status:VALID)

数据无法查看,再次启动chunk
[root@server2 mnt]# systemctl start moosefs-chunkserver
[root@foundation88 dir1]# mfsfileinfo bigfile
bigfile:
	chunk 0: 0000000000000002_00000001 / (id:2 ver:1)
		copy 1: 172.25.88.2:9422 (status:VALID)
	chunk 1: 0000000000000003_00000001 / (id:3 ver:1)
		copy 1: 172.25.88.2:9422 (status:VALID)
	chunk 2: 0000000000000004_00000001 / (id:4 ver:1)
		copy 1: 172.25.88.2:9422 (status:VALID)
	chunk 3: 0000000000000005_00000001 / (id:5 ver:1)
		copy 1: 172.25.88.3:9422 (status:VALID)
[root@foundation88 dir1]# cd ../dir2/
[root@foundation88 dir2]# mfsfileinfo bigfile2
bigfile2:
	chunk 0: 0000000000000006_00000001 / (id:6 ver:1)
		copy 1: 172.25.88.2:9422 (status:VALID)
		copy 2: 172.25.88.3:9422 (status:VALID)
	chunk 1: 0000000000000007_00000001 / (id:7 ver:1)
		copy 1: 172.25.88.2:9422 (status:VALID)
		copy 2: 172.25.88.3:9422 (status:VALID)
	chunk 2: 0000000000000008_00000001 / (id:8 ver:1)
		copy 1: 172.25.88.2:9422 (status:VALID)
		copy 2: 172.25.88.3:9422 (status:VALID)
	chunk 3: 0000000000000009_00000001 / (id:9 ver:1)
		copy 1: 172.25.88.2:9422 (status:VALID)
		copy 2: 172.25.88.3:9422 (status:VALID)

当master不正常关闭时
[root@server1 3.0.103]# cd /var/lib/mfs/
[root@server1 mfs]# ll
total 3612
-rw-r----- 1 mfs mfs    2660 May 18 17:35 changelog.0.mfs
-rw-r----- 1 mfs mfs      45 May 18 16:26 changelog.1.mfs
-rw-r----- 1 mfs mfs     120 May 18 17:00 metadata.crc
-rw-r----- 1 mfs mfs    2901 May 18 17:00 metadata.mfs.back
-rw-r--r-- 1 mfs mfs       8 May 18 16:26 metadata.mfs.back.1
-rw-r--r-- 1 mfs mfs       8 Nov 23 20:46 metadata.mfs.empty
-rw-r----- 1 mfs mfs 3672832 May 18 17:00 stats.mfs
模拟不正常关闭
[root@server1 mfs]# kill -9  2114
[root@server1 mfs]# mfsmaster start
open files limit has been set to: 16384
working directory: /var/lib/mfs
lockfile created and locked
initializing mfsmaster modules ...
exports file has been loaded
topology file has been loaded
loading metadata ...
can't find metadata.mfs - try using option '-a'
init: metadata manager failed !!!
error occurred during initialization - exiting

[root@server1 mfs]# mfsmaster -a ##解决问题
这样并不能永久解决问题,当问题出现时不能总是需要手动输入这条命令,所以我选择修改文件
[root@server1 ~]# vim /usr/lib/systemd/system/moosefs-master.service
[Unit]
Description=MooseFS Master server
Wants=network-online.target
After=network.target network-online.target

[Service]
Type=forking
ExecStart=/usr/sbin/mfsmaster -a
ExecStop=/usr/sbin/mfsmaster stop
ExecReload=/usr/sbin/mfsmaster reload
PIDFile=/var/lib/mfs/.mfsmaster.lock
TimeoutStopSec=1800
TimeoutStartSec=1800
Restart=no

[Install]
WantedBy=multi-user.target

正常关闭时
[root@server1 mfs]# mfsmaster stop
sending SIGTERM to lock owner (pid:11559)
waiting for termination terminated
[root@server1 mfs]# ll
total 3612
-rw-r----- 1 mfs mfs    2744 May 18 17:40 changelog.1.mfs
-rw-r----- 1 mfs mfs      45 May 18 16:26 changelog.2.mfs
-rw-r----- 1 mfs mfs     120 May 18 17:41 metadata.crc
-rw-r----- 1 mfs mfs    3877 May 18 17:41 metadata.mfs
-rw-r----- 1 mfs mfs    2901 May 18 17:00 metadata.mfs.back.1
-rw-r--r-- 1 mfs mfs       8 Nov 23 20:46 metadata.mfs.empty
-rw-r----- 1 mfs mfs 3672832 May 18 17:41 stats.mfs

当数据被误删除时
[root@foundation88 dir1]# ls
bigfile  passwd
[root@foundation88 dir1]# rm -rf passwd
[root@foundation88 dir1]# mfsgettrashtime .		##可以看到数据被删除时可以保存86400s

.: 86400
恢复方法
[root@foundation88 dir1]# mkdir /mnt/mfsmeta
[root@foundation88 ~]# mfsmount -m /mnt/mfsmeta/
mfsmaster accepted connection with parameters: read-write,restricted_ip
[root@foundation88 ~]# cd /mnt/mfsmeta/
[root@foundation88 mfsmeta]# ls
sustained  trash
[root@foundation88 mfsmeta]# cd trash/

[root@foundation88 trash]# find -name *passwd*
./004/00000004|dir1|passwd
[root@foundation88 trash]# cd 004
[root@foundation88 004]# ls
00000004|dir1|passwd  undel
[root@foundation88 004]# mv 00000004\|dir1\|passwd undel/
[root@foundation88 004]# cd /mnt/mfs
[root@foundation88 mfs]# ls
dir1  dir2
[root@foundation88 mfs]# cd dir1/
[root@foundation88 dir1]# ls
bigfile  passwd
恢复成功!!!
mfsmaser的高可用
1.首先需要在server1(master)获取高可用的安装源
[root@foundation80 ~]# vim /etc/yum.repos.d/dvd.repo
  1 [yum]
  2 name=rhel7.3
  3 baseurl=http://172.25.80.250/rhel7.3
  4 gpgcheck=0
  5 [HighAvailability]
  6 name=rhel7.3
  7 baseurl=http://172.25.80.250/rhel7.3/addons/HighAvailability
  8 gpgcheck=0
  9 [ResilientStorage]
 10 name=rhel7.3
 11 baseurl=http://172.25.80.250/rhel7.3/addons/ResilientStorage
 12 gpgcheck=0

[root@server1 3.0.103]# yum repolist
Loaded plugins: product-id, search-disabled-repos, subscription-manager
This system is not registered to Red Hat Subscription Management. You can use subscription-manager to register.
HighAvailability                                         | 4.1 kB     00:00
ResilientStorage                                         | 4.1 kB     00:00
yum                                                      | 4.1 kB     00:00
(1/4): HighAvailability/group_gz                           | 3.4 kB   00:00
(2/4): HighAvailability/primary_db                         |  27 kB   00:00
(3/4): ResilientStorage/group_gz                           | 4.9 kB   00:00
(4/4): ResilientStorage/primary_db                         |  33 kB   00:00
repo id                                  repo name                        status
HighAvailability                         rhel7.3                             37
ResilientStorage                         rhel7.3                             42
yum                                      rhel7.3                          4,751
repolist: 4,830
[root@foundation80 ~]# yum install -y pacemaker corosync pcs
[root@foundation80 ~]# rpm -q pacemaker
pacemaker-1.1.18-11.el7.x86_64
2.制作免密:
[root@server1 3.0.103]# ssh-keygen
[root@server1 3.0.103]# ssh-copy-id server2
[root@server1 3.0.103]# systemctl start pcsd
[root@server1 3.0.103]# systemctl enable pcsd
设置密码,主备的密码必须相同
[root@server1 3.0.103]# passwd hacluster
Changing password for user hacluster.
New password:
BAD PASSWORD: The password is shorter than 8 characters
Retype new password:
passwd: all authentication tokens updated successfully.
3.配置bankup-mfsmaster ##172.25.80.4
[root@server4 ~]# ls
moosefs-master-3.0.103-1.rhsystemd.x86_64.rpm
[root@server4 ~]# rpm -ivh moosefs-master-3.0.103-1.rhsystemd.x86_64.rpm
[root@server4 ~]# vim /usr/lib/systemd/system/moosefs-master.service
  8 ExecStart=/usr/sbin/mfsmaster -a

配置yum源
[root@server4 ~]# vim /etc/yum.repos.d/yum.repo

[root@server4 ~]# yum repolist
HighAvailability                         rhel7.3                             37
ResilientStorage                         rhel7.3                             42
[root@server4 ~]# yum install -y pacemaker  corosync pcs

[root@server4 ~]# systemctl start pcsd
[root@server4 ~]# systemctl enable pcsd
[root@server4 ~]# passwd hacluster
4.开始创建集群,在server1(mfsmaster)上
[root@server1 3.0.103]# pcs cluster auth server1 server4
Username: hacluster
Password:
server4: Authorized
server1: Authorized
[root@server1 3.0.103]# pcs cluster setup --name mycluster server1 server4
Destroying cluster on nodes: server1, server4...
server1: Stopping Cluster (pacemaker)...
server4: Stopping Cluster (pacemaker)...
server4: Successfully destroyed cluster
server1: Successfully destroyed cluster

Sending cluster config files to the nodes...
server1: Succeeded
server4: Succeeded

Synchronizing pcsd certificates on nodes server1, server4...
server4: Success
server1: Success

Restarting pcsd on the nodes in order to reload the certificates...
server4: Success
server1: Success

[root@server1 3.0.103]# pcs cluster start --all 		##开启所有服务
server1: Starting Cluster...
server4: Starting Cluster...
[root@server1 3.0.103]# pcs status nodes 			##查看节点信息
Pacemaker Nodes:
 Online:
 Standby:
 Maintenance:
 Offline: server1 server4
Pacemaker Remote Nodes:
 Online:
 Standby:
 Maintenance:
 Offline:

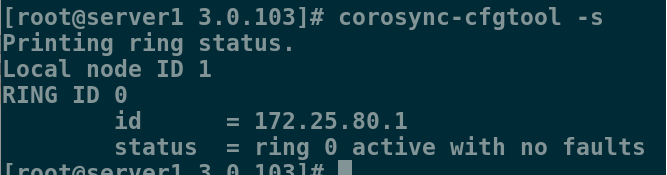
[root@server1 3.0.103]# corosync-cfgtool -s 		##验证corosync是否正常
Printing ring status.
Local node ID 1
RING ID 0
	id	= 172.25.80.1
	status	= ring 0 active with no faults		##没有错
5.创建主备集群
[root@server1 ~]# crm_verify -L -V		##检查配置,发现有错误
[root@server1 ~]#  pcs property set stonith-enabled=false	##更改属性,禁止STONITH
再检查一次
[root@server1 ~]# crm_verify -L -V		##没有报错
[root@server1 ~]# pcs status		##查看节点信息
Cluster name: mycluster
Stack: corosync
Current DC: server4 (version 1.1.15-11.el7-e174ec8) - partition with quorum
Last updated: Sat May 18 22:58:46 2019		Last change: Sat May 18 22:58:38 2019 by root via cibadmin on server1
2 nodes and 0 resources configured
Online: [ server1 server4 ]
No resources
Daemon Status:
  corosync: active/disabled
  pacemaker: active/disabled
  pcsd: active/enabled

[root@server1 ~]# pcs resource create vip ocf:heartbeat:IPaddr2 ip=172.25.80.100 cidr_netmask=32 op monitor interval=30s		##创建vip
[root@server1 ~]# ip a
2: eth0: <BROADCAST,MULTICAST,UP,LOWER_UP> mtu 1500 qdisc pfifo_fast state UP qlen 1000
    link/ether 52:54:00:00:00:01 brd ff:ff:ff:ff:ff:ff
    inet 172.25.80.1/24 brd 172.25.80.255 scope global eth0
       valid_lft forever preferred_lft forever
    inet 172.25.80.100/32 brd 172.25.80.255 scope global eth0		##成功
       valid_lft forever preferred_lft forever
在server4上查看监控
[root@server4 ~]# crm_mon

6.执行故障转移
[root@server1 ~]# pcs cluster stop server1
server1: Stopping Cluster (pacemaker)...
server1: Stopping Cluster (corosync)...

查看监控,发现vip漂移

[root@server1 ~]# pcs cluster start server1		##开启master,没有抢占资源,vip会在server4关掉后漂移回来
server1: Starting Cluster...
[root@server4 ~]# pcs cluster stop server4
server4: Stopping Cluster (pacemaker)...
server4: Stopping Cluster (corosync)...
[root@server4 ~]# pcs cluster start server4
server4: Starting Cluster...
[root@server4 ~]# crm_mon

当master出现故障时,back-master会接替master,保证了客户端的正常使用,成功实现高可用
用vip的方式来实现存储共享
1.先恢复环境,写好解析
客户端:
[root@foundation80 ~]# umount /mnt/mfs
[root@foundation80 ~]# umount /mnt/mfsmeta
[root@foundation80 ~]# vim /etc/hosts
  6 172.25.80.100   mfsmaster

Maser:
[root@server1 ~]# systemctl stop moosefs-master
[root@server1 ~]# vim /etc/hosts
172.25.80.100   mfsmaster

Sever2:
[root@server2 mnt]# systemctl stop moosefs-chunkserver
[root@server2 ~]# umount /dev/vda1
[root@server2 ~]# vim /etc/hosts
172.25.80.100   mfsmaster

Server3:
[root@server3 ~]# systemctl stop moosefs-chunkserver
[root@server3 ~]# vim /etc/hosts
172.25.80.100   mfsmaster
2.给server3加一块磁盘

[root@server3 ~]# fdisk -l
Disk /dev/vda: 10.7 GB, 10737418240 bytes, 20971520 sectors
Units = sectors of 1 * 512 = 512 bytes
Sector size (logical/physical): 512 bytes / 512 bytes
I/O size (minimum/optimal): 512 bytes / 512 bytes
4.下载安装远程块存储设备并开启服务
[root@server3 ~]# yum install -y targetcli
[root@server3 ~]# systemctl start target
5.配置iSCSI服务
[root@server3 ~]# targetcli
Warning: Could not load preferences file /root/.targetcli/prefs.bin.
targetcli shell version 2.1.fb41
Copyright 2011-2013 by Datera, Inc and others.
For help on commands, type 'help'.

/> cd backstores/block
/backstores/block> create my_disk1 /dev/vda
Created block storage object my_disk1 using /dev/vda.
/backstores/block> cd ../..
/> cd iscsi
/iscsi> create iqn.2019-05.com.example:server3
Created target iqn.2019-05.com.example:server3.
Created TPG 1.
Global pref auto_add_default_portal=true
Created default portal listening on all IPs (0.0.0.0), port 3260.
/iscsi> cd iqn.2019-05.com.example:server3/
/iscsi/iqn.20...ample:server3> cd tpg1/luns
/iscsi/iqn.20...er3/tpg1/luns> create /backstores/block/my_disk1
Created LUN 0.
/iscsi/iqn.20...er3/tpg1/luns> cd ..
/iscsi/iqn.20...:server3/tpg1> cd acls
/iscsi/iqn.20...er3/tpg1/acls> create iqn.2019-05.com.example:client
Created Node ACL for iqn.2019-05.com.example:client
Created mapped LUN 0.
/iscsi/iqn.20...er3/tpg1/acls> cd ../../../..
/> ls

/> exit
6.在master上安装iscsi客户端软件
[root@server1 ~]# yum install -y iscsi-*
[root@server1 ~]# vim /etc/iscsi/initiatorname.iscsi
InitiatorName=iqn.2019-05.com.example:client
7.发现共享磁盘并登陆
[root@server1 ~]# iscsiadm -m discovery -t st -p 172.25.80.3
172.25.80.3:3260,1 iqn.2019-05.com.example:server3
[root@server1 ~]# iscsiadm -m node -l
Login to [iface: default, target: iqn.2019-05.com.example:server3, portal: 172.25.80.3,3260] successful.
[root@server1 ~]# fdisk -l
Disk /dev/sdb: 10.7 GB, 10737418240 bytes, 20971520 sectors
Units = sectors of 1 * 512 = 512 bytes
Sector size (logical/physical): 512 bytes / 512 bytes
I/O size (minimum/optimal): 512 bytes / 512 bytes

8.使用共享磁盘,建立分区
[root@server1 ~]# fdisk /dev/sdb
Command (m for help): n
Select (default p):
Using default response p
Partition number (1-4, default 1):
First sector (2048-20971519, default 2048):
Using default value 2048
Last sector, +sectors or +size{K,M,G} (2048-20971519, default 20971519):
Using default value 20971519
Partition 1 of type Linux and of size 10 GiB is set
Command (m for help): p

Disk /dev/sdb: 10.7 GB, 10737418240 bytes, 20971520 sectors
Units = sectors of 1 * 512 = 512 bytes
Sector size (logical/physical): 512 bytes / 512 bytes
I/O size (minimum/optimal): 512 bytes / 512 bytes
Disk label type: dos
Disk identifier: 0xbea5feb3

   Device Boot      Start         End      Blocks   Id  System
/dev/sdb1            2048    20971519    10484736   83  Linux

Command (m for help): w
The partition table has been altered!

[root@server1 ~]# mkfs.xfs /dev/sdb1 ##格式化分区
9.挂载磁盘,备份数据
[root@server1 ~]# mount /dev/sda1 /mnt
[root@server1 ~]# df
Filesystem                          1K-blocks    Used Available Use% Mounted on
/dev/mapper/rhel_foundation167-root  17811456 1245080  16566376   7% /
devtmpfs                               497300       0    497300   0% /dev
tmpfs                                  508264       0    508264   0% /dev/shm
tmpfs                                  508264   13076    495188   3% /run
tmpfs                                  508264       0    508264   0% /sys/fs/cgroup
/dev/sda1                             1038336  123364    914972  12% /mnt

[root@server1 ~]# cd /var/lib/mfs/			##这是mfs的数据目录
[root@server1 mfs]# ls
changelog.7.mfs  metadata.mfs         metadata.mfs.empty
metadata.crc     metadata.mfs.back.1  stats.mfs
[root@server1 mfs]# cp -p * /mnt/			##带权限拷贝/var/lib/mfs的所有数据文件到/dev/sda1上
[root@server1 mfs]# cd /mnt/
[root@server1 mnt]# ls
changelog.7.mfs  metadata.mfs         metadata.mfs.empty
metadata.crc     metadata.mfs.back.1  stats.mfs
[root@server1 mnt]# ll -d
drwxr-xr-x. 2 root root 182 May 21 22:57 .
[root@server1 mnt]# chown mfs.mfs /mnt		##当目录属于mfs用户和组时,才能正常使用
[root@server1 mnt]# ll -d
drwxr-xr-x. 2 mfs mfs 182 May 21 22:57 .
[root@server1 mnt]# cd
[root@server1 ~]# umount /mnt/
[root@server1 ~]# mount /dev/sdb1 /var/lib/mfs/		##使用分区,测试是否可以使用共享磁盘
[root@server1 ~]# df
/dev/sdb1                            10474496   32944  10441552   1% /var/lib/mfs

[root@server1  ~]# systemctl start moosefs-master  # 服务开启成功,就说明数据文件拷贝成功,共享磁盘可以正常使用
[root@server1 ~]# ps ax
  PID TTY      STAT   TIME COMMAND
24862 ?        S<     0:00 /usr/sbin/mfsmaster -a

[root@server1 ~]# systemctl stop moosefs-master
10.配置backup-master,是之也可以使用共享磁盘
[root@server4 ~]# vim /etc/hosts
172.25.80.100   mfsmaster
[root@server4 ~]# yum install -y iscsi-*
[root@server4 ~]# vim /etc/iscsi/initiatorname.iscsi
InitiatorName=iqn.2019-05.com.example:client
[root@server4 ~]# iscsiadm -m discovery -t st -p 172.25.80.3
172.25.80.3:3260,1 iqn.2019-05.com.example:server3
[root@server4 ~]#  iscsiadm -m node  -p 172.25.80.3 -l
Logging in to [iface: default, target: iqn.2019-05.com.example:server3, portal: 172.25.80.3,3260] (multiple)
Login to [iface: default, target: iqn.2019-05.com.example:server3, portal: 172.25.80.3,3260] successful.
[root@server4 ~]# fdisk -l
Disk /dev/sdb: 10.7 GB, 10737418240 bytes, 20971520 sectors
Units = sectors of 1 * 512 = 512 bytes
Sector size (logical/physical): 512 bytes / 512 bytes
I/O size (minimum/optimal): 512 bytes / 512 bytes
Disk label type: dos
Disk identifier: 0xbea5feb3

   Device Boot      Start         End      Blocks   Id  System
/dev/sdb1            2048    20971519    10484736   83  Linux


[root@server4 ~]# mount /dev/sdb1 /var/lib/mfs/		##此处使用的磁盘和master是同一块,因为master已经做过配置了,所以我们只需要使用即可,不用再次配置
[root@server4 ~]# systemctl start moosefs-master		##测试磁盘是否可以正常使用
[root@server4 ~]# systemctl stop moosefs-master
[root@server4 ~]#  pcs cluster start server4
server4: Starting Cluster...

11.在master上创建mfs文件系统
[root@server1 ~]# pcs cluster start server1
server1: Starting Cluster...
[root@server1 ~]# pcs status
Cluster name: mycluster
Stack: corosync
Current DC: server4 (version 1.1.15-11.el7-e174ec8) - partition with quorum
Last updated: Wed May 22 00:18:33 2019		Last change: Sat May 18 23:11:20 2019 by root via cibadmin on server1

2 nodes and 1 resource configured

Online: [ server1 server4 ]

Full list of resources:

 vip	(ocf::heartbeat:IPaddr2):	Started server1

Daemon Status:
  corosync: active/disabled
  pacemaker: active/disabled
  pcsd: active/enabled


[root@server1 ~]# pcs resource create mfsdata ocf:heartbeat:Filesystem device=/dev/sdb1 directory=/var/lib/mfs/ fstype=xfs op monitor interval=1min
[root@server1 ~]# pcs status
Cluster name: mycluster
Stack: corosync
Current DC: server4 (version 1.1.15-11.el7-e174ec8) - partition with quorum
Last updated: Wed May 22 00:27:04 2019		Last change: Wed May 22 00:25:27 2019 by root via cibadmin on server1

2 nodes and 2 resources configured

Online: [ server1 server4 ]

Full list of resources:

 vip	(ocf::heartbeat:IPaddr2):	Started server4
 mfsdata	(ocf::heartbeat:Filesystem):	Started server1

Daemon Status:
  corosync: active/disabled
  pacemaker: active/disabled
  pcsd: active/enabled
[root@server1 ~]# pcs resource create mfsd systemd:moosefs-master op monitor interval=1min		##创建系统

[root@server1 ~]# pcs cluster stop server1
server1: Stopping Cluster (pacemaker)...
server1: Stopping Cluster (corosync)...
[root@server1 ~]# pcs resource group add mfsgroup vip mfsdata mfsd			##把vip,mfsdata,mfsd 集中在一个组中
[root@server4 ~]# pcs status
Cluster name: mycluster
Stack: corosync
Current DC: server4 (version 1.1.15-11.el7-e174ec8) - partition with quorum
Last updated: Wed May 22 00:42:46 2019		Last change: Wed May 22 00:42:44 2019 by root via cibadmin on server4

2 nodes and 3 resources configured

Online: [ server4 ]
OFFLINE: [ server1 ]

Full list of resources:

 vip	(ocf::heartbeat:IPaddr2):	Started server4
 mfsdata	(ocf::heartbeat:Filesystem):	Started server4
 mfsd	(systemd:moosefs-master):	Started server4

Daemon Status:
  corosync: active/disabled
  pacemaker: active/disabled
  pcsd: active/enabled
当关闭master之后,master上的服务就会迁移到backup-master上

再次测试:
[root@server1 ~]# pcs cluster start server1
[root@server4 ~]# pcs cluster stop server4
[root@server1 ~]# pcs status
Cluster name: mycluster
Stack: corosync
Current DC: server1 (version 1.1.15-11.el7-e174ec8) - partition with quorum
Last updated: Wed May 22 00:47:08 2019		Last change: Wed May 22 00:44:38 2019 by root via cibadmin on server4

2 nodes and 3 resources configured

Online: [ server1 ]
OFFLINE: [ server4 ]

Full list of resources:

 Resource Group: mfsgroup
     vip	(ocf::heartbeat:IPaddr2):	Started server1
     mfsdata	(ocf::heartbeat:Filesystem):	Started server1
     mfsd	(systemd:moosefs-master):	Started server1

Daemon Status:
  corosync: active/disabled
  pacemaker: active/disabled
  pcsd: active/enabled

fence解决脑裂问题
1.先在客户端测试高可用
打开chunkserver
[root@server2 mnt]# systemctl start moosefs-chunkserver
[root@server2 mnt]# ping mfsmaster
PING mfsmaster (172.25.80.100) 56(84) bytes of data.
64 bytes from mfsmaster (172.25.80.100): icmp_seq=1 ttl=64 time=0.178 ms
64 bytes from mfsmaster (172.25.80.100): icmp_seq=2 ttl=64 time=0.531 ms
[root@server3 ~]# systemctl start moosefs-chunkserver
[root@server3 ~]#  ping mfsmaster
PING mfsmaster (172.25.80.100) 56(84) bytes of data.
64 bytes from mfsmaster (172.25.80.100): icmp_seq=1 ttl=64 time=0.269 ms
64 bytes from mfsmaster (172.25.80.100): icmp_seq=2 ttl=64 time=0.249 ms


查看vip的位置
[root@server1 ~]# ip a
2: eth0: <BROADCAST,MULTICAST,UP,LOWER_UP> mtu 1500 qdisc pfifo_fast state UP qlen 1000
    link/ether 52:54:00:00:00:01 brd ff:ff:ff:ff:ff:ff
    inet 172.25.80.1/24 brd 172.25.80.255 scope global eth0
       valid_lft forever preferred_lft forever
    inet 172.25.80.100/32 brd 172.25.80.255 scope global eth0

开启master
[root@server1 ~]# pcs cluster start server1
server1: Starting Cluster...
在客户端进行分布式存储测试
[root@foundation80 ~]# mfsmount 		##挂载成功
mfsmaster accepted connection with parameters: read-write,restricted_ip,admin ; root mapped to root:root
如果挂载失败则需要删除/mnt/mfs下的文件
rm -rf /mnt/mfs/*
[root@foundation80 ~]# cd /mnt/mfs/
[root@foundation80 mfs]# ls
dir1  dir2
[root@foundation80 mfs]# cd dir1/
[root@foundation80 dir1]# dd if=/dev/zero of=bigfile2 bs=1M 		count=2000		##上传一份大文件
2000+0 records in
2000+0 records out
2097152000 bytes (2.1 GB) copied, 8.3571 s, 251 MB/s

[root@server4 ~]# pcs cluster stop server1		##在客户端上传大文件的同时,关闭正在提供服务的服务端
server1: Stopping Cluster (pacemaker)...
server1: Stopping Cluster (corosync)...

[root@foundation80 dir1]# mfsfileinfo bigfile2 ##我们查看到文件上传成功,并没有受到影响
通过以上实验我们发现,当master挂掉之后,backup-master会立刻接替master的工作,保证客户端可以进行正常访问,但当master重新运行时,不能保证master是否会抢回自己的工作,从而导致master和backup-master同时修改同一份数据文件从而发生脑裂,此时fence就派上用场了
1.安装fence服务
[root@server1 ~]# yum install -y fence-virt
[root@server1 ~]# mkdir /etc/cluster
[root@server4 mfs]# yum install -y fence-virt
[root@server4 mfs]# mkdir /etc/cluster
2.生成一份fence密钥文件,传给服务端
[root@foundation80 ~]# fence_virtd -c
Module search path [/usr/lib64/fence-virt]:
Available backends:
    libvirt 0.3
Available listeners:
    multicast 1.2
Listener module [multicast]:
Multicast IP Address [225.0.0.12]:
Multicast IP Port [1229]:
Interface [virbr0]: br0     # 注意此处要修改接口,必须与本机一致
Key File [/etc/cluster/fence_xvm.key]:
Backend module [libvirt]:

[root@foundation80 ~]# mkdir /etc/cluster
[root@foundation80 ~]# dd if=/dev/urandom of=/etc/cluster/fence_xvm.key bs=128 count=1
[root@foundation80 ~]# systemctl start fence_virtd
[root@foundation80 ~]# cd /etc/cluster/
[root@foundation80 cluster]# ls
fence_xvm.key
[root@foundation80 cluster]# scp fence_xvm.key root@172.25.80.1:/etc/cluster/
[root@foundation80 cluster]# scp fence_xvm.key root@172.25.80.4:/etc/cluster/
[root@foundation80 cluster]# netstat -anulp | grep 1229
udp        0      0 0.0.0.0:1229            0.0.0.0:*                           23000/fence_virtd

[root@foundation80 cluster]# virsh list
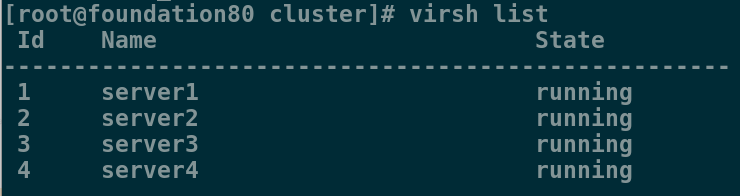
在master查看监控crm_mon
[root@server1 cluster]# pcs stonith create vmfence fence_xvm pcmk_host_map="server1:server1;server4:server4" op monitor interval=1min
[root@server1 cluster]# crm_verify -L -V
[root@server1 cluster]# fence_xvm -H server4			##server4断电重启
[root@server1 cluster]# crm_mon

[root@server1 cluster]# crm_mon ##查看监控,server4上的服务迁移到master上

[root@server1 cluster]# echo c > /proc/sysrq-trigger ##模拟master端内核崩溃
查看监控发现,master重启成功之后,不会抢占资源,服务依旧在backup-master端正常运行,说明fence成功生效


 180
180


 被折叠的 条评论
为什么被折叠?
被折叠的 条评论
为什么被折叠?
 到【灌水乐园】发言


