


一、服务端开发
1、pom文件依赖
        <dependency>
            <groupId>org.springframework.boot</groupId>
            <artifactId>spring-boot-starter-web-services</artifactId>
        </dependency>
        <dependency>
            <groupId>org.apache.cxf</groupId>
            <artifactId>cxf-rt-frontend-jaxws</artifactId>
            <version>3.1.6</version>
        </dependency>
        <dependency>
            <groupId>org.apache.cxf</groupId>
            <artifactId>cxf-rt-transports-http</artifactId>
            <version>3.1.6</version>
        </dependency>
2、接口
package com.example.demo.ws;

import javax.jws.WebMethod;
import javax.jws.WebParam;
import javax.jws.WebService;

@WebService(name = "TestService", // 暴露服务名称
        targetNamespace = "http://ws.demo.example.com"// 命名空间,一般是接口的包名倒序
)
public interface TestService {
    @WebMethod
    public String sayHello(@WebParam(name = "name") String name);

}
注意:接口的targetNamespace 要和接口实现类的targetNamespace 一致!!!
3、接口实现类
package com.example.demo.ws;

import org.springframework.stereotype.Component;

import javax.jws.WebService;

@WebService(serviceName = "TestService", // 与接口中指定的name一致
        targetNamespace = "http://ws.demo.example.com", // 与接口中的命名空间一致
        endpointInterface = "com.example.demo.ws.TestService"// 接口地址
)
@Component
public class TestServiceImpl implements TestService {
    @Override
    public String sayHello(String name) {
        System.out.println("服务端被调用!");
        return name + ",你好!";
    }
}
4、Web Service配置类
package com.example.demo.ws;

import org.springframework.boot.web.servlet.ServletRegistrationBean;
import org.springframework.context.annotation.Bean;
import org.springframework.context.annotation.Configuration;

import org.apache.cxf.Bus;
import org.apache.cxf.bus.spring.SpringBus;
import org.apache.cxf.jaxws.EndpointImpl;
import org.apache.cxf.transport.servlet.CXFServlet;

import javax.xml.ws.Endpoint;

@Configuration
public class CxfConfig {
    @Bean
    public ServletRegistrationBean disServlet() {
        ServletRegistrationBean servletRegistrationBean = new ServletRegistrationBean(new CXFServlet(), "/webService/*");
        return servletRegistrationBean;
    }

    @Bean(name = Bus.DEFAULT_BUS_ID)
    public SpringBus springBus() {
        return new SpringBus();
    }

    @Bean
    public Endpoint endpoint() {
        EndpointImpl endpoint = new EndpointImpl(springBus(), new TestServiceImpl());
        endpoint.publish("/TestService");
        return endpoint;
    }

}
5、启动项目查看所写接口:http://localhost:8080/webService
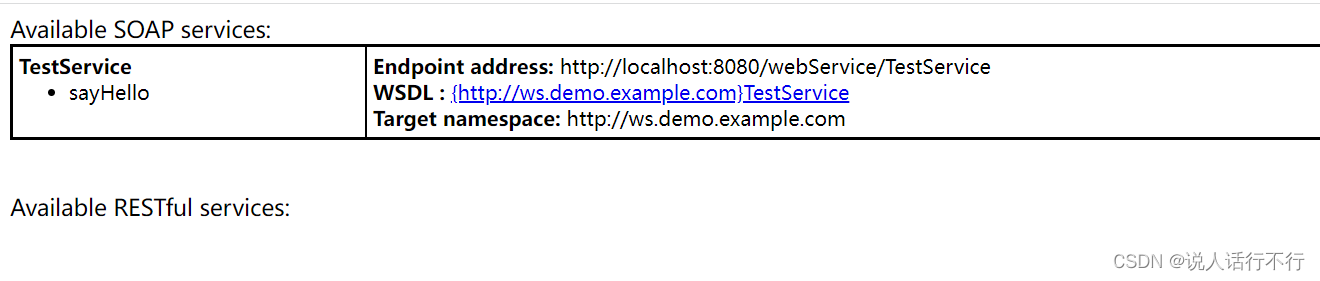
接口的WSDL文件:http://localhost:8080/webService/TestService?wsdl
WSDL 是基于 XML 的用于描述 Web Services 以及如何访问 Web Services 的语言
至此,服务端开发完成。
二、客户端开发
如何在其它项目调用前面所写的Web Service接口???
需要将WSDL转Java代码。
http://localhost:8080/webService/TestService?wsdl 这是接口的WSDL文件地址。
也可以把内容复制出来,放在文本文档,再保存为wsdl后缀的文件。
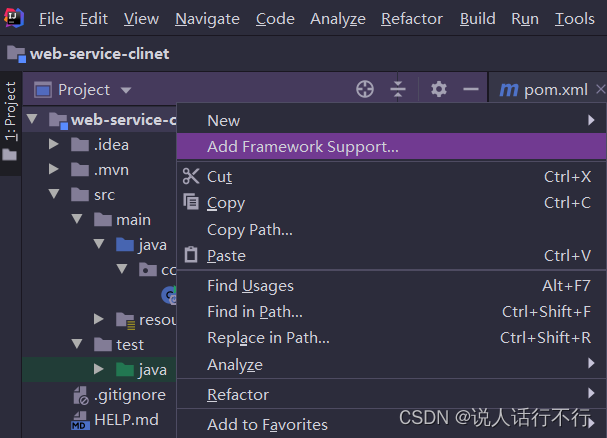
1、新建另一个项目:
因为这里用到是axis,不加以下依赖会出现异常:
java.lang.ClassNotFoundException: org.apache.axis.wsdl.WSDL2Java
        <dependency>
            <groupId>org.lucee</groupId>
            <artifactId>axis</artifactId>
            <version>1.4.0</version>
        </dependency>
        <dependency>
            <groupId>org.lucee</groupId>
            <artifactId>jaxrpc</artifactId>
            <version>1.4.0</version>
        </dependency>
        <dependency>
            <groupId>commons-discovery</groupId>
            <artifactId>commons-discovery</artifactId>
            <version>0.5</version>
        </dependency>
2、添加Web Service 客户端支持
项目名处右键-Add Framework Support... 。添加框架支持
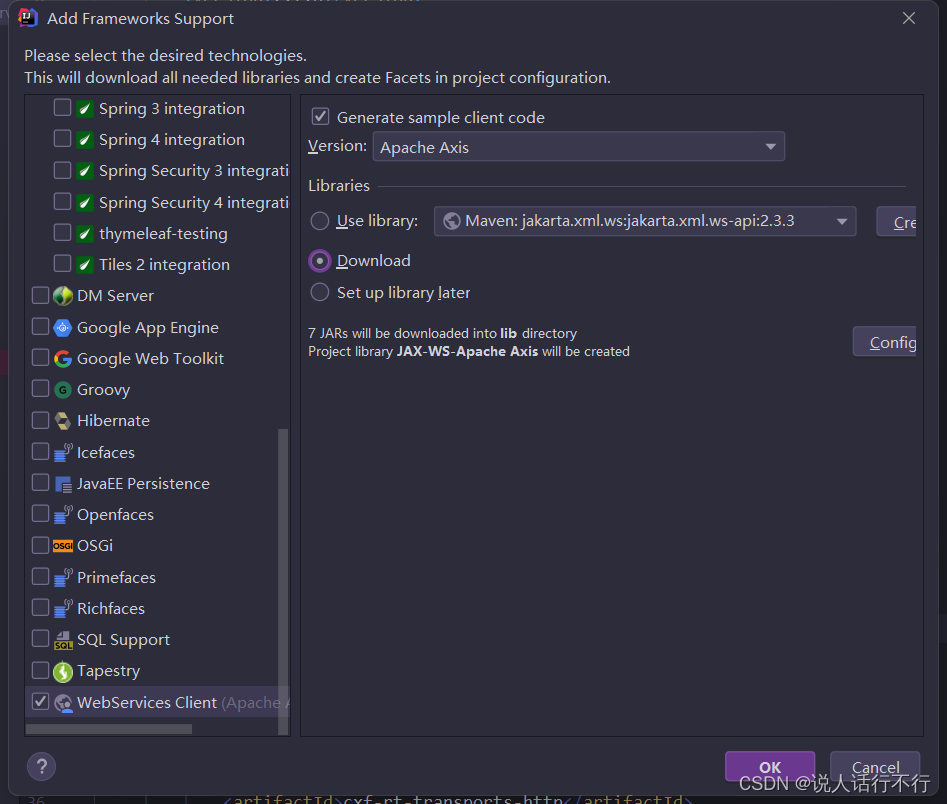
添加Web Service Clinet支持,按照图中选项,ok即可。
3、将wsdl转java代码
Tools->WebServices->Generate Java Code From Wsdl...
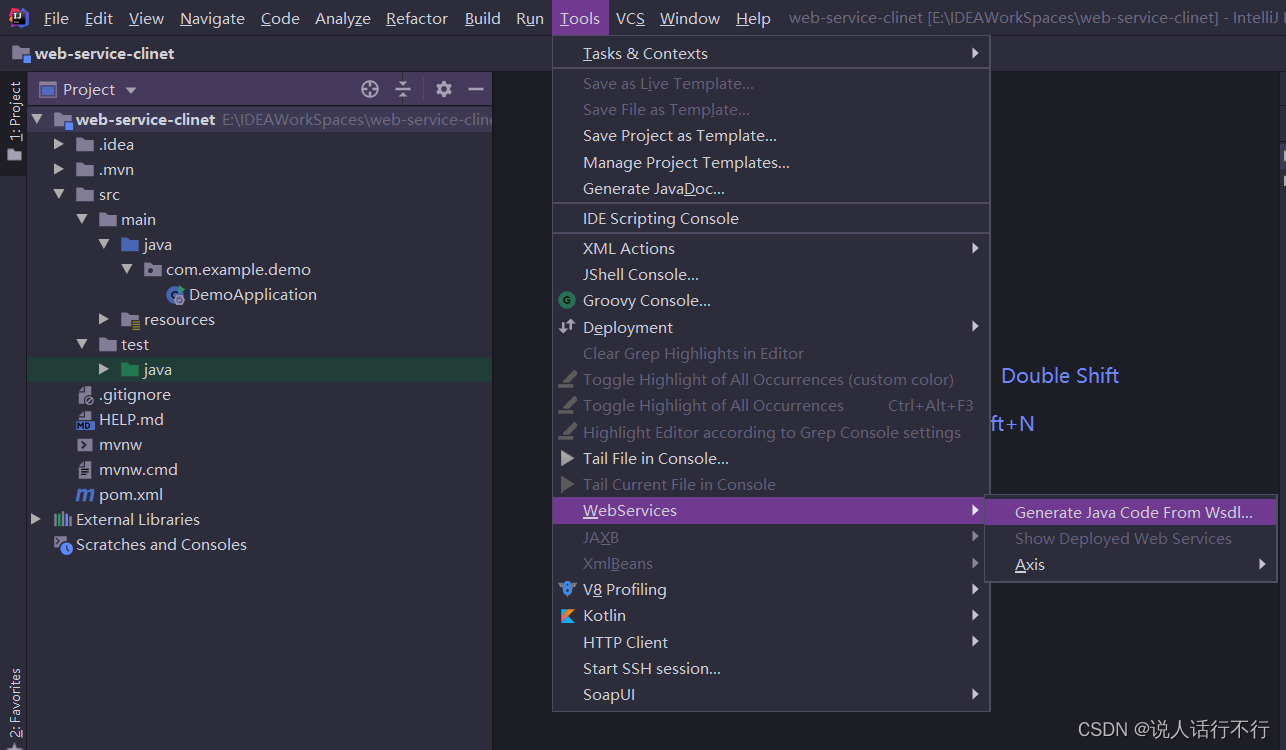
Then:

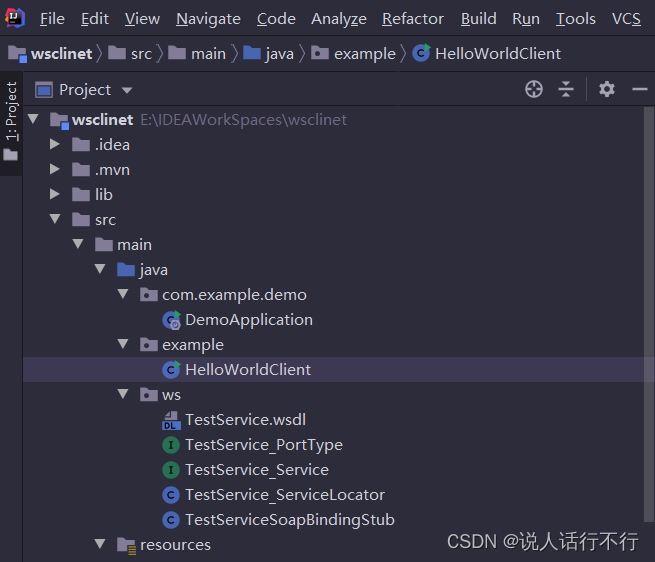
于是生成一堆文件:
4、接口调用
HelloWorldClient.java
package example;

import ws.TestService_PortType;
import ws.TestService_ServiceLocator;

public class HelloWorldClient {
    public static void main(String[] argv) {
        try {
            TestService_ServiceLocator factory = new TestService_ServiceLocator();
            TestService_PortType bizorgServiceImplPort = factory.getTestServiceImplPort();
            String result = bizorgServiceImplPort.sayHello("王富贵");
            System.out.println(result);
        } catch (javax.xml.rpc.ServiceException ex) {
            ex.printStackTrace();
        } catch (java.rmi.RemoteException ex) {
            ex.printStackTrace();
        }
    }
}
接口返回:

服务端:

over。
---------------------------------------------------------------------------------------------------------------------------------
服务端的开发有参考SpringBoot——实现WebService接口服务端以及客户端开发_Archie_java的博客-CSDN博客_springboot webservice接口开发客户端的开发完全自己试错过程。


 1933
1933


 被折叠的 条评论
为什么被折叠?
被折叠的 条评论
为什么被折叠?
 到【灌水乐园】发言


