


NOTE
数据无价!数据无价!数据无价!
使用该脚本前先将自己的需要调整的库拷贝一份!!!
应用背景和条件
由于以前用obsidian写文档时都专注于方便自己来记笔记,因此在设置附件位置时图简洁就将所有图片文件都放到了顶层的附件文件夹中,但是最近我想将自己的部分笔记分享出来(使用docsify)就发现了obsidian里面的图片插入默认是obsidian的简短形式,而且由于我的附件位置就在顶层,这就导致了我在推送自己的文件时没法将图片直接简单的上传,而且这样与markdown的标准写法不同,这就导致别的markdown软件无法识别,这就很恼火了。由于图片文件过多,因此用python写了一个简单的脚本来将文档中的图片放到指定的位置并修改图片引入的方式。
请确保你的情况与我的基本一致在执行下文代码,我没有将所有的情况都考虑进去,只针对了我的情况。由于我前面遇到那个问题,因此我使用了插件Custom Attachment location来管理我后续的图片引入方式,因此脚本是针对下述插件配置的。
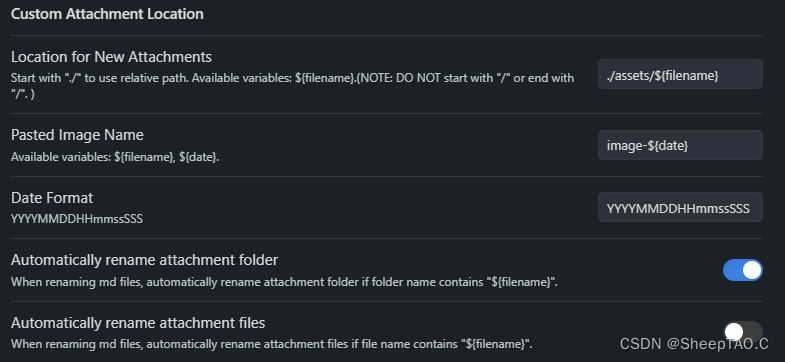
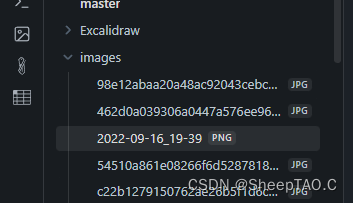
其他原仓库配置如下。
- 顶层文件位置
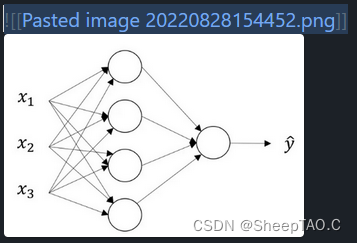
- 内部图片引入方式
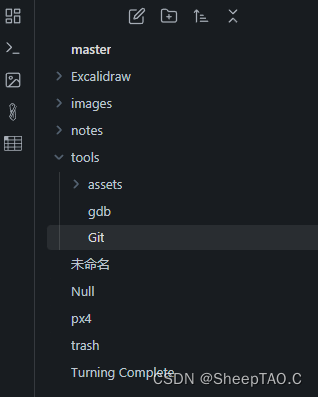
- 整体仓库样式
如果你的环境和我的基本一致,那么你就先测试一下脚本吧,不一致你可以改我的脚本,要不就快点寻找其他办法吧。
脚本代码
注意执行前备份仓库,数据无价!!!
import os
import re
import shutil
from tqdm import tqdm
# ======================================
# = config =
obsidianVault = 'C:\\Projects\\OB\\test'
accessoryPath = 'assets'
imagesPath = 'C:\\Projects\\OB\\test\\images'
# ======================================
imagesList = os.listdir(imagesPath)
def list_dir_in_folder(folderPath):
resList = []
folderList = os.listdir(folderPath)
folderList = [os.path.join(folderPath, v) for v in folderList]
for folder in folderList:
if os.path.isdir(folder):
resList.append(os.path.join(folderPath, folder))
return resList
folderList = [obsidianVault]
def operate_in_folder(folderPath):
print('='*64)
print(f'cd {folderPath}')
# 栈操作: 2.将对执行图片迁移操作的父文件夹中的子文件夹path加入栈中
global folderList
folderList.extend(list_dir_in_folder(folderPath))
files = []
for fileName in os.listdir(folderPath):
if fileName[-3:] == '.md':
filePath = os.path.join(folderPath, fileName)
files.append(filePath)
if not files:
return
for filePath in files:
with open(filePath, 'r', encoding='utf-8') as f:
content = f.read()
pattern = r'!\[\[(.*?)]\]' # 匹配 [[...]] 格式的内容
imgs = re.findall(pattern, content)
# 仅对含有图片的文档创建附件夹并移动相应的图片
if imgs:
fileName = os.path.basename(filePath)
attPath = os.path.join(folderPath, accessoryPath, fileName[:-3])
if not os.path.exists(attPath):
os.makedirs(attPath)
print(f'File: [{fileName}]. Attachments path: [{attPath}]. Total: [{len(imgs)}]')
for img in tqdm(imgs):
if img not in imagesList:
print(f'[WARNING]: {img} could not be found and will skip moving.')
continue
srcPath = os.path.join(imagesPath, img)
dstPath = os.path.join(attPath, img)
# 如果已经存在,就不移动,针对md文档中的一张图片被多次引用的情况
if not os.path.exists(dstPath):
shutil.move(srcPath, dstPath)
imgLink = os.path.join(accessoryPath, fileName[:-3], img).replace('\\', '/').replace(' ', '%20')
content = content.replace(f'![[{img}]]', f'')
with open(filePath, 'w', encoding='utf-8') as f:
f.write(content)
print('-'*64)
while folderList:
# 栈操作: 1.删除栈中的索引文件夹path
operate_in_folder(folderList.pop())
print('\n\n[DONE]: Please check.')
根据自己的仓库位置将上述 config 中的设置成自己的就行。具体来说 obsidianVault 设置成你的顶层仓库位置就行, accessoryPath 是针对插件Custom Attachment location的配置,最后的 imagesPath 顾名思义就是所有图片的附件位置。
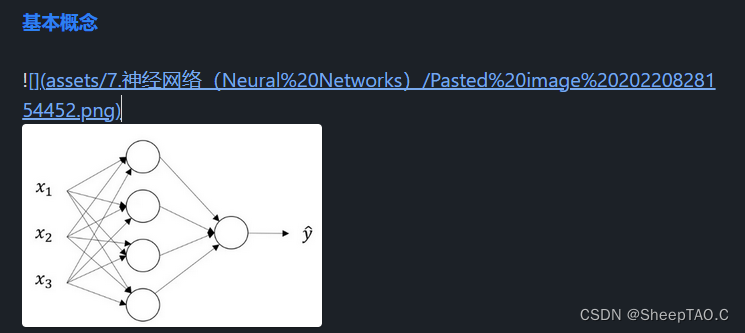
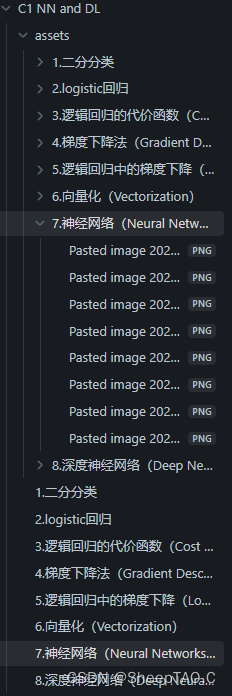
结果
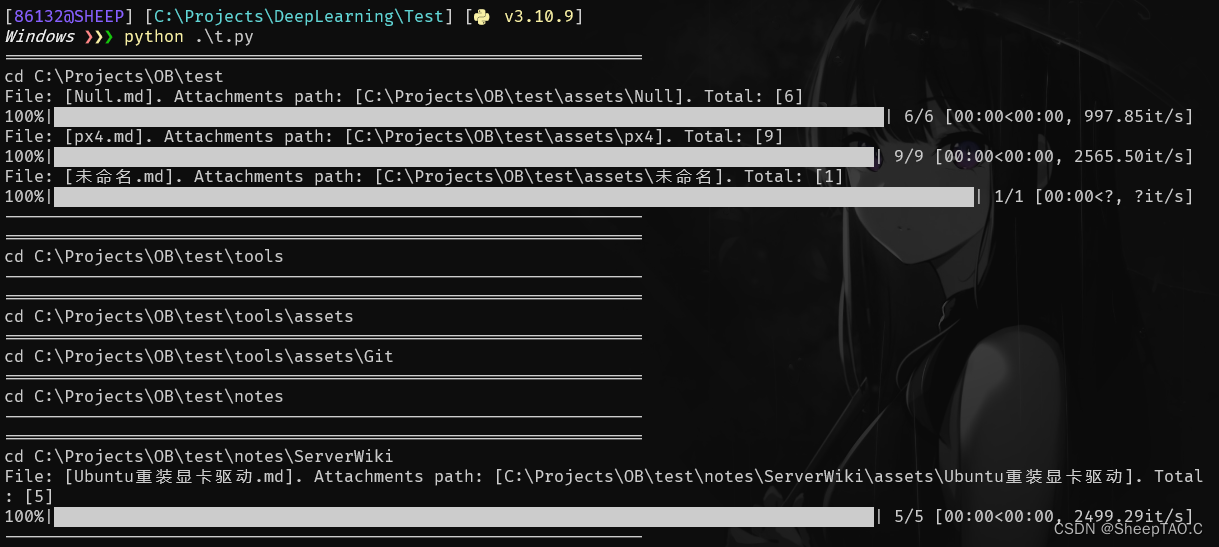
运行过程如上图(会显示进入了哪些文件夹,以及在当前文件夹路径是否执行图片迁移操作以及迁移后的问题),更改的文件位置和文章内容文件所引如下图
执行完成后记得自己先大致审阅一遍,有小问题自己改改应该就行了。


 5478
5478

 被折叠的 条评论
为什么被折叠?
被折叠的 条评论
为什么被折叠?
 到【灌水乐园】发言


