


1、下载1.4.3完全版
官网下载:http://fex.baidu.com/ueditor/
2、自行编译出jsp版本,可以自定义编码方式 gbk或者utf8。首先要确定电脑上是否安装node.js 若是安装,则继续,没安装则进行安装。怎么安装请参考

各自安好、博文: https://blog.csdn.net/qq_41465646/article/details/107656044
安装完成后,win+R 输入cmd进入命令行,然后输入
node -v 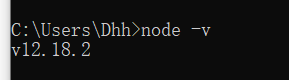 出现node.js版本号则表示node.js安装成功
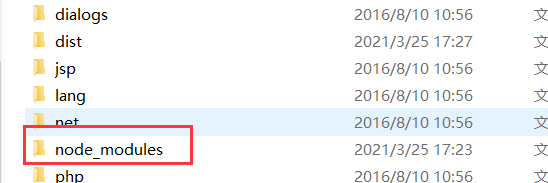
接下来在命令行中进入ueditor根目录运行
npm install然后出现文件夹则表示运行成功完成
然后在命令行输入
grunt --encode=utf8 --server=jsp
//或者输入
grunt --encode=gbk --server=jsp
然后会出现一个dist文件夹

里边就有需要问版本文件
将编译好的文件改名问ueditor整合到项目中

复制到项目中webapp目录下

文件目录入下

使用代码,jsp页面写法
<html>
<head>
    <meta http-equiv="Content-Type" content="text/html;charset=utf-8"/>
    <link href="${ctx}/ueditor/model.css" rel="stylesheet"	type="text/css">
    <script type="text/javascript" charset="utf-8" src="项目路径/res/hui/js/jquery.min.js"></script>
    <script type="text/javascript" charset="utf-8" src="项目路径/ueditor/ueditor.config.js"></script>
    <script type="text/javascript" charset="utf-8" src="项目路径/ueditor/ueditor.all.min.js"> </script>
    <script type="text/javascript" charset="utf-8" src="项目路径/ueditor/ueditor.parse.min.js"> </script>

    <style type="text/css">
        div{
            width:100%;
        }
    </style>
</head>
<body>
<div>
    <h1>完整demo</h1>\
    <textarea id="editor" name="editor" style="width:1024px;height:500px;"> </textarea>
    </div>


<script type="text/javascript">

    //实例化编辑器
    //建议使用工厂方法getEditor创建和引用编辑器实例,如果在某个闭包下引用该编辑器,直接调用UE.getEditor('editor')就能拿到相关的实例
    var ue = UE.getEditor('editor');
    //设置编辑器初始高度
    UE.getEditor('editor').setHeight(600)
    //图片上传配置
    UE.Editor.prototype._bkGetActionUrl = UE.Editor.prototype.getActionUrl;
    UE.Editor.prototype.getActionUrl = function(action) {
        if (action == '/api/ueditorUpload') {
            return '项目路径/newbusiness/ueditorUpload';
        } else {
            return this._bkGetActionUrl.call(this, action);
        }
    };
    </script>
</body>
</html>
修改ueditor.config.js图片上传路径

然后在jsp目录下打开config.json

 值和imageActionName的值相同
图片上传后台
@RequestMapping(value="/ueditorUpload",method = RequestMethod.POST)
	public void ueditorUpload(@RequestParam("file")MultipartFile files,HttpServletRequest request, HttpServletResponse response)throws ServletException, IOException {
		JSONObject json = new JSONObject();
		response.setCharacterEncoding("utf-8");
		String msg = "上传成功";
		try {
			String name = String.valueOf(System.currentTimeMillis())+files.getOriginalFilename().substring(files.getOriginalFilename().lastIndexOf("."));
			String path = "";
			String upPath="";
            String path1 = 图片服务器路径
            File file1 = new File(path1);
            path = file1.getCanonicalPath();
            String RouteNmae = Dbid.getID();
            path = path+"/"+RouteNmae+"/"+ name;
            upPath ="/图片服务器目录"+path;
	    File uploadFile = new File(upPath);
	    uploadFile.mkdirs();
	    json.put("state", "SUCCESS");
            json.put("url",path);
            json.put("size", files.getSize());
            json.put("original", name);
            json.put("type", files.getContentType());
            files.transferTo(uploadFile);
        } catch (Exception e){
			json.put("state", "ERROR");
		}
		response.getWriter().write(json.toString());
		response.getWriter().flush();
		response.getWriter().close();
	}
图片上传测试成功

可能出现的文件,会报错后台配置项http错误。
这是因为有些项目中部署后会有nginx服务器做代理,导致项目中controller.jsp不能正常访问,图片上传按钮点击会报错。原因是jsp是非静态资源,所以不能直接通过路径访问,解决办法是直接写一个action接口,通过接口获取图片上传配置信息,绕过直接通过jsp获取配置信息这一环节。将配置文件已json字符串的方式返回
        @RequestMapping("/getUeditorController")
        @ResponseBody
	public String getUeditorController(HttpServletRequest request, HttpServletResponse response){
		String exec="";
		try {
			request.setCharacterEncoding( "utf-8" );
			response.setHeader("Content-Type" , "text/html");
			exec="{\"imageActionName\": \"/api/ueditorUpload\",\"imageFieldName\": \"file\",\"imageMaxSize\": 2048000,\"imageAllowFiles\": [\".png\", \".jpg\", \".jpeg\", \".gif\", \".bmp\"],\"imageCompressEnable\": true,\"imageCompressBorder\": 1600,\"imageInsertAlign\": \"none\",\"imageUrlPrefix\": \"https://admin.educlouds.cn\",\"imagePathFormat\": \"/lzdx/SchoolWelcome/bulletin/picture\"}";
		} catch (Exception e) {
			e.printStackTrace();
		}
		return exec;
	}
然后修改ueditor.config.js中的配置

然后重新部署项目图片上传成功了。
以上为本人整合中的经验仅供参考,若遇到问题可以留言,一起探讨解决。


 1万+
1万+


 被折叠的 条评论
为什么被折叠?
被折叠的 条评论
为什么被折叠?
 到【灌水乐园】发言


