若依 ruoyi-vue element-ui el-cascader 级联选择器 选择任意一级选项,去掉单选按钮,选中点击后隐藏

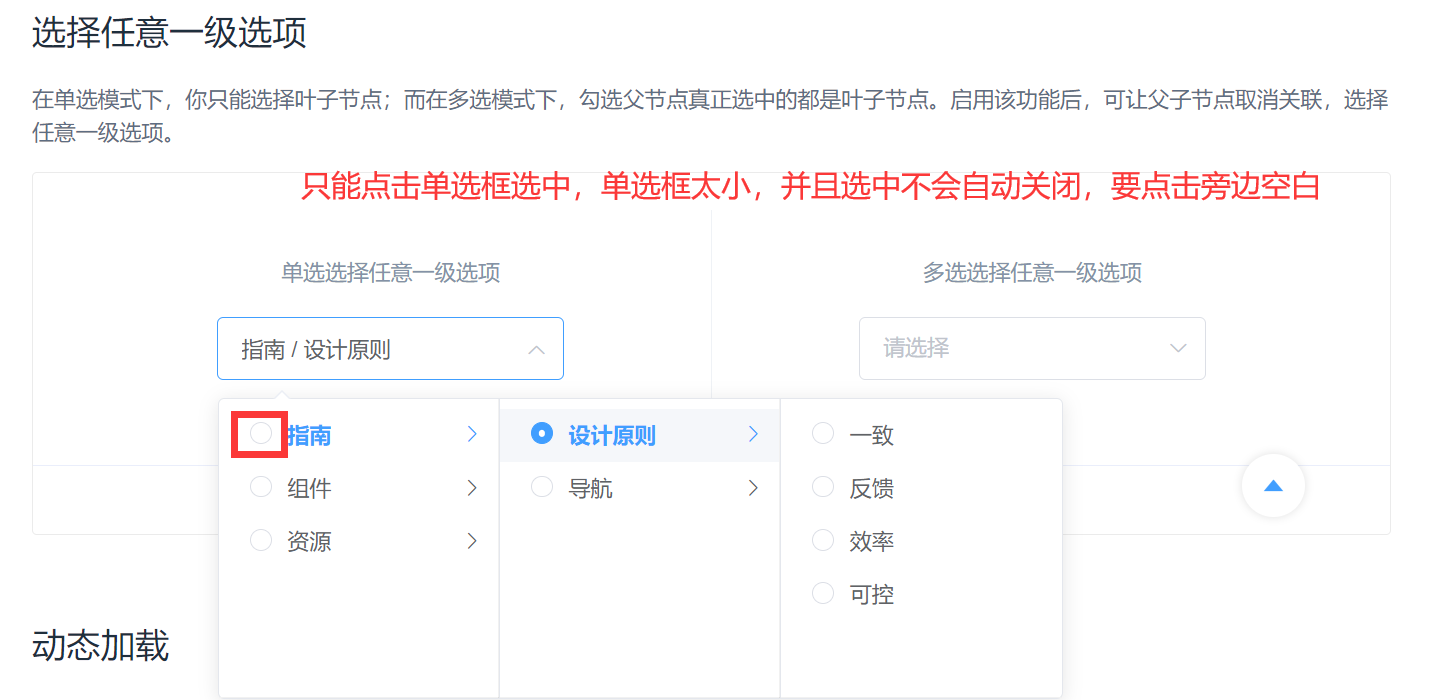
Cascader 级联选择器 选择任意一级选项,去掉单选按钮。
这兄弟文章写的可以,查了一堆文章,基本搞完才发现。

官方的例子不支持选中后自动关闭,要点击旁边空白,并且单选框太小了。
在这里插入图片描述

              <el-form-item label="所属地域" prop="areaCode">
                <el-cascader
                    style="width: 100%"
                    ref="cascader"
                    v-model="form.areaCode"
                    :options="tzSysTreeDictOptions"
                    @change="handleCascaderChange"
                    :props="{ expandTrigger: 'hover', label: 'name' ,emitPath: false,checkStrictly: true }"
                    placeholder="选择所属地域"
                />
              </el-form-item>
    handleCascaderChange(){
      this.$refs.cascader.dropDownVisible = false;
    },

全局样式,他们文章样式有问题,会导致el-radio-group 组件的单选框也消失

//el-cascader 单选框不显示,点击即选中
.el-cascader-node .el-radio__inner {
  border-radius: 0;
  border: 0;
  width: 170px;
  height: 34px;
  background-color: transparent;
  cursor: pointer;
  box-sizing: border-box;
  position: absolute;
  top: -18px;
  left: -19px;
}

.el-cascader-node .el-radio__input.is-checked .el-radio__inner {
  background: transparent;
}
  • 2
    点赞
  • 1
    收藏
    觉得还不错? 一键收藏
  • 1
    评论
首先,我们需要安装 `element-plus`,这是 `ElementUI` 的 `Vue3` 版本。 ```bash npm install element-plus --save ``` 然后,在 `main.js` 文件中引入并注册 `ElementPlus`。 ```js import { createApp } from 'vue' import ElementPlus from 'element-plus' import 'element-plus/lib/theme-chalk/index.css' import App from './App.vue' const app = createApp(App) app.use(ElementPlus) app.mount('#app') ``` 接下来,我们需要将 `el-menu` 组件封装成一个新的组件 `el-cascader-menu`,并在其中使用 `el-cascader` 组件来实现级联选择效果。 ```html <template> <el-cascader v-model="selected" :options="options" :props="props" :show-all-levels="false" @change="handleChange" ></el-cascader> </template> <script> import { ref, watch } from 'vue' import { useRoute } from 'vue-router' export default { name: 'ElCascaderMenu', props: { menuList: { type: Array, required: true } }, setup(props) { const route = useRoute() const selected = ref([]) const options = ref(props.menuList) const propsData = { checkStrictly: true, value: 'id', label: 'title', children: 'children' } const props = ref(propsData) watch( () => props.value, () => { options.value = props.menuList } ) const handleChange = (value) => { const path = value.map((id) => { const item = options.value.find((item) => item.id === id) return item.path || item.url }) route.push(path.join('/')) } return { selected, options, props, handleChange } } } </script> ``` 在 `setup` 函数中,我们使用 `ref` 创建了 `selected`、`options`、`props` 三个响应式变量,并使用 `watch` 监听 `props.value` 的变化来更新 `options` 的值。 `handleChange` 函数用来处理选择项的变化,并使用 `vue-router` 来实现路由跳转。 最后,我们需要在 `App.vue` 文件中引入并使用 `el-cascader-menu` 组件。 ```html <template> <div id="app"> <el-cascader-menu :menuList="menuList" /> </div> </template> <script> import ElCascaderMenu from '@/components/ElCascaderMenu.vue' export default { name: 'App', components: { ElCascaderMenu }, data() { return { menuList: [ { id: '1', title: '导航1', children: [ { id: '1-1', title: '选项1', children: [ { id: '1-1-1', title: '选项1-1', url: '/option-1-1' }, { id: '1-1-2', title: '选项1-2', url: '/option-1-2' } ] }, { id: '1-2', title: '选项2', url: '/option-2' } ] }, { id: '2', title: '导航2', children: [ { id: '2-1', title: '选项1', url: '/option-2-1' }, { id: '2-2', title: '选项2', url: '/option-2-2' } ] } ] } } } </script> ``` 在 `menuList` 中,我们使用了 `children` 字段来实现级联选择的效果。当某一层级的选项选中后,其子选项会自动展示在下一层级中。 最终效果如下所示: ![el-cascader-menu](https://user-images.githubusercontent.com/26276002/138021340-2b3d6e3d-6c7c-4d19-aa1a-7b2e1d0f05d2.gif)
评论 1
添加红包

请填写红包祝福语或标题

红包个数最小为10个

红包金额最低5元

当前余额3.43前往充值 >
需支付:10.00
成就一亿技术人!
领取后你会自动成为博主和红包主的粉丝 规则
hope_wisdom
发出的红包
实付
使用余额支付
点击重新获取
扫码支付
钱包余额 0

抵扣说明:

1.余额是钱包充值的虚拟货币,按照1:1的比例进行支付金额的抵扣。
2.余额无法直接购买下载,可以购买VIP、付费专栏及课程。

余额充值