


前提
本教程主要是面向全栈开发的快速上手教程,具备Java及前端基础即可学习!
主要内容
开发工具:IDEA+VSCode
后端:SpringBoot+MyBatisPlus
前端:Vue+VueRouter+Vuex+ElementUI
接口调试:Swagger
数据模拟:MockJS
身份认证:JWT
后台管理:vue-admin-template
项目部署:阿里云ECS+Nginx+MySQL
快速搭建一个springboot项目
springboot默认整合了Tomcat
创建项目的方式有如下两种方法
方法1:idea选择Spring initializr方式创建
1、idea选择Spring initializr,点击next
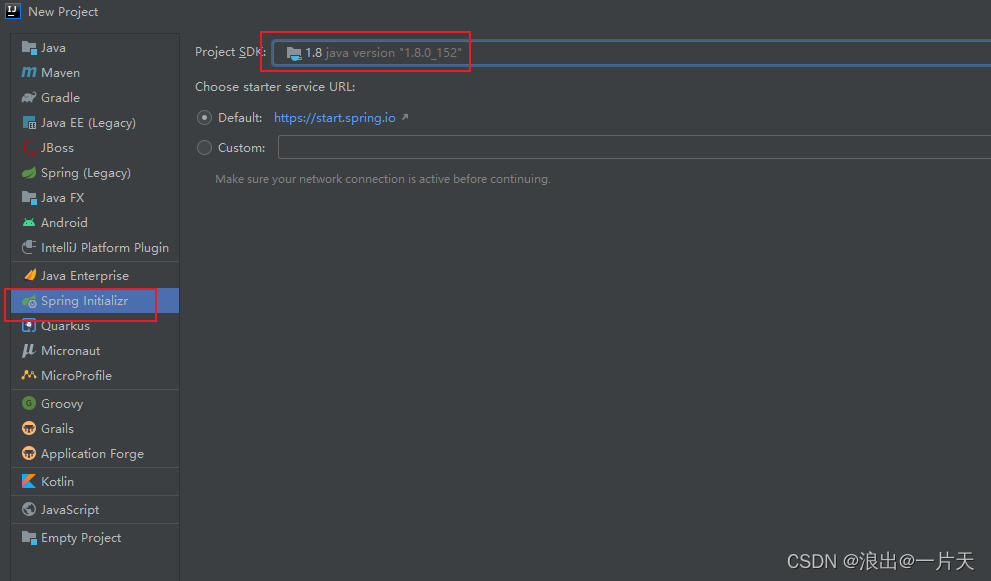
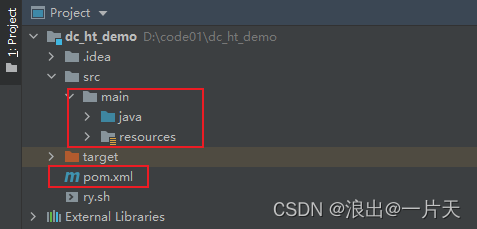
注:选择Spring initializr表示创建Springboot项目,springboot项目是包含了Maven项目的内容的,即含有如下内容结构:
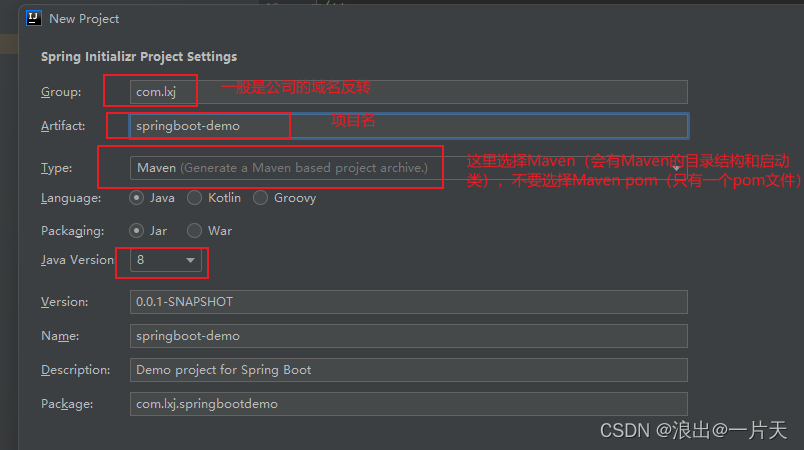
2、按如下配置参数,配置完后点击next
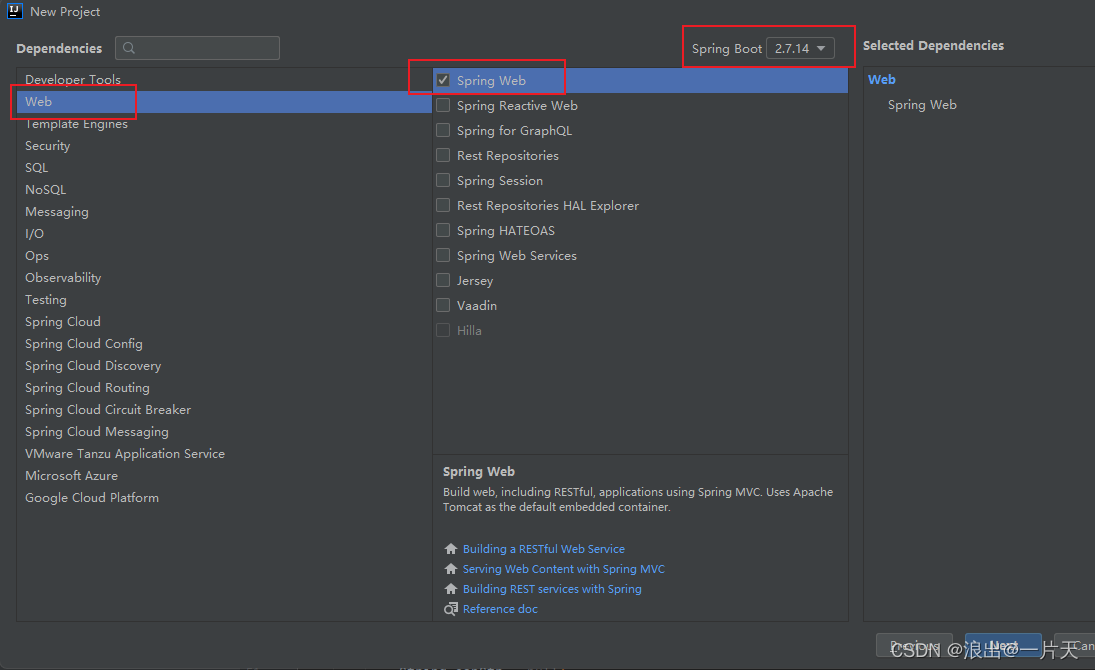
3、这里选择web,然后选择Spring web,这样就会有springmvc的相关依赖。这里一定要选择大版本是2的,如果选择3,那么你的jdk必须要是17以上,SpringBoot3以上版本不支持JDK11和JDK8,支持的最低版本是JDK17。
点击next
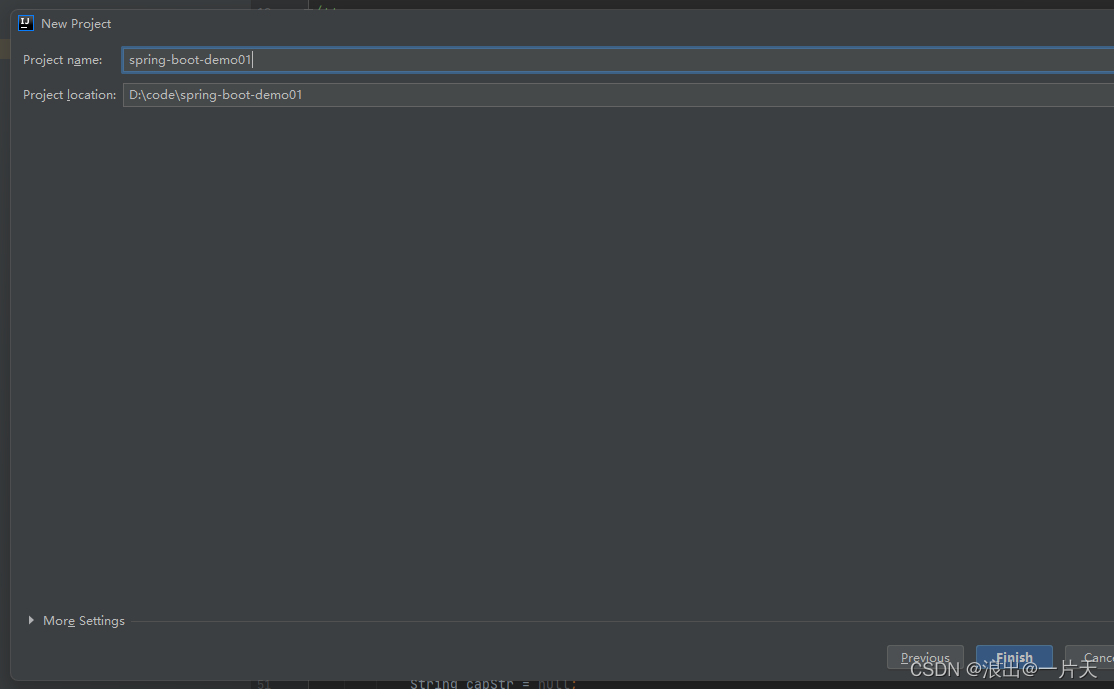
4、最后可以修改项目名也可以不修改,点击【finish】,完成Springboot项目的创建:
方法2:导入文件夹,然后自己创建需要的内容
我用的是这种方式,上一个方法我在创建后存依赖下载不了的问题。
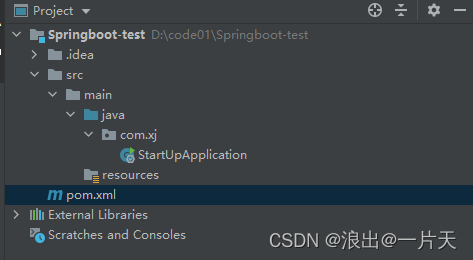
1、文件结构如下:
2、pom.xml
<?xml version="1.0" encoding="UTF-8"?>
<project xmlns="http://maven.apache.org/POM/4.0.0" xmlns:xsi="http://www.w3.org/2001/XMLSchema-instance"
         xsi:schemaLocation="http://maven.apache.org/POM/4.0.0 https://maven.apache.org/xsd/maven-4.0.0.xsd">
    <!-- pom模型版本 -->
    <modelVersion>4.0.0</modelVersion>
    <!-- 父级项目 -->
    <parent>
        <groupId>org.springframework.boot</groupId>
        <artifactId>spring-boot-starter-parent</artifactId>
        <version>2.7.3</version>
        <relativePath/> <!-- lookup parent from repository -->
    </parent>
    <!-- 项目信息 -->
    <groupId>com.lxj</groupId><!-- 项目唯一标识 -->
    <artifactId>Springboot-test</artifactId><!-- 项目名 -->
    <version>0.0.1-SNAPSHOT</version><!-- 版本 -->
    <name>Springboot-test</name><!-- 项目名 -->
    <description>Demo project for Spring Boot</description>
    <!-- 属性设置 -->
    <properties>
        <java.version>1.8</java.version>
    </properties>
    <dependencies>
        <dependency>
            <groupId>org.springframework.boot</groupId>
            <artifactId>spring-boot-starter-web</artifactId>
        </dependency>

        <dependency>
            <groupId>org.springframework.boot</groupId>
            <artifactId>spring-boot-starter-test</artifactId>
            <scope>test</scope>
        </dependency>
    </dependencies>

    <build>
        <plugins>
            <plugin>
                <groupId>org.springframework.boot</groupId>
                <artifactId>spring-boot-maven-plugin</artifactId>
            </plugin>
        </plugins>
    </build>

</project>
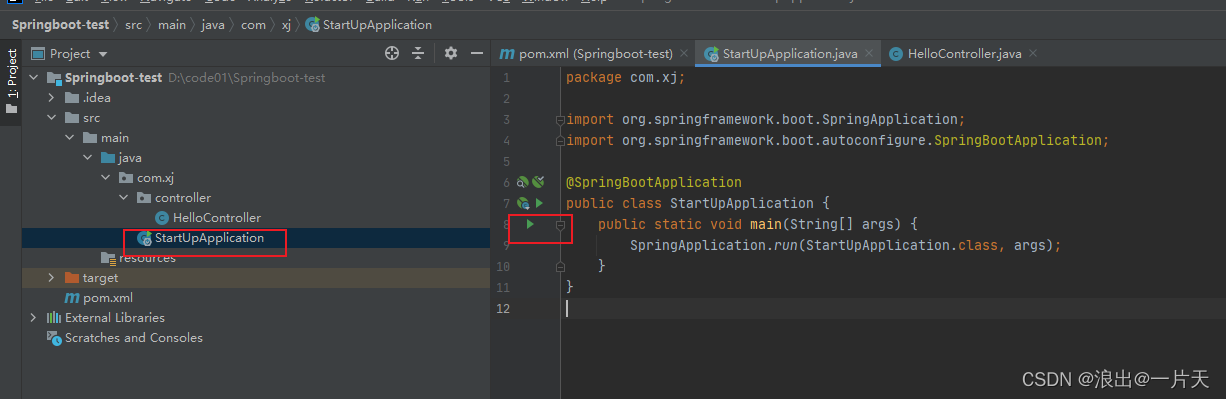
2、启动类
package com.xj;

import org.springframework.boot.SpringApplication;
import org.springframework.boot.autoconfigure.SpringBootApplication;

@SpringBootApplication
public class StartUpApplication {

    public static void main(String[] args) {

        SpringApplication.run(StartUpApplication.class, args);
    }
}
简单验证Springboot项目
1、新建一个controller包,再新建一个类

代码如下:
package com.xj.controller;

import org.springframework.web.bind.annotation.GetMapping;
import org.springframework.web.bind.annotation.RestController;

@RestController
public class HelloController {

    // http://localhost:8080/hello
    // http:// 协议
    // localhost:8080 域名
    // /hello 路径
    @GetMapping("/hello")
    public String hello(){

        return "hello SpringBoot";
    }
}
2、启动Springboot的启动类
3、Springboot的内置的Tomcat默认的协议是http,默认的启动端口是8080

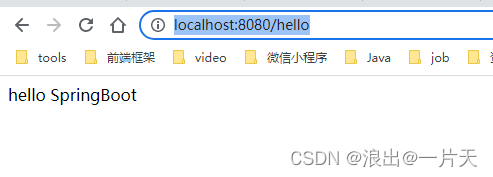
4、浏览器访问:http://localhost:8080/hello,如下出现controller类,“/hello”路径下的方法的返回值,则表示你的Springboot项目搭建没有问题。
Springboot的热部署
1、添加依赖
<dependency>
   <groupId>org.springframework.boot</groupId>
   <artifactId>spring-boot-devtools</artifactId>
   <optional>true</optional>
</dependency>
2、Springboot的配置文件中添加配置
配置文件位置:
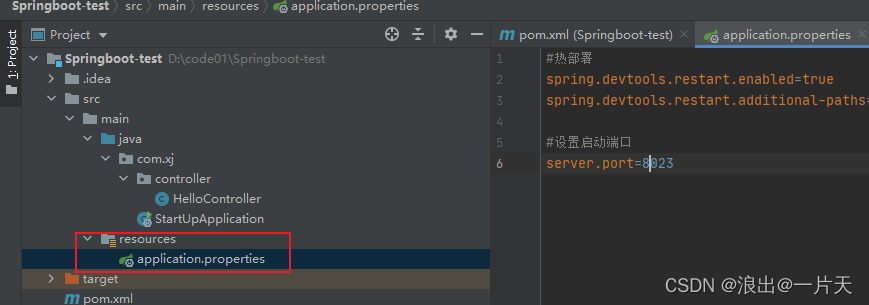
添加的代码如下:
#热部署
spring.devtools.restart.enabled=true
spring.devtools.restart.additional-paths=src/main/java
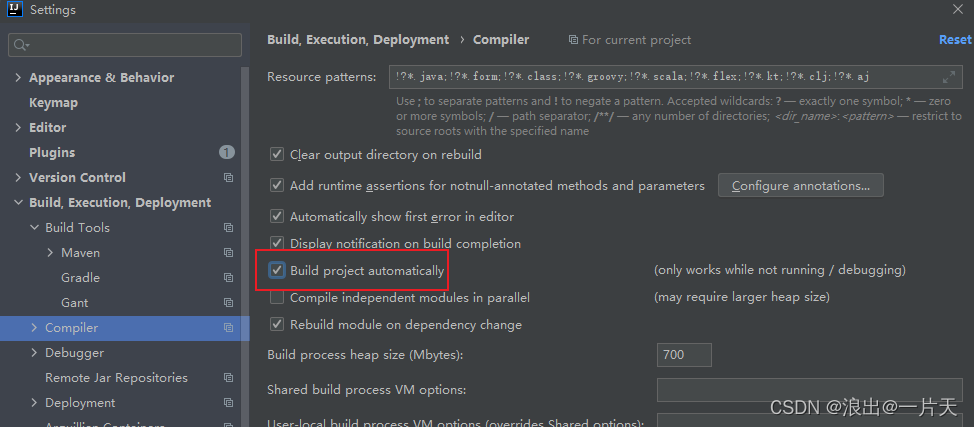
3、idea的settings的如下位置,勾选,然后点击应用
4、在代码编辑页面,ctrl+shft+alt+/ ,点击第一个
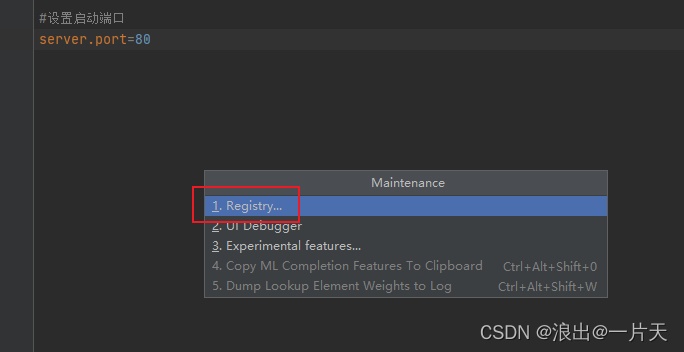
进入后,勾选如下图中选项即可,勾选后点击【close】
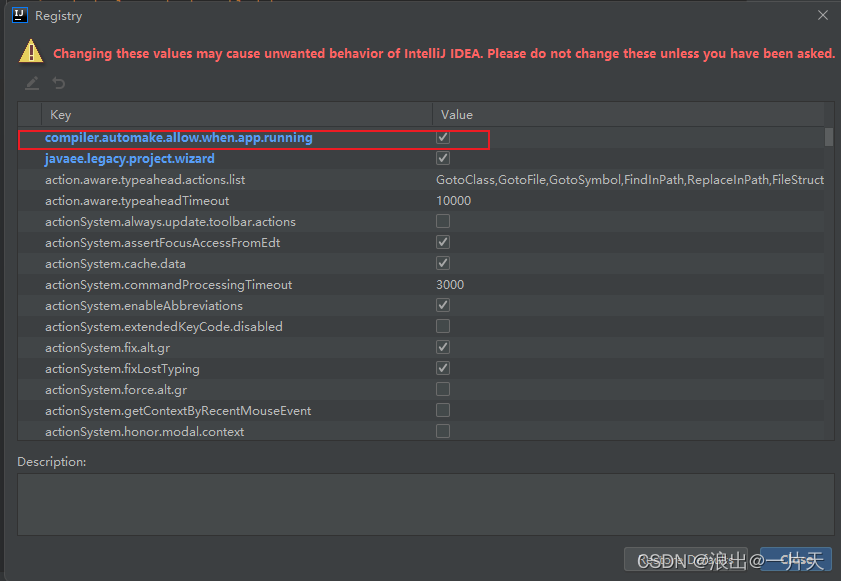
这样就完成了热部署的配置,之后修改代码后:ctrl+s 即可,不用在重启
Springboot Controller
@RestController
controller 控制器
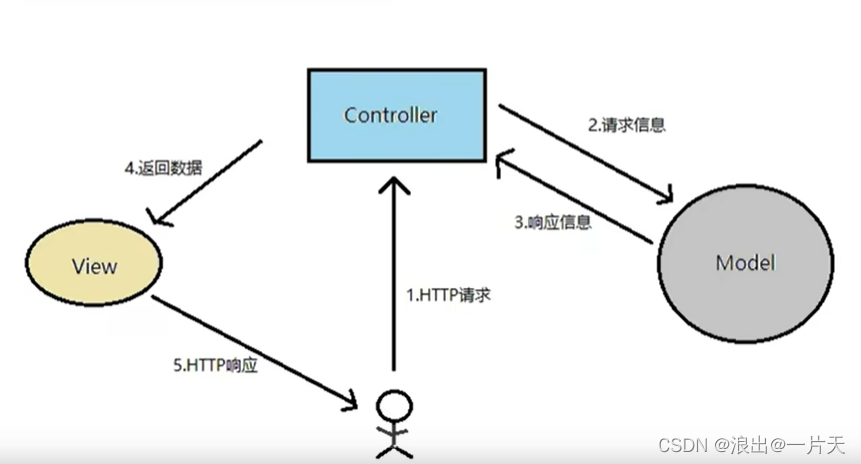
Spring Boot提供了@Controller和@RestController两种注解来标识此类负责接受和处理http请求。如果请求需要返回的是页面和数据,使用@controller,如果只是返回数据则可以使用@RestController
我们现在主要是前后端分离,@Controller需要返回一个视图,@RestController返回的可以是JSON也可以是字符串,所以RestController使用的比较多。
@RequestMapping
@GetMapping(“/hello”) 这个写法等价于:@RequestMapping(value = “/hello”,method = RequestMethod.GET)
@RequestMapping(“/hello”) //表示可以接受任何请求,只要是访问这个地址就可以接受到
@RequestMapping(value = “/hello”,method = RequestMethod.GET) //表示只能接受get请求,浏览器地址栏输入的都是get请求
package com.xj.controller;

import org.springframework.web.bind.annotation.GetMapping;
import org.springframework.web.bind.annotation.RequestMapping;
import org.springframework.web.bind.annotation.RequestMethod;
import org.springframework.web.bind.annotation.RestController;

@RestController
public class HelloController {

    // http://localhost:8080/hello
    // http:// 协议
    // localhost:8080 域名
    // /hello 路径
//    @GetMapping("/hello") 这个写法等价于:@RequestMapping(value = "/hello",method = RequestMethod.GET)
//    @RequestMapping("/hello") //表示可以接受任何请求,只要是访问这个地址就可以接受到
    @RequestMapping(value = "/hello",method = RequestMethod.GET) //表示只能接受get请求,浏览器地址栏输入的都是get请求
    public String hello(){

        return "hello SpringBoot";
    }
}
以下展示了@RequestMapping的传参等用法
1、get方式传参
方法中接受的参数和浏览器地址中传递的参数名一致,则直接传递即可,如果不一致,则需要做特殊的处理才可以传递。
代码如下:
package com.xj.controller;

import org.springframework.web.bind.annotation.RequestMapping;
import org.springframework.web.bind.annotation.RequestMethod;
import org.springframework.web.bind.annotation.RequestParam;
import org.springframework.web.bind.annotation.RestController;

@RestController
public class ParaController {

    /**
    * 这是最简单的
    * */
    @RequestMapping(value = "/getTest1",method = RequestMethod.GET)
    public String getTest1(){

        return "getTest1";
    }

    /**
     * controller接受参数,方法中的参数和浏览器传过来的参数一致
     * */
    @RequestMapping(value = "/getTest2",method = RequestMethod.GET)
    // http://localhost:8023/getTest2?nickname=zhangsan&phone=123
    // 方法中的参数必须和浏览器传过来的参数名字要保持一致,这样才可以被方法接受到
    public String getTest2(String nickname,String phone){

        System.out.println("nickname:"+nickname);
        System.out.println("phone:"+phone);
        return "getTest2";
    }

    /**
     * controller接受参数,方法中的参数名和浏览器传过来的不一致,必须加@RequestParam(value = "nickname")
     * 这里浏览器如果不传的话就会报400的错
     * 如果不传,但是不想它报错后面加:required = false
     * */
    @RequestMapping(value = "/getTest3",method = RequestMethod.GET)
    // http://localhost:8023/getTest3?nickname=zhangsan
    public String getTest3(@RequestParam(value = "nickname",required = false) String name){

        System.out.println("name:"+name);
        return "getTest3";
    }
}
这里如果注释后面不加 required = false 的话,浏览器不传递 nickename = zhangsan,访问这个方法会报错,报错如下:

通常来说4开头的错误都是客户端的问题。
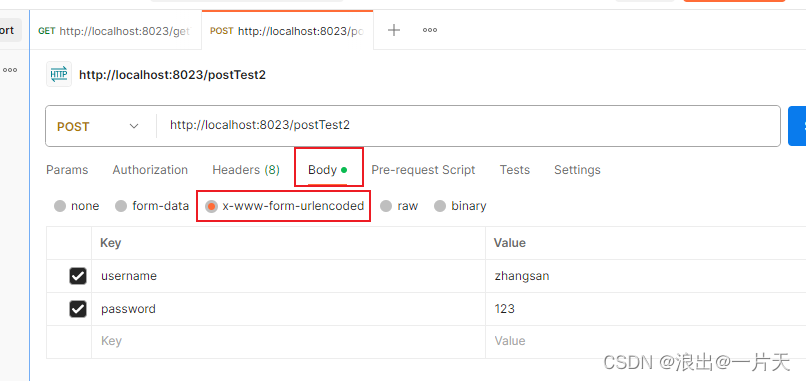
2、post方式传参
浏览器无法直接输入地址访问post请求,需要借助一个工具调试,这里用的是比较广泛的工具postman
post请求传参一般是在body中传,使用的传参方式如下:
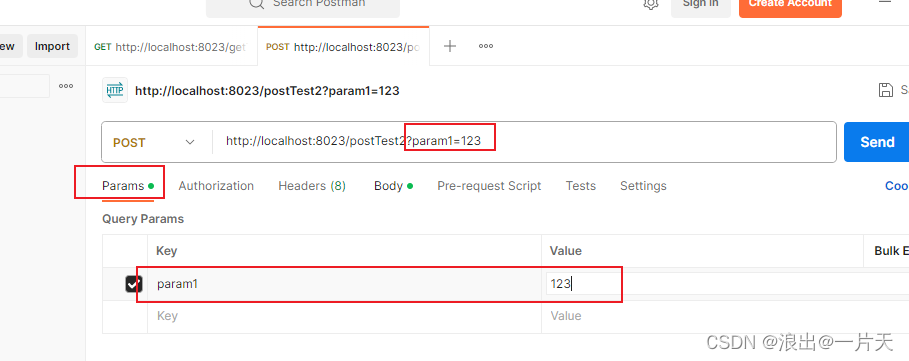
也可以在param中传,这样的话是会拼接到地址后面,参数少可以这样,参数多不建议在这里传
具体代码如下:
package com.xj.controller;

import com.xj.entity.User;
import org.springframework.web.bind.annotation.RequestBody;
import org.springframework.web.bind.annotation.RequestMapping;
import org.springframework.web.bind.annotation.RequestMethod;
import org.springframework.web.bind.annotation.RestController;

@RestController
public class ParaControllerPost {

    @RequestMapping(value = "/postTest1", method = RequestMethod.POST)
    public String postTest1() {

        return "POST1请求";
    }

    @RequestMapping(value = "/postTest2", method = RequestMethod.POST)
    public String postTest2(String username, String password) {

        System.out.println("username:" + username);
        System.out.println("password:" + password);
        return "POST2请求";
    }

    @RequestMapping(value = "/postTest3", method = RequestMethod.POST)
    public String postTest3(User user) {

        System.out.println(user);
        return "POST3请求";
    }

    @RequestMapping(value = "/postTest4", method = RequestMethod.POST)
    public String postTest4(@RequestBody User user) {

        System.out.println(user);
        return "POST4请求";
    }
}
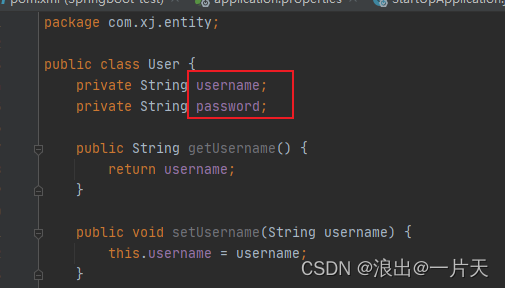
user实体
package com.xj.entity;

public class User {
    private String username;
    private String password;

    public String getUsername() {
        return username;
    }

    public void setUsername(String username) {
        this.username = username;
    }

    public String getPassword() {
        return password;
    }

    public void setPassword(String password) {
        this.password = password;
    }

    @Override
    public String toString() {
        return "User{" +
                "username='" + username + '\'' +
                ", password='" + password + '\'' +
                '}';
    }
}
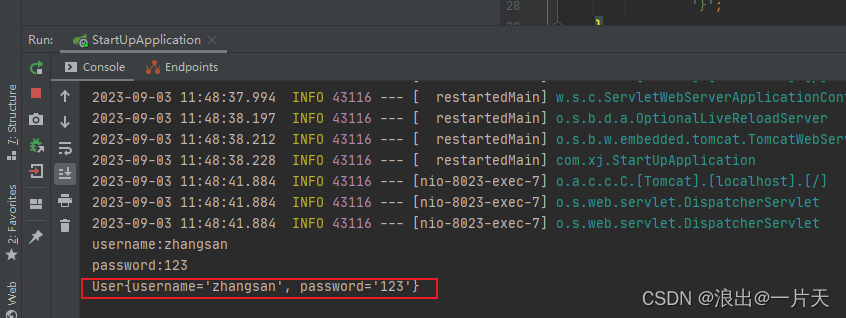
请求3中,我们只需要传入和User对应的属性名相同的参数,就会自动封装到User对象中,如下:
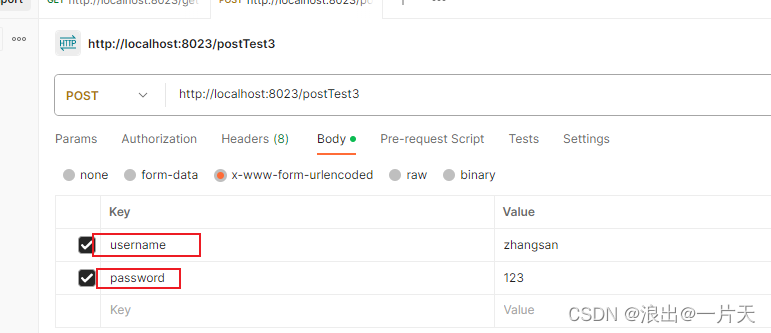
这里的参数和User类中的属性名相同:
后台获取到传过来的参数,并封装到User对象中
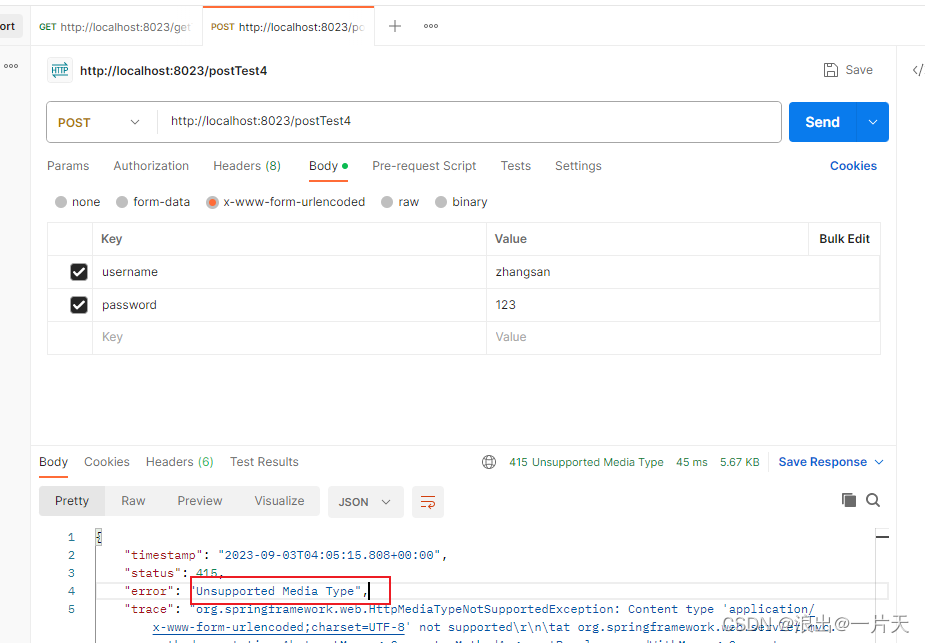
请求4中@RequestBody表示只接受json方式传参,如果还是用之前的传参方式访问请求4,就会报如下错误:
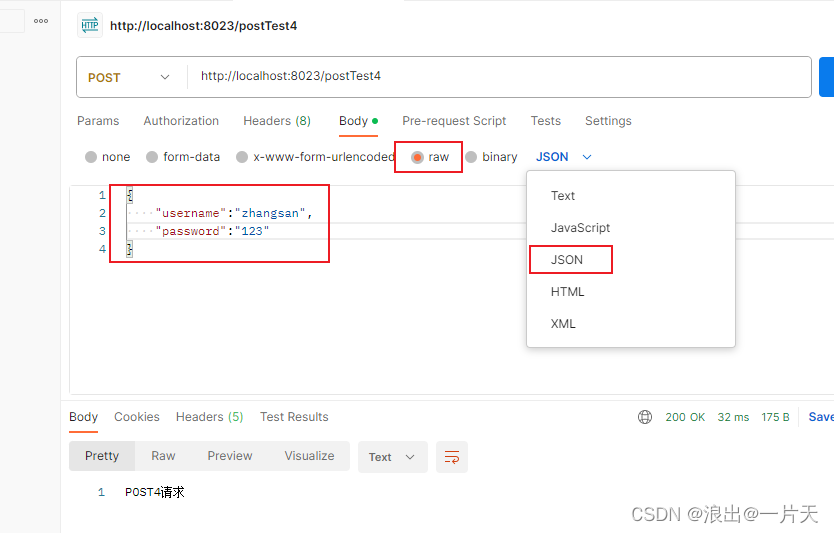
前台的传参必须是json,并且参数的数据类型需要和后台对应,应如下传参:
Springboot 文件上传+拦截器
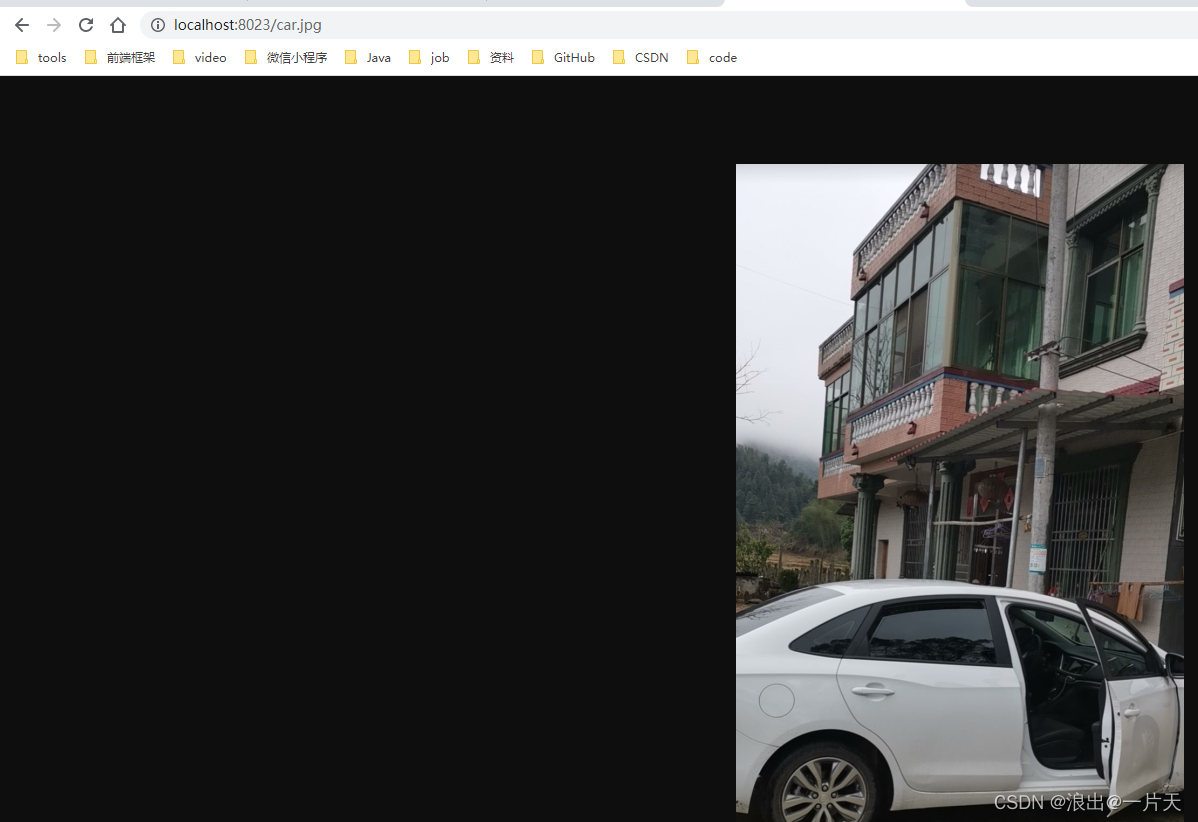
静态文件目录
static这个目录Springboot默认做了一个映射,前台可以直接访问,如下即可说明:

前台访问效果:
如果你需要在static文件夹中新建一个目录,浏览器访问的时候则需要再加一个目录结构
Springboot文件上传
方法中有MultipartFile类接收前端传过来的文件,用如下这种方式发送请求:
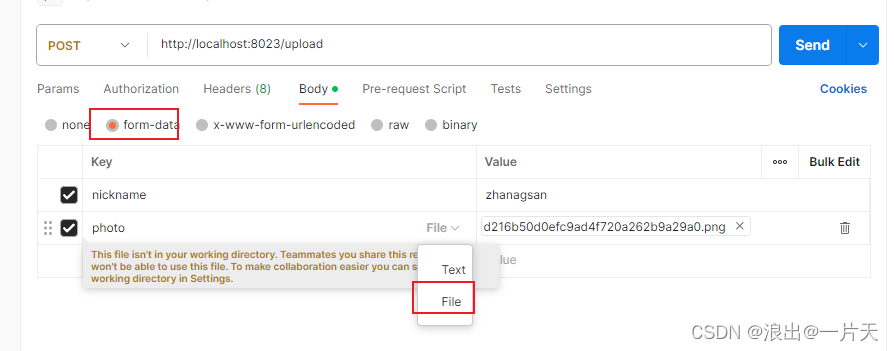
具体代码如下:
package com.xj.controller;

import org.springframework.web.bind.annotation.PostMapping;
import org.springframework.web.bind.annotation.RestController;
import org.springframework.web.multipart.MultipartFile;

import javax.servlet.http.HttpServletRequest;

@RestController
public class fileUploadController {

    @PostMapping("/upload") //等价于@RequestMapping(value = "/upload",method = RequestMethod.POST)
    public String uploadFile(String nickname, MultipartFile photo, HttpServletRequest request){

        System.out.println(nickname);
        //获取图片的原始名称
        System.out.println(photo.getOriginalFilename());
        //获取文件类型
        System.out.println(photo.getContentType());
        //文件上传后暂时存放路径
        String path = request.getServletContext().getRealPath("/upload");
        System.out.println(path);
        return "上传成功";
    }
}
Springboot拦截器
前端访问地址,先会经过拦截器,拦截器返回true则可以继续访问Controller
具体代码如下
package com.xj.interceptor;

import org.springframework.web.servlet.HandlerInterceptor;

import javax.servlet.http.HttpServletRequest;
import javax.servlet.http.HttpServletResponse;

public class LoginInterceptor implements HandlerInterceptor {

    @Override
    public boolean preHandle(HttpServletRequest request, HttpServletResponse response, Object handler) throws Exception {

        // request 可以拿到前端传过来的一些数据,比如cookie,response可以返回一些信息给前端
        System.out.println("loginInterceptor"); //这里可以代表做一些操作
        return true; //返回true,表示通过拦截器,false表示不通过拦截器,不会继续往下访问Controller
    }
}
拦截器要注册和限定拦截请求路径
package com.xj.config;

import com.xj.interceptor.LoginInterceptor;
import org.springframework.context.annotation.Configuration;
import org.springframework.web.servlet.config.annotation.InterceptorRegistry;
import org.springframework.web.servlet.config.annotation.WebMvcConfigurer;

@Configuration
public class InterceptorConfig implements WebMvcConfigurer {

    @Override
    public void addInterceptors(InterceptorRegistry registry) {

        //注册拦截器,拦截的地址是 /user下面的
//        registry.addInterceptor(new LoginInterceptor()).addPathPatterns("/user/**");
        //注册拦截器,拦截的地址是所有
        registry.addInterceptor(new LoginInterceptor());
    }
}
访问之前的post3请求,先会打印拦截器中的内容,请求如下:

结果:
loginInterceptor
username:zhangsan
password:123
RestFul服务+Swagger
Springboot中的restful
restful 是一种编程规范和约束
如下是Springboot体现的restful编程规范
package com.xj.controller;

import com.xj.entity.User;
import org.springframework.web.bind.annotation.*;

@RestController
public class UserController {

    @GetMapping("/user/{id}")
    public String getUserById(@PathVariable int id) {
    //@PathVariable 注解配合 @GetMapping("/user/{id}") 中的{id}可以在请求路径中传递参数值并获取到参数值
        System.out.println(id);
        return "根据id获取用户信息";
    }

    @PostMapping("/user")
    public String save(User user) {

        return "添加用户";
    }

    @PutMapping("/user")
    public String update(User user) {

        return "跟新用户";
    }

    @DeleteMapping("/user/{id}")
    public String deleteById(@PathVariable int id) {

        System.out.println
最低0.47元/天 解锁文章


 871
871


 被折叠的 条评论
为什么被折叠?
被折叠的 条评论
为什么被折叠?
 到【灌水乐园】发言


