


1.编译环境
VMware+Ubuntu18.04+dpdk19.08
gcc versions >= 4.9				gcc --version
Kernel version >= 3.16			uname -r
glibc >= 2.7  					ldd --version
2.dpdk下载
https://core.dpdk.org/download/
#安装依赖
sudo apt-get install libpcap-devel
sudo apt-get install libnuma-dev
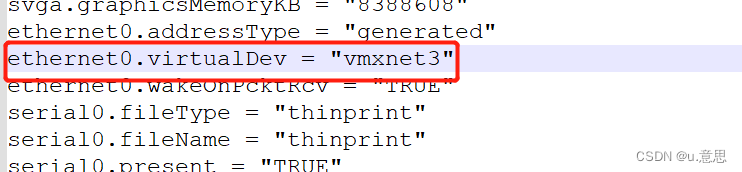
3.设置多队列网卡
修改Ubuntu18.04.vmx
cat /proc/interrupts | grep eth

虚拟机有多少个CPU就会有多少个队列
4.巨页设置
4.1创建、删除巨页文件
#创建巨页文件
sudo mkdir -p /mnt/huge
grep -s '/mnt/huge' /proc/mounts > /dev/null
if [ $? -ne 0 ] ; then
	sudo mount -t hugetlbfs nodev /mnt/huge
fi
#删除巨页文件
grep -s '/mnt/huge' /proc/mounts > /dev/null
if [ $? -eq 0 ] ; then
	sudo umount /mnt/huge
fi
if [ -d /mnt/huge ] ; then
	sudo rm -R /mnt/huge
fi
4.2设置巨页大小
方法一
#sudo vi /etc/default/grub
#修改GRUB_CMDLINE_LINUX
GRUB_CMDLINE_LINUX="find_preseed=/preseed.cfg noprompt net.ifnames=0 biosdevname=0 default_hugepagesz=1G hugepagesz=2M hugepages=1024 isolcpus=0-2"
#net.ifnames=0 biosdevname=0 网卡重命名
#isolcpus=0-2 隔离CPU核

#修改GRUB_CMDLINE_LINUX后更新
sudo update-grub
方法二
#设置巨页大小
echo $Pages > /sys/kernel/mm/hugepages/hugepages-${HUGEPGSZ}/nr_hugepages
4.3清空巨页大小
echo 0 > /sys/kernel/mm/hugepages/hugepages-${HUGEPGSZ}/nr_hugepages
4.4查看大页内存使用情况
cat /proc/meminfo |grep -i HugePages
5.设置dpdk的环境变量
export RTE_SDK=`pwd`
export RTE_TARGET=x86_64-native-linux-gcc
6.IGB_UIO
6.1绑定网卡
方法一:配置设备
#加载igb_uio驱动
sudo modprobe uio
sudo insmod {RTE_TARGET}/kmod/igb_uio.ko
#绑定网卡
sudo ./usertools/dpdk-devbind.py --bind=igb_uio eth0
or
sudo ./usertools/dpdk-devbind.py --bind=igb_uio 03:00.0
#查看端口绑定状态
./usertools/dpdk-devbind.y --status
方法二:配置驱动
内核源码中Documentation\ABI\testing\sysfs-bus-pci对bind、new_id的描述:
What:		/sys/bus/pci/drivers/.../bind
Date:		December 2003
Contact:	linux-pci@vger.kernel.org
Description:
		Writing a device location to this file will cause
		the driver to attempt to bind to the device found at
		this location.	This is useful for overriding default
		bindings.  The format for the location is: DDDD:BB:DD.F.
		That is Domain:Bus:Device.Function and is the same as
		found in /sys/bus/pci/devices/.  For example:
		# echo 0000:00:19.0 > /sys/bus/pci/drivers/foo/bind
		(Note: kernels before 2.6.28 may require echo -n).

What:		/sys/bus/pci/drivers/.../new_id
Date:		December 2003
Contact:	linux-pci@vger.kernel.org
Description:
		Writing a device ID to this file will attempt to
		dynamically add a new device ID to a PCI device driver.
		This may allow the driver to support more hardware than
		was included in the driver's static device ID support
		table at compile time.  The format for the device ID is:
		VVVV DDDD SVVV SDDD CCCC MMMM PPPP.  That is Vendor ID,
		Device ID, Subsystem Vendor ID, Subsystem Device ID,
		Class, Class Mask, and Private Driver Data.  The Vendor ID
		and Device ID fields are required, the rest are optional.
		Upon successfully adding an ID, the driver will probe
		for the device and attempt to bind to it.  For example:
		# echo "8086 10f5" > /sys/bus/pci/drivers/foo/new_id
		# 写入要bind的网卡设备的 PCI ID (e.g. 8086 10f5, 格式:设备厂商号 设备号)
对 bind 文件写入每一个接口的 pci 号意味着我们可以将一个网卡上的不同口绑定到不同的驱动上。
向 new_id 中写入设备 id,将会动态的在 pci 设备驱动中添加一个新的设备 id。这种功能允许驱动添加更多的硬件而非仅有在编译时包含到驱动中的静态支持设备 ID 列表中的硬件。
两种方式都可以绑定新的网卡,而dpdk使用/sys/bus/pci/drivers/…/new_id方式绑定网卡
6.2解绑网卡
方法一:配置设备
#方法一
sudo ${RTE_SDK}/usertools/dpdk-devbind.py -b $DRV $PCI_PATH
# example
sudo ./usertools/dpdk-devbind.py -b vmxnet3 03:00.0
#方法二:
sudo ./usertools/dpdk-devbind.py -u 03:00.0
方法二:配置驱动
What:		/sys/bus/pci/drivers/.../unbind
Date:		December 2003
Contact:	linux-pci@vger.kernel.org
Description:
		Writing a device location to this file will cause the
		driver to attempt to unbind from the device found at
		this location.	This may be useful when overriding default
		bindings.  The format for the location is: DDDD:BB:DD.F.
		That is Domain:Bus:Device.Function and is the same as
		found in /sys/bus/pci/devices/. For example:
		# echo 0000:00:19.0 > /sys/bus/pci/drivers/foo/unbind
		(Note: kernels before 2.6.28 may require echo -n).
设置cpu的亲和性
将8个网卡队列各自绑定到一个CPU
echo 1 > /proc/irq/57/smp_affinity
echo 2 > /proc/irq/58/smp_affinity
echo 4 > /proc/irq/59/smp_affinity
echo 8 > /proc/irq/60/smp_affinity
echo 10 > /proc/irq/61/smp_affinity
echo 20 > /proc/irq/62/smp_affinity
echo 40 > /proc/irq/63/smp_affinity
echo 80 > /proc/irq/64/smp_affinity
异常处理
1、/usr/bin/env: “python”: 没有那个文件或目录
apt install python
2、insmod igb_uio.ko
insmod: ERROR: could not insert module igb_uio.ko: Unknown symbol in module
查看igb_uio.ko的依赖:modinfo igb_uio.ko
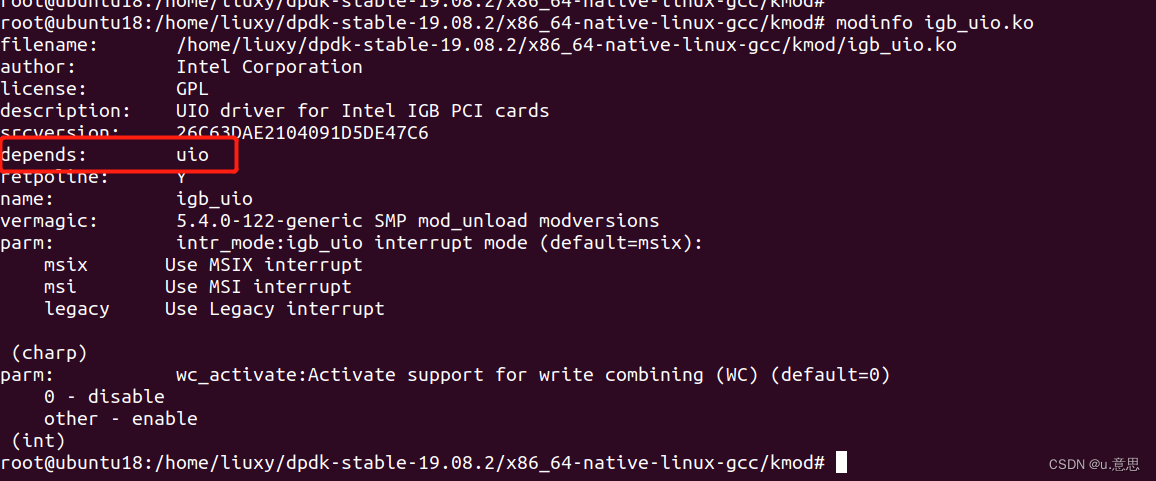
#先加载igb_uio.ko的依赖,在加载igb_uio.ko

modprobe uio


 4375
4375


 被折叠的 条评论
为什么被折叠?
被折叠的 条评论
为什么被折叠?
 到【灌水乐园】发言


