一、多线程简介
1、什么是多线程:
如果在一个进程中同时运行了多个线程,用来完成不同的工作,则称之为“多线程”。
多个线程交替占用CPU资源,而非真正的并行执行。
2、多线程的好处:
(1)充分利用CPU的资源。
(2)简化编程模型。
(3)带来良好的用户体验。
3、代码介绍:
public class MyThread {
    public static void main(String[] args) {

        Thread t = Thread.currentThread();	//获得主线程对象
        System.out.println("当前线程是:"+t.getName());

        //主线程
        String name = Thread.currentThread().getName();
        System.out.println("线程的初始名字是:"+name);

        //将主线程的名字改为“hello”(也就是设置线程名)
        Thread.currentThread().setName("hello");
        name = Thread.currentThread().getName();
        System.out.println("重命名成功,线程现在的名字是:"+name);
    }
}
4、运行结果图:

二、多线程的Thread类
1、Java提供了java.lang.Thread类支持多线程编程。
2、主线程:
2.1、main()方法即为主程序入口。
2.2、产生其他子线程的线程。
2.3、必须最后完成执行,因为它执行各种关闭动作。
3、创建线程的两种方式:
1、创建方式和使用线程的步骤:

2、举例说明:
2.1、例子1:定义MyThread类继承Thread类。


2.1.1、代码展示:
/**
 * 继承Thread 类,重写run方法,在方法中编写相关代码
 * 启动线程用:start
 */
public class MyThread1 extends Thread{
    //打印10个当前运行的线程的名字
    @Override
    public void run() {
        for (int i = 0; i < 10; i++) {
            System.out.println(Thread.currentThread().getName()+":"+i);
        }
    }

    public static void main(String[] args) {
        MyThread1 myThread1 = new MyThread1();
        MyThread1 myThread2 = new MyThread1();
        myThread1.run();
        System.out.println("======================");
        myThread2.run();    //启动主线程:Thread.currentThread().getName()=main
        myThread2.start();  //启动子线程:Thread.currentThread().getName()=Thread-1
    }
}
2.1.2、运行截图:


2.2、例子2:定义MyRunnable类实现Runnable接口。


2.2.1、代码展示:
/**
 * 继承Runnable 接口
 * 启动线程用:start
 */
public class MyThread2 implements Runnable{
    @Override
    public void run() {
        for (int i = 0; i < 10; i++) {
            System.out.println(Thread.currentThread().getName()+":"+i);
        }
    }

    public static void main(String[] args) {
        MyThread2 myThread2 = new MyThread2();
        Thread thread = new Thread(myThread2);
        thread.start();
    }
}
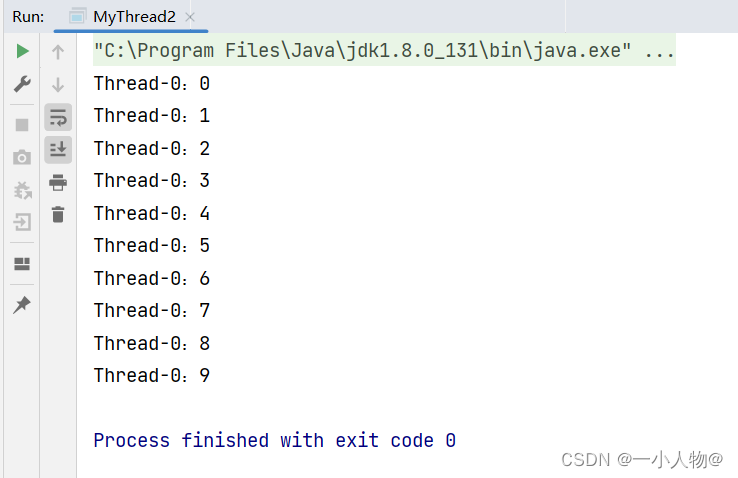
2.2.2、运行截图:

三、线程的状态与调度:
1、线程状态:
1.1、创建状态——>就绪状态<——阻塞状态<——运行状态——>死亡状态。

1.2、代码展示:
public class MyThread3 implements Runnable{
    @Override
    public void run() {
        try {
        System.out.println("线程运行......");
            Thread.sleep(500);
            int a = 10/0;
            System.out.println("运行继续......");
        } catch (Exception e) {
            e.printStackTrace();
            System.out.println("线程执行中断......");
        }
    }

    public static void main(String[] args) {
        Thread thread = new Thread(new MyThread3());
        System.out.println("创建状态......");
        thread.start();
        System.out.println("就绪状态......");
    }
}
1.3、运行截图:

2、线程调度:
2.1、指的是按照特定机制为多个线程分配CPU的使用权。【优先级:thread1.getPriority()】


2.2、代码展示:
/**
 * 优先级的设置
 */
public class MyThread4 implements Runnable{
    @Override
    public void run() {
        for (int i = 0; i < 10; i++) {
            System.out.println(Thread.currentThread().getName()+":"+i);
        }
    }

    public static void main(String[] args) {
        Thread thread1 = new Thread(new MyThread4(),"AAA");
        Thread thread2 = new Thread(new MyThread4(),"bbbb");

        thread1.setPriority(Thread.MAX_PRIORITY);
        thread2.setPriority(Thread.MIN_PRIORITY);

        System.out.println(thread1.getPriority());
        System.out.println(thread2.getPriority());

        thread1.start();
        thread2.start();
    }
}
2.3、运行截图:

四、休眠+强制执行:
1、休眠:
1.1、休眠的代码写法:Thread.sleep(500); //1000毫秒=1秒

2、强制执行:
2.1、线程的强制执行:执行的线程.join();

3、代码展示:
/**
 * 休眠+强制执行
 */
public class MyThread5 implements Runnable{
    @Override
    public void run() {
        for (int i = 0; i < 10; i++) {
            try {
                Thread.sleep(500);
            } catch (Exception e) {
                e.printStackTrace();
            }
            System.out.println(Thread.currentThread().getName()+":"+i);
        }
    }

    public static void main(String[] args) {
        MyThread5 myThread5 = new MyThread5();
        Thread thread = new Thread(myThread5);

        thread.start();

        for (int i = 0; i < 20; i++) {
            if (i==5){
                //强制执行
                try {
                    thread.join();
                } catch (Exception e) {
                    e.printStackTrace();
                }
            }
            System.out.println(Thread.currentThread().getName()+"运行:"+i);
        }
    }
}
4、运行截图:


五、线程的礼让:
1、线程礼让的调用写法:Thread.yield();

2、代码展示:
/**
 * 线程的礼让,两种结果:让还是不让
 */
public class MyThread6 implements Runnable{
    @Override
    public void run() {
        for (int i = 0; i < 10; i++) {
            System.out.println(Thread.currentThread().getName()+":"+i);
            if(i==3){
                System.out.println("礼让......");
                //线程礼让
                Thread.yield();
            }
        }
    }

    public static void main(String[] args) {
        Thread thread1 = new Thread(new MyThread6(),"AAA");
        Thread thread2 = new Thread(new MyThread6(),"BBB");

        thread1.start();
        thread2.start();
    }
}
3、运行截图:

六、给代码块加锁(在接口中实现):
1、synchronized(类名.class){}或synchronized(this){}

2、加锁的作用:括号里面的内容其实就是一个监听,监听在它的大括号里面的代码变化情况。


 3815
3815

 被折叠的 条评论
为什么被折叠?


