


语句直接写在<script setup></script>内
vue2父子组件相互调用方法和获取data中的数据
1.父组件向子组件传值
子组件(名字cs.vue):
<template>
  <h1 >{{ msg }}</h1>
</template>

<script setup>
defineProps({
  msg: String
})
</script>
父组件(无需注册组件)
<script setup>
import cs from './components/cs.vue'
</script>
<template>
  <cs msg="123222" ></cs>
</template>

2.子组件向父组件传值
子组件(名字cs.vue):
<template>
  <h1 @click="c">123222</h1>
</template>

<script setup>
const emits=defineEmits(["ccc"]);

let c=function (){
    console.log('111');
    emits("ccc","cccv",{a:1})
}
</script>
父组件(无需注册组件)
<script setup>
import cs from './components/cs.vue'
let cc=function(ctext1,ctext2){
  console.log(ctext1);
  console.log(ctext2.a);
}
</script>
<template>
  <cs  @ccc="cc"></cs>
</template>
点击效果:(因为点击触发了子组件中的c方法,固打印了111,随后触发父组件自定义事件ccc,即父组件中的cc方法,并为此方法传递两个参数即"cccv",{a:1})

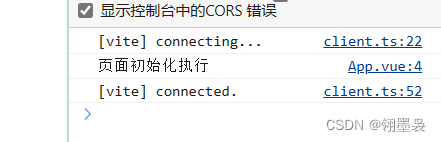
3.页面初始化执行方法
不再需要created
<script setup>
console.log('页面初始化执行');
</script>
进入页面直接触发
4.响应式数据
直接创建的属性修改时页面是不会重新渲染的,固需创建响应式数据。
1.简单数据类型使用ref()函数,修改值和获取值的时候,需要.value。在模板中使用ref申明的响应式数据,可省略
	如let d=ref(2);d.value++;使用时直接{{d}}
2.复杂数据类型使用reactive()函数,如let d=reactive({a:2});d.a++;测试这种是响应式的
3.转换响应式对象中某个属性为单独响应式数据使用toRef(),如let d=reactive({a:2});let da=toRef(d, 'a');da.value++;
4.toRefs转换响应式对象中所有属性(也可以是一部分)为单独响应式数据,对象成为普通对象。
const obj = reactive({
      msg: 'hello',
      info: 'hi'
    })
    const { msg, info } = toRefs(obj)
    const hClick = () => {
    msg.value = 'nihao'
    info.vaule = 'hihi'
    }
5.对外暴露参数
子组件
<template>
  <h1 @click="c">123</h1>
</template>

<script setup>
import { ref } from 'vue'
let c=function (){
   d.value++;
}
let d=ref(1);
let f=2;
defineExpose({//对外暴露d和f
    d,f
})
</script>
父组件
<script setup>
import cs from './components/cs.vue'
console.log('页面初始化执行');

let csRef1=ref()
console.log(csRef1.value);
onMounted(()=>{//注意要在初始化后才能取到值
  console.log("渲染完成");
  console.log(csRef1.value.d);
})
</script>
<template>
  <h1>{{ csRef1}}</h1>
  <cs ref="csRef1"></cs>
</template>
效果:可见onMounted触发前csRef1.value是没有值的。另外暴露的多个参数响应式不会发生变化。

6.监听参数变化
import { ref, watch, reactive } from "vue";
let name = ref("张三");
let age = ref(18);
let person = reactive({
  Hobby: "photo",
  city: {
    jiangsu: ""
  },
});
监听refimpl数据
watch(name, (newValue, oldValue) => {
  console.log("new", newValue, "old", oldValue);
});
watch(age, (newValue, oldValue) => {
  console.log("new", newValue, "old", oldValue);
});
监听proxy数据(当监听值为proxy对象时,oldValue值将出现异常,此时与newValue相同)
// 监听proxy对象
watch(person, (newValue, oldValue) => {
  console.log("newValue", newValue, "oldValue", oldValue);
});
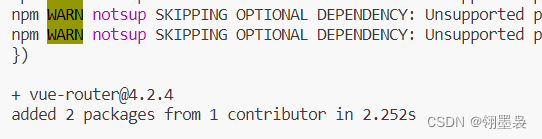
7.页面路由
npm add vue-router//安装router
看到版本4.2.4
创建js文件,我这里是叫router.js(若是ts文件,出现找不到模块“xxx.vue”或其相应的类型声明,可参考解决方案)
import { createRouter, createWebHashHistory,createWebHistory } from 'vue-router'
import index2 from 'xxx/index2.vue'
import index3 from 'xxx/index3.vue'
const routes = [{
    path: "/",
    redirect: "index2" //默认显示组件(路由的重定向)
},
{
    path: "/index2",//跳转页面所用路径
    name: "index2",
    component: index2//实际跳转的页面
},
{
    path: "/index3",
    name: "index3",
    component: index3
},
]
export default createRouter({
    history: createWebHashHistory(),//Hash用createWebHashHistory,History用createWebHistory
    routes,
})
main.js
import routes from "./router";
const app=createApp(App);
app.use(routes).mount('#app')
App.vue
:key="$route.fullPath"自己看情况加不加,对此参数的解释
<router-view :key="$route.fullPath" />
使用时
<router-link to="/index3">跳3</router-link>
8.使用Pinia进行一些公共参数管理
npm install pinia@2.0.14//我的vue版本是3.2.8,这里要注意一下版本冲突问题
main.js
import { createPinia } from 'pinia'
const pinia = createPinia()
const app=createApp(App);
app.use(pinia)
app..mount('#app')
piniaData.js
import { defineStore } from 'pinia'

// 第一个参数是应用程序中 store 的唯一 id
export const login1 = defineStore('login', {
  // 推荐使用 完整类型推断的箭头函数
  state: () => {
    return {
      LonginName:'Eduardo',
      trpe: true,
    }
  },
})
export const user = defineStore('user', {
    // other options...
})
vue使用(具体操作看官网)
import { login1 } from './piniaData'
let store1 = login1()
let {LonginName} = storeToRefs(store1)//解构响应式参数
//修改参数啥的巴拉巴拉
store1.LonginName=store1.LonginName+"1";
。。。
store1.$reset()//重置pinia的state参数
store1.$state = { counter: 666, name: 'Paimon' }//整个替换
另:生命周期钩子
- setup() : 开始创建组件之前,在 beforeCreate 和 created 之前执行,创建的是 data 和 method
- onBeforeMount() : 页面/组件挂载到节点上之前执行的函数;
- onMounted() : 页面/组件挂载完成后执行的函数;
- onBeforeUpdate(): 页面/组件更新之前执行的函数;
- onUpdated(): 页面/组件更新完成之后执行的函数;
- onBeforeUnmount(): 页面/组件卸载之前执行的函数;
- onUnmounted(): 页面/组件完成后执行的函数;
- onActivated(): 被包含在 中的组件,会多出两个生命周期钩子函数,被激活时执行;
- onDeactivated(): 比如从 A 组件,切换到 B 组件,A 组件消失时执行;
- onErrorCaptured(): 当捕获一个来自子孙组件的异常时激活钩子函数。


 9616
9616


 被折叠的 条评论
为什么被折叠?
被折叠的 条评论
为什么被折叠?
 到【灌水乐园】发言


