


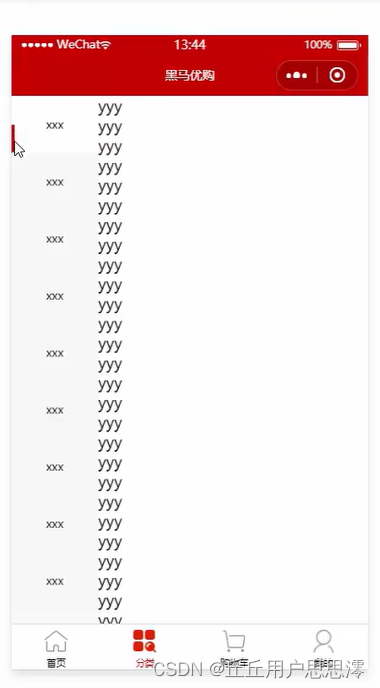
渲染分类页面的基本结构
1.首先需要定义页面结构:
<template>
  <view>
    <view class="scroll-view-container">
      <!-- 左侧的滚动视图区域 -->
      <scroll-view class="left-scroll-view" scroll-y :style="{height: wh + 'px'}">
        <view class="left-scroll-view-item active">xxx</view>
        <view class="left-scroll-view-item">xxx</view>
        <view class="left-scroll-view-item">xxx</view>
        <view class="left-scroll-view-item">xxx</view>
        <view class="left-scroll-view-item">xxx</view>
        <view class="left-scroll-view-item">多复制一些节点,演示纵向滚动效果...</view>
      </scroll-view>
      <!-- 右侧的滚动视图区域 -->
      <scroll-view class="right-scroll-view" scroll-y :style="{height: wh + 'px'}">
        <view class="left-scroll-view-item">zzz</view>
        <view class="left-scroll-view-item">zzz</view>
        <view class="left-scroll-view-item">zzz</view>
        <view class="left-scroll-view-item">zzz</view>
        <view class="left-scroll-view-item">多复制一些节点,演示纵向滚动效果</view>
      </scroll-view>
    </view>
  </view>
</template>
2.动态计算窗口的剩余高度:
<script>
  export default {
    data() {
      return {
        // 窗口的可用高度 = 屏幕高度 - navigationBar高度 - tabBar 高度
        wh: 0
      };
    },
    onLoad() {
      // 获取当前系统的信息
      const sysInfo = uni.getSystemInfoSync()
      // 为 wh 窗口可用高度动态赋值
      this.wh = sysInfo.windowHeight
    }
  }
</script>
3.美化页面结构:
.scroll-view-container {
  display: flex;

  .left-scroll-view {
    width: 120px;

    .left-scroll-view-item {
      line-height: 60px;
      background-color: #f7f7f7;
      text-align: center;
      font-size: 12px;

      // 激活项的样式
      &.active {
        background-color: #ffffff;
        position: relative;

        // 渲染激活项左侧的红色指示边线
        &::before {
          content: ' ';
          display: block;
          width: 3px;
          height: 30px;
          background-color: #c00000;
          position: absolute;
          left: 0;
          top: 50%;
          transform: translateY(-50%);
        }
      }
    }
  }
}
效果:
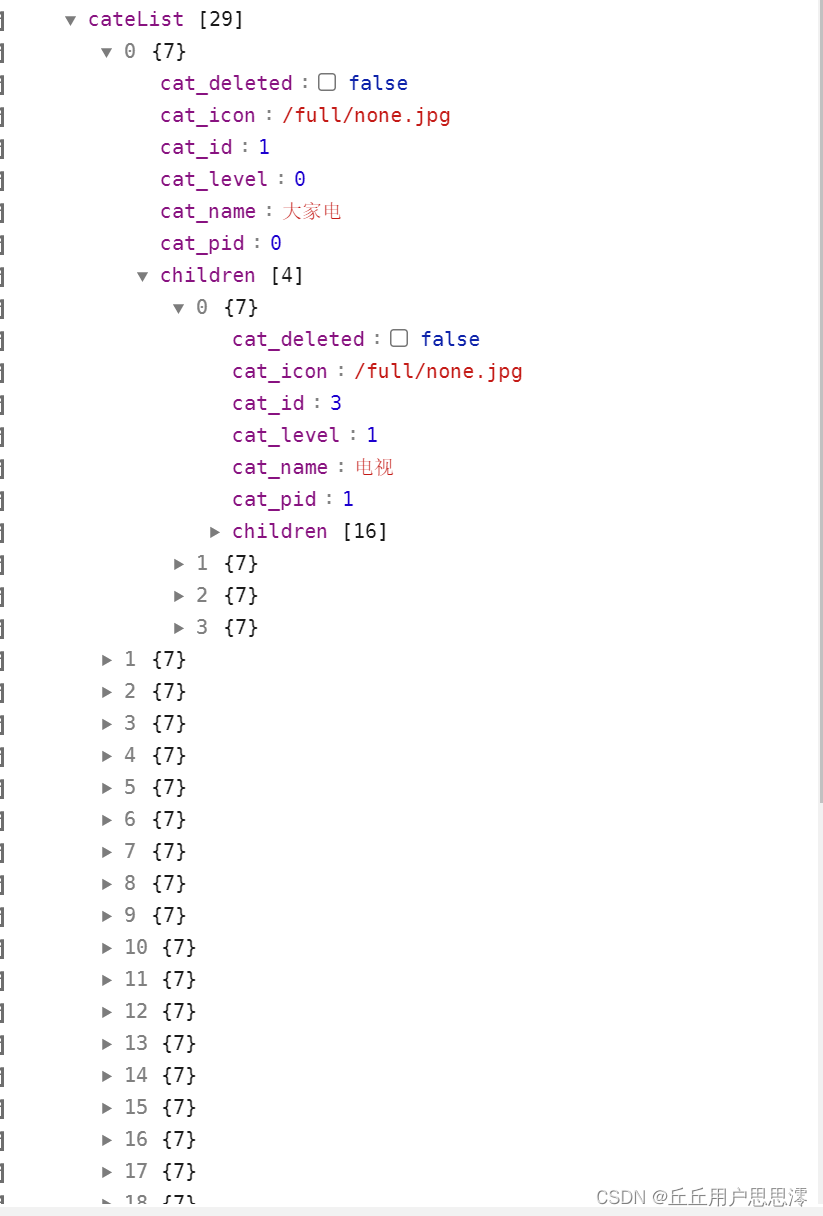
获取分类数据
1.在 data 中定义分类数据节点
2.调用获取分类列表数据的方法
3.定义获取分类列表数据的方法
data() {
  return {
    // 分类数据列表
    cateList: []
  }
}
onLoad() {
  // 调用获取分类列表数据的方法
  this.getCateList()
}
methods: {
  async getCateList() {
    // 发起请求
    const { data: res } = await uni.$http.get('/api/public/v1/categories')
    // 判断是否获取失败
    if (res.meta.status !== 200) return uni.$showMsg()
    // 转存数据
    this.cateList = res.message
  }
}
cateList内容:
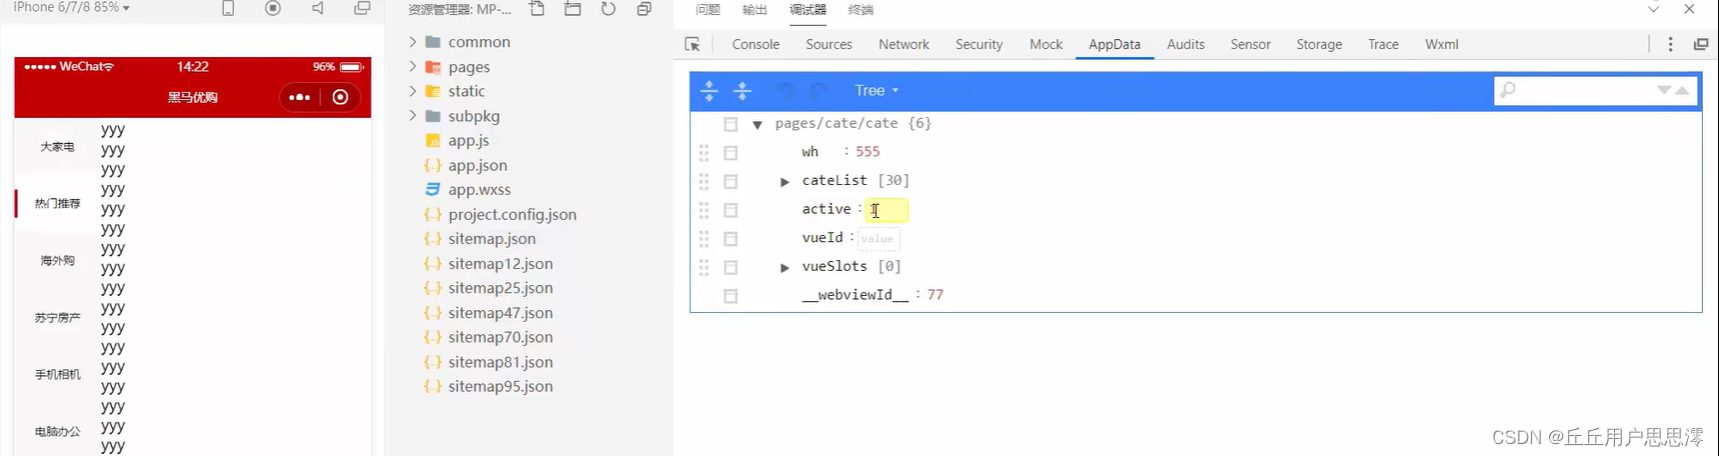
动态渲染左侧的一级分类列表
1.循环渲染列表结构,为选中项动态添加 .active 类名,为一级分类的 item 项绑定点击事件处理函数 activeChanged
2.在 data 中定义默认选中项的索引
3.定义 activeChanged 事件处理函数,动态修改选中项的索引
<!-- 左侧的滚动视图区域 -->
<scroll-view class="left-scroll-view" scroll-y :style="{height: wh + 'px'}">
  <block v-for="(item, i) in cateList" :key="i">
    <view :class="['left-scroll-view-item', i === active ? 'active' : '']" @click="activeChanged(i)">{{item.cat_name}}</view>
  </block>
</scroll-view>

data() {
  return {
    // 当前选中项的索引,默认让第一项被选中
    active: 0
  }
}

methods: {
  // 选中项改变的事件处理函数
  activeChanged(i) {
    this.active = i
  }
}
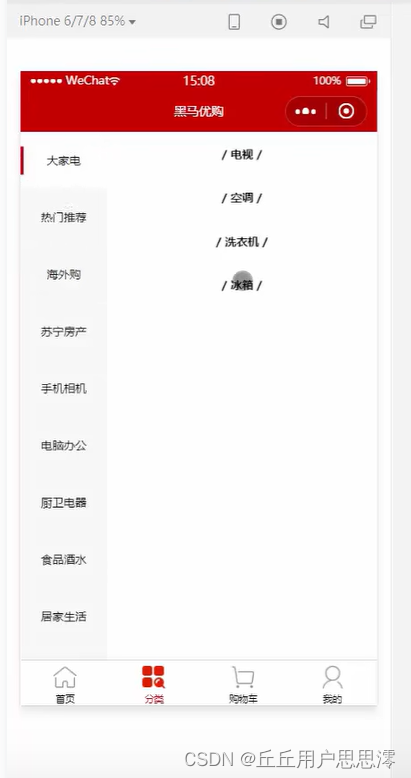
效果:
动态渲染右侧的二级分类列表
1.在 data 中定义二级分类列表的数据节点
2.修改 getCateList 方法,在请求到数据之后,为二级分类列表数据赋值
3.修改 activeChanged 方法,在一级分类选中项改变之后,为二级分类列表数据重新赋值
4.循环渲染右侧二级分类列表的 UI 结构
5.美化二级分类的标题样式
<!-- 右侧的滚动视图区域 -->
<scroll-view class="right-scroll-view" scroll-y :style="{height: wh + 'px'}">
  <view class="cate-lv2" v-for="(item2, i2) in cateLevel2" :key="i2">
    <view class="cate-lv2-title">/ {{item2.cat_name}} /</view>
  </view>
</scroll-view>

data() {
  return {
    // 二级分类列表
    cateLevel2: []
  }
}

methods: {
  // 选中项改变的事件处理函数
  activeChanged(i) {
    this.active = i
    // 为二级分类列表重新赋值
    this.cateLevel2 = this.cateList[i].children
  }
  async getCateList() {
    const { data: res } = await uni.$http.get('/api/public/v1/categories')
    if (res.meta.status !== 200) return uni.$showMsg()
    this.cateList = res.message
    // 为二级分类赋值
    this.cateLevel2 = res.message[0].children
  }
}

.cate-lv2-title {
  font-size: 12px;
  font-weight: bold;
  text-align: center;
  padding: 15px 0;
}
效果:
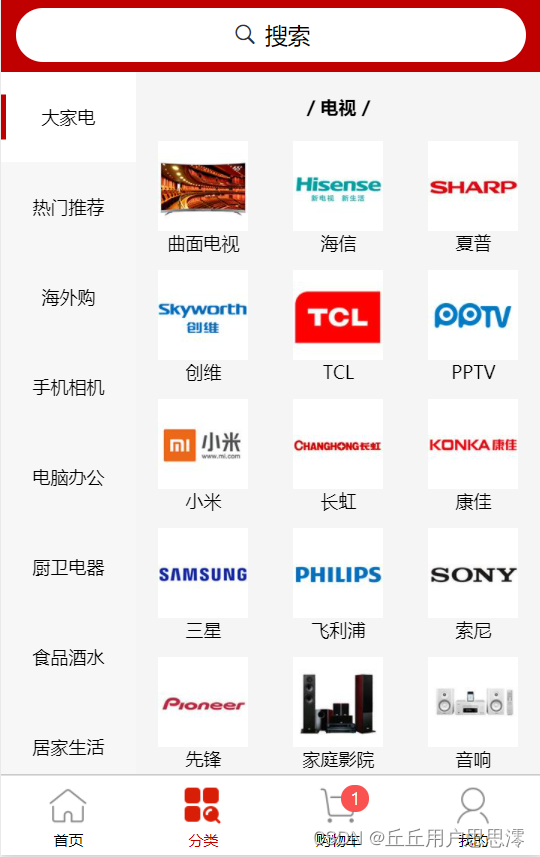
动态渲染右侧的三级分类列表
1.在二级分类的 <view> 组件中,循环渲染三级分类的列表结构
2.美化三级分类的样式
<!-- 右侧的滚动视图区域 -->
<scroll-view class="right-scroll-view" scroll-y :style="{height: wh + 'px'}">
  <view class="cate-lv2" v-for="(item2, i2) in cateLevel2" :key="i2">
    <view class="cate-lv2-title">/ {{item2.cat_name}} /</view>
    <!-- 动态渲染三级分类的列表数据 -->
    <view class="cate-lv3-list">
      <!-- 三级分类 Item 项 -->
      <view class="cate-lv3-item" v-for="(item3, i3) in item2.children" :key="i3">
        <!-- 图片 -->
        <image :src="item3.cat_icon"></image>
        <!-- 文本 -->
        <text>{{item3.cat_name}}</text>
      </view>
    </view>
  </view>
</scroll-view>

.cate-lv3-list {
  display: flex;
  flex-wrap: wrap;

  .cate-lv3-item {
    width: 33.33%;
    margin-bottom: 10px;
    display: flex;
    flex-direction: column;
    align-items: center;

    image {
      width: 60px;
      height: 60px;
    }

    text {
      font-size: 12px;
    }
  }
}
效果:
切换一级分类后重置滚动条的位置
1.在 data 中定义滚动条距离顶部的距离
2.动态为右侧的 <scroll-view> 组件绑定 scroll-top 属性的值
3.切换一级分类时,动态设置 scrollTop 的值
<!-- 右侧的滚动视图区域 -->
<scroll-view class="right-scroll-view" scroll-y :style="{height: wh + 'px'}" :scroll-top="scrollTop"></scroll-view>


data() {
  return {
    // 滚动条距离顶部的距离
    scrollTop: 0
  }
}

methods: {
  // 选中项改变的事件处理函数
  // 选中项改变的事件处理函数
  activeChanged(i) {
    this.active = i
    this.cateLevel2 = this.cateList[i].children

    // 让 scrollTop 的值在 0 与 1 之间切换
    this.scrollTop = this.scrollTop === 0 ? 1 : 0

    // 可以简化为如下的代码:
    // this.scrollTop = this.scrollTop ? 0 : 1
  }
}
点击三级分类跳转到商品列表页面
1.为三级分类的 Item 项绑定点击事件处理函数
2.定义事件处理函数
<view class="cate-lv3-item" v-for="(item3, i3) in item2.children" :key="i3" @click="gotoGoodsList(item3)">
  <image :src="item3.cat_icon"></image>
  <text>{{item3.cat_name}}</text>
</view>


// 点击三级分类项跳转到商品列表页面
gotoGoodsList(item3) {
  uni.navigateTo({
    url: '/subpkg/goods_list/goods_list?cid=' + item3.cat_id
  })
}


 3212
3212


 被折叠的 条评论
为什么被折叠?
被折叠的 条评论
为什么被折叠?
 到【灌水乐园】发言


