


官方项目:
Visual Studio 2022 社区版
.NET6
目标平台:
TesseractOCR兼容 x86 与 x64
1.通过NuGet获取TesseractOCR包

2.下载语言模型
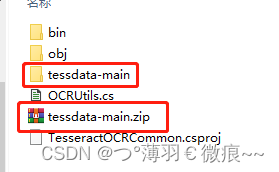
从官方项目中获取模型数据, 网址为GitHub - tesseract-ocr/tessdata: Trained models with support for legacy and LSTM OCR engineTrained models with support for legacy and LSTM OCR engine - GitHub - tesseract-ocr/tessdata: Trained models with support for legacy and LSTM OCR engine https://github.com/tesseract-ocr/tessdata下载完成后解压在你的项目中,如图所示
有几个需要用到的模型,需要生成的时候复制到输出目录中,在项目中设置即可
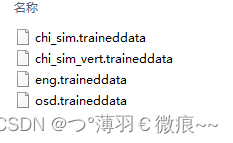
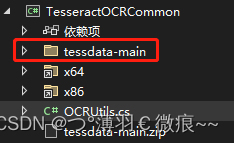
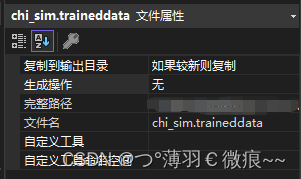
在你的项目中的tessdata-main文件夹找到这几个文件,并右键->属性设置为【如果较新则复制】
3.封装工具类OCRUtils.cs
using System.Drawing;
using Tesseract;

namespace TesseractOCRCommon
{
    public class OCRUtils : IDisposable
    {
        private TesseractEngine _engineForchi = null;
        private TesseractEngine _engineForeng = null;


        public string test_string(Bitmap bitmap)
        {
            if (_engineForchi  == null)
            {
                _engineForchi = new TesseractEngine("tessdata-main", "chi_sim", EngineMode.Default);
            }
            using (var page = _engineForchi.Process(bitmap))
            {
                // 获取识别结果
                return page.GetText();
            }
        }
        public string test_int(Bitmap bitmap)
        {
            if (_engineForeng == null)
            {
                _engineForeng = new TesseractEngine("tessdata-main", "eng", EngineMode.Default);
            }
            using (var page = _engineForeng.Process(bitmap))
            {
                return page.GetText();
            }
        }

        public void Dispose()
        {
            if (_engineForchi != null) { _engineForchi.Dispose(); }
            if (_engineForeng != null) { _engineForeng.Dispose(); }
        }
    }
}
4.使用
string target = Path.Combine(AppDomain.CurrentDomain.BaseDirectory, "Files", "cut.jpg");

//裁剪出姓名
using Bitmap cutName = ImageUtils.RegionCropping(target, 330, 110, 870, 90);
// 裁剪出身份证号
using Bitmap cutIDCardNumber = ImageUtils.RegionCropping(target, 590, 1100, 930, 90);

string str = GetOCRUtils.test_string(cutName).Replace(" ","").Replace("\n","");
string str1 = GetOCRUtils.test_int(cutIDCardNumber).Replace("\n", ""); ;
附 :ImageUtils.RegionCropping()源码
        /// <summary>
        /// 图片区域裁剪
        /// </summary>
        /// <param name="sourcePath">源图路径</param>
        /// <param name="x">裁剪起始坐标x</param>
        /// <param name="y">裁剪起始坐标y</param>
        /// <param name="width">裁剪区域长度</param>
        /// <param name="height">裁剪区域高度</param>
        /// <returns></returns>
        public static Bitmap RegionCropping(string sourcePath, int x, int y, int width, int height)
        {
            Bitmap result = null;
            //从文件加载原图
            using (Image originImage = Image.FromFile(sourcePath))
            {
                //创建矩形对象表示原图上裁剪的矩形区域,这里相当于划定原图上坐标为(10, 10)处,50x50大小的矩形区域为裁剪区域
                Rectangle cropRegion = new Rectangle(x, y, width, height);
                //创建空白画布,大小为裁剪区域大小
                result = new Bitmap(cropRegion.Width, cropRegion.Height);
                //创建Graphics对象,并指定要在result(目标图片画布)上绘制图像
                Graphics graphics = Graphics.FromImage(result);
                //使用Graphics对象把原图指定区域图像裁剪下来并填充进刚刚创建的空白画布
                graphics.DrawImage(originImage, new Rectangle(0, 0, cropRegion.Width, cropRegion.Height), cropRegion, GraphicsUnit.Pixel);
            }
            return result;
        }


 4054
4054

 被折叠的 条评论
为什么被折叠?
被折叠的 条评论
为什么被折叠?
 到【灌水乐园】发言


