


这里前端用的是Vue,组件用的是Element-UI。
1.前端
1.1 在Element-UI中找到上传组件
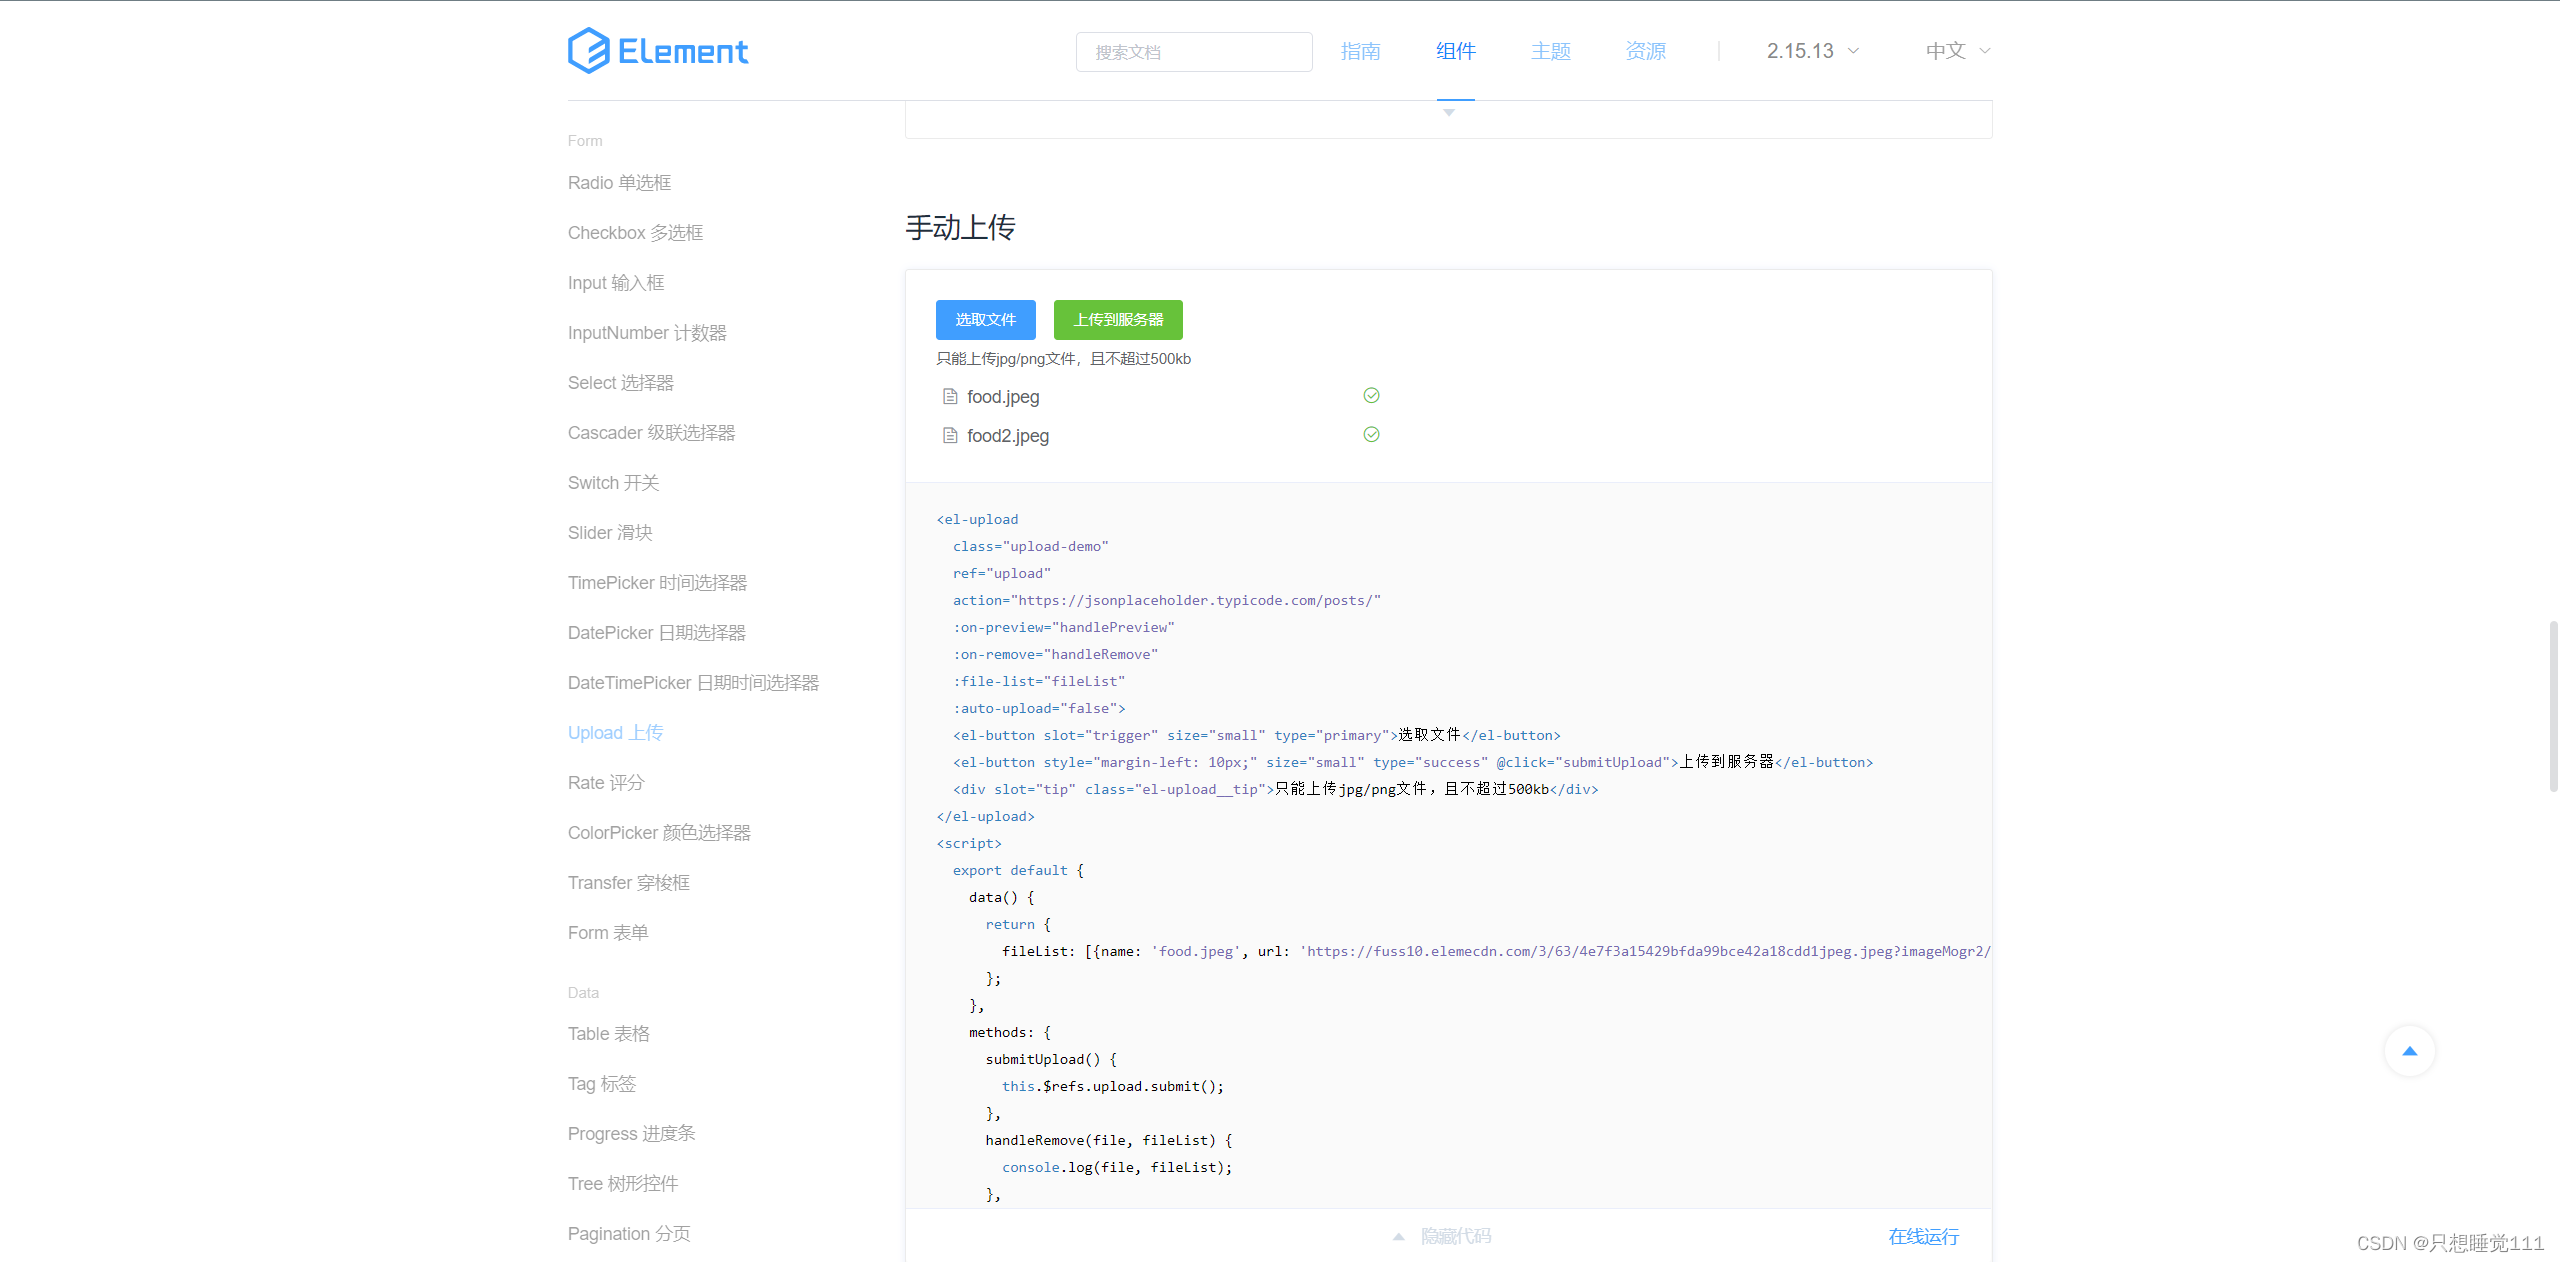
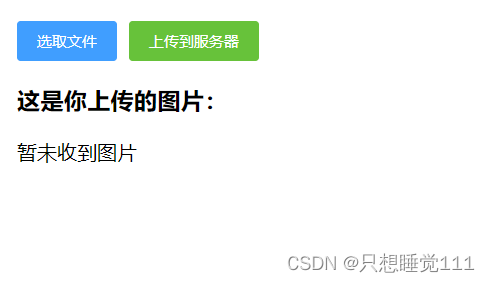
1.2实现前端页面如下所示
1.3 html代码
<template>
<div>
<div>
<el-upload
class="upload-demo"
ref="upload"
action="https://jsonplaceholder.typicode.com/posts/"
:http-request="picUpload"
:on-success="handleSuccess"
multiple
:file-list="fileList"
:auto-upload="false">
<el-button slot="trigger" size="small" type="primary">选取文件</el-button>
<el-button style="margin-left: 10px;" size="small" type="success" @click="submitUpload">
上传到服务器
</el-button>
</el-upload>
</div>
<div>
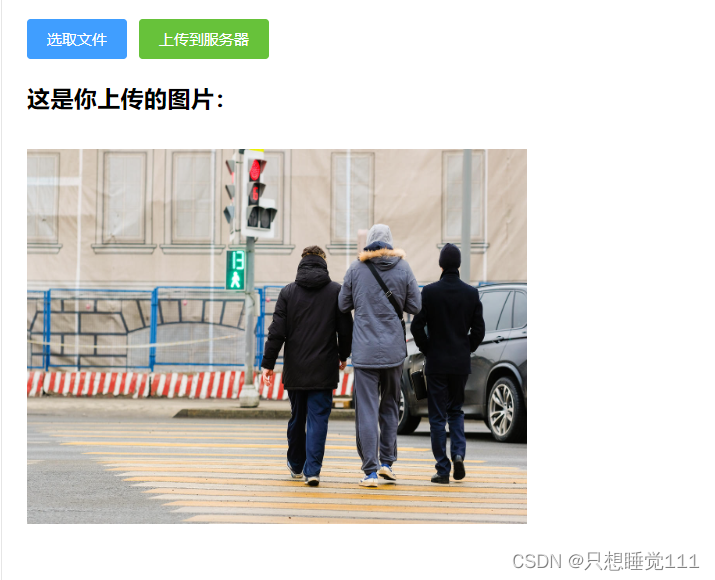
<h3>这是你上传的图片:</h3>
<img v-if="imageUrl!==''" :src="this.hostURL+imageUrl" style="width: 400px; height: 300px; margin-top: 10px">
<span v-else>暂未收到图片</span>
</div>
</div>
</template>
其中hostURL定义在main.js中,使用this调用。
//传输图片添加
Vue.prototype.hostURL = 'http://localhost:8081/static/'
1.4 js代码
我这里因为是测试,而且后端图片都是放在/resources/static下的,所以后端直接给返回了文件名。
后端返回结果如下:
{code: 200, message: '图片传输成功', obj: '2023-05-25-20-02.jpg'}
<script>
import axios from "axios";

export default {
    data() {
        return {
            fileList: [],
            imageUrl: ''
        }
    },
    methods: {
        handleSuccess(res, file) {
            this.imageUrl = URL.createObjectURL(file.raw);
        },
        submitUpload() {
            this.$refs.upload.submit();
            this.fileList = [];
        },
        picUpload(f) {
            let params = new FormData()
            //注意在这里一个坑f.file
            params.append("file", f.file);
            axios({
                method: 'post',
                //这里的id是我要改变用户的ID值
                url: '/upload',
                data: params,
                headers: {
                    'content-type': 'multipart/form-data'
                }
            }).then(resp => {
                //这里返回的是头像的url
                console.log(resp);
                this.imageUrl = resp.obj;
            })
        }
    }
}
</script>
2.后端
2.1 定义Controller接收/upload请求
这里返回给前端的对象直接放入了新的文件名,后续会将图片名与路径写入数据库中,返回json格式的name与path对象。也可以考虑实现获取所有静态图片的功能,返回一个列表回去。
package com.xxxx.server.controller;

import com.xxxx.server.pojo.RespBean;
import io.swagger.annotations.ApiOperation;
import org.springframework.beans.factory.annotation.Value;
import org.springframework.web.bind.annotation.PostMapping;
import org.springframework.web.bind.annotation.RequestBody;
import org.springframework.web.bind.annotation.RestController;
import org.springframework.web.multipart.MultipartFile;

import java.io.File;
import java.time.LocalDateTime;
import java.time.format.DateTimeFormatter;

/**
 * 传送图片
 *
 * @author HuangSJ
 */
@RestController
public class UploadController {
    @Value("${file.upload-path}")
    private String imgUrl;

    @ApiOperation(value = "返回前端发送来的图片")
    @PostMapping("/upload")
    public RespBean returnImg(@RequestBody MultipartFile file) {
        String originalFilename = file.getOriginalFilename();
        int index = originalFilename.indexOf(".");
        String formatFileName = LocalDateTime.now().format(DateTimeFormatter.ofPattern("yyyy-MM-dd-HH-mm")).toString();
        String newFileName = formatFileName + originalFilename.substring(index);
        try {
            //将文件保存指定目录
            file.transferTo(new File(imgUrl + newFileName));
            return RespBean.success("图片传输成功", newFileName);
        } catch (Exception e) {
            e.printStackTrace();
        }
        return RespBean.error("图片传输出现了错误!");
    }
}
2.2 Application.yml
新增如下配置,根据个人文件路径修改即可。
file:
    upload-path: D:/Code/系统/yeb/yeb_back/yeb-server/src/main/resources/static/
2.3 WebConfig.java
保证前端能直接获取后端的静态文件,这里的filePath不定义变量或者定义局部变量都可以。这里主要功能是将包含/static/*的路径映射到本地的静态文件夹static下,保证图片的读取。
package com.xxxx.server.config;

import org.springframework.context.annotation.Configuration;
import org.springframework.web.servlet.config.annotation.ResourceHandlerRegistry;
import org.springframework.web.servlet.config.annotation.WebMvcConfigurer;

/**
 * 实现前端Vue :src 根据url显示头像图片,则必须设置WebMVC中的静态资源配置
 */

@Configuration
public class WebConfig implements WebMvcConfigurer {
    private String filePath = "D:/Code/系统/yeb/yeb_back/yeb-server/src/main/resources/static/";
    @Override
    public void addResourceHandlers(ResourceHandlerRegistry registry) {
        //将前者的路径映射到后者的static路径
        registry.addResourceHandler("/static/**").addResourceLocations("file:" + filePath);
        System.out.println("静态资源获取");
    }
}
2.4 拦截器问题
如果出现了后端测试功能正常,前端也接收到返回的值,但是获取图片时拿不到数据的情况,可以 考虑一下是不是被拦截了。我这里写了一个SecurityConfig文件,在这里放行一下就可以拿到图片了。
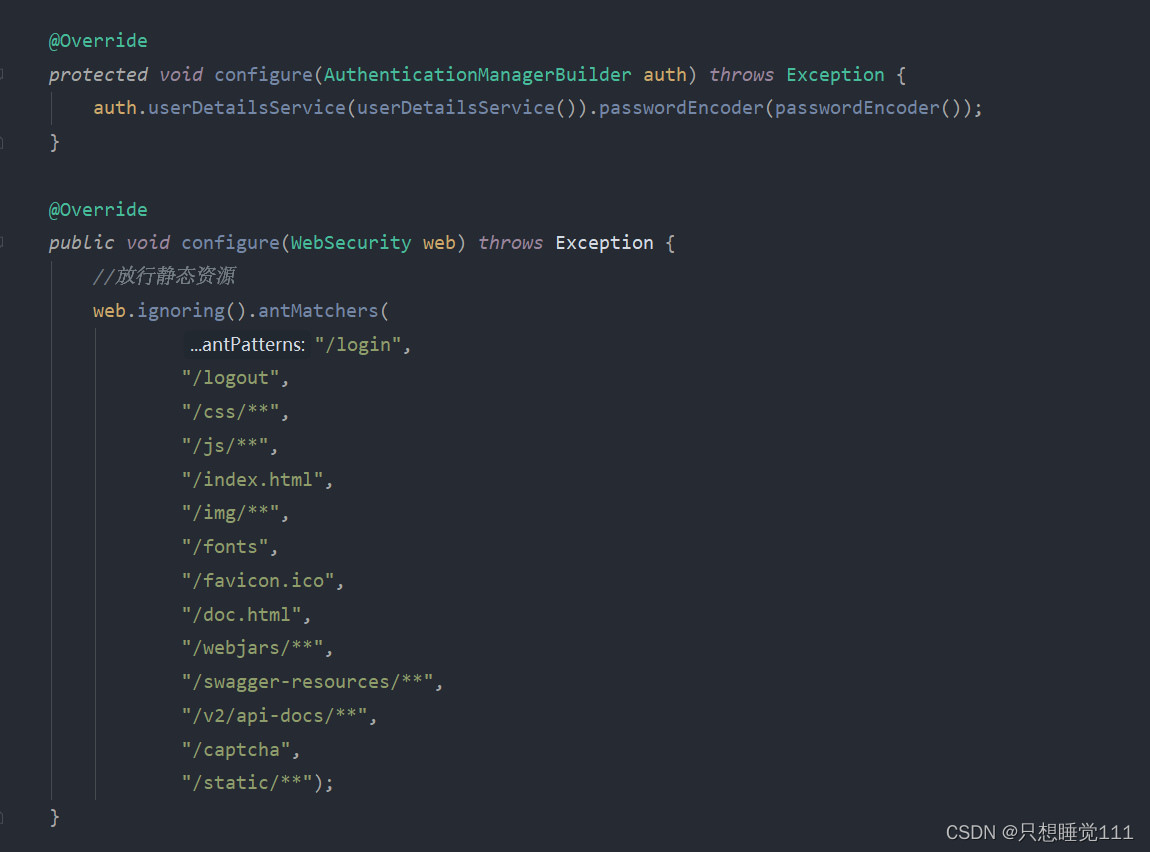
这个是别人那里看到的代码,大家可以根据情况自己修改代码。
package com.bomc.enterprise.config;

import com.bomc.enterprise.interceptor.LoginInterceptor;
import org.springframework.beans.factory.annotation.Value;
import org.springframework.context.annotation.Bean;
import org.springframework.context.annotation.Configuration;
import org.springframework.web.servlet.config.annotation.*;

@Configuration
public class WebConfig implements WebMvcConfigurer {

    @Value("${server.servlet.context-path}")
    private String contextPath;
    //不注册这个在过滤器中 service将报空
    @Bean
    public LoginInterceptor loginInterceptor(){
        return new LoginInterceptor();
    }

    //添加拦截器方法
    @Override
    public void addInterceptors(InterceptorRegistry registry) {
        //添加拦截路径
        String[] addPathPatters={
                "/**"
        };
        //添加不拦截路径
        String[] excludePathPatters={
                "/", "/login/login", "/login/loginPage","/login/register",
                "/**/*.css", "/**/*.js", "/**/*.png", "/**/*.jpg",
                "/**/*.jpeg", "/**/*.gif", "/**/fonts/*", "/**/*.svg",
                "/**/*.ttf","/**/*.woff","/**/*.eot","/**/*.otf","/**/*.woff2"
        };
        //注册登录拦截器
        registry.addInterceptor(loginInterceptor()).addPathPatterns(addPathPatters).excludePathPatterns(excludePathPatters);
        //如果多条拦截器则增加多条
    }

    //添加放行静态资源
    @Override
    public void addResourceHandlers(ResourceHandlerRegistry registry) {

        //文件磁盘图片url 映射
        //配置server虚拟路径,handler为前台访问的目录,locations为files相对应的本地路径
        registry.addResourceHandler("/attachments/**").addResourceLocations("file:E:/东信svn项目/enterprise/code/attachments/");
        //配置静态文件路径,与上面并不冲突
        registry.addResourceHandler("/**").addResourceLocations("classpath:/META-INF/resources/");
    }
}
3.结果展示
参考文章
[1]:springboot踩坑三:配置静态资源访问与本地路径的映射
[2]:Springboot+vue 实现图片上传至数据库并显示


 1万+
1万+


 被折叠的 条评论
为什么被折叠?
被折叠的 条评论
为什么被折叠?
 到【灌水乐园】发言


