


文章目录
1、基本概念
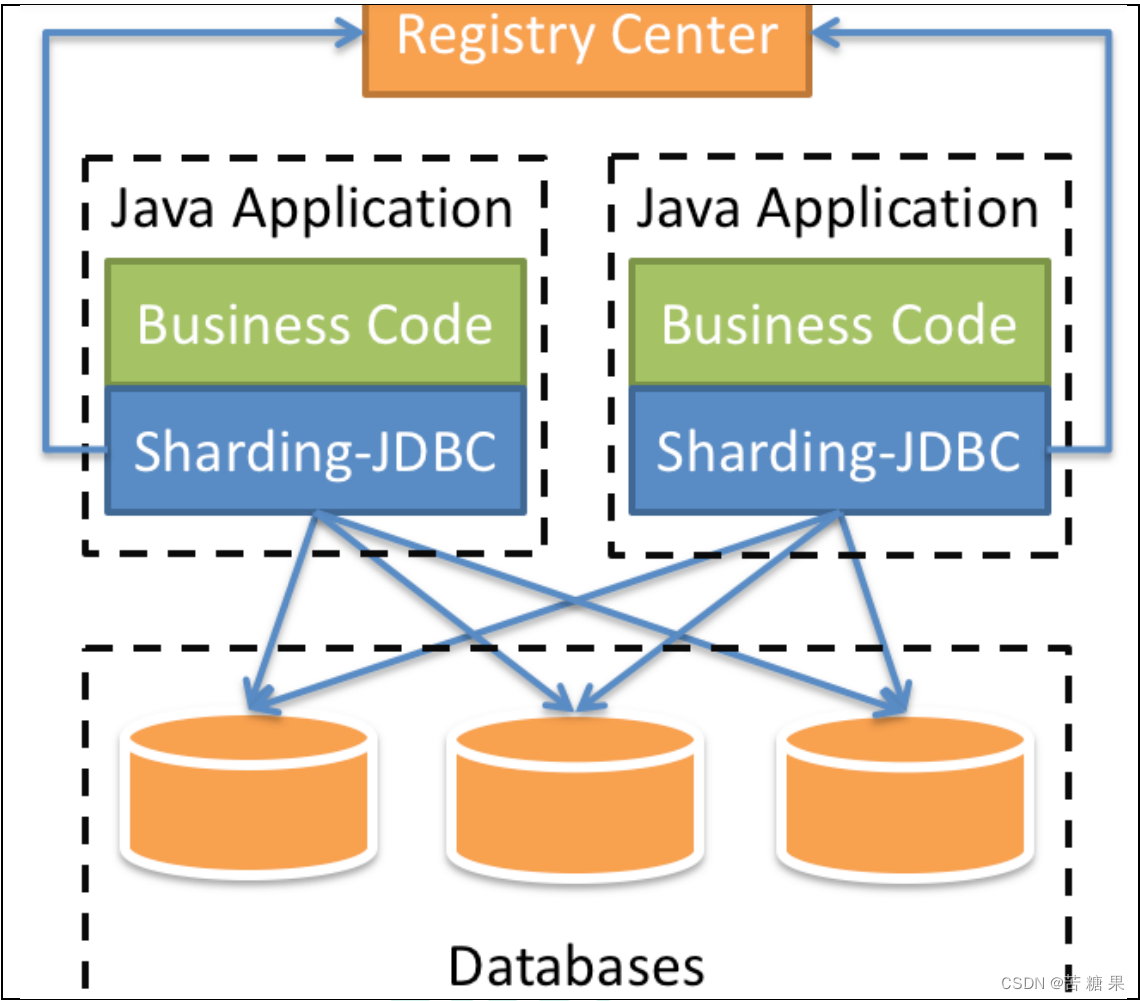
1.1 什么是 Sharding Sphere
一套开源的分布式数据库中间件解决方案
有三个产品:Sharding-JDBC 和 Sharding-Proxy
定位为关系型数据库中间件,合理在分布式环境下使用关系型数据库操作
1.2 分库分表
1.2.1 概念
分库分表有两种方式:垂直切分和水平切分
垂直切分:垂直分表和垂直分库(表结构不同)
水平切分:水平分表和水平分库 (表结构相同)
垂直分表: 根据业务规则,或访问频次、是否大字段,将常用字段与不常用字段为为N个表
垂直分库: 根据业务规则,将不同模块的表分别放在不同数据库,库可以分布在不同服务器
水平分表: 根据表数据规则,将一个表得数据根据规则进行拆分成多个表(比如:分区,轮询,取模)
水平分库:根据表数据规则,将一个表的数据分到不同的库中,每个库只有这个表的部分数据
1.2.2 应用
(1)在数据库设计时候考虑垂直分库和垂直分表
(2)随着数据库数据量增加,不要马上考虑做水平切分,首先考虑缓存处理,读写分离,使用索引等等方式,如果这些方式不能根本解决问题了,再考虑做水平分库和水平分表
1.2.3 分库分表问题
(1)跨节点连接查询问题(分页、排序)
(2)多数据源管理问题
2. Sharding-JDBC
2.1 Sharding-JDBC简介
1)是轻量级的 java 框架,是增强版的 JDBC 驱动
2)主要目的是:简化对分库分表之后数据相关操作
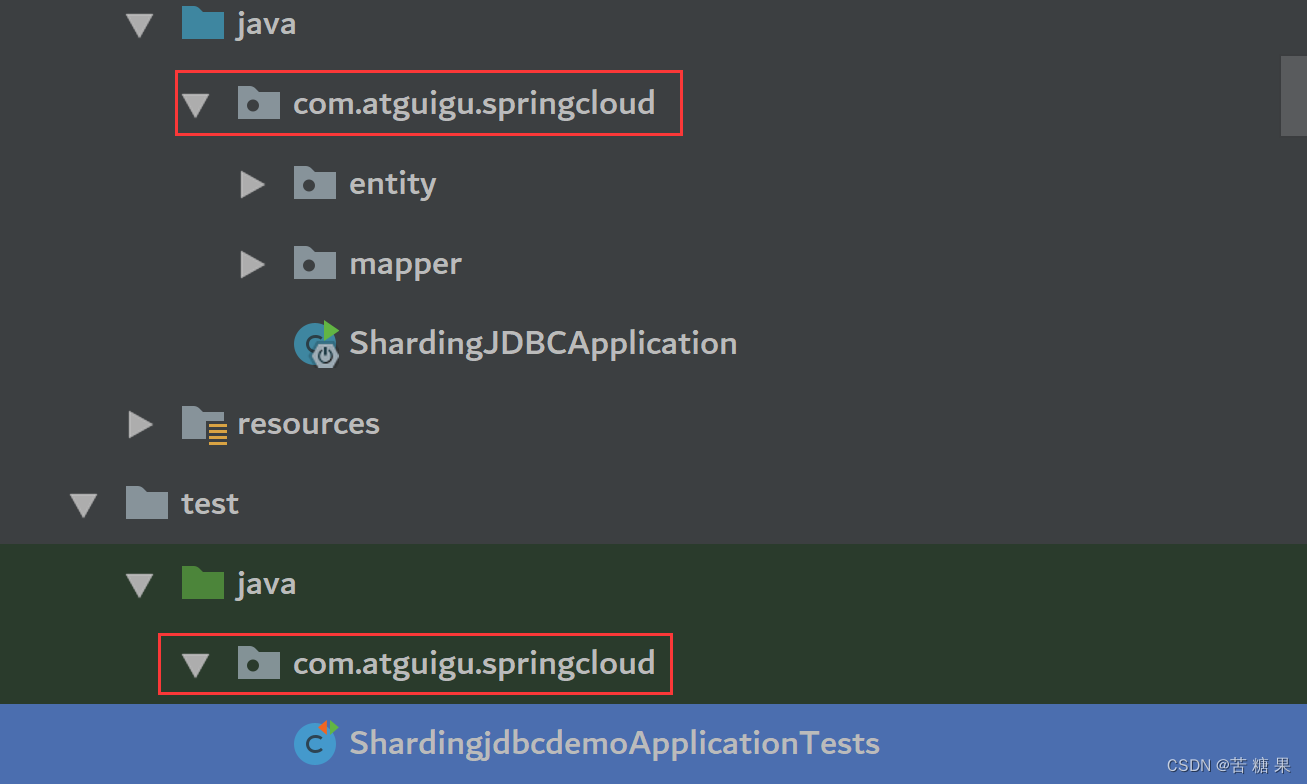
2.2 sharding-jdbc-demo工程搭建
2.2.1 新建module sharding-jdbc-demo
2.2.2 改pom
<dependencies>
<dependency>
<groupId>org.springframework.boot</groupId>
<artifactId>spring-boot-starter</artifactId>
<version>2.2.1.RELEASE</version>
</dependency>
<dependency>
<groupId>org.springframework.boot</groupId>
<artifactId>spring-boot-starter-web</artifactId>
<version>2.2.1.RELEASE</version>
</dependency>
<dependency>
<groupId>org.springframework.boot</groupId>
<artifactId>spring-boot-starter-test</artifactId>
</dependency>
<dependency>
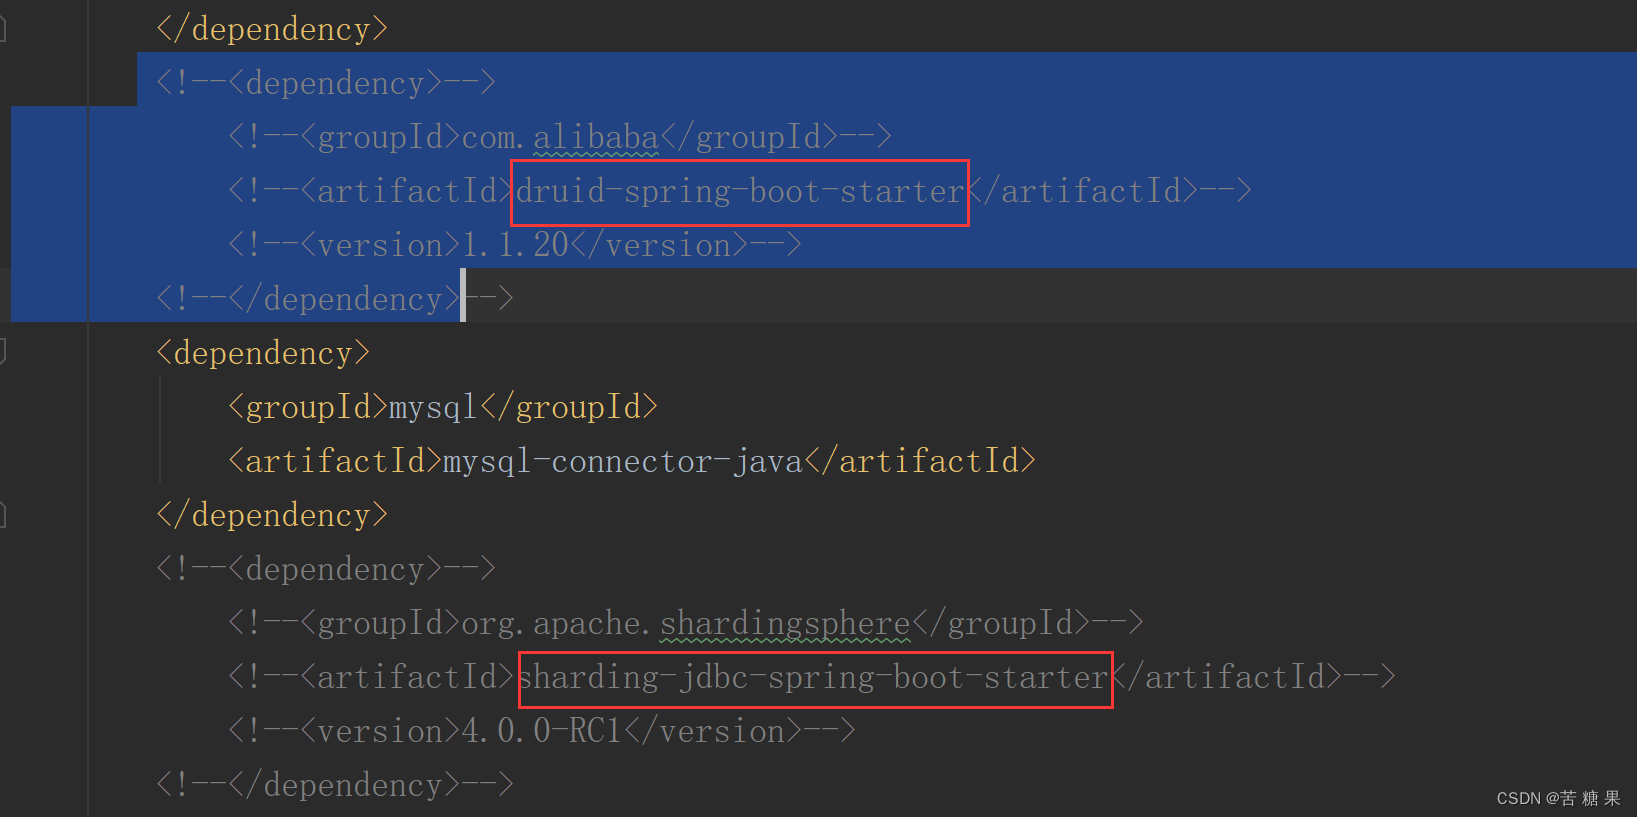
<groupId>com.alibaba</groupId>
<artifactId>druid-spring-boot-starter</artifactId>
<version>1.1.20</version>
</dependency>
<dependency>
<groupId>mysql</groupId>
<artifactId>mysql-connector-java</artifactId>
</dependency>
<dependency>
<groupId>org.apache.shardingsphere</groupId>
<artifactId>sharding-jdbc-spring-boot-starter</artifactId>
<version>4.0.0-RC1</version>
</dependency>
<dependency>
<groupId>com.baomidou</groupId>
<artifactId>mybatis-plus-boot-starter</artifactId>
<version>3.0.5</version>
</dependency>
<dependency>
<groupId>org.projectlombok</groupId>
<artifactId>lombok</artifactId>
</dependency>
</dependencies>
记得引入spring-boot-starter-web依赖,否则项目启动成功后会自动关闭。
2.2.3 启动类和业务类
@SpringBootApplication
@MapperScan(basePackages = "com.atguigu.springcloud.mapper")
public class ShardingJDBCApplication {
    public static void main(String[] args) {
        SpringApplication.run(ShardingJDBCApplication.class,args);
    }
}
@Mapper
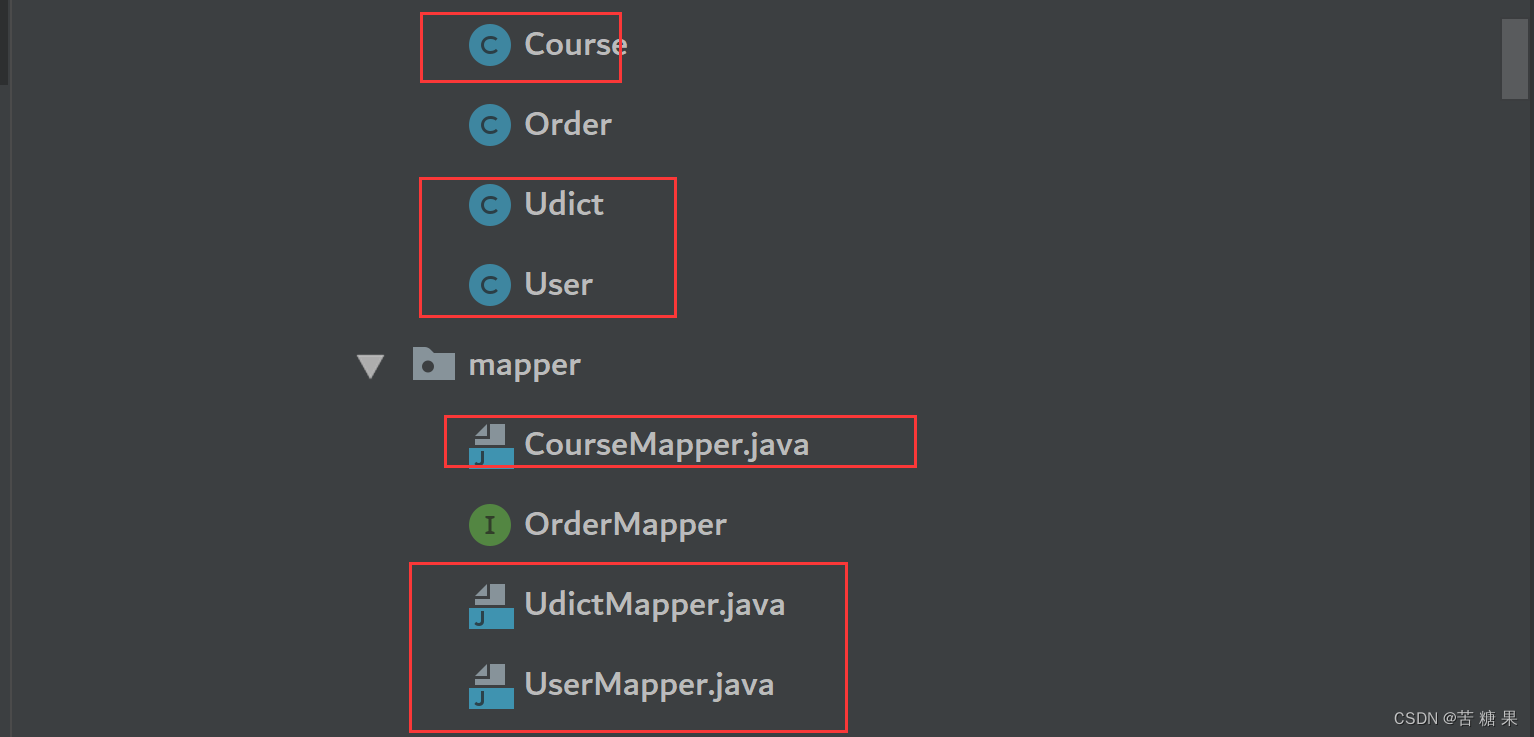
public interface CourseMapper extends BaseMapper<Course> {
}
@Data
public class Course {
    private String cstatus;
    private String cname;
    private Long cid;
    private Long userId;
}
2.2.4 测试类
注意:测试类的包路径要与启动类一致,否则无法注入bean
@RunWith(SpringRunner.class)
@SpringBootTest
public class ShardingjdbcdemoApplicationTests {
}
2.3 Sharding-JDBC 实现水平分表
2.3.1 改properties
# shardingjdbc 分片策略
# 配置数据源,给数据源起名称
spring.shardingsphere.datasource.names=m1
# 允许覆盖重名bean
spring.main.allow-bean-definition-overriding=true
#配置数据源具体内容,包含连接池,驱动,地址,用户名和密码
spring.shardingsphere.datasource.m1.type=com.alibaba.druid.pool.DruidDataSource
spring.shardingsphere.datasource.m1.driver-class-name=com.mysql.jdbc.Driver
spring.shardingsphere.datasource.m1.url=jdbc:mysql://localhost:3306/course_db?useUnicode=true&characterEncoding=utf-8&useSSL=false
spring.shardingsphere.datasource.m1.username=root
spring.shardingsphere.datasource.m1.password=root

#指定 course 表分布情况,配置表在哪个数据库里面,表名称都是什么 m1.course_1 ,m1.course_2
spring.shardingsphere.sharding.tables.course.actual-data-nodes=m1.course_$->{1..2}
# 指定 course 表里面主键 cid 生成策略 SNOWFLAKE
spring.shardingsphere.sharding.tables.course.key-generator.column=cid
spring.shardingsphere.sharding.tables.course.key-generator.type=SNOWFLAKE
# 指定分片策略 约定 cid 值偶数添加到 course_1 表,如果 cid 是奇数添加到 course_2表
spring.shardingsphere.sharding.tables.course.table-strategy.inline.sharding_column=cid
spring.shardingsphere.sharding.tables.course.table-strategy.inline.algorithm_expression=course_$->{cid % 2 + 1}
# 打开 sql 输出日志
spring.shardingsphere.props.sql.show=true
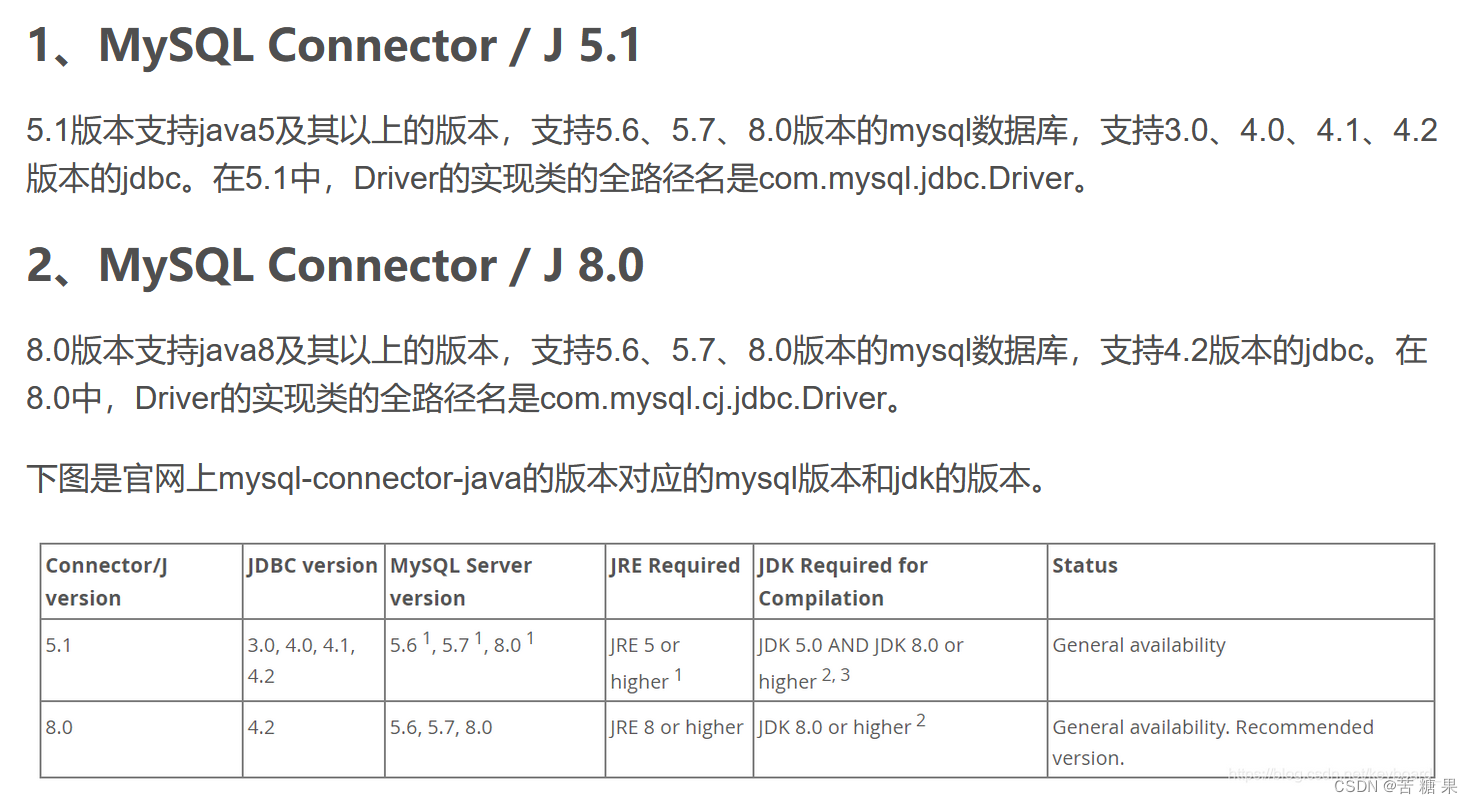
注意:mysql 5.8 版本驱动类与之前不同。我使用的是5.7的mysql.Driver的实现类的全路径名是com.mysql.jdbc.Driver。
 允许覆盖重名bean:dataSource这个bean已存在,允许覆盖。
spring.main.allow-bean-definition-overriding=true
cid % 2 + 1:为何+1?
+1的原因:如果下标从0开始就不用加,现在下标是从1开始,所以得加。本来下标0代表偶数,+1后下标1代表偶数
2.3.2 按照水平分表的方式,创建数据库和数据库表
1)创建数据库 course_db
2)在数据库创建两张表 course_1 和 course_2
3)约定规则:如果添加课程 id 是偶数把数据添加 course_1,如果奇数添加到 course_2
2.3.3 测试
//注入 mapper
    @Resource
    private CourseMapper courseMapper;

    //添加课程的方法
    @Test
    public void addCourse() {
        for (int i = 1; i <= 10; i++) {
            Course course = new Course();
            course.setCname("java" + i);
            course.setUserId(100L);
            course.setCstatus("Normal" + i);
            courseMapper.insert(course);
        }
    }

    //查询课程的方法
    @Test
    public void findCourse() {
        QueryWrapper<Course> wrapper = new QueryWrapper<>();
        wrapper.eq("cid", 763102447882207233L);
        Course course = courseMapper.selectOne(wrapper);
        System.out.println(course);
    }
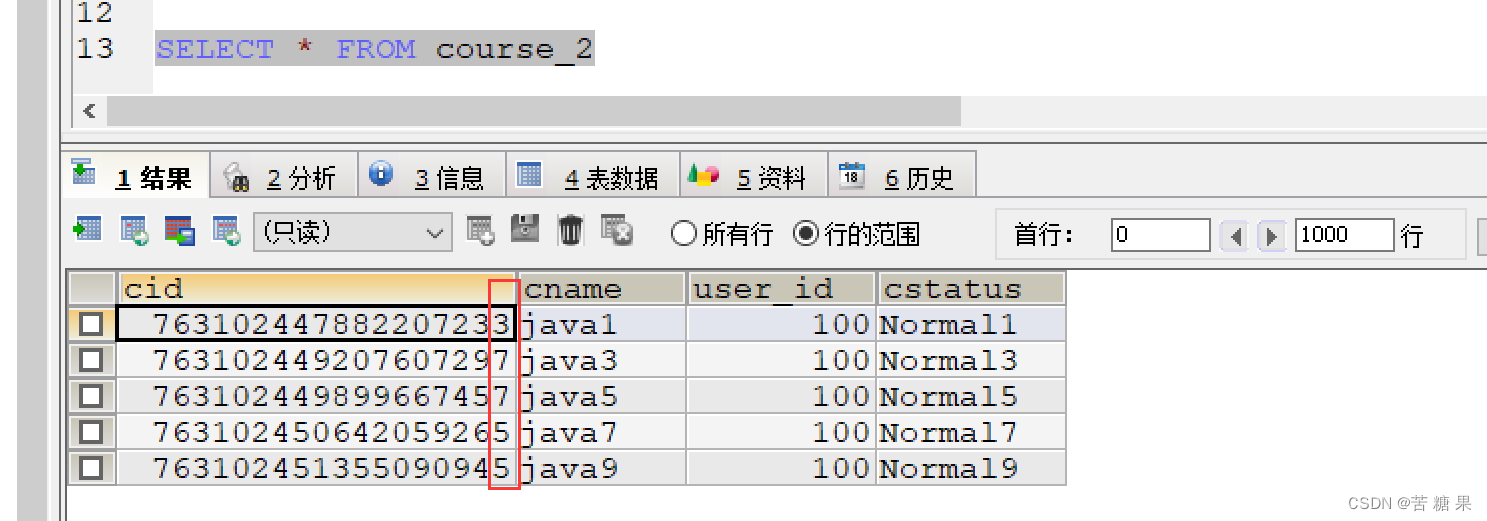
2表cid全是奇数
2.4 Sharding-JDBC 实现水平分库
2.4.1 改properties
# shardingjdbc 分片策略
# 配置数据源,给数据源起名称
spring.shardingsphere.datasource.names=m1,m2
# 允许覆盖重名bean
spring.main.allow-bean-definition-overriding=true
#配置数据源具体内容,包含连接池,驱动,地址,用户名和密码
spring.shardingsphere.datasource.m1.type=com.alibaba.druid.pool.DruidDataSource
spring.shardingsphere.datasource.m1.driver-class-name=com.mysql.jdbc.Driver
spring.shardingsphere.datasource.m1.url=jdbc:mysql://localhost:3306/edu_db_1?useUnicode=true&characterEncoding=utf-8&useSSL=false
spring.shardingsphere.datasource.m1.username=root
spring.shardingsphere.datasource.m1.password=root

#配置数据源具体内容,包含连接池,驱动,地址,用户名和密码
spring.shardingsphere.datasource.m2.type=com.alibaba.druid.pool.DruidDataSource
spring.shardingsphere.datasource.m2.driver-class-name=com.mysql.jdbc.Driver
spring.shardingsphere.datasource.m2.url=jdbc:mysql://localhost:3306/edu_db_2?useUnicode=true&characterEncoding=utf-8&useSSL=false
spring.shardingsphere.datasource.m2.username=root
spring.shardingsphere.datasource.m2.password=root

#指定数据库分布情况,数据库里面表分布情况# m1 m2 course_1 course_2
spring.shardingsphere.sharding.tables.course.actual-data-nodes=m$->{1..2}.course_$->{1..2}
# 指定 course 表里面主键 cid 生成策略 SNOWFLAKE
spring.shardingsphere.sharding.tables.course.key-generator.column=cid
spring.shardingsphere.sharding.tables.course.key-generator.type=SNOWFLAKE

# 指定表分片策略 约定 cid 值偶数添加到 course_1 表,如果 cid 是奇数添加到course_2 表
# +1的原因:如果下标从0开始就不用加,现在下标是从1开始,所以得加。本来下标0代表偶数,+1后下标1代表偶数
spring.shardingsphere.sharding.tables.course.table-strategy.inline.sharding_column=cid
spring.shardingsphere.sharding.tables.course.table-strategy.inline.algorithm_expression=course_$->{cid % 2 + 1}

# 指定数据库分片策略 约定 user_id 是偶数添加 m1,是奇数添加 m2
spring.shardingsphere.sharding.tables.course.database-strategy.inline.sharding_column=user_id
spring.shardingsphere.sharding.tables.course.database-strategy.inline.algorithm_expression=m$->{user_id % 2 + 1}
# 打开 sql 输出日志
spring.shardingsphere.props.sql.show=true
2.4.2 建库表和测试

@Test
    public void addCourseDb() {
        Course course = new Course();
        course.setCname("javademo1");
        //分库根据 user_id
        course.setUserId(111L);
        course.setCstatus("Normal1");
        courseMapper.insert(course);
    }

    //查询操作
    @Test
    public void findCourseDb() {
        QueryWrapper<Course> wrapper = new QueryWrapper<>();
        //设置 userid 值
        wrapper.eq("user_id", 111L);
        //设置 cid 值
        wrapper.eq("cid", 763127952517890049L);
        Course course = courseMapper.selectOne(wrapper);
        System.out.println(course);
    }
cid与user_id都是奇数,2库的2表

2.5 Sharding-JDBC 实现垂直分库
2.5.1 改properties
# shardingjdbc 分片策略
# 配置数据源,给数据源起名称
spring.shardingsphere.datasource.names=m1,m2,m0
# 允许覆盖重名bean
spring.main.allow-bean-definition-overriding=true
#配置数据源具体内容,包含连接池,驱动,地址,用户名和密码
spring.shardingsphere.datasource.m1.type=com.alibaba.druid.pool.DruidDataSource
spring.shardingsphere.datasource.m1.driver-class-name=com.mysql.jdbc.Driver
spring.shardingsphere.datasource.m1.url=jdbc:mysql://localhost:3306/edu_db_1?useUnicode=true&characterEncoding=utf-8&useSSL=false
spring.shardingsphere.datasource.m1.username=root
spring.shardingsphere.datasource.m1.password=root

#配置数据源具体内容,包含连接池,驱动,地址,用户名和密码
spring.shardingsphere.datasource.m2.type=com.alibaba.druid.pool.DruidDataSource
spring.shardingsphere.datasource.m2.driver-class-name=com.mysql.jdbc.Driver
spring.shardingsphere.datasource.m2.url=jdbc:mysql://localhost:3306/edu_db_2?useUnicode=true&characterEncoding=utf-8&useSSL=false
spring.shardingsphere.datasource.m2.username=root
spring.shardingsphere.datasource.m2.password=root

#配置数据源具体内容,包含连接池,驱动,地址,用户名和密码
spring.shardingsphere.datasource.m0.type=com.alibaba.druid.pool.DruidDataSource
spring.shardingsphere.datasource.m0.driver-class-name=com.mysql.jdbc.Driver
spring.shardingsphere.datasource.m0.url=jdbc:mysql://localhost:3306/user_db?useUnicode=true&characterEncoding=utf-8&useSSL=false
spring.shardingsphere.datasource.m0.username=root
spring.shardingsphere.datasource.m0.password=root

# 配置 user_db 数据库里面 t_user 专库专表
spring.shardingsphere.sharding.tables.t_user.actual-data-nodes=m$->{0}.t_user
# 指定 course 表里面主键 cid 生成策略 SNOWFLAKE
spring.shardingsphere.sharding.tables.t_user.key-generator.column=user_id
spring.shardingsphere.sharding.tables.t_user.key-generator.type=SNOWFLAKE

spring.shardingsphere.sharding.tables.t_user.table-strategy.inline.sharding_column=user_id
spring.shardingsphere.sharding.tables.t_user.table-strategy.inline.algorithm_expression=t_user
# 打开 sql 输出日志
spring.shardingsphere.props.sql.show=true
2.5.2 测试
    @Test
    public void addUserDb() {
        User user = new User();
        user.setUsername("lucy");
        user.setUstatus("a");
        userMapper.insert(user);
    }
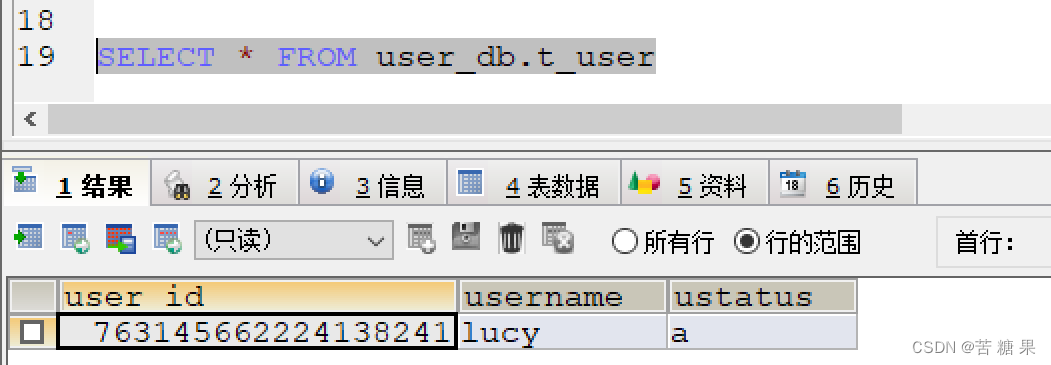
其实,我觉着垂直分库和分表不用刻意指定。因为垂直分库是把表分不到不同的库,垂直分表是把一个表拆分成多个表。这在设计之初是可以预见的。
2.6 Sharding-JDBC 操作公共表
2.6.1 建表和实体
分别在user_db、edu_db_2、edu_db_1中执行。
CREATE TABLE `t_udict` (
  `dict_id` BIGINT(20) NOT NULL,
  `uvalue` VARCHAR(64) DEFAULT NULL,
  `ustatus` VARCHAR(32) DEFAULT NULL,
  PRIMARY KEY (`dict_id`)
) ENGINE=INNODB DEFAULT CHARSET=utf8
@Data
@TableName("t_udict")
public class Udict {
    private Long dictid;
    private String ustatus;
    private String uvalue;
}
@Mapper
public interface UdictMapper extends BaseMapper<Udict> {
}
2.6.2 改properties
spring.shardingsphere.sharding.broadcast-tables=t_udict
spring.shardingsphere.sharding.tables.t_udict.key-generator.column=dict_id
spring.shardingsphere.sharding.tables.t_udict.key-generator.type=SNOWFLAKE
2.6.3 测试
@Test
    public void addDict() {
        Udict udict = new Udict();
        udict.setUstatus("a");
        udict.setUvalue("已启用");
        udictMapper.insert(udict);
    }

    //删除操作
    @Test
    public void deleteDict() {
        QueryWrapper<Udict> wrapper = new QueryWrapper<>();
        //设置 userid 值
        wrapper.eq("dict_id", 763535578640678913L);
        udictMapper.delete(wrapper);
    }

2.7 Sharding-JDBC 实现读写分离
2.7.1 搭建MySQL一主一从
2.7.2Sharding-JDBC配置读写分离策略
读写分离:让主库处理事务性的增删改操作,让从库处理查询操作。
新增配置
# user_db 从服务器
spring.shardingsphere.datasource.s0.type=com.alibaba.druid.pool.DruidDataSource
spring.shardingsphere.datasource.s0.driver-class-name=com.mysql.jdbc.Driver
spring.shardingsphere.datasource.s0.url=jdbc:mysql://localhost:3317/user_db?useUnicode=true&characterEncoding=utf-8&useSSL=false
spring.shardingsphere.datasource.s0.username=root
spring.shardingsphere.datasource.s0.password=root

# 主库从库逻辑数据源定义 ds0 为 user_db
spring.shardingsphere.sharding.master-slave-rules.ds0.master-data-source_name=m0
spring.shardingsphere.sharding.master-slave-rules.ds0.slave-data-source_names=s0
# 配置 user_db 数据库里面 t_user 专库专表
#spring.shardingsphere.sharding.tables.t_user.actual-data-nodes=m$->{0}.t_user
# t_user 分表策略,固定分配至 ds0 的 t_user 真实表
spring.shardingsphere.sharding.tables.t_user.actual-data-nodes=ds0.t_user
完整配置
# shardingjdbc 分片策略
# 配置数据源,给数据源起名称
spring.shardingsphere.datasource.names=m1,m2,m0,s0
# 允许覆盖重名bean
spring.main.allow-bean-definition-overriding=true
#配置数据源具体内容,包含连接池,驱动,地址,用户名和密码
spring.shardingsphere.datasource.m1.type=com.alibaba.druid.pool.DruidDataSource
spring.shardingsphere.datasource.m1.driver-class-name=com.mysql.jdbc.Driver
spring.shardingsphere.datasource.m1.url=jdbc:mysql://localhost:3306/edu_db_1?useUnicode=true&characterEncoding=utf-8&useSSL=false
spring.shardingsphere.datasource.m1.username=root
spring.shardingsphere.datasource.m1.password=root

#配置数据源具体内容,包含连接池,驱动,地址,用户名和密码
spring.shardingsphere.datasource.m2.type=com.alibaba.druid.pool.DruidDataSource
spring.shardingsphere.datasource.m2.driver-class-name=com.mysql.jdbc.Driver
spring.shardingsphere.datasource.m2.url=jdbc:mysql://localhost:3306/edu_db_2?useUnicode=true&characterEncoding=utf-8&useSSL=false
spring.shardingsphere.datasource.m2.username=root
spring.shardingsphere.datasource.m2.password=root

#配置数据源具体内容,包含连接池,驱动,地址,用户名和密码
spring.shardingsphere.datasource.m0.type=com.alibaba.druid.pool.DruidDataSource
spring.shardingsphere.datasource.m0.driver-class-name=com.mysql.jdbc.Driver
spring.shardingsphere.datasource.m0.url=jdbc:mysql://localhost:3307/user_db?useUnicode=true&characterEncoding=utf-8&useSSL=false
spring.shardingsphere.datasource.m0.username=root
spring.shardingsphere.datasource.m0.password=root

# user_db 从服务器
spring.shardingsphere.datasource.s0.type=com.alibaba.druid.pool.DruidDataSource
spring.shardingsphere.datasource.s0.driver-class-name=com.mysql.jdbc.Driver
spring.shardingsphere.datasource.s0.url=jdbc:mysql://localhost:3317/user_db?useUnicode=true&characterEncoding=utf-8&useSSL=false
spring.shardingsphere.datasource.s0.username=root
spring.shardingsphere.datasource.s0.password=root

# 主库从库逻辑数据源定义 ds0 为 user_db
spring.shardingsphere.sharding.master-slave-rules.ds0.master-data-source_name=m0
spring.shardingsphere.sharding.master-slave-rules.ds0.slave-data-source_names=s0
# 配置 user_db 数据库里面 t_user 专库专表
#spring.shardingsphere.sharding.tables.t_user.actual-data-nodes=m$->{0}.t_user
# t_user 分表策略,固定分配至 ds0 的 t_user 真实表
spring.shardingsphere.sharding.tables.t_user.actual-data-nodes=ds0.t_user

# 配置公共表
spring.shardingsphere.sharding.broadcast-tables=t_udict
spring.shardingsphere.sharding.tables.t_udict.key-generator.column=dict_id
spring.shardingsphere.sharding.tables.t_udict.key-generator.type=SNOWFLAKE

# 配置 user_db 数据库里面 t_user 专库专表
#spring.shardingsphere.sharding.tables.t_user.actual-data-nodes=m$->{0}.t_user
# 指定 course 表里面主键 cid 生成策略 SNOWFLAKE
spring.shardingsphere.sharding.tables.t_user.key-generator.column=user_id
spring.shardingsphere.sharding.tables.t_user.key-generator.type=SNOWFLAKE

spring.shardingsphere.sharding.tables.t_user.table-strategy.inline.sharding_column=user_id
spring.shardingsphere.sharding.tables.t_user.table-strategy.inline.algorithm_expression=t_user
# 打开 sql 输出日志
spring.shardingsphere.props.sql.show=true
2.7.3 测试
//添加操作
    @Test
    public void addUserDb2MS() {
        User user = new User();
        user.setUsername("jackrose");
        user.setUstatus("b");
        userMapper.insert(user);
    }
    //查询操作
    @Test
    public void findUserDb() {
        QueryWrapper<User> wrapper = new QueryWrapper<>();
        //设置 userid 值
        wrapper.eq("user_id",765512157289775105L);
        User user = userMapper.selectOne(wrapper);
        System.out.println(user);
    }

 插入操作在主库,查询操作在从库,读写分离配置成功。
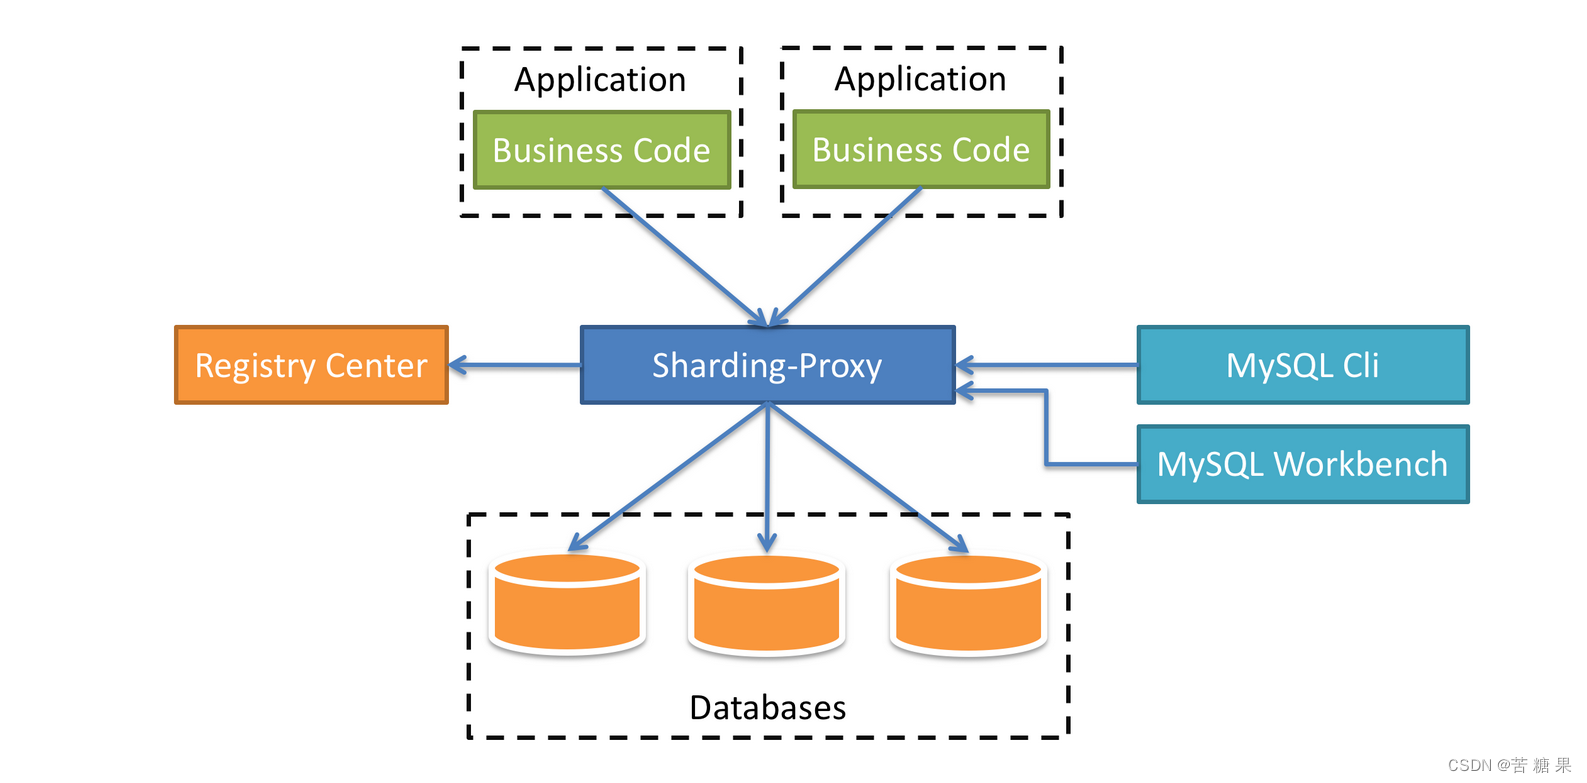
3.Sharding-Proxy
3.1 简介
定位为透明化的数据库代理端,提供封装了数据库二进制协议的服务端版本,用于完成对异构语言的支持。 目前先提供MySQL/PostgreSQL版本,它可以使用任何兼容MySQL/PostgreSQL协议的访问客户端(如:MySQL Command Client, MySQL Workbench, Navicat等)操作数据,对DBA更加友好。
**向应用程序完全透明,可直接当做MySQL/PostgreSQL使用。**
适用于任何兼容MySQL/PostgreSQL协议的的客户端。
3.2 安装下载
官网下载:https://shardingsphere.apache.org/document/legacy/4.x/document/cn/downloads/
 将安装包上传至linux服务器
cd /usr/share
mkdir sharding-proxy
cp apache-shardingsphere-incubating-4.0.1-sharding-proxy-bin.tar.gz sharding-proxy
tar -xvf apache-shardingsphere-incubating-4.0.1-sharding-proxy-bin.tar.gz
3.3 修改配置
3.3.1 权限验证
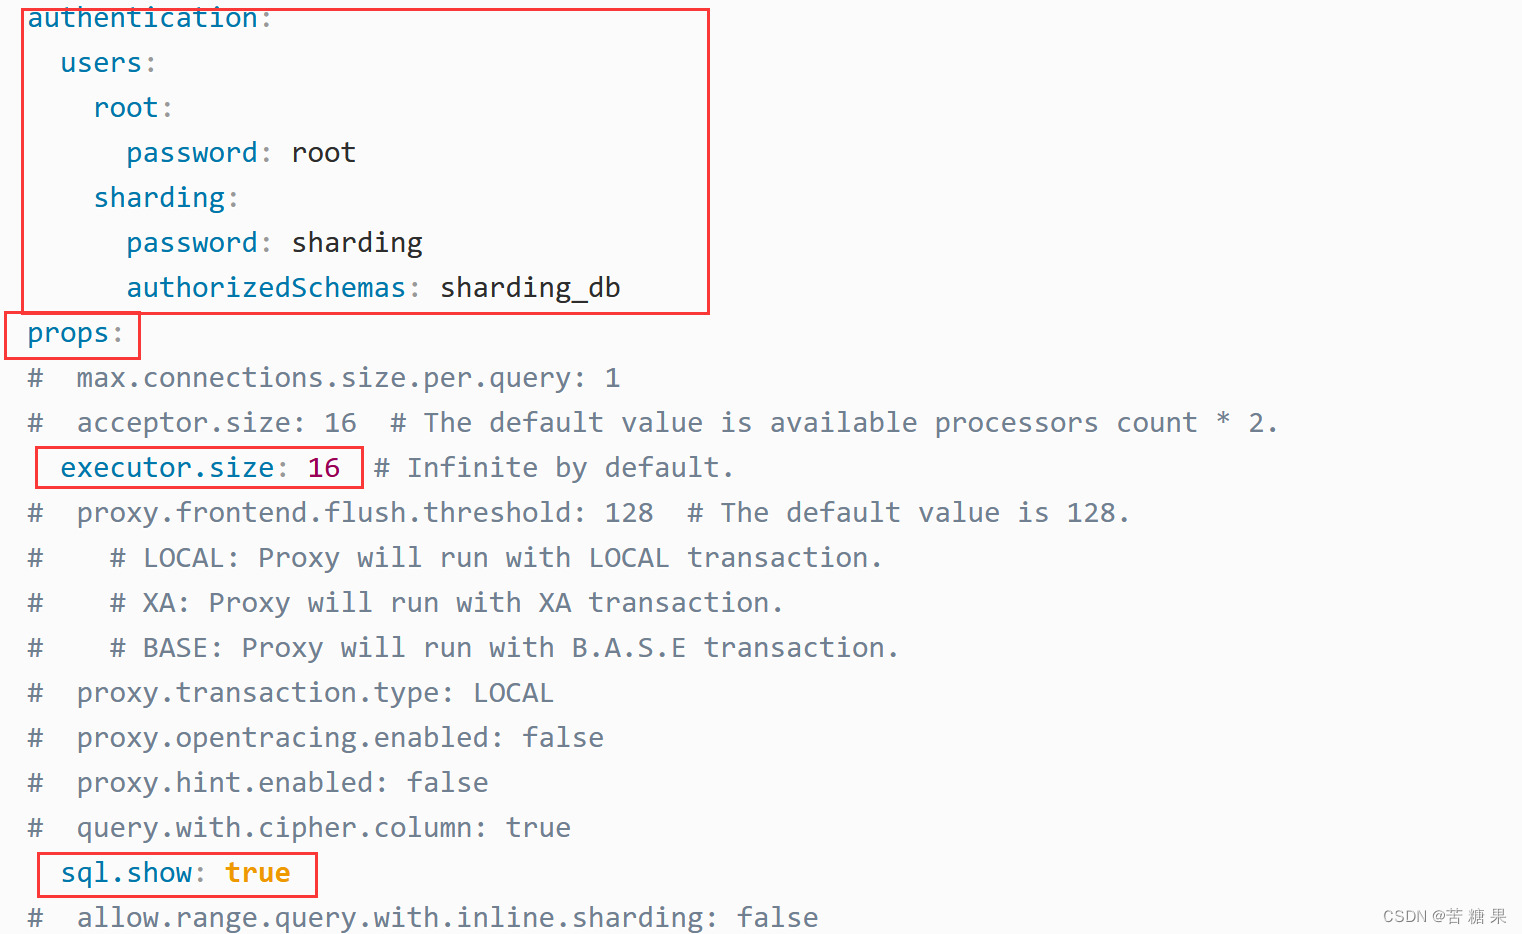
编辑%SHARDING_PROXY_HOME%\conf\server.yaml。详情请参见配置手册。
Sharding-Proxy使用conf/server.yaml配置注册中心、认证信息以及公用属性。
权限验证:
用于执行登录Sharding Proxy的权限验证。配置用户名、密码、可访问的数据库后,必须使用正确的用户名、密码才可登录Proxy。
authentication:
  users:
    root: # 自定义用户名
      password: root # 自定义用户名
    sharding: # 自定义用户名
      password: sharding # 自定义用户名
      authorizedSchemas: sharding_db, masterslave_db # 该用户授权可访问的数据库,多个用逗号分隔。缺省将拥有root权限,可访问全部数据库。
认证信息配置:
conf/server.yaml
放开对应的注释
3.3.2 分库分表配置
conf/config-sharding.yaml
将MySQL的注释放开,其他的不动。schemaName不能重复。
######################################################################################################
#
# If you want to connect to MySQL, you should manually copy MySQL driver to lib directory.
#
######################################################################################################

schemaName: sharding_db

dataSources:
  ds_0:
    url: jdbc:mysql://localhost:3307/demo_ds_0?serverTimezone=UTC&useSSL=false
    username: root
    password: root
    connectionTimeoutMilliseconds: 30000
    idleTimeoutMilliseconds: 60000
    maxLifetimeMilliseconds: 1800000
    maxPoolSize: 50
  ds_1:
    url: jdbc:mysql://localhost:3307/demo_ds_1?serverTimezone=UTC&useSSL=false
    username: root
    password: root
    connectionTimeoutMilliseconds: 30000
    idleTimeoutMilliseconds: 60000
    maxLifetimeMilliseconds: 1800000
    maxPoolSize: 50
#
shardingRule:
  tables:
    t_order:
      actualDataNodes: ds_${0..1}.t_order_${0..1}
      tableStrategy:
        inline:
          shardingColumn: order_id
          algorithmExpression: t_order_${order_id % 2}
      keyGenerator:
        type: SNOWFLAKE
        column: order_id
    t_order_item:
      actualDataNodes: ds_${0..1}.t_order_item_${0..1}
      tableStrategy:
        inline:
          shardingColumn: order_id
          algorithmExpression: t_order_item_${order_id % 2}
      keyGenerator:
        type: SNOWFLAKE
        column: order_item_id
  bindingTables:
    - t_order,t_order_item
  defaultDatabaseStrategy:
    inline:
      shardingColumn: user_id
      algorithmExpression: ds_${user_id % 2}
  defaultTableStrategy:
    none:
If you want to connect to MySQL, you should manually copy MySQL driver to lib directory
根据注释提示,需要下载MySQL 的驱动包。
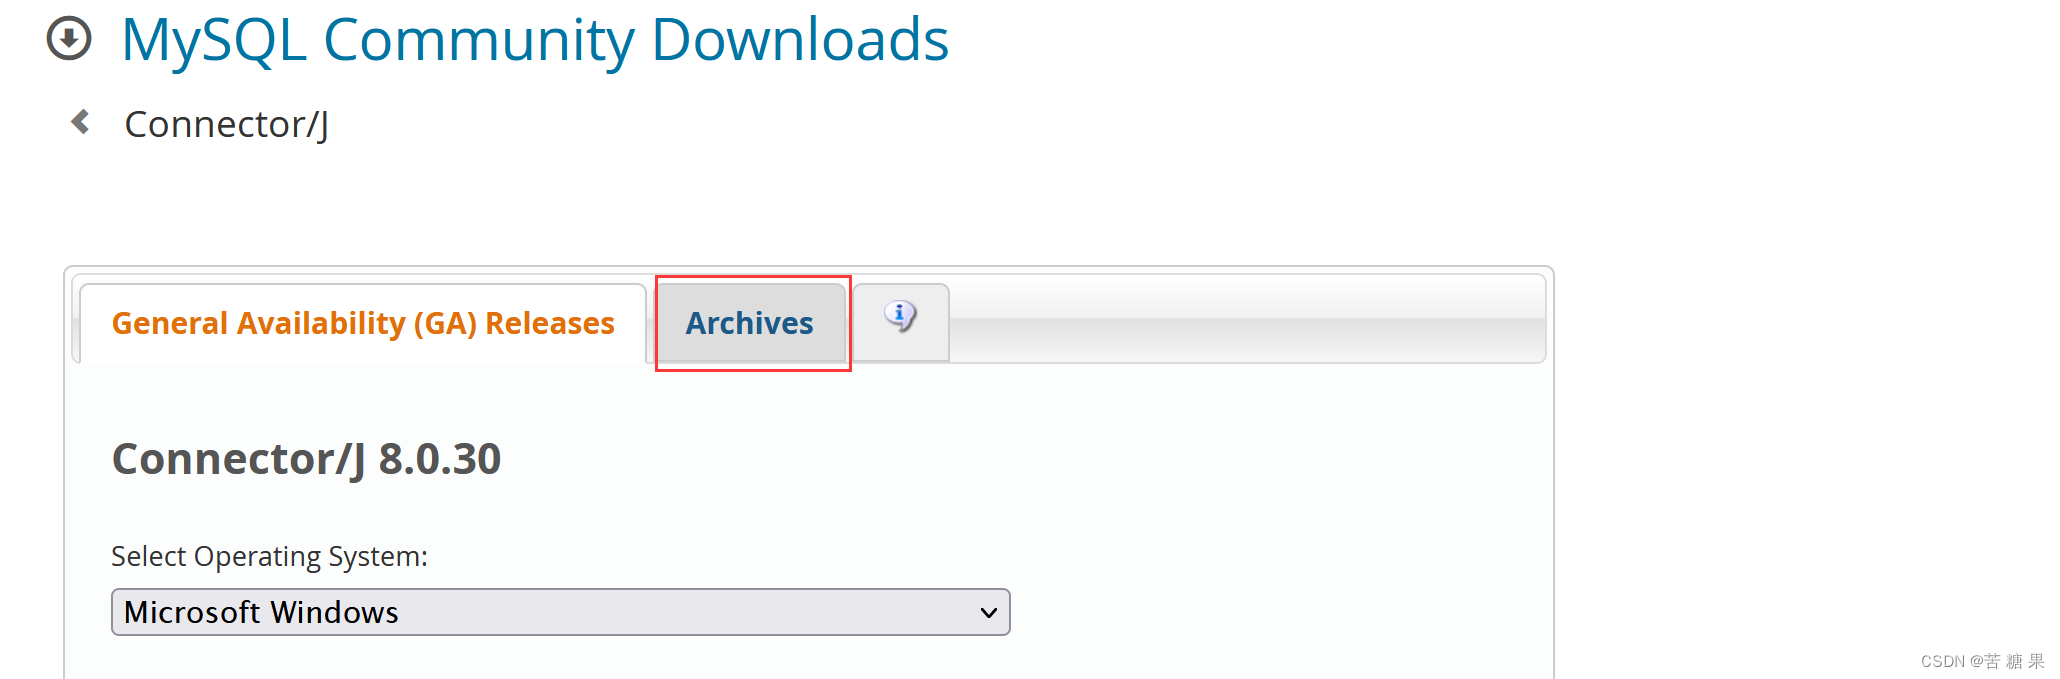
官网下载太慢,来此处下载。https://downloads.mysql.com/archives/c-j/
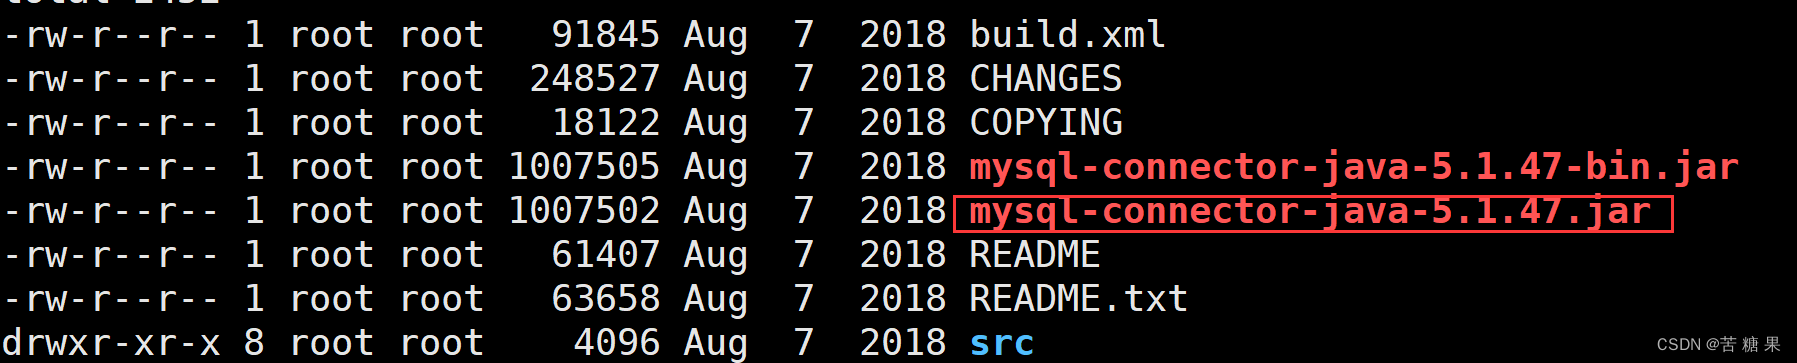
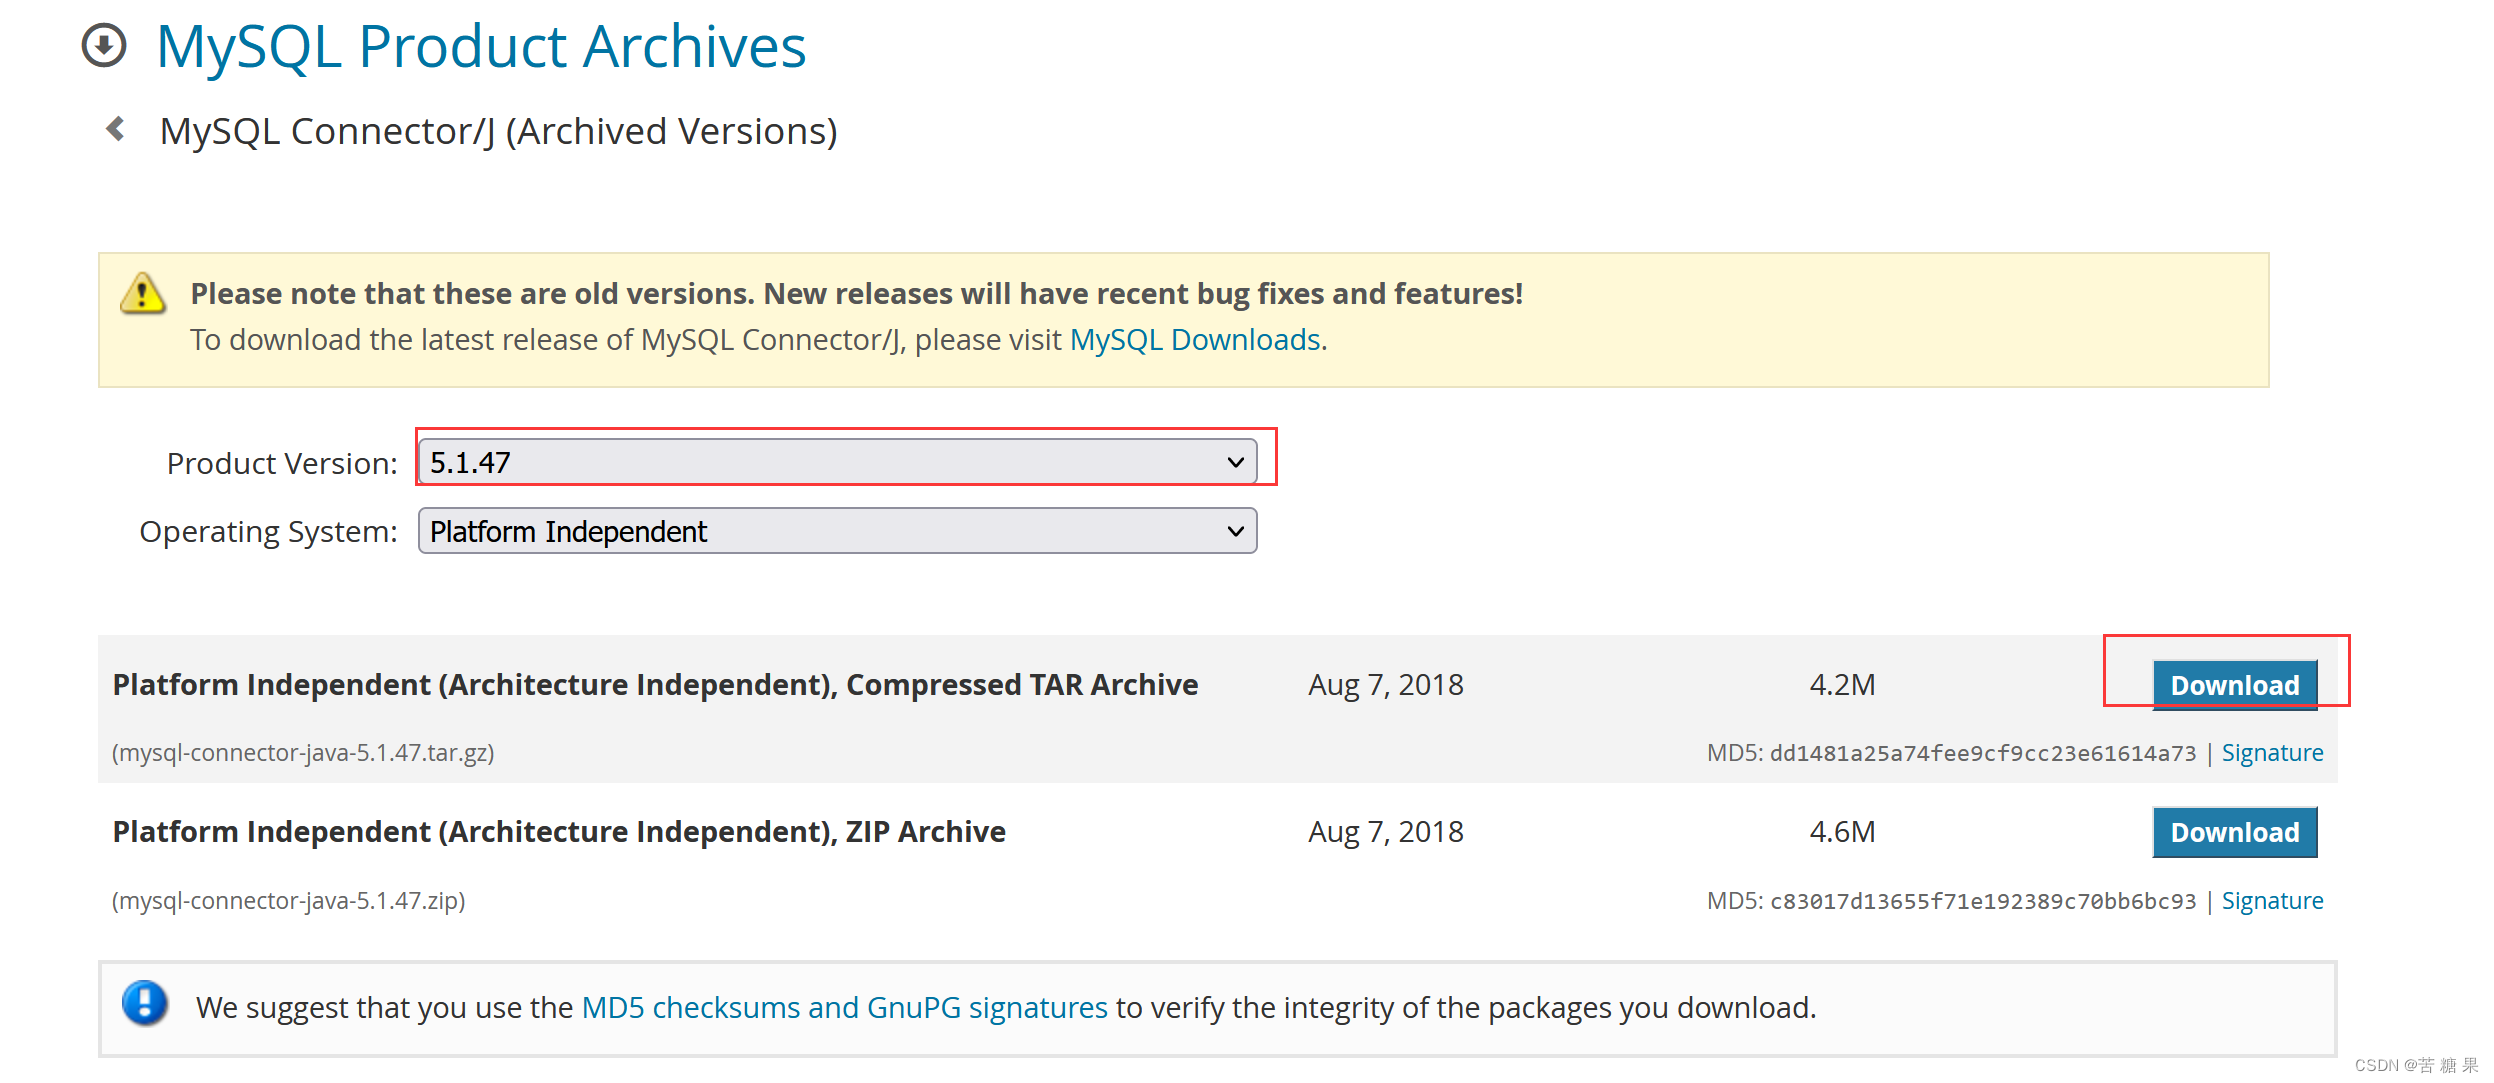 下载完成上传至linux服务器并解压。解压后将jar包放置到sharding-proxy解压目录的lib目录下
3.3.3 读写分离配置
此时搭建的是一主一从,但是每个数据库实例里面有两个库
第一个数据库的读写分离配置:
conf/config-master_slave.yaml
######################################################################################################
#
# If you want to connect to MySQL, you should manually copy MySQL driver to lib directory.
#
######################################################################################################

########################
#
# 第一个数据库的读写分离
# 读从库,写更新删除在主库
#
########################

schemaName: sharding_db_0
#
dataSources:
  master_0_ds:
    url: jdbc:mysql://192.168.10.10:3307/demo_ds_0?serverTimezone=UTC&useSSL=false
    username: root
    password: root
    connectionTimeoutMilliseconds: 30000
    idleTimeoutMilliseconds: 60000
    maxLifetimeMilliseconds: 1800000
    maxPoolSize: 50
  slave_ds_0:
    url: jdbc:mysql://192.168.10.10:3317/demo_ds_0?serverTimezone=UTC&useSSL=false
    username: root
    password: root
    connectionTimeoutMilliseconds: 30000
    idleTimeoutMilliseconds: 60000
    maxLifetimeMilliseconds: 1800000
    maxPoolSize: 50

masterSlaveRule:
  name: ms_ds
  masterDataSourceName: master_0_ds
  slaveDataSourceNames:
    - slave_ds_0
#    - slave_ds_1
  loadBalanceAlgorithmType: ROUND_ROBIN
第二个数据库的读写分离配置:
conf/config-master_slave_2.yaml
全部配置完之后,然后启动服务:
######################################################################################################
#
# If you want to connect to MySQL, you should manually copy MySQL driver to lib directory.
#
######################################################################################################

########################
#
# 第2个数据库的读写分离
# 读从库,写更新删除在主库
#
########################

schemaName: sharding_db_1
#
dataSources:
  master_1_ds:
    url: jdbc:mysql://192.168.10.10:3307/demo_ds_1?serverTimezone=UTC&useSSL=false
    username: root
    password: root
    connectionTimeoutMilliseconds: 30000
    idleTimeoutMilliseconds: 60000
    maxLifetimeMilliseconds: 1800000
    maxPoolSize: 50
  slave_ds_1:
    url: jdbc:mysql://192.168.10.10:3317/demo_ds_1?serverTimezone=UTC&useSSL=false
    username: root
    password: root
    connectionTimeoutMilliseconds: 30000
    idleTimeoutMilliseconds: 60000
    maxLifetimeMilliseconds: 1800000
    maxPoolSize: 50

masterSlaveRule:
  name: ms_ds_1
  masterDataSourceName: master_1_ds
  slaveDataSourceNames:
    - slave_ds_1
#    - slave_ds_1
  loadBalanceAlgorithmType: ROUND_ROBIN
3.3.4 更新主从库的配置
docker stop mysql-master mysql-slave01
cd /mydata/mysql/master/conf
vim my.cnf
# 增加如下配置
binlog-do-db=demo_ds_0
binlog-do-db=demo_ds_1
cd /mydata/mysql/slave/conf
vim my.cnf
# 增加如下配置
replicate_wild_do_table=demo_ds_0.%
replicate_wild_do_table=demo_ds_1.%
docker start mysql-master mysql-slave01
3.3.5 启动
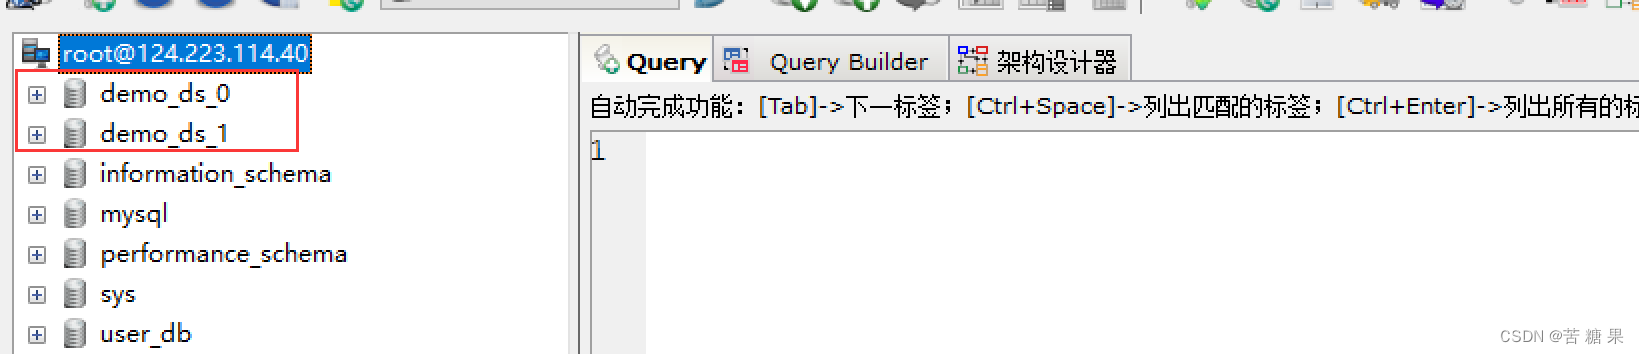
连接到主库,创建 demo_ds_0 demo_ds_1 两个数据库,然后切换到从库,发现数据库已同步正常
 启动需要依赖jdk,所以若未安装jdk,可参考 Linux环境安装jdk
进入到sharding-proxy 的解压目录的bin目录下,执行 sh start.sh 3388 指定在3388端口上启动
进入logs目录下查看stdout.log,末尾出现ACTIVE 说明启动成功。
进入云服务器开启3388端口
使用SQLyog DBeaver 命令行连接均出现异常,改用navicat连接正常。在简介中有说明。

3.3.6 验证
创建表结构:
CREATE TABLE t_order (
order_id bigint(20)NOT NULL AUTO_INCREMENT,
user_id int(11)NOT NULL,
status varchar(50) DEFAULT NULL,
PRIMARY KEY (order_id)
)ENGINE=InnoDB DEFAULT CHARSET=utf8 COLLATE=utf8_bin;

CREATE TABLE t_order_item(
order_item_id bigint (20)NOT NULL,
order_id bigint (20)NOT NULL,
user_id int (11)NOT NULL,
content varchar (255) DEFAULT NULL,
status varchar(50) DEFAULT NULL,
PRIMARY KEY(order_item_id)
)ENGINE=InnoDB DEFAULT CHARSET=utf8 COLLATE=utf8_bin;
插入数据
insert into t_order (user_id,status) VALUES(1,1)
insert into t_order (user_id,status) VALUES(3,2)
insert into t_order (user_id,status) VALUES(2,3)
insert into t_order (user_id,status) VALUES(4,4)
发现分库分表正常,主从同步正常。
4. Springboot集成sharding-proxy
4.1 注释掉sharding-jdbc-demo中多余的代码
注释pom多余依赖
 注释测试类中其余的mapper及代码
注释多余的实体类和多余的mapper
4.2 新建application.yml
server:
  port: 8001

spring:
  application:
    name: sharding-jdbc-demo
  datasource:
    driver-class-name: com.mysql.jdbc.Driver
    url: jdbc:mysql://localhost:3388/sharding_db?useUnicode=true&characterEncoding=utf-8&useSSL=false
    username: root
    password: root
此处直接连接sharding-proxy,把sharding-proxy当成一个数据库来管理。连接sharding_db库。
4.3 建实体类和mapper
@Data
@TableName("t_order")
@ToString
public class Order {
    @TableId("order_id")
    private Long orderId;
    private Long userId;
    private String status;
}
实体类中需要制定主键id,否则会报错
@Mapper
public interface OrderMapper extends BaseMapper<Order> {
}
4.4 测试
    @Resource
    private OrderMapper orderMapper;

    @Test
    public void addOrder() {
        Order order = new Order();
        order.setUserId(6L);
        order.setStatus("5");
        orderMapper.insert(order);
        log.info("插入成功!"+order);
    }
    @Test
    public void findOrder() {
        QueryWrapper<Order> wrapper = new QueryWrapper<>();
        //设置 userid 值
        wrapper.eq("user_id",5L);
        Order order = orderMapper.selectOne(wrapper);
        log.info("查询成功!"+order);
    }
 插入和查询成功,大功告成!!!


 408
408


 被折叠的 条评论
为什么被折叠?
被折叠的 条评论
为什么被折叠?
 到【灌水乐园】发言


