


环境就不说了 安装node 安装cli之类。。。
一,初始化项目
vue init webpack projectName
之后就是相关配置 严格模式最好不要选
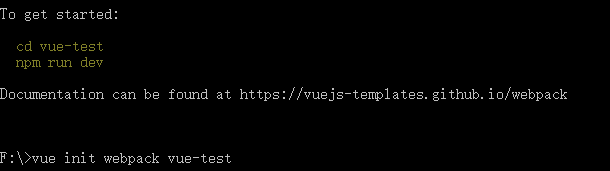
执行此命令,即可启动自己的项目,关于主机端口配置在config目录下的index.js文件中
ps:以上比较简单 可以在菜鸟教程上观看详细的步骤
二,安装及引入项目所需依赖(做此记录时我仅安装Axios,Element,Less)
npm i vue-axios  -S
npm i element-ui -S
npm install less less-loader --save-dev
//i为install简写  -S为--save-dev简写
//据说使用简写会有一定差别,但暂未发现
安装完成之后,在配置文件packjosn.js中会看到相关版本信息
"dependencies": {
    "axios": "^0.19.0",
    "element-ui": "^2.10.1",
    "vue": "^2.5.2",
    "vue-axios": "^2.1.4",
    "vue-echarts": "^4.0.3",
    "vue-router": "^3.0.1"
  },
ps:其中dependencies为生产环境所需依赖,devDependencies为开发环境所需依赖具体区别在此不做赘述
安装完成之后在main.js中引入即可,上代码
import Vue from 'vue'
import router from './router'
import ElementUI from 'element-ui';
import 'element-ui/lib/theme-chalk/index.css';
import axios from 'axios'
import VueAxios from 'vue-axios'
import App from './App'
Vue.config.productionTip = false
Vue.use(ElementUI)
Vue.use(VueAxios,axios);
使用此方法(VueAxios )使用axios时还需安装VueAxios 否则报错,
或者将axios加入vue原型亦可,代码如下:
import axios from 'axios'
Vue.prototype.$ajax= axios
axios具体用法见官方文档axios使用说明
看到一篇封装axios的详细教程
https://blog.csdn.net/qq_38145702/article/details/81558816
使用Less等预编译语言不用引入 具体见我另一篇博客VUE2.0 vue-cli构建项目中使用Less/Scss
项目起步完成

  <el-button type="primary">主要按钮</el-button>
  //element使用正常
  <style scoped lang="less">
  @color:red;
  //Less使用正常
  getData(){
      this.axios.post('http://jsonplaceholder.typicode.com/posts'
      ).then(function (response) {
          console.log(response);
        })
        .catch(function (error) {
          console.log(error);
        });
    }
   axios使用正常 [安利一个比较好用的在线接口网站jsonplaceholder]
接下来开始写项目咯
三,开始踩坑
将HelloWord.vue作为空模板把默认内容删除
<template>
		//这里是页面--html  此处有且只有一个直接子div
</template>

<script>
//这里是脚本--js
export default {
  name: 'Login',
  data () {
    return {

    };
  },
  methods:{

  }
}
</script>

<!-- Add "scoped" attribute to limit CSS to this component only -->
<style scoped lang="less">
//这里是样式--css
</style>
然后去router/index.js文件中配置路由,在开发中只有发生页面跳转就在此写路由
import Vue from 'vue'
import Router from 'vue-router'
import Login from '@/components/Login' //引入模板
Vue.use(Router) //使用路由
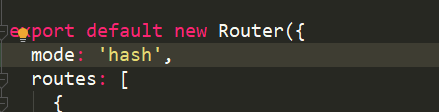
export default new Router({
routes: [
//配置路由
{
path: '/',
name: 'Login',
component: Login
}
]
})
ps:关于vue的路由使用可参考我转载的一篇文章,记录了路由传参的过程
https://segmentfault.com/a/1190000018711422
写到这应该可以结束了 具体踩的坑还是在别的文章中体现吧 不然太乱了
最后说一下打包上线,就是把vue项目打包成普通项目放入tomcat等服务器中
npm run build
执行此命令后会将项目打包成dist文件夹,里面有index.html和一些资源文件,
!!关键是没人看啊 有人看的话给个赞 啊 我继续更新
父组件改变子组件的值
想要把遮罩层抽出来写成子组件,在父组件里改变点击按钮让遮罩显示,
用父子传值好像只能传一次 在这里还是用ref操作dom吧
父组件里绑定ref
 <ReleaseRes ref="ReleaseRes"></ReleaseRes>
 //然后在方法里改变值
  //发布资源
      releaseRes() {//点击这个按钮出现遮罩层
        this.$refs.ReleaseRes.releaseResVisible = true;
      },
然后是在子组件里使用父组件定义的方法
openDetail() {
        this.$parent.addTab();//这里是父组件里的方法
      },
有时候会需要在页面监听路由变化进行数据更新
watch: {
      /**
       * 利用路由反向监听tab变更
       * @param to
       */
      '$route'(to) {
        console.log(to);
        this.getResource();
        this.getComment();
      }
    },
使用vue-router实现拦截登录(全局守卫)
当然也可以使用axios的响应拦截器对后台返回的“登录状态”进行判断
首先是在路由的index页对将要跳转的页面做如下配置
 //需要登录才能进入的页面可以增加一个meta属性
          meta: {
            requireAuth: true}
        },
然后在main.js页面写相关逻辑
/*
* 全局守卫
* */
router.beforeEach((to, from, next)=>{
  console.log('-------------to--------');
  console.log(to);
  console.log('---------------------');
  console.log(sessionStorage);
  if (to.fullPath=="/"){//如果是去登录页就让他去
    next()
  } else {//如果不是去登录页我们就检查他的session
    try{
      if (sessionStorage.getItem("username")){//如果session里面有登录信息,就让他过去
        next()
      }else {
        next({path:"/"})//如果没有就去登录页登录
      }
    }catch (e) {
      next({path:"/"})//不行就去登录页
    }
  }

})
router.beforeEach的理解: 定义: 全局守卫 ,不管访问那个路由都先走这里
每个守卫方法接收三个参数:

to: Route: 即将要进入的目标 路由对象

from: Route: 当前导航正要离开的路由

next: Function: 一定要调用该方法来 resolve 这个钩子。执行效果依赖 next 方法的调用参数。

next(): 进行管道中的下一个钩子。如果全部钩子执行完了,则导航的状态就是 confirmed (确认的)。

next(false): 中断当前的导航。如果浏览器的 URL 改变了 (可能是用户手动或者浏览器后退按钮),那么 URL 地址会重置到 from 路由对应的地址。

next(’/’) 或者 next({ path: ‘/’ }): 跳转到一个不同的地址。当前的导航被中断,然后进行一个新的导航。你可以向 next 传递任意位置对象,且允许设置诸如 replace: true、name: ‘home’ 之类的选项以及任何用在 router-link 的 to prop 或 router.push 中的选项。

next(error): (2.4.0+) 如果传入 next 的参数是一个 Error 实例,则导航会被终止且该错误会被传递给 router.onError() 注册过的回调。

确保要调用 next 方法,否则钩子就不会被 resolved。
关于打包的配置
一,路径配置
在config-index下

二,在router-index下
三,build-utils下

另外:关于打包之后的样式与开发环境不一致的问题,可参见我的另一篇总结
https://blog.csdn.net/qq_44472722/article/details/95217445
修改滚动条样式,
好久没更了,今天写到一个要,于是百度了一下,代码如下
//修改滚动条样式
  ::-webkit-scrollbar {
    width: .5rem;
    height: .5rem;
    background: hsla(0, 0%, 100%, 0.6);
  }

  ::-webkit-scrollbar-track {
    border-radius: 0;
  }

  ::-webkit-scrollbar-thumb {
    border-radius: 0;
    background-color: rgba(95,95,95,.4);
    transition: all .2s;
    border-radius: .5rem;

    &:hover {
      background-color: rgba(95,95,95, .7);
    }
  }
然后写道一个前端的搜索功能,用es6的filter和match即可实现
首先写一个计算属性
computed:{
      searchBaseName:function () {
      return  this.checkBaseList.filter(item=>{
          return item.match(this.baseNameKey)
        })
      }
    },
然后去遍历这个返回的数据而不是list本身了
<el-checkbox v-for="(item,index) in searchBaseName"
                               :key="index"
                               :label="item">

                  </el-checkbox>
深度监听
 watch:{
            // releaseResFromStr.serverClass.dataBaseType
            /* 监听数据库类型-改变对应端口号
            * 深度监听
            * */
            "releaseResFromStr.serverClass.dataBaseType":{
                handler(newName) {
                    if(newName==1){
                        this.releaseResFromStr.serverClass.ip[4] = "3306"
                    }else if (newName==2){
                        this.releaseResFromStr.serverClass.ip[4] = "1521"
                    } else if (newName==3){
                        this.releaseResFromStr.serverClass.ip[4] = "5236"
                    } else {
                        this.releaseResFromStr.serverClass.ip[4] = "54321"
                    }
                },
                deep: true,
            }
        },
文件下载方法
引用
https://blog.csdn.net/nihaoa50/article/details/84346880
exportData () {
        const form = this.getSearchForm() // 要发送到后台的数据
        axios({ // 用axios发送post请求
          method: 'post',
          url: '/user/12345', // 请求地址
          data: form, // 参数
          responseType: 'blob' // 表明返回服务器返回的数据类型
        })
          .then((res) => { // 处理返回的文件流
            const content = res
            const blob = new Blob([content])
            const fileName = '测试表格123.xls'
            if ('download' in document.createElement('a')) { // 非IE下载
              const elink = document.createElement('a')
              elink.download = fileName
              elink.style.display = 'none'
              elink.href = URL.createObjectURL(blob)
              document.body.appendChild(elink)
              elink.click()
              URL.revokeObjectURL(elink.href) // 释放URL 对象
              document.body.removeChild(elink)
            } else { // IE10+下载
              navigator.msSaveBlob(blob, fileName)
            }
        })
      }
类的绑定
<i :class="['el-icon-refresh',clickIcon?'donghua':'']" @click="refreshBase()"></i>
:class="[item.icon,{navCheck:categoryIndex==index}]"
样式的绑定格式
<el-form-item :style="{'position': 'absolute','top': 0,'left': takePrepare.validityType===1?200+'px':0}">
element dialog 居中
.el-dialog{
       display: flex;
       flex-direction: column;
       margin:0 !important;
       position:absolute;
       top:50%;
       left:50%;
       transform:translate(-50%,-50%);
       /*height:600px;*/
       max-height:calc(100% - 30px);
       max-width:calc(100% - 30px);
   }
   .el-dialog .el-dialog__body{
       flex:1;
       overflow: auto;
   }
vue计算属性传参
computed: {
          text() {
              return function (index) {
                  return this.Ratedata[index].currentRate.toFixed(0) + '%';
              }
          }
        },
element表格嵌套表格的写法
https://blog.csdn.net/Mr_EvanChen/article/details/83350134?utm_source=app


 464
464


 被折叠的 条评论
为什么被折叠?
被折叠的 条评论
为什么被折叠?
 到【灌水乐园】发言


