


通过拖拽改变大小是一个很常见的业务场景,比如我们常用的编辑器(Jetbrains 系列、VSCode),都有一些可以通过拖拽改变宽高的窗口,当我们鼠标悬停在边缘时,鼠标变为水平或者垂直的双向箭头,通过拖拽来改变宽高。
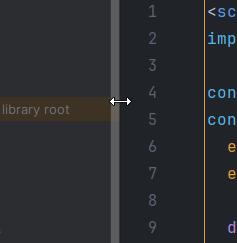
先看最终效果:
为了简化操作,接下来我将使用 Vue3 实现类似的功能,代码并不局限于框架,通过简单的修改也可以在 JavaScript 或者 React 中实现同样的效果。样式我使用了 Tailwind CSS,如果有不理解的类,可以去 Tailwind CSS 查阅。
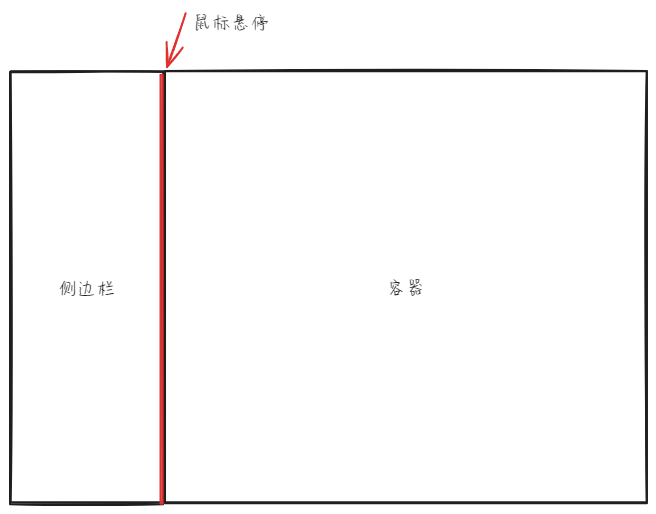
先来介绍一下原理。当鼠标悬停在侧边栏拖拽区域时,鼠标样式变为双向箭头,提示我们可以通过拖拽改变大小。鼠标按下拖拽时,监听 document 的 mousemove 和 mouseup 事件,通过鼠标的 x 坐标减去侧边栏距离页面左部的距离,算出侧边栏的新宽度,给侧边栏设置样式。鼠标松开时移除监听事件。我们还可以在拖拽过程中限制最小/最大宽度。
完整代码:
<script setup lang="ts">
import { ref } from 'vue'

const handleMouseDown = (event: MouseEvent) => {
  event.preventDefault()
  event.stopPropagation()

  document.addEventListener('mousemove', handleMouseMove)
  document.addEventListener('mouseup', handleMouseUp)
}

const asideRef = ref<HTMLElement | null>(null)
const handleMouseMove = (event: MouseEvent) => {
  let newWidth = event.clientX - asideRef.value?.getBoundingClientRect().left
  if (newWidth < 240) newWidth = 240
  if (newWidth > 400) newWidth = 400

  if (asideRef.value) {
    asideRef.value.style.width = `${newWidth}px`
  }
}

const handleMouseUp = () => {
  document.removeEventListener('mousemove', handleMouseMove)
  document.removeEventListener('mouseup', handleMouseUp)
}

const isResizing = ref(false)
const resetWidth = () => {
  if (asideRef.value) {
    isResizing.value = true
    asideRef.value.style.width = `300px`
    setTimeout(() => (isResizing.value = false), 300)
  }}
</script>

<template>
  <div class="flex h-full">
    <aside
      ref="asideRef"
      :class="`group relative w-[300px] bg-gray-100 p-2 ${
        isResizing && 'transition-all duration-300 ease-in-out'
      }`"
    >
      <p>
        Lorem ipsum dolor sit amet, consectetur adipisicing elit. Atque, culpa cumque, cupiditate
        doloremque doloribus explicabo, facilis illum ipsam minima nobis officiis optio possimus
        repudiandae sint totam ullam unde velit voluptates.
      </p>
      <div
        @mousedown="handleMouseDown"
        @click="resetWidth"
        class="absolute inset-y-0 right-0 w-1 cursor-ew-resize bg-gray-200 opacity-0 transition group-hover:opacity-100 dark:bg-zinc-800"
      ></div>
    </aside>
    <div class="min-w-0 flex-1">Content</div>
  </div>
</template>
- 拖拽区域默认是隐藏的,透明度设置为了 0,当鼠标进入侧边栏时透明度设置为 100%。
- 当用户在侧边栏的拖拽区域按下鼠标按钮时,handleMouseDown 函数会被调用,它会添加两个事件监听器,分别监听鼠标移动和鼠标按钮释放事件。当用户移动鼠标时,handleMouseMove 函数会被调用,计算新的侧边栏宽度,并更新侧边栏的宽度。当用户释放鼠标按钮时,handleMouseUp 函数会被调用,移除鼠标移动和鼠标按钮释放的事件监听器。
- 鼠标单击拖拽区域会将侧边栏宽度设置为默认的 300 像素。
- isResizing 用于跟踪侧边栏是否正在调整宽度。当 isResizing 的值为 true 时,给侧边栏添加一个 300 毫秒的动画
transition-all duration-300 ease-in-out。
最后,如果文章对您有所帮助,还希望能够点赞、收藏、关注,您的每一次点击都会为我带来无穷的动力来写出更好的文章。


 316
316

 被折叠的 条评论
为什么被折叠?
被折叠的 条评论
为什么被折叠?
 到【灌水乐园】发言


