


一、表单控件
1. 使用v-model双向绑定
- 单向绑定:把Model绑定到View中,Model更新数据,View也更新数据
- 双向绑定:在单向的基础上,把View绑定到Model上,即View更新,Model也更新
- 双向绑定原理:v-mode监听用户的输入事件以便更新数据
- 注意:v-model优先选择vue实例中的数据作为数据来源,所以应该通过data选项声明初始值
控件表单.html
<!DOCTYPE html>
<html xmlns:v-on="http://www.w3.org/1999/xhtml">
<head>
    <title></title>
    <meta charset="utf-8"/>
    <script src="https://cdn.jsdelivr.net/npm/vue/dist/vue.js"></script>
</head>
<body>
<div id="example-checkboxs" class="demo">
    <input type="checkbox" id="jack" value="Jack" v-model="checkedNames">
    <label for="jack">Jack</label>
    <input type="checkbox" id="john" value="John" v-model="checkedNames">
    <label for="john">John</label>
    <input type="checkbox" id="mike" value="Mike" v-model="checkedNames">
    <label for="mike">Mike</label>
    <br>
    <span>Checked names: {{ checkedNames }}</span>
</div>
<script>
    new Vue({
        el: '#example-checkboxs',
        data: {
            checkedNames: []
        }
    })
</script>
</body>
</html>
2. 使用v-for
动态选项.html
<!DOCTYPE html>
<html xmlns:v-bind="http://www.w3.org/1999/xhtml">
<head>
    <title></title>
    <meta charset="utf-8"/>
    <script src="https://cdn.jsdelivr.net/npm/vue/dist/vue.js"></script>
</head>
<body>
<div id="example-selected" class="demo">
    <select v-model="selected">
        <!--此处提交的value值被绑定到selected中,因此selected会实时改变-->
        <option v-for="option in options" v-bind:value="option.value">
            {{option.text}}
        </option>
    </select>
    <span>Checked names: {{ selected }}</span>
</div>
<script>
    new Vue({
        el: '#example-selected',
        data: {
            selected:'A',
            options:[
                {text:'one',value:'A'},
                {text:'two',value:'B'},
                {text:'three',value:'C'}
            ]
        }
    })
</script>
</body>
</html>

PS:常见组件
 1. <input>:单行文本
 2. <textarea>:多行文本
 3. <checkbox>:复选框
 4. <radio>:单选框
 5. <select>:选择列表
3.修饰符
- .lazy:在“change”时而非“input”时更新
<input v-model.lazy="msg">
- .number:自动将用户的输入值转为数值类型
<input v-model.number="age" type="number">
- .trim:自动过滤用户输入的首尾空白字符
<input v-model.trim="msg">
二、生命周期
1. 总体流程
开始创建——初始化数据——编译模板——挂载DOM——渲染、更新、渲染——卸载

2. 生命周期钩子
生命周期就是代码执行的过程,钩子就是在代码执行过程中的回调函数,也就是代码执行过程中所需的一些逻辑处理。
再简单来说就是,生命周期是一条路,而钩子是这条路上的几个固定坐标。
- beforeCreate:实例初始化之后,创建完成之前被调用
- Created:实例已经创建完成之后被调用
- beforeMount:在挂载之前被调用,调用相关的render函数
- Mounted:挂载到实例上之后调用该钩子
- beforeUpdate:数据更新时调用,在此可进一步更新状态,而且因为虚拟DOM,不会重新渲染
- Updated:更新完成后调用
- beforeDestroy:实例销毁前调用
- Destroy:实例销毁后调用
生命周期钩子的函数
<!DOCTYPE html>
<html xmlns:v-on="http://www.w3.org/1999/xhtml" xmlns:v-bind="http://www.w3.org/1999/xhtml">
<head>
    <title></title>
    <meta charset="utf-8"/>
    <script src="https://cdn.jsdelivr.net/npm/vue/dist/vue.js"></script>
</head>
<body>
<div id="app">
    <h1>{{message}}</h1>
</div>
</body>
<script>
    var vm = new Vue({
        el: '#app',
        data: {
            message: 'Vue的生命周期'
        },
        beforeCreate: function() {
            console.group('------beforeCreate创建前状态------');
            console.log("%c%s", "color:red" , "el     : " + this.$el);   //undefined
            console.log("%c%s", "color:red","data   : " + this.$data);  //undefined
            console.log("%c%s", "color:red","message: " + this.message)
        },
        created: function() {
            console.group('------created创建完毕状态------');
            console.log("%c%s", "color:red","el     : " + this.$el); //undefined
            console.log("%c%s", "color:red","data   : " + this.$data);//已被初始化
            console.log("%c%s","color:red","message: " + this.message);
            //已被初始化
        },
        beforeMount: function() {
            console.group('------beforeMount挂载前状态------');
            console.log("%c%s" ,"color:red","el     : " + (this.$el));//已被初始化
            console.log(this.$el);
            console.log("%c%s", "color:red","data   : " + this.$data);//已被初始化
            console.log("%c%s", "color:red","message: " + this.message); //已被初始化
        },
        mounted: function() {
            console.group('------mounted 挂载结束状态------');
            console.log("%c%s","color:red","el     : " + this.$el);//已被初始化
            console.log(this.$el);
            console.log("%c%s", "color:red","data   : " + this.$data);//已被初始化
            console.log("%c%s", "color:red","message: " + this.message);//已被初始化
        },
        beforeUpdate: function () {
            console.group('beforeUpdate 更新前状态===============》');
            console.log("%c%s", "color:red","el     : " + this.$el);
            console.log(this.$el);
            console.log("%c%s", "color:red","data   : " + this.$data);
            console.log("%c%s", "color:red","message: " + this.message);
        },
        updated: function () {
            console.group('updated 更新完成状态===============》');
            console.log("%c%s", "color:red","el     : " + this.$el);
            console.log(this.$el);
            console.log("%c%s", "color:red","data   : " + this.$data);
            console.log("%c%s", "color:red","message: " + this.message);
        },
        beforeDestroy: function () {
            console.group('beforeDestroy 销毁前状态===============》');
            console.log("%c%s", "color:red","el     : " + this.$el);
            console.log(this.$el);
            console.log("%c%s", "color:red","data   : " + this.$data);
            console.log("%c%s", "color:red","message: " + this.message);
        },
        destroyed: function () {
            console.group('destroyed 销毁完成状态===============》');
            console.log("%c%s", "color:red","el     : " + this.$el);
            console.log(this.$el);
            console.log("%c%s", "color:red","data   : " + this.$data);
            console.log("%c%s", "color:red","message: " + this.message)
        }
    })
</script>
</html>
注意各钩子函数间el、data、message的变化

-
在beforeCreate和created钩子函数之间的生命周期
首先进行了初始化事件,然后进行数据观测,即数据和属性进行绑定 -
在created钩子函数和beforeMount间的生命周期
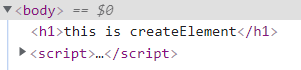
调用优先级:render函数>template选项>outer HTML
<!DOCTYPE html>
<html lang="en">
<head>
    <meta charset="UTF-8">
    <meta name="viewport" content="width=device-width, initial-scale=1.0">
    <meta http-equiv="X-UA-Compatible" content="ie=edge">
    <title>vue生命周期学习</title>
    <script src="https://cdn.bootcss.com/vue/2.4.2/vue.js"></script>
</head>
<body>
<div id="app">
    <!--html中修改的-->
    <h1>{{message + '这是在outer HTML中的'}}</h1>
</div>
</body>
<script>
    var vm = new Vue({
        el: '#app',
        render:function(createElement){
            return createElement('h1','this is createElement')
        },
        template: "<h1>{{message +'这是在template中的'}}</h1>", //在vue配置项中修改的
        data: {
            message: 'Vue的生命周期'
        }
    })
</script>
</html>
- beforeUpdate和Updated之间


 431
431


 被折叠的 条评论
为什么被折叠?
被折叠的 条评论
为什么被折叠?
 到【灌水乐园】发言


