


目录
概述
本文章记录了本人使用正点原子F407和H743两块开发板移植LVGL8.2的说明,移植步骤安装正点原子的B站教程。
移植步骤
1. 准备材料
1.下载LVGL源码
- LVGL 相关的源码和工程都是存放在 GitHub 远程仓库中,该 GitHub 远程仓库地址为https://github.com/lvgl/lvgl/,用户可以该仓库中下载 LVGL 图形库的源码,注意在仓库中选择8.2分支进行下载。(github比较慢,可以到gitee上面搜索下载)

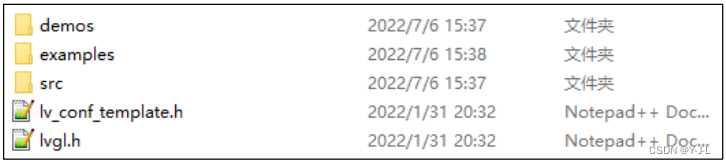
2.LVGL文件夹简介


3.正点原子触摸屏实验例程和定时器例程,以F4为例。
2.精简LVGL源码
2.将文件夹下的的 lv_conf_template.h 文件改名为 lv_conf.h,打开lv_conf.h修改条件编译如下:

3.examples 文件夹,仅保留其中的 porting 文件夹,其他的文件和 文件夹皆可删除,删减后如下图所示。
![]()
3.向工程添加文件
1》在工程 的 Middlewares 目录下新建 LVGL 文件夹,并在该文件夹下新建 GUI 文件夹和 GUI_APP 文件 夹,最后在 GUI 文件夹下新建 lvgl 文件夹。具体的文件夹结构如下图所示:

这里说明一点,我们的工程之所以采用这样的文件夹结构,主要是为了兼容 LVGL源码中 包含头文件的格式。对于初学者,这里建议按照此结构新建文件夹,否则有可能会遇到很多关 于头文件的报错。如果要运行LVGL的官方Demo需要把Demos复制到GUI_APP文件夹下。
2》复制 LVGL 源码到工程中
把精简后的 LVGL 源码(图 2.1.3 中的文件和文件夹)复制到《LVGL 例程 1 无操作系统移植》的 Middlewares/LVGL/GUI/lvgl 路径下,如下图所示:

3》添加LVGL相关分组并将对应的文件添加到工程对应的分组下。

4》添加头文件

5》添加定时器驱动,定时器配置为中断模式。
4.修改工程文件
为LVGL添加时基
1.在定时器源文件中添加#include "lvgl.h"头文件声明;
2.在定时器的中断回调函数 HAL_TIM_PeriodElapsedCallback 添加以下源码:
lv_tick_inc(x);
初始化定时器时,需保证:进入中断的时间间隔 = x 毫秒。比如设置了1ms的定时器中断,则添加程序为:lv_tick_inc(1);程序如下:
void HAL_TIM_PeriodElapsedCallback(TIM_HandleTypeDef *htim) {
 if (htim == (&g_timx_handle))
 {
 lv_tick_inc(1); /* lvgl 的 1ms 心跳 */
 } }
配置显示屏驱动
1》打开 Middlewares/lvgl/examples/porting 分组中的 lv_port_disp_template.c/h(显示屏相关) 将这 42个文件中的条件编译指令#if 0 都 修改成#if 1,如下源码所示:

2》修改 lv_port_disp_template.c 文件
/**
 * @file lv_port_disp_templ.c
 *
 */

 /*Copy this file as "lv_port_disp.c" and set this value to "1" to enable content*/
#if 1

/*********************
 *      INCLUDES
 *********************/
#include "lv_port_disp_template.h"
#include "../../lvgl.h"
#include "lcd.h"

/*********************
 *      DEFINES
 *********************/
#define MY_DISP_HOR_RES (800)   /* 屏幕宽度 */
#define MY_DISP_VER_RES (480)   /* 屏幕高度 */
/**********************
 *      TYPEDEFS
 **********************/

/**********************
 *  STATIC PROTOTYPES
 **********************/
static void disp_init(void);

static void disp_flush(lv_disp_drv_t * disp_drv, const lv_area_t * area, lv_color_t * color_p);
//static void gpu_fill(lv_disp_drv_t * disp_drv, lv_color_t * dest_buf, lv_coord_t dest_width,
//        const lv_area_t * fill_area, lv_color_t color);

/**********************
 *  STATIC VARIABLES
 **********************/

/**********************
 *      MACROS
 **********************/

/**********************
 *   GLOBAL FUNCTIONS
 **********************/
/**
 * @brief       LCD加速绘制函数
 * @param       (sx,sy),(ex,ey):填充矩形对角坐标,区域大小为:(ex - sx + 1) * (ey - sy + 1)
 * @param       color:要填充的颜色
 * @retval      无
 */
void lcd_draw_fast_rgb_color(int16_t sx, int16_t sy,int16_t ex, int16_t ey, uint16_t *color)
{
    uint16_t w = ex-sx+1;
    uint16_t h = ey-sy+1;

    LCD_Set_Window(sx, sy, w, h);
    uint32_t draw_size = w * h;
    LCD_WriteRAM_Prepare();

    for(uint32_t i = 0; i < draw_size; i++)
    {
        LCD_WriteRAM(color[i]);
    }
}


void lv_port_disp_init(void)
{
    /*-------------------------
     * Initialize your display
     * -----------------------*/
    disp_init();

    /*-----------------------------
     * Create a buffer for drawing
     *----------------------------*/

    /**
     * LVGL requires a buffer where it internally draws the widgets.
     * Later this buffer will passed to your display driver's `flush_cb` to copy its content to your display.
     * The buffer has to be greater than 1 display row
     *
     * There are 3 buffering configurations:
     * 1. Create ONE buffer:
     *      LVGL will draw the display's content here and writes it to your display
     *
     * 2. Create TWO buffer:
     *      LVGL will draw the display's content to a buffer and writes it your display.
     *      You should use DMA to write the buffer's content to the display.
     *      It will enable LVGL to draw the next part of the screen to the other buffer while
     *      the data is being sent form the first buffer. It makes rendering and flushing parallel.
     *
     * 3. Double buffering
     *      Set 2 screens sized buffers and set disp_drv.full_refresh = 1.
     *      This way LVGL will always provide the whole rendered screen in `flush_cb`
     *      and you only need to change the frame buffer's address.
     */

    /* Example for 1) */
    static lv_disp_draw_buf_t draw_buf_dsc_1;
    static lv_color_t buf_1[MY_DISP_HOR_RES * 10];                          /*A buffer for 10 rows*/
    lv_disp_draw_buf_init(&draw_buf_dsc_1, buf_1, NULL, MY_DISP_HOR_RES * 10);   /*Initialize the display buffer*/

    /* Example for 2) */
//    static lv_disp_draw_buf_t draw_buf_dsc_2;
//    static lv_color_t buf_2_1[MY_DISP_HOR_RES * 10];                        /*A buffer for 10 rows*/
//    static lv_color_t buf_2_2[MY_DISP_HOR_RES * 10];                        /*An other buffer for 10 rows*/
//    lv_disp_draw_buf_init(&draw_buf_dsc_2, buf_2_1, buf_2_2, MY_DISP_HOR_RES * 10);   /*Initialize the display buffer*/

//    /* Example for 3) also set disp_drv.full_refresh = 1 below*/
//    static lv_disp_draw_buf_t draw_buf_dsc_3;
//    static lv_color_t buf_3_1[MY_DISP_HOR_RES * MY_DISP_VER_RES];            /*A screen sized buffer*/
//    static lv_color_t buf_3_2[MY_DISP_HOR_RES * MY_DISP_VER_RES];            /*Another screen sized buffer*/
//    lv_disp_draw_buf_init(&draw_buf_dsc_3, buf_3_1, buf_3_2, MY_DISP_VER_RES * LV_VER_RES_MAX);   /*Initialize the display buffer*/

    /*-----------------------------------
     * Register the display in LVGL
     *----------------------------------*/

    static lv_disp_drv_t disp_drv;                         /*Descriptor of a display driver*/
    lv_disp_drv_init(&disp_drv);                    /*Basic initialization*/

    /*Set up the functions to access to your display*/

    /*Set the resolution of the display*/
/*修改1:修改屏幕参数,即分辨率######################*/
    disp_drv.hor_res = lcddev.width;
    disp_drv.ver_res = lcddev.height;

    /*Used to copy the buffer's content to the display*/
    disp_drv.flush_cb = disp_flush;

    /*Set a display buffer*/
    disp_drv.draw_buf = &draw_buf_dsc_1;

    /*Required for Example 3)*/
    //disp_drv.full_refresh = 1

    /* Fill a memory array with a color if you have GPU.
     * Note that, in lv_conf.h you can enable GPUs that has built-in support in LVGL.
     * But if you have a different GPU you can use with this callback.*/
    //disp_drv.gpu_fill_cb = gpu_fill;

    /*Finally register the driver*/
    lv_disp_drv_register(&disp_drv);
}

/**********************
 *   STATIC FUNCTIONS
 **********************/

/*Initialize your display and the required peripherals.*/
static void disp_init(void)
{
    /*You code here*/
/*修改2:添加LCD初始化函数和横竖屏设置###############################*/
    LCD_Init();         /* 初始化LCD */
    LCD_Display_Dir(1); /* 设置横屏 */
}

/*Flush the content of the internal buffer the specific area on the display
 *You can use DMA or any hardware acceleration to do this operation in the background but
 *'lv_disp_flush_ready()' has to be called when finished.*/
static void disp_flush(lv_disp_drv_t * disp_drv, const lv_area_t * area, lv_color_t * color_p)
{
    /*The most simple case (but also the slowest) to put all pixels to the screen one-by-one*/

//    /* 在指定区域内填充指定颜色块 */
/*修改3:添加打点函数###########################*/
    LCD_Color_Fill(area->x1, area->y1, area->x2, area->y2, (uint16_t *)color_p);
//    lcd_draw_fast_rgb_color(area->x1,area->y1,area->x2,area->y2,(uint16_t*)color_p);

    /*IMPORTANT!!!
     *Inform the graphics library that you are ready with the flushing*/
    lv_disp_flush_ready(disp_drv);
}

/*OPTIONAL: GPU INTERFACE*/

/*If your MCU has hardware accelerator (GPU) then you can use it to fill a memory with a color*/
//static void gpu_fill(lv_disp_drv_t * disp_drv, lv_color_t * dest_buf, lv_coord_t dest_width,
//                    const lv_area_t * fill_area, lv_color_t color)
//{
//    /*It's an example code which should be done by your GPU*/
//    int32_t x, y;
//    dest_buf += dest_width * fill_area->y1; /*Go to the first line*/
//
//    for(y = fill_area->y1; y <= fill_area->y2; y++) {
//        for(x = fill_area->x1; x <= fill_area->x2; x++) {
//            dest_buf[x] = color;
//        }
//        dest_buf+=dest_width;    /*Go to the next line*/
//    }
//}


#else /*Enable this file at the top*/

/*This dummy typedef exists purely to silence -Wpedantic.*/
typedef int keep_pedantic_happy;
#endif

配置触摸驱动
/**
 * @file lv_port_indev_templ.c
 *
 */

 /*Copy this file as "lv_port_indev.c" and set this value to "1" to enable content*/
#if 1

/*********************
 *      INCLUDES
 *********************/
#include "lv_port_indev_template.h"
#include "../../lvgl.h"
#include "touch.h"


/*********************
 *      DEFINES
 *********************/

/**********************
 *      TYPEDEFS
 **********************/

/**********************
 *  STATIC PROTOTYPES
 **********************/

static void touchpad_init(void);
static void touchpad_read(lv_indev_drv_t * indev_drv, lv_indev_data_t * data);
static bool touchpad_is_pressed(void);
static void touchpad_get_xy(lv_coord_t * x, lv_coord_t * y);


/**********************
 *  STATIC VARIABLES
 **********************/
lv_indev_t * indev_touchpad;

static int32_t encoder_diff;
static lv_indev_state_t encoder_state;

/**********************
 *      MACROS
 **********************/

/**********************
 *   GLOBAL FUNCTIONS
 **********************/

void lv_port_indev_init(void)
{
    /**
     * Here you will find example implementation of input devices supported by LittelvGL:
     *  - Touchpad
     *  - Mouse (with cursor support)
     *  - Keypad (supports GUI usage only with key)
     *  - Encoder (supports GUI usage only with: left, right, push)
     *  - Button (external buttons to press points on the screen)
     *
     *  The `..._read()` function are only examples.
     *  You should shape them according to your hardware
     */

    static lv_indev_drv_t indev_drv;

    /*------------------
     * Touchpad
     * -----------------*/

    /*Initialize your touchpad if you have*/
    touchpad_init();

    /*Register a touchpad input device*/
    lv_indev_drv_init(&indev_drv);
    indev_drv.type = LV_INDEV_TYPE_POINTER;
    indev_drv.read_cb = touchpad_read;
    indev_touchpad = lv_indev_drv_register(&indev_drv);

}

/**********************
 *   STATIC FUNCTIONS
 **********************/

/*------------------
 * Touchpad
 * -----------------*/

/*Initialize your touchpad*/
static void touchpad_init(void)
{
    /*Your code comes here*/
/*修改1:添加触摸屏初始化函数,如果是电阻屏还可以添加校准相关内容*/
	tp_dev.init();
}

/*Will be called by the library to read the touchpad*/
static void touchpad_read(lv_indev_drv_t * indev_drv, lv_indev_data_t * data)
{
    static lv_coord_t last_x = 0;
    static lv_coord_t last_y = 0;

    /*Save the pressed coordinates and the state*/
    if(touchpad_is_pressed()) {
        touchpad_get_xy(&last_x, &last_y);
        data->state = LV_INDEV_STATE_PR;
    } else {
        data->state = LV_INDEV_STATE_REL;
    }

    /*Set the last pressed coordinates*/
    data->point.x = last_x;
    data->point.y = last_y;
}

/*Return true is the touchpad is pressed*/
static bool touchpad_is_pressed(void)
{
    /*Your code comes here*/
/*修改2:添加触摸面板扫描函数以查询是否有触摸点按下**/
	tp_dev.scan(0);
	if(tp_dev.sta & TP_PRES_DOWN){
		return true;
	}
    return false;
}

/*Get the x and y coordinates if the touchpad is pressed*/
static void touchpad_get_xy(lv_coord_t * x, lv_coord_t * y)
{
    /*Your code comes here*/
/*修改3:添加获取触摸坐标的程序*/
    (*x) = tp_dev.x[0];
    (*y) = tp_dev.y[0];
}

#else /*Enable this file at the top*/

/*This dummy typedef exists purely to silence -Wpedantic.*/
typedef int keep_pedantic_happy;
#endif
编写测试代码

添加的简单测试代码如下:
#include "lvgl.h"
#include "lv_port_indev_template.h"
#include "lv_port_disp_template.h"
int main(void) {
 /* 系统其他硬件初始化信息,这里忽略 */
 btim_timx_int_init(10-1,7200-1); /* 根据自己的开发板 MCU 定义定时器周期为 1ms */
 lv_init(); /* lvgl 系统初始化 */
 lv_port_disp_init(); /* lvgl 显示接口初始化,放在 lv_init()的后面 */
 lv_port_indev_init(); /* lvgl 输入接口初始化,放在 lv_init()的后面 */
 lv_obj_t *label = lv_label_create(lv_scr_act());
 lv_label_set_text(label,"Hello Alientek!!!");
 lv_obj_center(label);
 while(1)
 {
 lv_timer_handler(); /* LVGL 管理函数相当于 RTOS 触发任务调度函数 */
 delay_ms(5);
 }
或者使用官方的测试Demo,使用方法如下:

main函数如下:
#include "sys.h"
#include "delay.h"
#include "usart.h"
#include "led.h"
#include "key.h"
#include "lcd.h"
#include "usmart.h"
#include "touch.h"
#include "timer.h"

/* LVGL */
#include "lvgl.h"
#include "lv_port_indev_template.h"
#include "lv_port_disp_template.h"
#include "lv_demo_stress.h"

int main(void)
{

    HAL_Init();                   	//初始化HAL库
    Stm32_Clock_Init(336,8,2,7);  	//设置时钟,168Mhz
	delay_init(168);               	//初始化延时函数
	uart_init(115200);             	//初始化USART
	usmart_dev.init(84); 		    //初始化USMART
	LED_Init();						//初始化LED
	KEY_Init();						//初始化KEY
 	LCD_Init();           			//初始化LCD
	tp_dev.init();				    //触摸屏初始化
	TIM3_Init(10-1,8400-1);    /* 初始化定时器 */


    lv_init();                          /* lvgl系统初始化 */
    lv_port_disp_init();                /* lvgl显示接口初始化,放在lv_init()的后面 */
    //lv_port_indev_init();               /* lvgl输入接口初始化,放在lv_init()的后面 */

    lv_demo_stress();                   /* 官方例程测试 */

    while (1)
    {
        lv_task_handler();
        delay_ms(5);
    }

}
问题记录(重点)
分配的堆栈空间太小了(F407和H743共同的问题)
在用正点原子的H743做LVGL的移植的时候,在B站上看的正点原子的视频,一步步按照步骤移植,在显示简单的静态控件的时候(一个switch开关)可以正常显示和触屏,但是按照教程跑LVGL官方的压力测试Demo(stress)的时候却不能正常运行,屏幕花屏卡死。在正点原子论坛逛了很久,有老哥说是打点函数不对,但是我仔细看了没什么问题,后面发现正点原子有F407的LVGL程序,然后我重新用F407的板子按教程重新移植一遍,发现还是不行,一运行Demo就卡死,经过半天的冥思苦想不多尝试,我发现是程序开的堆栈空间太小了,用触摸例程那个程序默认设置的堆栈大小是【Stack_Size EQU 0x00000400】、【Heap_Size EQU 0x00000200】,这个内存太小了,运行官方Demo需要的堆栈空间比较大,而默认分配的堆栈空间比较小所以发生了堆栈溢出,堆栈溢出后程序会进入到硬件错误中断HardFault_Handler()程序卡死,我听过Debug调试发现确实是进入了硬件错误中断,我把堆栈空间加大后(设置为【Stack_Size EQU 0x00000800】【Heap_Size EQU 0x00000800】)程序动画就正常运行了,但是动画是花屏运行的。
屏幕花屏:

程序所占ROM和RAM大小
程序的堆栈大小和编译后的RW-data、ZI-data的大小的关系:
程序的堆栈来自于RAM,在编译程序时,分配给程序的可写数据区(RW-data)和未初始化数据区(ZI-data)的大小由程序中全局变量和静态变量所使用的空间大小决定。程序的堆栈大小则取决于程序在运行时需要使用的函数调用层数和局部变量的使用空间。
在编写启动文件时,需要定义堆栈和RW-data、ZI-data的初始大小和结束地址。这是因为,编译器在编译程序时会为这些数据段预留一定的空间,而堆栈的大小和函数调用的深度以及局部变量的使用空间是在程序运行时动态分配的。因此,在启动文件中需要为堆栈和数据段预留一定的空间,以避免程序运行时发生堆栈溢出和数据段越界的问题。
总之,程序的堆栈大小和RW-data、ZI-data的大小都是需要在启动文件中进行定义的,以保证程序的正常运行。
关于如何查看程序所需的堆栈空间大小的方法可以参考:

程序优化等级对程序运行的影响(优化等级对F407没影响对H743有影响)
对堆栈大小设置完后运行stress Demo,Demo的动画是可以运行了,但是动画是糊的(花的),所以接着找问题,我将自己写的H743程序与正点原子论坛一位台湾老哥的程序进行对比,然后我把LCD的初始化函数LCD_Init();放到main()函数里,不放到LVGL的disp_init()函数里(即在main函数中进行LCD初始化,不在LVGL中进行),我发现程序可以正常运行了,不会卡死动画流畅刷新没有糊,我将LCD_Init()函数放到lv_port_disp_init()函数的开头注释掉disp_init函数(取代disp_init函数进行初始化)我发现动画运行效果还是不行,然后我重新写个函数包含lv_port_disp_init()和LCD_Init()函数,程序又可以正常运行了,动画也运行正常,于是我开始怀疑keil编译器有问题,程序一开始使用的程序优化等级是-O0,然后我修改了一下优化等级为-O1,程序奇迹般正常运行动画也正常,我修改成其他优化等级,动画都正常运行了,唯独-O0不行,至此H743的移植就大功告成了。
发现优化等级对程序的影响后我对F407的移植程序做了测试,发现F407在-O0下是没影响的,程序可以正常运行,优化等级对程序的影响只在H743有。

修改优化等级:

各优化等级的差别可以参考:
https://blog.csdn.net/weixin_37787043/article/details/108759503
LVGL打点函数的几种方式(非LTDC、RGB屏)
打点函数在lv_port_disp_template.c的disp_flush()函数中。
第一种方法:是直接向 lvgl 提供绘制单个像素的屏幕驱动接口,好处是易懂,但是刷图缓慢。

第二种方法:是向 lvgl 提供开辟一个屏幕缓存空间的接口,填充像素数据接口,这样好处是刷图快速,刷图帧率显著提升。图中 ili9341_display_region() 这个函数就是用于告诉屏幕需要以那个坐标为起点开辟一个多大的显示区域,然后往这个区域填充数量相等的颜色数据即可,相比的一种方法,第二种方法只需发送一次坐标位置而第一种方法需要每个点都发生坐标位置。

第三种方法:与第二种方法相同,主要做法为将官方的双层
for循环简化为单层for循环,这里就需要通过 lvgl 提供的坐标计算出需要刷新的宽和高再通过宽和高计算出总共需要刷新的像素数

运行官方Demo的方法:

工程下载:
已经移植好的LVGL8.2程序,无操作系统,运行官方Demo:
H743:
https://download.csdn.net/download/qq_44675660/87777721
F407:


 2062
2062

 被折叠的 条评论
为什么被折叠?
被折叠的 条评论
为什么被折叠?
 到【灌水乐园】发言


