


1.导入依赖
			<dependency>
				<groupid>io.springfox</groupid>
				<artifactId>springfox-swagger2</artifactId>
				<version>2.2.2</version>
			</dependency>
			<dependency>
				<groupid>io.springfox</groupid>
				<artifactId>springfox-swagger-ui</artifactId>
				<version>2.2.2</version>
			</dependency>
2.启动类加注解
@EnableSwagger2
3.编写config类
@Configuration
@EnableSwagger2
public class SwaggerConfig {
@Bean
public Docket createRestApi() {
    return new Docket(DocumentationType.SWAGGER_2)
            .apiInfo(apiInfo()).
                    select().
                    apis(RequestHandlerSelectors.basePackage(“com.xxx.xxx.controller")).//需要注解类的父目录
                    paths(PathSelectors.any()).
                    build();
}

private ApiInfo apiInfo() {
    return new ApiInfoBuilder().title("自定义标题")
            .description("自定义描述").
                    termsOfServiceUrl("http://www.java-mindmap.com")
            .version("1.0")
            .build();
}
}
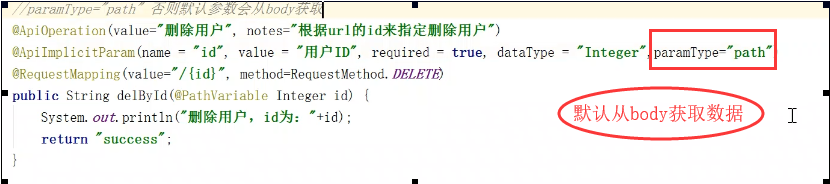
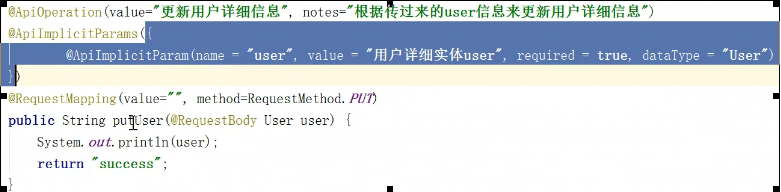
4.接口上加注解(适用范围:返回数据非界面 @Responsebody(单方法上) @RestCotroller(类上))
1.单参数
2.多参数
5.查看接口:http:localhost:8080/swagger-ui.html(固定)


 485
485


 被折叠的 条评论
为什么被折叠?
被折叠的 条评论
为什么被折叠?
 到【灌水乐园】发言


