


1.无状态登录原理
1.1.什么是有状态?
有状态服务,即服务端需要记录每次会话的客户端信息,从而识别客户端身份,根据用户身份进行请求的处理,典型的设计如tomcat中的session。
例如登录:用户登录后,我们把登录者的信息保存在服务端session中,并且给用户一个cookie值,记录对应的session。然后下次请求,用户携带cookie值来,我们就能识别到对应session,从而找到用户的信息。
缺点是什么?
- 服务端保存大量数据,增加服务端压力
- 服务端保存用户状态,无法进行水平扩展
- 客户端请求依赖服务端,多次请求必须访问同一台服务器
1.2.什么是无状态
微服务集群中的每个服务,对外提供的都是Rest风格的接口。而Rest风格的一个最重要的规范就是:服务的无状态性,即:
- 服务端不保存任何客户端请求者信息
- 客户端的每次请求必须具备自描述信息,通过这些信息识别客户端身份
带来的好处是什么呢?
- 客户端请求不依赖服务端的信息,任何多次请求不需要必须访问到同一台服务
- 服务端的集群和状态对客户端透明
- 服务端可以任意的迁移和伸缩
- 减小服务端存储压力
1.3.如何实现无状态
无状态登录的流程:
- 当客户端第一次请求服务时,服务端对用户进行信息认证(登录)
- 认证通过,将用户信息进行加密形成token,返回给客户端,作为登录凭证
- 以后每次请求,客户端都携带认证的token
- 服务的对token进行解密,判断是否有效。
流程图:

整个登录过程中,最关键的点是什么?
token的安全性
token是识别客户端身份的唯一标示,如果加密不够严密,被人伪造那就完蛋了。
采用何种方式加密才是安全可靠的呢?
我们将采用JWT + RSA非对称加密
1.4.JWT
1.4.1.简介
JWT,全称是Json Web Token, 是JSON风格轻量级的授权和身份认证规范,可实现无状态、分布式的Web应用授权;官网:https://jwt.io

GitHub上jwt的java客户端:https://github.com/jwtk/jjwt
1.4.2.数据格式
JWT包含三部分数据:
-
Header:头部,通常头部有两部分信息:
- 声明类型,这里是JWT
- 加密算法,自定义
我们会对头部进行base64加密(可解密),得到第一部分数据
-
Payload:载荷,就是有效数据,一般包含下面信息:
- 用户身份信息(注意,这里因为采用base64加密,可解密,因此不要存放敏感信息)
- 注册声明:如token的签发时间,过期时间,签发人等
这部分也会采用base64加密,得到第二部分数据
-
Signature:签名,是整个数据的认证信息。一般根据前两步的数据,再加上服务的的密钥(secret)(不要泄漏,最好周期性更换),通过加密算法生成。用于验证整个数据完整和可靠性
生成的数据格式:

可以看到分为3段,每段就是上面的一部分数据
1.4.3.JWT交互流程
流程图:

步骤翻译:
- 1、用户登录
- 2、服务的认证(验证用户名密码),通过后根据secret生成token
- 3、将生成的token返回给用户
- 4、用户每次请求携带token
- 5、服务端利用公钥解读jwt签名,判断签名有效后,从Payload中获取用户信息
- 6、处理请求,返回响应结果
因为JWT签发的token中已经包含了用户的身份信息,并且每次请求都会携带,这样服务的就无需保存用户信息,甚至无需去数据库查询,完全符合了Rest的无状态规范。
1.4.4.非对称加密
加密技术是对信息进行编码和解码的技术,编码是把原来可读信息(又称明文)译成代码形式(又称密文),其逆过程就是解码(解密),加密技术的要点是加密算法,加密算法可以分为三类:
- 对称加密,如AES
- 基本原理:将明文分成N个组,然后使用密钥对各个组进行加密,形成各自的密文,最后把所有的分组密文进行合并,形成最终的密文。
- 优势:算法公开、计算量小、加密速度快、加密效率高
- 缺陷:双方都使用同样密钥,安全性得不到保证
- 非对称加密,如RSA
- 基本原理:同时生成两把密钥:私钥和公钥,私钥隐秘保存,公钥可以下发给信任客户端
- 私钥加密,持有私钥或公钥才可以解密
- 公钥加密,持有私钥才可解密
- 优点:安全,难以破解
- 缺点:算法比较耗时
- 基本原理:同时生成两把密钥:私钥和公钥,私钥隐秘保存,公钥可以下发给信任客户端
- 不可逆加密,如MD5,SHA
- 基本原理:加密过程中不需要使用密钥,输入明文后由系统直接经过加密算法处理成密文,这种加密后的数据是无法被解密的,无法根据密文推算出明文。
RSA算法历史:
1977年,三位数学家Rivest、Shamir 和 Adleman 设计了一种算法,可以实现非对称加密。这种算法用他们三个人的名字缩写:RSA
1.5.结合Zuul的鉴权流程
我们逐步演进系统架构设计。需要注意的是:secret是签名的关键,因此一定要保密,我们放到鉴权中心保存,其它任何服务中都不能获取secret。
1.5.1.没有RSA加密时
在微服务架构中,我们可以把服务的鉴权操作放到网关中,将未通过鉴权的请求直接拦截,如图:

- 1、用户请求登录
- 2、Zuul将请求转发到授权中心,请求授权
- 3、授权中心校验完成,颁发JWT凭证
- 4、客户端请求其它功能,携带JWT
- 5、Zuul将jwt交给授权中心校验,通过后放行
- 6、用户请求到达微服务
- 7、微服务将jwt交给鉴权中心,鉴权同时解析用户信息
- 8、鉴权中心返回用户数据给微服务
- 9、微服务处理请求,返回响应
发现什么问题了?
每次鉴权都需要访问鉴权中心,系统间的网络请求频率过高,效率略差,鉴权中心的压力较大。
1.5.2.结合RSA的鉴权
直接看图:

- 我们首先利用RSA生成公钥和私钥。私钥保存在授权中心,公钥保存在Zuul和各个微服务
- 用户请求登录
- 授权中心校验,通过后用私钥对JWT进行签名加密
- 返回jwt给用户
- 用户携带JWT访问
- Zuul直接通过公钥解密JWT,进行验证,验证通过则放行
- 请求到达微服务,微服务直接用公钥解析JWT,获取用户信息,无需访问授权中心
服务暴露的问题?
避免被暴露
jwt服务间鉴权
2.授权中心
2.1.创建授权中心
授权中心的主要职责:
- 用户鉴权:
- 接收用户的登录请求,通过用户中心的接口进行校验,通过后生成JWT
- 使用私钥生成JWT并返回
- 服务鉴权:微服务间的调用不经过Zuul,会有风险,需要鉴权中心进行认证
- 原理与用户鉴权类似,但逻辑稍微复杂一些(此处我们不做实现)
因为生成jwt,解析jwt这样的行为以后在其它微服务中也会用到,因此我们会抽取成工具。我们把鉴权中心进行聚合,一个工具module,一个提供服务的module
2.1.1.创建父module
我们先创建父module,名称为:ly-auth-center


修改pom.xml文件秀项目打包方式

<packaging>pom</packaging>
2.1.2.通用module
创建module
然后是授权服务的通用模块:ly-auth-common:


2.1.3.授权服务
创建module


完善pom.xml,引入依赖

<?xml version="1.0" encoding="UTF-8"?>
<project xmlns="http://maven.apache.org/POM/4.0.0"
         xmlns:xsi="http://www.w3.org/2001/XMLSchema-instance"
         xsi:schemaLocation="http://maven.apache.org/POM/4.0.0 http://maven.apache.org/xsd/maven-4.0.0.xsd">
    <parent>
        <artifactId>ly-auth-center</artifactId>
        <groupId>com.leyou.service</groupId>
        <version>1.0.0-SNAPSHOT</version>
    </parent>
    <modelVersion>4.0.0</modelVersion>

    <artifactId>ly-auth-service</artifactId>
    <dependencies>
        <dependency>
            <groupId>org.springframework.cloud</groupId>
            <artifactId>spring-cloud-starter-netflix-eureka-client</artifactId>
        </dependency>
        <dependency>
            <groupId>org.springframework.boot</groupId>
            <artifactId>spring-boot-starter-web</artifactId>
        </dependency>
        <dependency>
            <groupId>com.leyou.service</groupId>
            <artifactId>ly-auth-common</artifactId>
            <version>${leyou.latest.version}</version>
        </dependency>
        <dependency>
            <groupId>org.springframework.cloud</groupId>
            <artifactId>spring-cloud-starter-openfeign</artifactId>
        </dependency>
    </dependencies>

</project>
创建启动类:


@SpringBootApplication
@EnableDiscoveryClient
@EnableFeignClients
public class LyAuthApplication {
    public static void main(String[] args) {
        SpringApplication.run(LyAuthApplication.class, args);
    }
}
配置application.yml


server:
  port: 8089
spring:
  application:
    name: auth-service
eureka:
  client:
    service-url:
      defaultZone: http://127.0.0.1:10086/eureka
    registry-fetch-interval-seconds: 10
  instance:
    lease-renewal-interval-in-seconds: 5 # 每隔5秒发送一次心跳
    lease-expiration-duration-in-seconds: 10 # 10秒不发送就过期
    prefer-ip-address: true
    ip-address: 127.0.0.1
    instance-id: ${spring.application.name}:${server.port}
修改路由:

zuul:
  prefix: /api # 添加路由前缀
  routes:
    item-service: /item/**
    search-service: /search/**
    user-service: /user/**
    auth-service: /auth/**
2.2.编写JWT工具
我们在ly-auth-coomon中编写一些通用的工具类:

2.2.1.RSA工具类:

public class RsaUtils {
    /**
     * 从文件中读取公钥
     *
     * @param filename 公钥保存路径,相对于classpath
     * @return 公钥对象
     * @throws Exception
     */
    public static PublicKey getPublicKey(String filename) throws Exception {
        byte[] bytes = readFile(filename);
        return getPublicKey(bytes);
    }

    /**
     * 从文件中读取密钥
     *
     * @param filename 私钥保存路径,相对于classpath
     * @return 私钥对象
     * @throws Exception
     */
    public static PrivateKey getPrivateKey(String filename) throws Exception {
        byte[] bytes = readFile(filename);
        return getPrivateKey(bytes);
    }

    /**
     * 获取公钥
     *
     * @param bytes 公钥的字节形式
     * @return
     * @throws Exception
     */
    public static PublicKey getPublicKey(byte[] bytes) throws Exception {
        X509EncodedKeySpec spec = new X509EncodedKeySpec(bytes);
        KeyFactory factory = KeyFactory.getInstance("RSA");
        return factory.generatePublic(spec);
    }

    /**
     * 获取密钥
     *
     * @param bytes 私钥的字节形式
     * @return
     * @throws Exception
     */
    public static PrivateKey getPrivateKey(byte[] bytes) throws Exception {
        PKCS8EncodedKeySpec spec = new PKCS8EncodedKeySpec(bytes);
        KeyFactory factory = KeyFactory.getInstance("RSA");
        return factory.generatePrivate(spec);
    }

    /**
     * 根据密文,生存rsa公钥和私钥,并写入指定文件
     *
     * @param publicKeyFilename  公钥文件路径
     * @param privateKeyFilename 私钥文件路径
     * @param secret             生成密钥的密文
     * @throws IOException
     * @throws NoSuchAlgorithmException
     */
    public static void generateKey(String publicKeyFilename, String privateKeyFilename, String secret) throws Exception {
        KeyPairGenerator keyPairGenerator = KeyPairGenerator.getInstance("RSA");
        SecureRandom secureRandom = new SecureRandom(secret.getBytes());
        keyPairGenerator.initialize(1024, secureRandom);
        KeyPair keyPair = keyPairGenerator.genKeyPair();
        // 获取公钥并写出
        byte[] publicKeyBytes = keyPair.getPublic().getEncoded();
        writeFile(publicKeyFilename, publicKeyBytes);
        // 获取私钥并写出
        byte[] privateKeyBytes = keyPair.getPrivate().getEncoded();
        writeFile(privateKeyFilename, privateKeyBytes);
    }

    private static byte[] readFile(String fileName) throws Exception {
        return Files.readAllBytes(new File(fileName).toPath());
    }

    private static void writeFile(String destPath, byte[] bytes) throws IOException {
        File dest = new File(destPath);
        if (!dest.exists()) {
            dest.createNewFile();
        }
        Files.write(dest.toPath(), bytes);
    }
}
2.2.2.常量类
其中定义了jwt中的payload的常用key


public abstract class JwtConstans {
    public static final String JWT_KEY_ID = "id";
    public static final String JWT_KEY_USER_NAME = "username";
}
2.2.3.对象工具类:
从jwt解析得到的数据是Object类型,转换为具体类型可能出现空指针,这个工具类进行了一些转换:


public class ObjectUtils {

    public static String toString(Object obj) {
        if (obj == null) {
            return null;
        }
        return obj.toString();
    }

    public static Long toLong(Object obj) {
        if (obj == null) {
            return 0L;
        }
        if (obj instanceof Double || obj instanceof Float) {
            return Long.valueOf(StringUtils.substringBefore(obj.toString(), "."));
        }
        if (obj instanceof Number) {
            return Long.valueOf(obj.toString());
        }
        if (obj instanceof String) {
            return Long.valueOf(obj.toString());
        } else {
            return 0L;
        }
    }

    public static Integer toInt(Object obj) {
        return toLong(obj).intValue();
    }
}
2.2.4.载荷:UserInfo


public class UserInfo {

    private Long id;

    private String username;

    public UserInfo() {
    }

    public UserInfo(Long id, String username) {
        this.id = id;
        this.username = username;
    }

    public Long getId() {
        return this.id;
    }

    public void setId(Long id) {
        this.id = id;
    }

    public String getUsername() {
        return username;
    }

    public void setUsername(String username) {
        this.username = username;
    }
}
2.2.5.JWT工具类
我们需要先在ly-auth-common中引入JWT依赖:

<dependencies>
    <dependency>
        <groupId>io.jsonwebtoken</groupId>
        <artifactId>jjwt</artifactId>
        <version>0.9.0</version>
    </dependency>
    <dependency>
        <groupId>joda-time</groupId>
        <artifactId>joda-time</artifactId>
    </dependency>
    <dependency>
        <groupId>org.springframework.boot</groupId>
        <artifactId>spring-boot-starter-test</artifactId>
    </dependency>
</dependencies>


代码:
package com.leyou.auth.utils;

import com.leyou.auth.entiy.UserInfo;
import io.jsonwebtoken.Claims;
import io.jsonwebtoken.Jws;
import io.jsonwebtoken.Jwts;
import io.jsonwebtoken.SignatureAlgorithm;
import org.joda.time.DateTime;

import java.security.PrivateKey;
import java.security.PublicKey;

public class JwtUtils {
    /**
     * 生成Token
     * @param userInfo
     * @param privateKey
     * @param expireMinutes
     * @return
     */
    public static String generateToken(UserInfo userInfo, PrivateKey privateKey, int expireMinutes) {
        return Jwts.builder()
                .claim(JwtConstants.JWT_KEY_ID, userInfo.getId())
                .claim(JwtConstants.JWT_KEY_USER_NAME, userInfo.getUsername())
                .setExpiration(DateTime.now().plusMinutes(expireMinutes).toDate())
                .signWith(SignatureAlgorithm.RS256, privateKey)
                .compact();
    }

    /**
     * 生成Token
     * @param userInfo
     * @param privateKey
     * @param expireMinutes
     * @return
     * @throws Exception
     */
    public static String generateToken(UserInfo userInfo, byte[] privateKey, int expireMinutes) throws Exception {
        return Jwts.builder()
                .claim(JwtConstants.JWT_KEY_ID, userInfo.getId())
                .claim(JwtConstants.JWT_KEY_USER_NAME, userInfo.getUsername())
                .setExpiration(DateTime.now().plusMinutes(expireMinutes).toDate())
                .signWith(SignatureAlgorithm.ES256, RsaUtils.getPrivateKey(privateKey))
                .compact();
    }

    /**
     * 公钥解析Token
     * @param publicKey
     * @param token
     * @return
     */
    public static Jws<Claims> parseToken(PublicKey publicKey, String token) {
        return Jwts.parser().setSigningKey(publicKey).parseClaimsJws(token);
    }


    /**
     * 公钥解析Token
     * @param publicKey
     * @param token
     * @return
     * @throws Exception
     */
    public static Jws<Claims> parseToken(byte[] publicKey, String token) throws Exception {
        return Jwts.parser().setSigningKey(RsaUtils.getPublicKey(publicKey)).parseClaimsJws(token);
    }


    /**
     * 从Token中获取用户信息(使用公钥解析)
     * @param publicKey
     * @param token
     * @return
     */
    public static UserInfo getUserInfo(PublicKey publicKey, String token) {
        Jws<Claims> claimsJws = parseToken(publicKey, token);
        Claims body = claimsJws.getBody();
        return new UserInfo(
                ObjectUtils.toLong(body.get(JwtConstants.JWT_KEY_ID)),
                ObjectUtils.toString(body.get(JwtConstants.JWT_KEY_USER_NAME))
        );
    }

    /**
     * 从Token中获取用户信息(使用公钥解析)
     * @param publicKey
     * @param token
     * @return
     * @throws Exception
     */
    public static UserInfo getUserInfo(byte[] publicKey, String token) throws Exception {
        Jws<Claims> claimsJws = parseToken(publicKey, token);
        Claims body = claimsJws.getBody();
        return new UserInfo(
                ObjectUtils.toLong(body.get(JwtConstants.JWT_KEY_ID)),
                ObjectUtils.toString(body.get(JwtConstants.JWT_KEY_USER_NAME))
        );
    }

}
2.2.6.测试
我们在ly-auth-common中编写测试类:


package com.leyou.auth;

import com.leyou.auth.utils.RsaUtils;
import org.junit.Test;

import java.security.PrivateKey;
import java.security.PublicKey;

public class JwtTest {

    //生成公匙位置
    private static final String pubKeyPath = "D:/AProgramWorkSpace/idea/test/rsa.pub";


    //生成私匙位置
    private static final String priKeyPath = "D:/AProgramWorkSpace/idea/test/rsa.pri";

    private PublicKey publicKey;

    private PrivateKey privateKey;

    @Test
    public void testRes() throws Exception{
        RsaUtils.generateKey(pubKeyPath, priKeyPath, "234");
    }

}
运行测试


生成token

    @Before //@Before方法生成一个对象,然后在@Test里调用。
    public void testGetRsa() throws Exception{

        this.publicKey = RsaUtils.getPublicKey(pubKeyPath);
        this.privateKey = RsaUtils.getPrivateKey(priKeyPath);

    }
    @Test
    public void testGenerateToken() throws Exception{
        //生成token
        String token = JwtUtils.generateToken(new UserInfo(20L, "jack"), privateKey, 5);
        System.out.println("token = "+token);

    }


解析token
复制上面生成的token
复制到下面这个地方
 @Test
    public void testParseToken() throws Exception {

        String token = "eyJhbGciOiJSUzI1NiJ9.eyJpZCI6MjAsInVzZXJuYW1lIjoiamFjayIsImV4cCI6MTYzMDcyMTI4MX0.SlL_MHuEzhCii01fMkApXAIHAnO2Rv7X4UXgvoNfHR3AZXYH9V7d5gPDLLLgHcmRYGsgMpPCMSI00LDArY1mOxu9q2E6FgQY1iGKzHmSqATP4cR6OxVCl4e4xIYHOeGkzqDcRZv4g8yeWO860ngIpDIqDL8GXlkbded81cR1NZs";

        // 解析token
        UserInfo user = JwtUtils.getUserInfo(publicKey,token);
        System.out.println("id: " + user.getId());
        System.out.println("userName: " + user.getUsername());

    }


2.3.编写登录授权接口
接下来,我们需要在ly-auth-servcice编写一个接口,对外提供登录授权服务。基本流程如下:
- 客户端携带用户名和密码请求登录
- 授权中心调用客户中心(ly-user-service)接口,根据用户名和密码查询用户信息
- 如果用户名密码正确,能获取用户,否则为空,则登录失败
- 如果校验成功,则生成JWT并返回
2.3.1.生成公钥和私钥
我们需要在授权中心生成真正的公钥和私钥。我们必须有一个生成公钥和私钥的secret,这个可以配置到application.yml中:

ly:
  jwt:
    secret: ly@Login(Auth}*^31)&heiMa% # 登录校验的密钥
    pubKeyPath: D:/AProgramWorkSpace/idea/test/rsa.pub # 公钥地址
    priKeyPath: D:/AProgramWorkSpace/idea/test/rsa.pri # 私钥地址
    expire: 30 # 过期时间,单位分钟
然后编写属性类,加载这些数据:


package com.leyou.pop;

import com.leyou.auth.utils.RsaUtils;
import lombok.Data;
import lombok.extern.slf4j.Slf4j;
import org.slf4j.Logger;
import org.slf4j.LoggerFactory;
import org.springframework.boot.context.properties.ConfigurationProperties;

import javax.annotation.PostConstruct;
import java.io.File;
import java.security.PrivateKey;
import java.security.PublicKey;
@Slf4j
@Data
@ConfigurationProperties("ly.jwt")
public class JwtProperties {

    private String secret; // 密钥

    private String pubKeyPath;// 公钥

    private String priKeyPath;// 私钥

    private int expire;// token过期时间

    private PublicKey publicKey; // 公钥

    private PrivateKey privateKey; // 私钥

    private String cookieName;

    private Integer cookieMaxAge;

//    private static final Logger logger = LoggerFactory.getLogger(JwtProperties.class);

    /**
     * @PostContruct:在构造方法执行之后执行该方法
     */
    @PostConstruct
    public void init(){
        try {
            File pubKey = new File(pubKeyPath);
            File priKey = new File(priKeyPath);
            if (!pubKey.exists() || !priKey.exists()) {
                // 生成公钥和私钥
                RsaUtils.generateKey(pubKeyPath, priKeyPath, secret);
            }
            // 获取公钥和私钥
            this.publicKey = RsaUtils.getPublicKey(pubKeyPath);
            this.privateKey = RsaUtils.getPrivateKey(priKeyPath);
        } catch (Exception e) {
            log.error("初始化公钥和私钥失败!", e);
            throw new RuntimeException();
        }
    }
}
2.3.2.CookieUtils
要注意,这里我们使用了一个工具类,CookieUtils,可以在课前资料中找到,我们把它添加到ly-common中,然后引入servlet相关依赖即可:
引入依赖

		<dependency>
            <groupId>com.leyou.common</groupId>
            <artifactId>ly-common</artifactId>
        </dependency>
2.3.3.UserClient
接下来我们肯定要对用户密码进行校验,所以我们需要通过FeignClient去访问 user-service微服务:
引入user-service依赖:

<dependency>
    <groupId>com.leyou.service</groupId>
    <artifactId>ly-user-interface</artifactId>
    <version>${leyou.latest.version}</version>
</dependency>
编写FeignClient:

@FeignClient(value = "user-service")
public interface UserClient extends UserApi {
}
在ly-user-interface中编写UserApi
引入依赖:

<dependency>
    <groupId>org.springframework</groupId>
    <artifactId>spring-webmvc</artifactId>
</dependency>


public interface UserApi {

    @GetMapping("query")
    User queryUser(
            @RequestParam("username") String username,
            @RequestParam("password") String password
    );
}
2.3.4.service

@Service
@EnableConfigurationProperties(JwtProperties.class)
public class AuthService {

    @Autowired
    private JwtProperties jwtProp;

    @Autowired
    private UserClient userClient;

    private static Logger logger = LoggerFactory.getLogger(AuthService.class);

    public String authentication(String username, String password) {
        try {
            // 查询用户
            User user = this.userClient.queryUser(username, password);
            if (null == user) {
                logger.info("用户信息不存在,{}", username);
                return null;
            }

            // 生成token
            String token = JwtUtils.generateToken(
                    new UserInfo(user.getId(), user.getUsername()),
                    jwtProp.getPrivateKey(), jwtProp.getExpire());
            return token;
        } catch (Exception e) {
            return null;
        }
    }
}
2.3.5 AuthController

package com.leyou.web;

import com.leyou.auth.entiy.UserInfo;
import com.leyou.auth.utils.JwtUtils;
import com.leyou.common.enums.ExceptionEnum;
import com.leyou.common.exception.LyException;
import com.leyou.common.utils.CookieUtils;
import com.leyou.pop.JwtProperties;
import com.leyou.service.AuthService;
import org.apache.commons.lang3.StringUtils;
import org.springframework.beans.factory.annotation.Autowired;
import org.springframework.boot.context.properties.EnableConfigurationProperties;
import org.springframework.http.HttpStatus;
import org.springframework.http.ResponseEntity;
import org.springframework.web.bind.annotation.*;

import javax.servlet.http.HttpServletRequest;
import javax.servlet.http.HttpServletResponse;

@RestController
@EnableConfigurationProperties(JwtProperties.class)
public class AuthController {
    @Autowired
    private AuthService authService;

    @Autowired
    private JwtProperties prop;

    /**
     * 登录授权
     *
     * @param username
     * @param password
     * @return
     */
    @PostMapping("accredit")
    public ResponseEntity<Void> authentication(
            @RequestParam("username") String username,
            @RequestParam("password") String password,
            HttpServletRequest request,
            HttpServletResponse response) {
        // 登录校验
        System.out.println(username);
        System.out.println(password);
        String token = authService.authentication(username, password);
        if (StringUtils.isBlank(token)) {
            return new ResponseEntity<>(HttpStatus.UNAUTHORIZED);
        }
        // 将token写入cookie,并指定httpOnly为true,防止通过JS获取和修改

        CookieUtils.setCookie(request, response, prop.getCookieName(), token, prop.getCookieMaxAge(), true);
        return ResponseEntity.ok().build();
    }
2.4.登录页面
接下来,我们看看登录页面,是否能够正确的发出请求。
我们在页面输入登录信息,然后点击登录:

查看控制台:
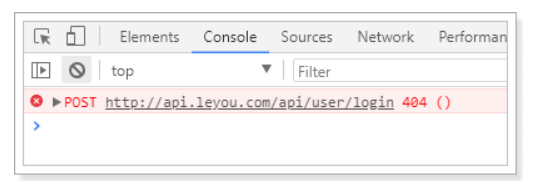
发现请求的路径不对,我们的认证接口是:
/api/auth/accredit
我们打开login.html,修改路径信息:

页面ajax请求:

然后再次测试, 成功跳转到了首页:

2.5.解决cookie写入问题
接下来我们查看首页cookie:

什么都没有,为什么?
2.5.1.问题分析
我们在之前测试时,清晰的看到了响应头中,有Set-Cookie属性,为什么在这里却什么都没有?
我们之前在讲cors跨域时,讲到过跨域请求cookie生效的条件:
- 服务的响应头中需要携带Access-Control-Allow-Credentials并且为true。
- 响应头中的Access-Control-Allow-Origin一定不能为*,必须是指定的域名
- 浏览器发起ajax需要指定withCredentials 为true
看看我们的服务端cors配置:

没有任何问题。
再看客户端浏览器的ajax配置,我们在js/common.js中对axios进行了统一配置:

一切OK。
那说明,问题一定出在响应的set-cookie头中。我们再次仔细看看刚才的响应头:

我们发现cookie的 domain属性似乎不太对。
cookie也是有域 的限制,一个网页,只能操作当前域名下的cookie,但是现在我们看到的地址是0.0.1,而页面是www.leyou.com,域名不匹配,cookie设置肯定失败了!
2.5.2.跟踪CookieUtils
我们去Debug跟踪CookieUtils,看看到底是怎么回事:
我们发现内部有一个方法,用来获取Domain:

问题找到了:我们请求时的serverName明明是:api.leyou.com,现在却被变成了:127.0.0.1,因此计算domain是错误的,从而导致cookie设置失败!
2.5.3.解决host地址的变化
那么问题来了:为什么我们这里的请求serverName变成了:127.0.0.1:8087呢?
这里的server name其实就是请求的时的主机名:Host,之所以改变,有两个原因:
- 我们使用了nginx反向代理,当监听到api.leyou.com的时候,会自动将请求转发至127.0.0.1:10010,即Zuul。
- 而后请求到达我们的网关Zuul,Zuul就会根据路径匹配,我们的请求是/api/auth,根据规则被转发到了 127.0.0.1:8087 ,即我们的授权中心。
我们首先去更改nginx配置,让它不要修改我们的host:
proxy_set_header Host $host;

把nginx进行reload:
nginx.exe -s reload
这样就解决了nginx这里的问题。但是Zuul还会有一次转发,所以要去修改网关的配置:

本来这样可以了,but新版本有bug,所以要把zuul的版本降到2.0.0
修改gateway的依赖在dependencies第一行依赖处加入
<!-- https://mvnrepository.com/artifact/org.springframework.cloud/spring-cloud-netflix-zuul -->
<dependency>
    <groupId>org.springframework.cloud</groupId>
    <artifactId>spring-cloud-netflix-zuul</artifactId>
    <version>2.0.0.RELEASE</version>
</dependency>
重启后,我们再次测试。

完美!
2.5.4.再次测试
我们再次登录,发现依然没有cookie!!
发现,响应头中根本没有set-cookie了。
这是怎么回事??
2.5.5.Zuul的敏感头过滤
Zuul内部有默认的过滤器,会对请求和响应头信息进行重组,过滤掉敏感的头信息:

会发现,这里会通过一个属性为SensitiveHeaders的属性,来获取敏感头列表,然后添加到IgnoredHeaders中,这些头信息就会被忽略。
而这个SensitiveHeaders的默认值就包含了set-cookie:

解决方案有两种:
全局设置:
zuul.sensitive-headers=
指定路由设置:
zuul.routes.<routeName>.sensitive-headers=zuul.routes.<routeName>.custom-sensitive-headers=true
思路都是把敏感头设置为null

2.5.6.最后的测试
再次重启后测试:

3.首页判断登录状态
虽然cookie已经成功写入,但是我们首页的顶部,登录状态依然没能判断出用户信息:

这里需要向后台发起请求,获取根据cookie获取当前用户的信息。
我们先看页面实现
3.1.页面JS代码
页面的顶部已经被我们封装为一个独立的Vue组件,在/js/pages/shortcut.js中

打开js,发现里面已经定义好了Vue组件,并且在created函数中,查询用户信息:

查看网络控制台,发现发起了请求:

因为token在cookie中,因此本次请求肯定会携带token信息在头中。
3.2.后台实现校验用户接口
我们在ly-auth-service中定义用户的校验接口,通过cookie获取token,然后校验通过返回用户信息。
- 请求方式:GET
- 请求路径:/verify
- 请求参数:无,不过我们需要从cookie中获取token信息
- 返回结果:UserInfo,校验成功返回用户信息;校验失败,则返回401
代码:
先设置错误信息

UN_AUTHORIZED(401,"未授权"),
AuthController

    @GetMapping("verify")
    public ResponseEntity<UserInfo> verify(@CookieValue("LY_TOKEN") String token){
        //解析token
        try {
            UserInfo userInfo = JwtUtils.getUserInfo(prop.getPublicKey(), token);
            //返回用户信息
            return ResponseEntity.ok(userInfo);
        }catch (Exception e){
            //token以过期,或者token篡改
            throw new LyException(ExceptionEnum.UN_AUTHORIZED);
        }
    }
运行测试

修改leyou-portal当中的js当中的pages的shortcut.js

  <li class='f-item' v-if='user && user.userName'>
               尊敬的会员,<span style='color: red;'>{{user.userName}}</span>
3.3.测试

页面效果:

3.4.刷新token
每当用户在页面进行新的操作,都应该刷新token的过期时间,
否则30分钟后用户的登录信息就无效了。
而刷新其实就是重新生成一份token,然后写入cookie即可。
那么问题来了:
我们怎么知道用户有操作呢?
事实上,每当用户来查询其个人信息,就证明他正在浏览网页,
此时刷新cookie是比较合适的时机。
因此我们可以对刚刚的校验用户登录状态的接口进行改进,加入刷新token的逻辑。

    @GetMapping("verify")
    public ResponseEntity<UserInfo> verify(
            @CookieValue("LY_TOKEN") String token,
            HttpServletRequest request,
            HttpServletResponse response
    ){
        //解析token
        try {
            UserInfo userInfo = JwtUtils.getUserInfo(prop.getPublicKey(), token);

            //刷新token,重新生成token
            String newToken = JwtUtils.generateToken(userInfo, prop.getPrivateKey(), prop.getExpire());
            //写回cookie
            CookieUtils.setCookie(request, response, prop.getCookieName(), newToken, prop.getCookieMaxAge(), true);
            //返回用户信息
            return ResponseEntity.ok(userInfo);
        }catch (Exception e){
            //token以过期,或者token篡改
            throw new LyException(ExceptionEnum.UN_AUTHORIZED);
        }
    }
4.网关的登录拦截器
接下来,我们在Zuul编写拦截器,对用户的token进行校验,如果发现未登录,则进行拦截。
4.1.引入jwt相关配置
既然是登录拦截,一定是前置拦截器,我们在ly-api-gateway中定义。
首先引入所需要的依赖:

	    <dependency>
            <groupId>com.leyou.common</groupId>
            <artifactId>ly-common</artifactId>
            <version>1.0.0-SNAPSHOT</version>
        </dependency>
        <dependency>
            <groupId>com.leyou.auth</groupId>
            <artifactId>ly-auth-common</artifactId>
            <version>1.0.0-SNAPSHOT</version>
        </dependency>
然后编写属性文件:

ly:
  jwt:
    pubKeyPath: C:/Users/ZHENG/Desktop/leyou_msgrs/rsa/rsa.pub # 公钥地址
    cookieName: LY_TOKEN # cookie的名称
编写属性类,读取公钥:

package com.leyou.gateway.config;

import com.leyou.auth.utils.RsaUtils;
import lombok.Data;
import lombok.extern.slf4j.Slf4j;
import org.slf4j.Logger;
import org.slf4j.LoggerFactory;
import org.springframework.boot.context.properties.ConfigurationProperties;
import javax.annotation.PostConstruct;
import java.security.PublicKey;

@ConfigurationProperties(prefix = "ly.jwt")
@Data
@Slf4j
public class JwtProperties {

    private String pubKeyPath;// 公钥

    private PublicKey publicKey; // 公钥

    private String cookieName;

    private static final Logger logger = LoggerFactory.getLogger(JwtProperties.class);

    @PostConstruct
    public void init() {
        try {
            // 获取公钥和私钥
            this.publicKey = RsaUtils.getPublicKey(pubKeyPath);
        } catch (Exception e) {
            logger.error("初始化公钥失败!", e);
            throw new RuntimeException();
        }
    }
}
4.2.编写过滤器逻辑
基本逻辑:
- 获取
cookie中的token - 通过
JWT对token进行校验 - 通过:则放行;不通过:则重定向到登录页


 @Override
    public Object run() throws ZuulException {
        //获取上下文
        RequestContext ctx = RequestContext.getCurrentContext();
        //获取request
        HttpServletRequest request = ctx.getRequest();
        //获取cookie 中 token
        String token = CookieUtils.getCookieValue(request, prop.getCookieName());
        try {
            //解析token
            UserInfo user = JwtUtils.getUserInfo(prop.getPublicKey(), token);
            //校验权限

        }catch (Exception e){
            //解析token失败,未登录,拦截
            ctx.setSendZuulResponse(false);
            //返回状态码
            ctx.setResponseStatusCode(403);
        }
        //校验权限
        return null;
    }

刷新页面,清除cookie发现请求校验的接口也被拦截了:


证明我们的拦截器生效了,但是,似乎有什么不对的。这个路径似乎不应该被拦截啊!
4.3.白名单
要注意,并不是所有的路径我们都需要拦截,例如:
- 登录校验接口:
/auth/** - 注册接口:
/user/register - 数据校验接口:
/user/check/** - 发送验证码接口:
/user/code - 搜索接口:
/search/**
另外,跟后台管理相关的接口,因为我们没有做登录和权限,因此暂时都放行,但是生产环境中要做登录校验:
- 后台商品服务:
/item/**
所以,我们需要在拦截时,配置一个白名单,如果在名单内,则不进行拦截。
在application.yaml中添加规则:

ly:
  filter:
    allowPaths:
      - /api/auth
      - /api/search
      - /api/user/register
      - /api/user/check
      - /api/user/code
      - /api/item
然后读取这些属性:


package com.leyou.gateway.config;

import lombok.Data;
import org.springframework.boot.context.properties.ConfigurationProperties;

import java.util.List;

@Data
@ConfigurationProperties(prefix = "ly.filter")
public class FilterProperties {
    private List<String> allowPaths;
}
在过滤器中的shouldFilter方法中添加判断逻辑:

@EnableConfigurationProperties({JwtProperties.class, FilterProperties.class})

防止手残全部代码
package com.leyou.gateway.filter;

import com.leyou.auth.entity.UserInfo;
import com.leyou.auth.utils.JwtUtils;
import com.leyou.common.utils.CookieUtils;
import com.leyou.gateway.config.FilterProperties;
import com.leyou.gateway.config.JwtProperties;
import com.netflix.zuul.ZuulFilter;
import com.netflix.zuul.context.RequestContext;
import com.netflix.zuul.exception.ZuulException;
import org.apache.http.protocol.RequestContent;
import org.slf4j.Logger;
import org.slf4j.LoggerFactory;
import org.springframework.beans.factory.annotation.Autowired;
import org.springframework.boot.context.properties.EnableConfigurationProperties;
import org.springframework.cloud.netflix.zuul.filters.support.FilterConstants;
import org.springframework.stereotype.Component;

import javax.servlet.http.Cookie;
import javax.servlet.http.HttpServletRequest;

@Component
@EnableConfigurationProperties({JwtProperties.class, FilterProperties.class})
public class AuthFilter extends ZuulFilter  {

    @Autowired
    private JwtProperties prop;

    @Autowired
    private FilterProperties filterPrope;

    private static final Logger logger = LoggerFactory.getLogger(AuthFilter.class);

    @Override
    public String filterType() {
        return "pre";
    }

    @Override
    public int filterOrder() {
        return 5;
    }

    @Override
    public boolean shouldFilter() {

        // 获取上下文
        RequestContext ctx = RequestContext.getCurrentContext();
        // 获取request
        HttpServletRequest request = ctx.getRequest();
        //获取请求的URL路径
        String path = request.getRequestURI();
        //判断是否在放行,放行则返回false
        return !isAllowPath(path);
    }

    private boolean isAllowPath(String path) {
        for (String allowPath : filterPrope.getAllowPaths()) {
            //判断是否是允许的
            if(path.startsWith(allowPath)){
                return true;
            }
        }
        return false ;
    }

    @Override
    public Object run() throws ZuulException {
        // 获取上下文
        RequestContext ctx = RequestContext.getCurrentContext();
        // 获取request
        HttpServletRequest request = ctx.getRequest();
        // 获取token
        String token = CookieUtils.getCookieValue(request, prop.getCookieName());
        // 校验
        try {
            // 校验通过什么都不做,即放行
            JwtUtils.getUserInfo(prop.getPublicKey(),token);
        } catch (Exception e) {
            // 校验出现异常,返回403
            ctx.setSendZuulResponse(false);
            ctx.setResponseStatusCode(403);
        }
        return null;
    }
}
运行测试


 715
715


 被折叠的 条评论
为什么被折叠?
被折叠的 条评论
为什么被折叠?
 到【灌水乐园】发言


