


实习
elmentUI的table取每列或者一行数据
<el-table-column label="成交截图" prop="followImage" align="center">
    <template slot-scope="scope">
        <el-image
            :src="scope.row.followImage"
            class="follow-image"
            :preview-src-list="[scope.row.followImage]"
        ></el-image>
    </template>
</el-table-column>
- 需要template去接收,一个具名插槽slot-scope=“scope”
- scope.row可以取到整行数据
- scope.row.followImage可以取到其中每列数据
正则匹配,输入整数最多包含2位小数(例:输入金额)
let val = this.price
    .replace(/[^\d.]/g, "")
    .replace(/\.{2,}/g, ".")
    .replace(".", "$#$")
    .replace(/\./g, "")
    .replace("$#$", ".")
    .replace(/^(\-)*(\d+)\.(\d\d).*$/, "$1$2.$3")
    .replace(/^\./g, "");
手写一个上传图片组件
//html
<el-form-item label="成交证明截图:" v-if="followForm.state==='completed'">
    <div class="upload-c" :style="{backgroundImage:`url(${imageUrl})`}">
        <i class="el-icon-plus" v-if="imageUrl==''"></i>
        <input type="file" accept="image/*" @change="onInputFileChange" />
    </div>
</el-form-item>
//js
async onInputFileChange(e) {//上传接口
    const imageUri = await this.selectPhotos(
        e.target.files[0],
        "image"
    );
    this.imageUrl = imageUri;
}
//css
.upload-c {
    width: 90px;
    height: 90px;
    display: flex;
    align-items: center;
    justify-content: center;
    background: #f6f6f6;
    border: 1px solid #d2d2d2;
    border-radius: 3px;
    position: relative;
    background-size: cover;
    background-repeat: no-repeat;
    input {
        position: absolute;
        top: 0;
        left: 0;
        width: 100%;
        height: 100%;
        opacity: 0;
    }
}
VUE中如何修改elementUI样式,不影响别的组件
- 深度选择器deep
例如我们想要修改这个样式

<style lang="less" scoped>
/deep/.el-icon-circle-close{
    color: #ffffff;
}
</style>
- 修改当前页面的样式不影响别的页面。! important都不能修改,但是deep能够修改,优先级很高。
- 如果想要修改全局的这个样式,需要在初始化样式时使用,就不用了加deep了。如果修改不了就可以用! important
用css修改滚动条样式
::-webkit-scrollbar 滚动条整体部分
::-webkit-scrollbar-button 滚动条两端的按钮
::-webkit-scrollbar-track 外层轨道
::-webkit-scrollbar-track-piece 内层滚动槽
::-webkit-scrollbar-thumb 滚动的滑块
::-webkit-scrollbar-corner 边角
::-webkit-resizer 定义右下角拖动块的样式
::-webkit-scrollbar[-*]
&::-webkit-scrollbar {
    height: 25px;
    width: 50px;
}
&::-webkit-scrollbar-thumb {
    background: red;
}

Vue自定义指令
- 钩子函数
- bind:只调用一次,指令第一次绑定到元素时调用。在这里可以进行一次性的初始化设置。
- inserted:被绑定元素插入父节点时调用 (仅保证父节点存在,但不一定已被插入文档中)。
- update:所在组件的 VNode 更新时调用,但是可能发生在其子 VNode 更新之前。指令的值可能发生了改变,也可能没有。但是你可以通过比较更新前后的值来忽略不必要的模板更新 (详细的钩子函数参数见下)。
- componentUpdated:指令所在组件的 VNode 及其子 VNode 全部更新后调用。
- unbind:只调用一次,指令与元素解绑时调用。
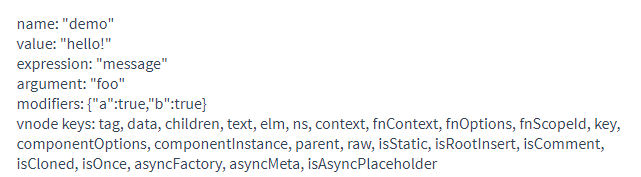
<div id="hook-arguments-example" v-demo:foo.a.b="message"></div>
Vue.directive('demo', {
  bind: function (el, binding, vnode) {
    var s = JSON.stringify
    el.innerHTML =
      'name: '       + s(binding.name) + '<br>' +
      'value: '      + s(binding.value) + '<br>' +
      'expression: ' + s(binding.expression) + '<br>' +
      'argument: '   + s(binding.arg) + '<br>' +
      'modifiers: '  + s(binding.modifiers) + '<br>' +
      'vnode keys: ' + Object.keys(vnode).join(', ')
  }
})
- 指令钩子函数会被传入以下参数:
- el:指令所绑定的元素,可以用来直接操作 DOM。
- binding:一个对象,包含以下 property:
- name:指令名,不包括 v- 前缀。
- value:指令的绑定值,例如:v-my-directive=“1 + 1” 中,绑定值为 2。
- oldValue:指令绑定的前一个值,仅在 update 和 componentUpdated 钩子中可用。无论值是否改变都可用。
- expression:字符串形式的指令表达式。例如 v-my-directive=“1 + 1” 中,表达式为 “1 + 1”。
- arg:传给指令的参数,可选。例如 v-my-directive:foo 中,参数为 “foo”。
- modifiers:一个包含修饰符的对象。例如:v-my-directive.foo.bar 中,修饰符对象为 { foo: true, bar: true }。
- vnode:Vue 编译生成的虚拟节点。移步 VNode API 来了解更多详情。
- oldVnode:上一个虚拟节点,仅在 update 和 componentUpdated 钩子中可用。
- 扩展
- 动态指令参数。v-demo:[foo],foo可以是动态值。
- 简写函数。不用写钩子函数
Vue.directive('color-swatch', function (el, binding) {
  el.style.backgroundColor = binding.value
})
关于screen、page、client、offset
- srceen>page>client>offset

实现拖拽效果
<div @mousedown="changeHeightDown"></div>
        changeHeightDown(e){
            this.startHeight = e.pageY
            document.addEventListener("mousemove",this.changeHeightMove);
            document.addEventListener("mouseup",this.changeHeightUp);
        },
        changeHeightMove(e){
            let height = e.pageY - this.startHeight;
            this.vdrList[0].height += height;
            this.startHeight = e.pageY;
        },
        changeHeightUp(e){
            document.removeEventListener("mousemove",this.changeHeightMove);
        }
锚点跳转
//html
//锚点
<div class="titles" :id="`pack${index}`">包装信息</div>
//跳转
<div class="group-btn pack-info" @click="scollTo('pack',index)">
     <img src="../../images/pack-info.png" alt />
        <span>包装信息</span>
</div>
//js
scollTo(name, index) {
    document.querySelector(`#${name}${index}`).scrollIntoView(true);
},
复制除input文本
- 有input可以直接select,不用创建一个
- 没有input,可以先创建一个input或者textarea,然后select、copy
<p @click="copyText(scope.row.desc)" id="copybtn">复制</p>
copyText(text) {
var textArea = document.createElement("textarea");
textArea.value = text;
document.body.appendChild(textArea);
textArea.select();
try {
var successful = document.execCommand("copy");
var msg = successful
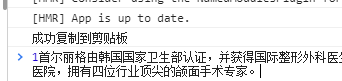
? "成功复制到剪贴板"
: "该浏览器不支持点击复制到剪贴板";
console.log(msg);
} catch (err) {}
document.body.removeChild(textArea);
},
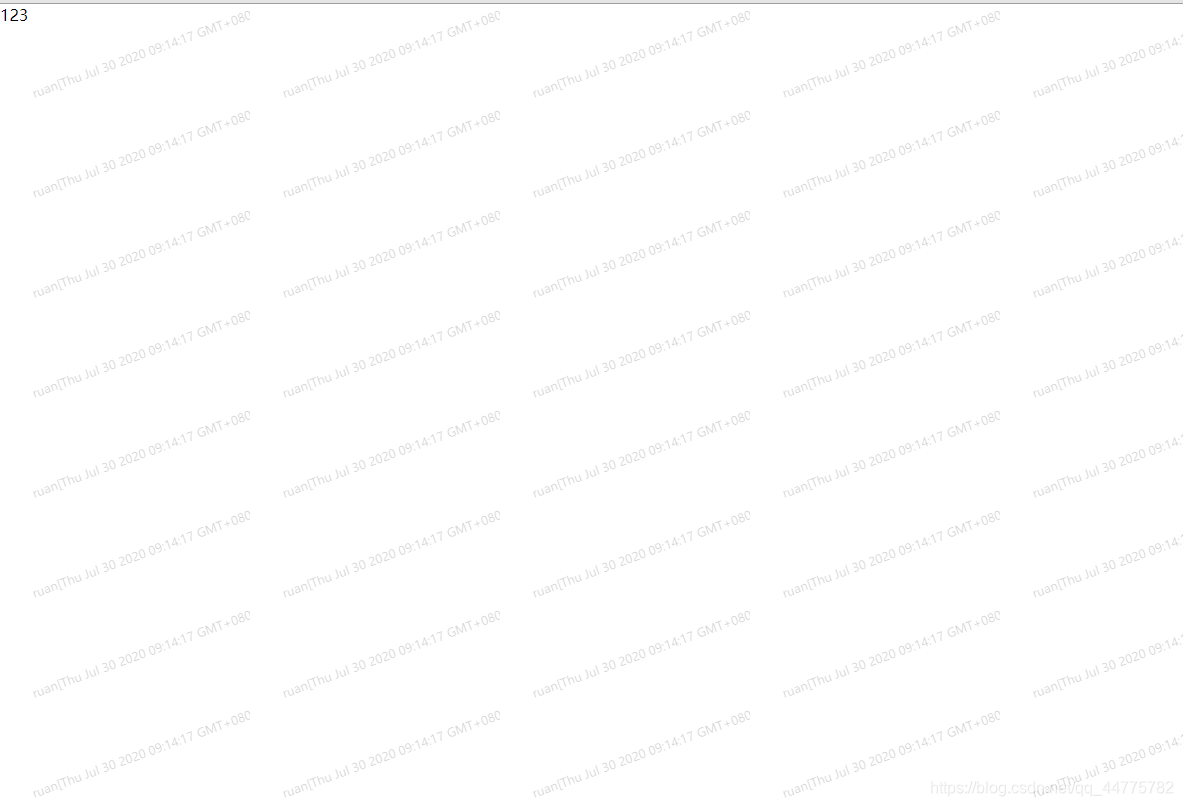
给页面加上水印
- 用canvas画一张背景图
export default {
    //tool.js
    addWaterMark() {
        const strArr = `${localStorage.getItem(
                "loginUserName"
            )}${localStorage
                .getItem("logunUserPhone")
                .slice(7, 11)}[${new Date()}]`;
        let ctx = document.createElement("canvas");
        ctx.width = 250;
        ctx.height = 100;
        ctx.style.display = "none";
        let cans = ctx.getContext("2d");
        cans.rotate((-20 * Math.PI) / 180);
        cans.font = "12px Microsoft YaHei";
        cans.fillStyle = "rgba(17, 17, 17, 0.20)";
        cans.textAlign = "left";
        cans.textBaseline = "Middle";
        cans.fillText(strArr, 0, 100);
        cans.save();
        return ctx.toDataURL();
    }
}
- 需要添加的页面引入
<template>
    <div class="content" :style="{backgroundImage:`url(${orgBackground})`}">123</div>
</template>

<script>
import tool from "../plus/tool";
export default {
    data() {
        return {
            orgBackground: "",
        };
    },
    name: "test",
    mounted() {
        localStorage.setItem("loginUserName", "ruan");
        localStorage.setItem("logunUserPhone", "123456");
        this.orgBackground = tool.addWaterMark();
        //监听dom属性改变重新生成水印(如果页面有变化需要去监听dom)
        // const org = document.querySelector(".content");
        // const options = {
        //     attributes: true,
        //     childList: true,
        //     subtree: true,
        // };
        // const observer = new MutationObserver((mutationList) => {
        // this.orgBackground = tool.addWaterMark();
        // });
        // observer.observe(org, options);
    },
};
</script>

<style lang='less' scoped>
.content {
    position: relative;
    width: 100vw;
    height: 100vh;
}
</style>
</script>
点击别处隐藏样式
<template>
    <div class="header">
        <div class="block" @click="isShowBlock"></div>
        <div class="block2" v-show="isShow"></div>
    </div>
</template>

<script>
export default {
    data() {
        return {
            isShow: true,
        };
    },
    methods: {
        isShowBlock() {
            this.isShow = !this.isShow;
        },
        close(e) {
            if (e.target.className != "block") {
                this.isShow = false;
            }
        },
    },
    mounted() {
        window.addEventListener("click", this.close);
    },
    beforeDestroy() {
        window.removeEventListener("click", this.close);
    },
};
</script>

<style lang='less' scoped>
.header {
    width: 700px;
    height: 700px;
    background-color: red;
    .block {
        width: 100px;
        height: 100px;
        background-color: royalblue;
    }
    .block2 {
        width: 100px;
        height: 100px;
        background-color: royalblue;
    }
}
</style>
图片加载失败,展示占位图片
<template>
    <img :src="props.src" @error='showErrorImage' />
</template>

<script>
export default {
    name: "editorImage",
    methods: {
        /**
         * @description 图片加载失败占位
         */
        showErrorImage(e) {
            e.target.src = require("../../assets/imgs/landing/img-1.png");
        },
    },
};
</script>

中文英文换行
 white-space: normal;
 word-break: break-all;
 word-wrap: break-word;
white-space: normal|pre|nowrap|pre-wrap|pre-line|inherit;
white-space 属性设置如何处理元素内的空白
normal 默认。空白会被浏览器忽略。
pre 空白会被浏览器保留。其行为方式类似 HTML 中的 pre 标签。
nowrap 文本不会换行,文本会在在同一行上继续,直到遇到 br 标签为止。
pre-wrap 保留空白符序列,但是正常地进行换行。
pre-line 合并空白符序列,但是保留换行符。
inherit 规定应该从父元素继承 white-space 属性的值。
word-wrap: normal|break-word;
word-wrap 属性用来标明是否允许浏览器在单词内进行断句,这是为了防止当一个字符串太长而找不到它的自然断句点时产生溢出现象。
normal: 只在允许的断字点换行(浏览器保持默认处理)
break-word:在长单词或URL地址内部进行换行
word-break: normal|break-all|keep-all;
word-break 属性用来标明怎么样进行单词内的断句。
normal:使用浏览器默认的换行规则。
break-all:允许再单词内换行
keep-all:只能在半角空格或连字符处换行
flex布局固定高度不被压缩
flex-shrink:0


elementUI级联选择器Cascader,删除tag存在的问题
    <div class="address-choose">
        <div class="card-show">
            <el-button
                class="tags"
                v-for="(item,index) in cityShowList"
                :key="index"
                :disabled="!showSave"
                @click="deleteCity(index)"
            >{{item}}</el-button>
        </div>
        <el-cascader
            v-model="cityList"
            :options="options"
            :props="{ multiple: true }"
            collapse-tags
            clearable
            @change="changeCity"
            :disabled="!showSave"
        ></el-cascader>
    </div>
点击按钮删除事件时,输入框中的值并没有变化
     deleteCity(index) {
         this.cityShowList.splice(index, 1);
         this.cityList.splice(index, 1);
     },

解决办法
- 给级联选择器v-if
- 删除事件中加this.$nextTick()
      <div class="address-choose">
          <div class="card-show">
              <el-button
                  class="tags"
                  v-for="(item,index) in cityShowList"
                  :key="index"
                  :disabled="!showSave"
                  @click="deleteCity(item,index)"
              >{{item}}</el-button>
          </div>
          <el-cascader
              v-model="cityList"
              :options="options"
              :props="{ multiple: true }"
              collapse-tags
              clearable
              @change="changeCity"
              :disabled="!showSave"

              v-if="showCity"
          ></el-cascader>
      </div>
    deleteCity(item, index) {
        this.showCity = false;
        this.cityShowList.splice(index, 1);
        this.cityList.splice(index, 1);
        this.$nextTick(() => {
            this.showCity = true;
        });
    },

echarts的一些问题
- echarts自适应页面
    let myChart = echarts.init(document.getElementById(`${this.id}`));
    myChart.clear();
    myChart.setOption(option, true);
    window.addEventListener("resize", () => {
        myChart.resize();
    });


- 提示+吸附
   let option = {
       tooltip: {
           trigger: "axis",
           axisPointer: {
               snap: true,
           },
       },
   }
- 流线型+放大数据点+渐变背景
let option = {
    series: [
         {
         name: "浏览次数",
         data: [820, 932, 901, 934, 1290, 1330, 1320],
         type: "line",
         smooth: true,//流线型
         symbolSize: 10,//放大点
         areaStyle: {//渐变背景
             color: new echarts.graphic.LinearGradient(
                 0,
                 0,
                 0,
                 1,
                 [
                     {
                         offset: 0,
                         color: "#66CCCC",
                     },
                     {
                         offset: 1,
                         color: "#fff",
                     },
                 ]
             ),
         },
     },
    ]
}
router新开窗口跳转
   /**
    * @description 跳转落地页详情
    */
   toLandingInfo(params) {
       let routeData = this.$router.resolve({
           name: "analysis.landing.info",
           query: {
               pageId: params.pageId,
               startTime: moment().subtract(6, "day").format("yyyy-MM-DD"),
               endTime: moment().format("yyyy-MM-DD"),
           },
       });
       window.open(routeData.href, "_blank");
   },
手写一个抽屉组件
基于vue的过渡动画
- 样式(点击消息提醒,从右侧弹出抽屉)

- transition + v-show/v-if
<template>
    <transition name="show" mode="out-in" @before-enter='transitionComplete' @after-leave='transitionComplete' @enter='transitioning' @leave='transitioning'>
        <div class="message-container" ref="message-container" @click="close" v-show="drawerClose">
            <div class="message">
            </div>
        </div>
    </transition>
</template>

<script>
export default {
    name: "messageCenter",
    props: {
        drawerClose: {//父组件的消息提醒icon,控制显示隐藏
            type: Boolean,
            default: false,
        },
    },
    data() {
        return {
        };
    },

    methods: {
        /**
         * @description 动画结束
         */
        transitionComplete() {
            const body = document.querySelector("body");
            body.style.overflow = "visible";
        },
        //动画进行时
        transitioning() {
            const body = document.querySelector("body");
            body.style.overflow = "hidden";
        },
        close(e) {
            const parent = this.$refs["message-container"];
            if (
                e.target.className != "message-container" &&
                e.target.className != "el-icon-bell" &&
                !parent.contains(e.target)
            ) {//除了本身及子元素和消息提醒,点击关闭
                this.$emit("closeMessage", false);
            }
        },
    },
    mounted() {
        window.addEventListener("click", this.close);
    },
    beforeDestroy() {
        window.removeEventListener("click", this.close);
    },
};
</script>

<style lang="less" scoped>
.show-enter-active,
.show-leave-active {
    transition: all 0.3s;
}
.show-enter,
.show-leave-to {
    transform: translateX(500px);
}
.message-container {
    // transition: all 0.3s ease-in-out;
    position: absolute;
    bottom: 0;
    right: 0px;
    width: 500px;
    height: calc(100vh - 60px);
    background: #ffffff;
    z-index: 99;
    box-shadow: -5px 11px 22px 0px rgba(0, 0, 0, 0.16);
}
</style>
- 动画
v-enter: 弹框显示前的样式,过渡的开始状态, 也就是动画还没开始前,动画的起始位置
v-enter-active 动画生效的状态,从底部过渡到页面的过程
v-enter-to 动画执行完的结束状态,也就是弹出结束后显示在页面的样式
v-leave 隐藏元素,离开动画的开始状态,元素消失开始的样式
v-leave-active 隐藏元素过程中,离开动画的生效动态即离开的过程,从上到下滑
v-leave-to 隐藏元素完成,离开动画的结束状态(此时v-leave的样式被删除)
- 事件钩子
<transition
  v-on:before-enter="beforeEnter"
  v-on:enter="enter"
  v-on:after-enter="afterEnter"
  v-on:enter-cancelled="enterCancelled"

  v-on:before-leave="beforeLeave"
  v-on:leave="leave"
  v-on:after-leave="afterLeave"
  v-on:leave-cancelled="leaveCancelled"
>
  <!-- ... -->
</transition>
我这里用了时间钩子,是因为,在动画过程中会重新计算宽高,所以会有滚动条,即使绝对定位也不行。所以在动画的时候给body加了overflow,结束之后又还原。就不会有滚动条了,前提是内容滚动区不是body,而是el-main之内的区域滚动。否则可能会有问题。
vue重置data中的数据
this.$options可以获取到单文件中的所有数据
this.$options.data()可以获取到单文件中的data的数据this.$options.methods可以获取到单文件中和全局的方法- …
this.$data = this.$options.data()可以重置整个data数据
- 重置表单数据
 resetForm() {
     this.filters = this.$options.data().filters;
 },
Cascader 级联选择器限制选中个数
- 我这里只有2级,所以直接循环
 <el-cascader
   v-model="area"
   :show-all-levels="false"
   :options="areaOptions"
   :props="{ multiple: true,checkStrictly:true }"
   @change="changeArea1"
   collapse-tags
   clearable></el-cascader>

    /**
     * @description 限制渠道归属地个数
     */
    changeArea1(val){
        this.disableArea(val)
    },
    /**
     * @description 处理禁用问题
     */
    disableArea(val){
        let list = [];
        val.forEach(item => {
            list.push(item[item.length-1]);
        });
        list = [...new Set(list)]//拿最后一级,去重
        if (list.length>=15) {
            let options = JSON.parse(JSON.stringify(this.areaOptions))
            for (const item1 of options) {
                if (!list.includes(item1.value)) {//第一级,如果大于15,没选中的禁用,选中的不禁用
                    item1.disabled=true
                }else{
                    item1.disabled=false
                }
                for (const item2 of item1.children) {//第二级,如果大于15,没选中的禁用,选中的不禁用
                    if (!list.includes(item2.value)) {
                        item2.disabled=true
                    }else{
                        item2.disabled=false
                    }
                 }
            }
            this.areaOptions = options
        }else{
            let options = JSON.parse(JSON.stringify(this.areaOptions))
            for (const item1 of options) {
                item1.disabled = false
                 for (const item2 of item1.children) {
                     item2.disabled = false
                 }
            }
            this.areaOptions = options
        }
        this.$forceUpdate();
    },
工作2年
实现计时器(增长或者减少),简单封装一下
- 00:00:00 -> 00:02:00 从0到结束
- 00:02:00 -> 00:00:00 从总时间到结束
- 00:01:00 -> 00:02:00 从中途到结束

class Timer {
  totalTime = 0; // 分钟数
  order = "increase"; //increase增长 reduce减少
  timer = null;
  gapTime = 1 * 1000; //间隔1s
  startTime = 0;
  realTime = "00:00:00";
  constructor(order, totalTime, startTime = 0) {
    this.order = order;
    this.totalTime = totalTime * 60 * 1000;
    this.startTime = startTime * 60 * 1000;
  }
  /**
   * @description 计时开始
   */
  start(callback, endCallback) {
    if (this.totalTime === 0) {
      return;
    }
    if (this.order === "increase") {
      this.increaseTime(callback, endCallback);
    } else {
      this.startTime = this.totalTime;
      this.reduceTime(callback, endCallback);
    }
  }
  /**
   * @description 增加计时
   */
  increaseTime(callback, endCallback) {
    this.timer = setInterval(() => {
      if (this.startTime >= this.totalTime) {
        // 开始时间>总时间 结束
        clearInterval(this.timer);
        endCallback();
      } else {
        // 开始时间++
        this.startTime += this.gapTime;
        this.getRealTime(this.startTime);
        callback(this.realTime);
      }
    }, this.gapTime);
  }
  /**
   * @description 减少计时
   */
  reduceTime(callback, endCallback) {
    this.timer = setInterval(() => {
      if (this.startTime <= 0) {
        // 开始时间>总时间 结束
        clearInterval(this.timer);
        endCallback();
      } else {
        // 开始时间++
        this.startTime -= this.gapTime;
        this.getRealTime(this.startTime);
        callback(this.realTime);
      }
    }, this.gapTime);
  }
  /**
   * @description 获取真实的时间
   */
  getRealTime(time) {
    const second = time / 1000;
    let h = parseInt((second / 60 / 60) % 24);
    let m = parseInt((second / 60) % 60);
    let s = parseInt(second % 60);
    h = h < 10 ? "0" + h : h;
    m = m < 10 ? "0" + m : m;
    s = s < 10 ? "0" + s : s;
    this.realTime = `${h}:${m}:${s}`;
  }
  /**
   * @description 通过分钟数获取真实时间
   */
  getTime(time) {
    const second = time * 60;
    let h = parseInt((second / 60 / 60) % 24);
    let m = parseInt((second / 60) % 60);
    let s = parseInt(second % 60);
    h = h < 10 ? "0" + h : h;
    m = m < 10 ? "0" + m : m;
    s = s < 10 ? "0" + s : s;
    return `${h}:${m}:${s}`;
  }
  /**
   * @description 停止 清除定时器
   */
  stop() {
    if (this.timer) {
      clearInterval(this.timer);
      this.timer = null;
    }
  }
}

export default Timer;
使用方式
<span>{{ this.realTime }}|{{ this.endTime }}</span>

import Timer from "../plugins/timer";
export default {
data() {
  return {
    timer: null,
    realTime: "00:00:00",
    endTime: "00:00:00",
  };
},
mounted() {
  this.timer = new Timer("increase", 2);
  this.timer.start(
    (realTime) => {
      this.realTime = realTime;
    },
    () => {
      this.realTime = "已结束";
    }
  );
  this.endTime = this.timer.getTime(2);
},
beforeDestroy() {
  this.timer.stop();
},
}


 402
402


 被折叠的 条评论
为什么被折叠?
被折叠的 条评论
为什么被折叠?
 到【灌水乐园】发言


