文章目录
一. JdbcTemplate概述
它是spring框架中提供的一个对象,是对原始繁琐的Jdbc API对象的简单封装。spring框架为我们提供了很多的操作模板类。
- 例如:操作关系型数据的JdbcTemplate和HibernateTemplate,操作nosql数据库的RedisTemplate,操作消息队列的JmsTemplate等等。
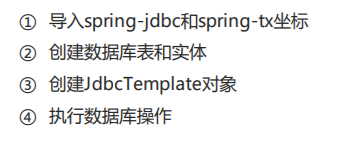
二. JdbcTemplate开发步骤

1. 导入坐标
<!--导入spring的jdbc坐标-->
<dependency>
	<groupId>org.springframework</groupId>
	<artifactId>spring-jdbc</artifactId>
	<version>5.0.5.RELEASE</version>
</dependency>

<!--导入spring的tx坐标-->
<dependency>
	<groupId>org.springframework</groupId>
	<artifactId>spring-tx</artifactId>
	<version>5.0.5.RELEASE</version>
</dependency>
2. 创建accout表和Accout实体

3. 创建JdbcTemplate对象、执行数据库操作
@Test
    //测试JdbcTemplate开发步骤
    public void test1() throws PropertyVetoException {
        //1. 创建数据源对象
        ComboPooledDataSource dataSource = new ComboPooledDataSource();
        dataSource.setDriverClass("com.mysql.jdbc.Driver");
        dataSource.setJdbcUrl("jdbc:mysql://localhost:3306/test");
        dataSource.setUser("root");
        dataSource.setPassword("root");
        //2、创建JdbcTemplate对象
        JdbcTemplate jdbcTemplate = new JdbcTemplate();
        //3. 设置数据源对象  设置数据源给JdbcTemplate
        jdbcTemplate.setDataSource(dataSource);
        //4. 执行操作
        int row = jdbcTemplate.update("insert into test.account values(?,?)", "tom", 5000);
        System.out.println(row);

    }

三. Spring产生JdbcTemplate对象
我们可以将JdbcTemplate的创建权交给Spring,将数据源DataSource的创建权也交给Spring,在Spring容器内部将数据源DataSource注入到JdbcTemplate模版对象中,配置如下:
<?xml version="1.0" encoding="UTF-8"?>
<beans xmlns="http://www.springframework.org/schema/beans"
       xmlns:xsi="http://www.w3.org/2001/XMLSchema-instance"
       xmlns:context="http://www.springframework.org/schema/context"
       xsi:schemaLocation="
       http://www.springframework.org/schema/beans http://www.springframework.org/schema/beans/spring-beans.xsd
       http://www.springframework.org/schema/context http://www.springframework.org/schema/context/spring-context.xsd">

    <!--加载jdbc.properties-->
    <context:property-placeholder location="classpath:jdbc.properties"/>

    <!--数据源对象-->
    <bean id="dataSource" class="com.mchange.v2.c3p0.ComboPooledDataSource">
        <property name="driverClass" value="${jdbc.driver}"/>
        <property name="jdbcUrl" value="${jdbc.url}"/>
        <property name="user" value="${jdbc.username}"/>
        <property name="password" value="${jdbc.password}"/>
    </bean>

    <!--jdbc模板对象-->
    <bean id="jdbcTemplate" class="org.springframework.jdbc.core.JdbcTemplate">
        <property name="dataSource" ref="dataSource"/>
    </bean>

</beans>

1. 从容器中获得JdbcTemplate进行添加操作

2. 修改操作

package com.itheima.test;

import com.itheima.domain.Account;
import org.junit.Test;
import org.junit.runner.RunWith;
import org.springframework.beans.factory.annotation.Autowired;
import org.springframework.jdbc.core.BeanPropertyRowMapper;
import org.springframework.jdbc.core.JdbcTemplate;
import org.springframework.test.context.ContextConfiguration;
import org.springframework.test.context.junit4.SpringJUnit4ClassRunner;

import java.util.List;

@RunWith(SpringJUnit4ClassRunner.class)
@ContextConfiguration("classpath:applicationContext.xml")
public class JdbcTemplateCRUDTest {

    @Autowired
    private JdbcTemplate jdbcTemplate;

    @Test
    public void testQueryCount(){
    	//简单类型不需要javabean进行封装
        Long count = jdbcTemplate.queryForObject("select count(*) from test.account", Long.class);
        System.out.println(count);
    }

    @Test
    public void testQueryOne(){
        Account account = jdbcTemplate.queryForObject("select * from test.account where name=?", new BeanPropertyRowMapper<Account>(Account.class), "tom");
        System.out.println(account);
    }


    @Test
    public void testQueryAll(){
    	//返回一个Javabean需要进行映射封装
        List<Account> accountList = jdbcTemplate.query("select * from test.account", new BeanPropertyRowMapper<Account>(Account.class));
        System.out.println(accountList);
    }

    @Test
    public void testUpdate(){
        jdbcTemplate.update("update test.account set money=? where name=?",10000,"tom");
    }

    @Test
    public void testDelete(){
        jdbcTemplate.update("delete from test.account where name=?","tom");
    }

}
3. 删除和查询全部操作

4. 查询单个数据操作操作


 108
108


 被折叠的 条评论
为什么被折叠?


