


文章目录
前言
自动化领域中Labview开发软件在界面开发中优势明显,Halcon在图像处理中有着举足轻重的地位,将两者结合起来使用时需要注意的就是数据结构方面的问题,这篇文章主要用来介绍Labview调用C++封装的DLL时,字符串和图像能在两者直接相互传输,达到对接的作用。
一、编程环境
VS2015、Halcon2019和Labview2018_x64(由于生成X64的dll,所以用的x64平台安装包)
二、C++环境配置
1.简介
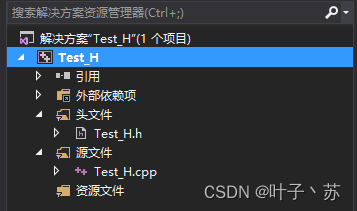
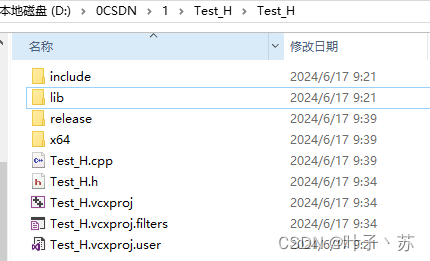
新建一个c++空项目,增加.h和.cpp文件,将halcon的根目录下的头文件和Lib文件夹复制到项目中,在项目属性页配置编程环境
2.流程


三、字符串相互传输
1.头文件代码
代码如下(示例):
#pragma once

#include <string>
#include "HalconCpp.h"

using namespace HalconCpp;
using namespace std;

extern "C"
{
	long __declspec(dllexport) dll_main(const char* input, int Height, int Width, char* output);
}
2.CPP代码
代码如下(示例):
#include "Test_H.h"

extern "C"
{
	long __declspec(dllexport) dll_main(const char* input, int Height, int Width, char* output)
	{
		string temp = input + string("Wo 爱学习") + "__" + to_string(Height) + "__" + to_string(Width);
		memcpy(output, temp.c_str(), strlen(temp.c_str()));
		return 0;
	}
}
3.Labview调用流程


四、Laview传入图像给到DLL
1.cpp代码
代码如下(示例):
#include "Test_H.h"

extern "C"
{
	long __declspec(dllexport) dll_main(const char* input, int Height, int Width, unsigned char* data, char* output)
	{
		string temp = input + string("Wo 爱学习") + "__" + to_string(Height) + "__" + to_string(Width);
		memcpy(output, temp.c_str(), strlen(temp.c_str()));

		HObject  ho_Image;
		GenImage1(&ho_Image, "byte", Width, Height, (Hlong)data);
		WriteImage(ho_Image, "jpeg", 0, "D:/0CSDN/000.jpg");
		return 0;
	}
}
备注:灰度图像数据可以用U8二维数组来表示,Halcon函数GenImage1第四个参数一定要转为Hlong
2.Labview传入图像流程


备注:Labview传入DLL参数时需要调用IMAQ GetImageSize获取到图像的尺寸,调用函数
IMAQ ImageToArray将图像数据转换为U8二维数组。
五、DLL输出图像给到Labview
1.cpp代码
代码如下(示例):
#include "Test_H.h"

extern "C"
{
	long __declspec(dllexport) dll_main(const char* input, int Height, int Width, unsigned char* data, char* output)
	{
		string temp = input + string("Wo 爱学习") + "__" + to_string(Height) + "__" + to_string(Width);
		memcpy(output, temp.c_str(), strlen(temp.c_str()));

		HObject  ho_Image;
		HTuple  hv_Width, hv_Height;
		HTuple  hv_Pointer, hv_Type;

		ReadImage(&ho_Image, "D:/0CSDN/011.bmp");
		GetImagePointer1(ho_Image, &hv_Pointer, &hv_Type, &hv_Width, &hv_Height);
		memcpy(data, (unsigned char*)hv_Pointer.L(), Height * Width);
		return 0;
	}
}
备注:需要获取到图像的数据指针,然后把图像数据通过memcpy内存拷贝到data中。
2.输出图像给到Labview流程


备注:首先需要知道DLL输出的图像的尺寸,通过尺寸的数值去初始化一个U8的二维数组用作Labview的输入,输出的U8数组用函数IMAQ ArrayToImage转换成Labview的图像进行显示。对于需要提前知道输出的图像尺寸,自己也可以定义一个DLL函数去获取图像的尺寸大小,或者本身就知道尺寸大小,写为固定值,这一点应该都好解决。
六、图像相互传输
1.cpp代码
代码如下(示例):
#include "Test_H.h"

extern "C"
{
	long __declspec(dllexport) dll_main(const char* input, int Height, int Width, unsigned char* data, char* output)
	{
		string temp = input + string("Wo 爱学习") + "__" + to_string(Height) + "__" + to_string(Width);
		memcpy(output, temp.c_str(), strlen(temp.c_str()));

		HObject  ho_Image, ImageScaled;
		HTuple  hv_Width, hv_Height;
		HTuple  hv_Pointer, hv_Type;

		GenImage1(&ho_Image, "byte", Width, Height, (Hlong)data);

		ScaleImage(ho_Image, &ImageScaled, 1, 200);  //提亮算法

		GetImagePointer1(ImageScaled, &hv_Pointer, &hv_Type, &hv_Width, &hv_Height);
		memcpy(data, (unsigned char*)hv_Pointer.L(), Height * Width);
		return 0;
	}
}
备注:Labview输入图像传给DLL后,执行提亮算法,将处理过的图再输出给到Labview用于显示。
2.图像互传Labview流程


备注:将前面介绍的输入输出结合起来就构成Labview和C++封装DLL数据相互传递最终结构。
总结
Labview用作项目的流程操作和界面显示,C++封装的DLL用作各种对图像处理的各种算法,两者搭配起来使用,对项目开发而言能更快捷。
源代码的下载地址为:https://download.csdn.net/download/qq_44869959/89446904


 1286
1286

 被折叠的 条评论
为什么被折叠?
被折叠的 条评论
为什么被折叠?
 到【灌水乐园】发言


